
On this page
Start here
Quick answer
Do not start by removing or replacing the ice maker. Thermador identifies T36IT900NP/07 as a built-in French-door bottom-freezer refrigerator with an automatic ice maker, but its public guidance does not say that an overflow proves a failed ice-maker assembly. First turn the ice maker off and shut the refrigerator water supply off from a safe, dry location, then document whether water continues, inspect the bin and level-sensing area for a visible jam, and check only accessible filter, line, and bin-seating conditions. If the overflow returns, comes from an inaccessible area, or reaches electrical parts, leave the appliance isolated and arrange qualified Thermador service.
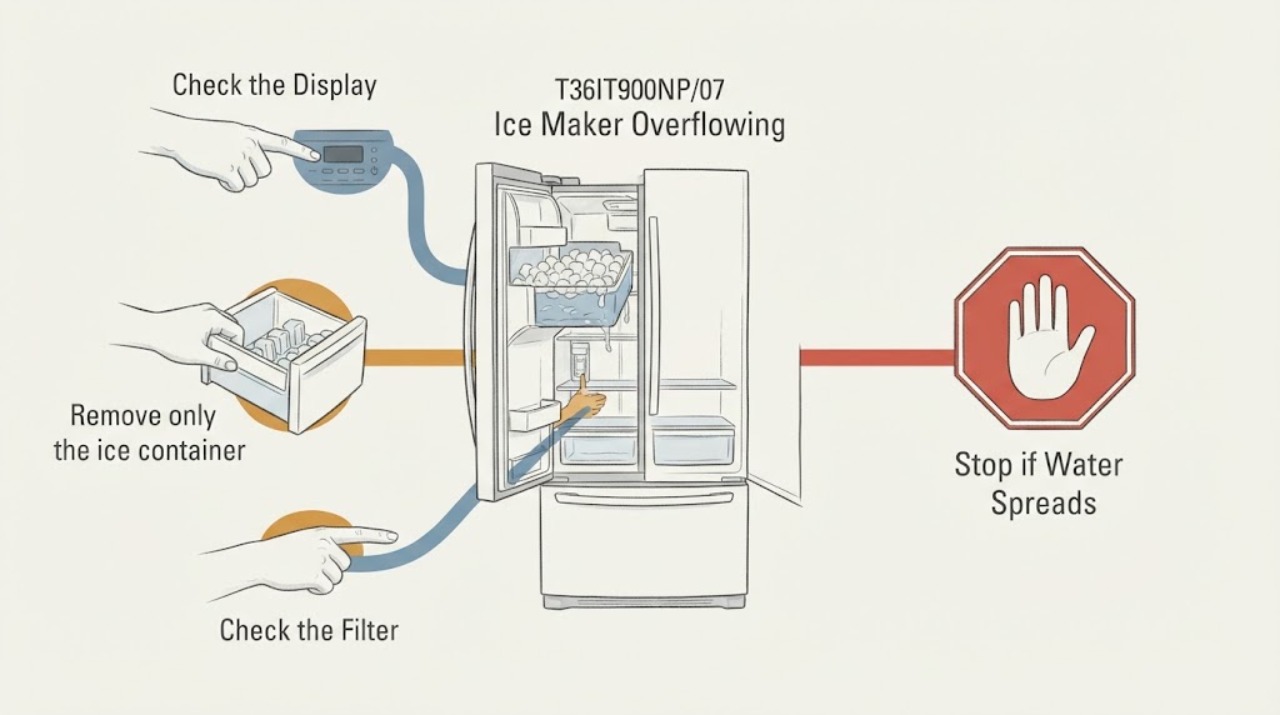
Work through in order
Diagnostic checks
Use only checks that match the exact appliance or system and its official guide.
-
Check 1
From a safe, dry position, turn the ice-maker function off using the documented control and close the refrigerator water shutoff; place a towel below the affected area without touching wet electrical parts.
Expected result: The water stops when the maker and supply are isolated, or water continues, pools near wiring, or cannot be safely contained.
Next step: Keep the water supply and ice maker off. If water is near electrical components or the source is inaccessible, leave the refrigerator isolated and arrange qualified Thermador service.
Why this matters
Why: Stopping the flow limits flood damage; continued water with the maker off points away from a simple ice-production cycle and toward a pressurized line, valve, or internal leak that needs service.
-
Check 2
Remove only the ice container if the exact manual permits that owner step, and inspect the visible level-sensing arm or sensor area, ice shovel, and cubes for a jam or object; use no sharp tool, heat source, or force.
Expected result: An ice cube or object blocks the level-sensing area, an ice shovel is left in the container, the bin is overfilled, or the visible area is clear.
Next step: Correct only a loose visible obstruction as the manual allows, refit the container correctly, and keep the maker off until the overflow risk is understood. Stop if any part is damaged or frozen together.
Why this matters
Why: Thermador says a jammed level arm or an object left in the container can affect sensing. A clear visible area does not rule out an internal fill-valve, sensor, or control problem and does not justify replacing the assembly by assumption.
-
Check 3
With the water supply still off, inspect the accessible water filter seating, visible supply tubing, and shutoff area for a loose connection, kink, or obvious damage; do not loosen a pressurized fitting or open the inlet assembly.
Expected result: The filter is not fully seated, the line is kinked or wet, the shutoff is closed, or all accessible connections are dry and secure.
Next step: Correct only a documented filter seating or visible line condition, then leave the supply off until the manual or service confirms it is safe to restore. Arrange service for a damaged line or persistent leak.
Why this matters
Why: Thermador identifies filter installation, water-line kinks, and water supply as relevant water-path checks. A dry accessible path shifts the concern to the ice maker's fill or sensing system, but does not identify a particular valve or board.
-
Check 4
Record the freezer temperature shown by the appliance, the shape and amount of spilled or frozen water, and whether the overflow happened during filling, after dispensing, or while the refrigerator was idle; do not force a harvest or fill cycle.
Expected result: The freezer is warmer than its normal setting, cubes are unusually fused or slushy, overflow follows a fill event, or water appears while idle.
Next step: Use the exact owner manual for temperature or ice-maker settings. If the maker is off but water appears while idle, keep the supply closed and arrange service rather than testing again.
Why this matters
Why: Temperature and timing help separate a warm-freezer or fill-event pattern from a leak that continues independently. These observations narrow service diagnosis but do not prove a failed ice-maker part.
-
Check 5
Check that the ice container is fully inserted and that no visible packaging, shovel, or ice buildup prevents the built-in detection area from seating; do not remove interior panels or reach behind the ice-maker housing.
Expected result: The container is not seated, the detection area is obstructed, or the container and visible detection area are correctly seated.
Next step: Reseat only as the manual directs and leave the maker off until the water path is dry. If overflow returns after an authorized check, book service for the exact model.
Why this matters
Why: Thermador says a built-in unit's ice bin must be inserted correctly to activate its detection switch. Correct seating with repeated overflow leaves a model-specific sensing or fill fault unresolved.
-
Check 6
After the area is dry and only if the exact manual supports restoring operation, make one supervised test with the supply and ice maker restored; stop immediately for renewed overflow, a leak, abnormal noise, smell, heat, or water near electrics.
Expected result: The test produces no overflow, overflow returns, water leaks from an inaccessible area, or an electrical or heat warning appears.
Next step: Turn the ice maker and water supply off again for any recurrence and arrange Thermador or qualified service. Do not use a replacement assembly as a substitute for diagnosis.
Why this matters
Why: A single clean test after a documented visible correction supports that correction, but a repeat overflow indicates an unresolved fill, level-sensing, water-path, or control condition that cannot be safely isolated by observation alone.
Use your observations
Decision map
Find the observation that best matches what you see, then follow the next safe action.
-
PATH 01Next step
What you see
Overflow stops with the ice maker and water supply off, and the visible bin or level-sensing area contains a loose jam or object.
Do this next
Remove only the loose obstruction as the exact manual permits, refit the bin, and keep the maker off until the area is dry; arrange service if the condition returns.
Why this path and its safety boundary
Why it matters: A visible sensing obstruction is more likely than a proven failed ice-maker assembly.
-
PATH 02Next step
What you see
The bin is not seated or an object prevents the built-in detection area from engaging, with no continuing water once the supply is closed.
Do this next
Seat the container only according to the T36IT900NP/07 manual and perform no further test until the spill is dry and contained.
Why this path and its safety boundary
Why it matters: Bin seating or detection can explain abnormal ice-maker behavior without proving a replacement need.
-
PATH 03Next step
What you see
The accessible filter or line is kinked, wet, loose, or incorrectly seated, and the overflow is tied to water filling.
Do this next
Keep the supply off, correct only the documented accessible condition, and arrange service for a damaged line or any connection that continues to leak.
Why this path and its safety boundary
Why it matters: An external water-path condition is more likely than a confirmed internal ice-maker fault.
-
PATH 04Next step
What you see
The bin, visible sensor area, filter, and accessible line are clear and secure, but overflow returns or water appears while the maker is off.
Do this next
Leave the ice maker and water supply off and arrange qualified Thermador service with the full model, timing, photos, and isolation result. Do not remove the ice-maker housing.
Why this path and its safety boundary
Why it matters: An internal fill, sensing, valve, or control condition remains possible; the public guidance does not identify which part should be replaced.
-
PATH 05Next step
What you see
Water reaches electrical parts, the source is behind an inaccessible panel, a breaker trips, smoke or burning odor occurs, or heat or abnormal noise is present.
Do this next
From a safe dry location isolate water and power, keep the refrigerator out of service, and contact qualified Thermador service. Do not use heat, sharp tools, panel removal, or energized testing.
Why this path and its safety boundary
Why it matters: This is a stop-use safety condition, not an owner ice-maker replacement decision.
Helpful context
Understand the symptom
Contain the overflow first
Switch the ice maker off and close the refrigerator water shutoff from a safe, dry location. Keep towels away from outlets and controls, and do not restart the maker merely to reproduce the spill. Note whether water stops immediately, continues with the maker off, or appears at a rear connection or inside an inaccessible compartment.
Use visible evidence to choose the next check
A jammed level-sensing arm, an object left in the bin, an incorrectly seated bin, a blocked filter, or a kinked accessible line can change the next step without proving that the ice-maker assembly needs replacement. Inspect only what the exact manual makes owner-accessible; do not pry frozen parts, use heat, or open the water inlet assembly.
Replacement is a later decision
Thermador's parts guidance says to search by the appliance model number when the part number is unknown. That is a fitment lookup, not evidence that an overflow requires a new ice maker. Use the full T36IT900NP/07 identity and the overflow record for an exact parts or service determination.
When checks do not resolve it
Need a professional?
Arrange qualified Thermador service when overflow returns after a visible bin, filter, or line check; water continues with the maker off; the source is inaccessible; a fill or sensing mechanism appears damaged; or any electrical, heat, smell, or repeated-breaker symptom occurs.
Have this ready
- Give the provider the complete T36IT900NP/07 model and revision, photos of the bin and spill, when the overflow occurs, whether isolation stops it, filter and line observations, freezer temperature, cube pattern, and any warning or safety symptom.
Common questions
FAQ
Does an overflowing ice maker mean the whole ice-maker assembly must be replaced?
No. Thermador's public guidance supports checking the level-sensing area, bin seating, filter, water path, freezer condition, and ice-maker setting first. A repeat overflow after those visible checks needs model-specific service, not a guessed assembly.
What should I do before inspecting the bin?
Turn the ice maker off and close the refrigerator water supply from a safe, dry location. Do not use sharp tools, hot air, or force to release frozen cubes.
How do I identify a reliable replacement part for T36IT900NP/07?
Use the complete model and revision in Thermador's official parts or manual lookup. The parts-support page says to search by model when the part number is unknown, but fitment lookup does not prove that an overflow requires replacement.
Why does built-in installation matter?
Thermador identifies T36IT900NP/07 as a built-in French-door bottom-freezer refrigerator and notes that a built-in unit's ice bin must be inserted correctly for its detection switch. Do not assume a freestanding refrigerator procedure applies.
Read the exact guide
Official sources
- T36IT900NP Built-in French Door Bottom FreezerThermador · Thermador T36IT900NP/07 ice maker overflow topic and T36IT900NP product-family identity; product page is retained for model and automatic-ice-maker context, not replacement fitment.
- Refrigerator Troubleshooting | Problems & SolutionsThermador · Thermador refrigerator ice maker overflowing and not-making-enough-ice checks for T36IT900NP/07, including bin, level arm, filter, water path, freezer, pressure, and setting boundaries.
- Appliance Information - Built-in French Door Bottom Freezer | T36IT900NP/07Thermador · Thermador T36IT900NP/07 built-in French-door bottom-freezer refrigerator, ice maker overflow topic identity, and exact model manuals and owner-support resources.
- Parts & Accessories | Refrigeration SupportThermador · Thermador T36IT900NP/07 ice maker overflow parts-fitment boundary; official model-number lookup is required when a part number is unknown.
Community feedback
Share a repair observation
Share a plain-text repair observation. Accepted observations are published automatically; this page may take a moment to update.