
On this page
Start here
Quick answer
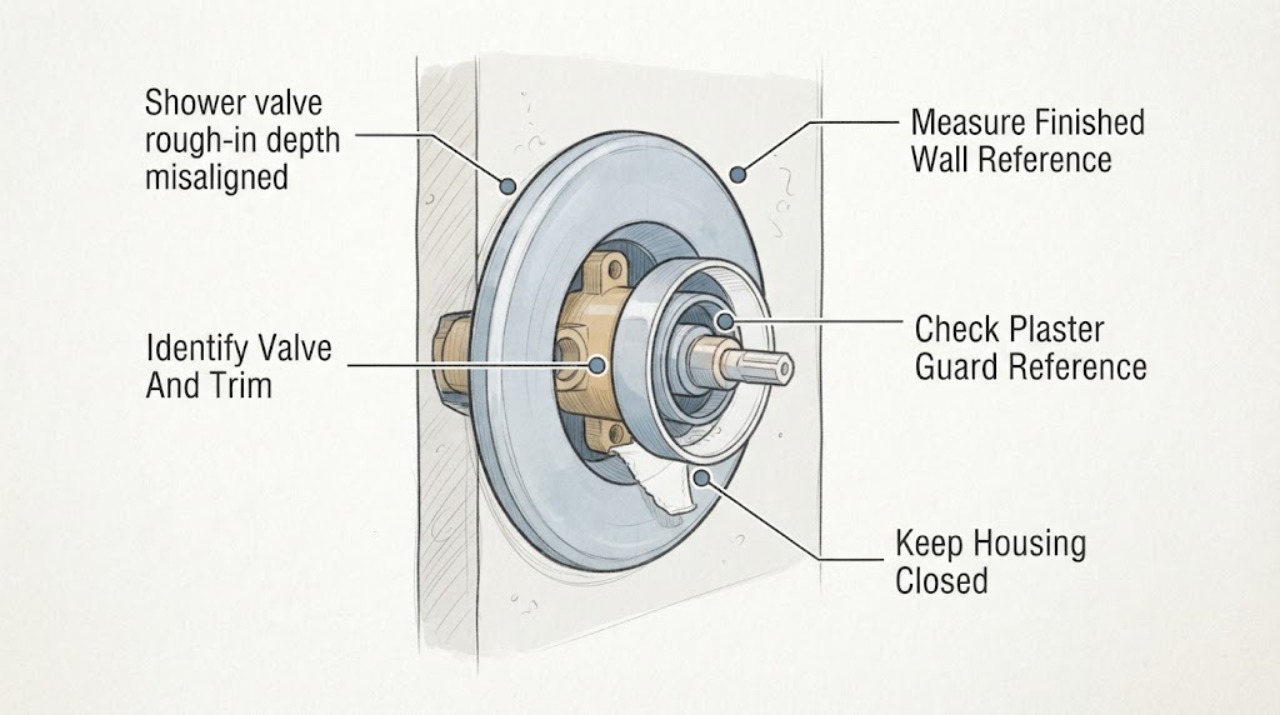
When a shower valve rough-in depth does not let the escutcheon sit correctly, do not start with a generic extender or move concealed plumbing by guesswork. Identify the exact valve body and trim, measure from the framing reference to the actual finished wall—including backer, waterproofing, mortar, tile, or surround—and compare that measurement with the valve maker's installation sheet. Use the plaster guard or reference face as that model's depth and alignment datum; it is not a universal dimension. A trim gap, exposed valve, blocked stop, handle that cannot seat, or a wall that has already been closed can indicate a depth, hole-size, trim-compatibility, or access problem. Stop before opening the wall or changing pressurized connections, isolate and document any leak, and have a qualified plumber or remodel professional correct the installation using the exact valve-and-trim instructions.
Before you begin
Safety first
- This article covers documentation and safe visual observation only. Concealed plumbing changes, pressure testing, opening or resealing the wall, and model-specific correction belong to qualified plumbing or remodeling service.
Work through in order
Diagnostic checks
Use only checks that match the exact appliance or system and its official guide.
-
Check 1
From ordinary accessible areas, photograph and record the valve body markings, cartridge or trim model information, escutcheon, handle, shower/tub configuration, installation sheet, and any supplied plaster guard or reference marks. Do not remove the trim, cartridge, wall, or pressurized connections just to identify them.
Expected result: The valve and trim may be an exact documented pair, an incomplete or mixed set, an unknown combination, or a cross-brand combination with no confirmed compatibility record.
Next step: Use the exact manufacturer's installation and trim documents when the pair is known. If identity or compatibility is unclear, stop cosmetic correction and arrange qualified plumbing or manufacturer support.
Stop if: Do not order a generic escutcheon, spacer, extender, cartridge, or trim based only on appearance or a nominal valve size.
Why this matters
Why: Depth and trim fit cannot be judged reliably until the valve body and trim family are known. Delta states that its listed universal rough valve works with specified Delta trim families but does not guarantee fit with other brands; Kohler's depth kits likewise vary by exact valve and trim family.
-
Check 2
Using the valve maker's drawing, record the distance from the stated framing or stud reference to the actual finished wall plane, including every installed layer. Compare the escutcheon seating surface, handle stem, stop, and plaster-guard or printed-face position with that document; do not use the raw stud-to-valve distance as the finished-wall depth.
Expected result: The measured finished-wall plane may match the documented reference, sit in front of it, sit behind it, or be impossible to measure without removing tile, opening the wall, or touching plumbing.
Next step: Record the layers, dimensions, photos, and exact document revision for the plumber or installer. Do not alter the wall or valve based on a generic depth table.
Stop if: Stop if measurement requires cutting waterproofing, removing tile, disturbing a sealed joint, entering a cavity, or contacting a concealed pressurized line.
Why this matters
Why: A mismatch can explain an escutcheon gap, exposed valve, blocked stop, or handle that cannot seat, but it does not by itself identify whether the rough valve, wall build-up, trim, or support is the cause.
-
Check 3
Compare the plaster guard, printed face, arrows, tabs, screw positions, and reference marks with the exact installation sheet, observing whether the guard was left, removed, rotated, or damaged during finishing. Keep the guard and its fasteners if they are still available; do not reconfigure it without the model-specific instructions.
Expected result: The reference face may be flush with the finished wall, subflush, proud of the wall, missing, damaged, or positioned differently from the installation sheet; the finished opening may also be too small or off-center.
Next step: Photograph the reference condition and compare it with the exact document. If the guard or reference is missing or conflicting, have the installer or plumber determine the correction before trim is forced into place.
Stop if: Do not enlarge the opening, bend the valve, drill through the finished wall, or move the rough-in to make a different escutcheon fit.
Why this matters
Why: The result changes the likely path between a normal trim fit, a rough-in depth mismatch, an incorrect wall opening, or a missing/damaged alignment aid. Moen describes the plaster ground as an alignment guide and Delta describes its plasterguard as a model-specific depth and opening reference.
-
Check 4
With water left in a safe controlled state, observe the escutcheon, sleeve, handle stem, stops, cartridge access, and any manufacturer-specified service opening from the finished side. Do not force the handle or cover, remove concealed parts, or use the trim as a clamp to pull the valve forward.
Expected result: Note an even wall contact and normal handle clearance versus a circumferential gap, rocking plate, blocked stop, short or overlong stem, misaligned screw holes, cracked seal, or no practical path to service the valve.
Next step: Keep the trim unforced and send the photos and measurements to a qualified plumber or the valve manufacturer for an exact correction path.
Stop if: Stop for a loose valve, sharp or cracked trim, blocked service access, a handle that binds, or any correction that would require concealed plumbing changes without the exact model instructions.
Why this matters
Why: A single trim symptom may come from depth, incompatible trim, wall opening, support, or damaged components. A valve that cannot be accessed or a trim that cannot seat is not corrected by hiding the gap with an unverified spacer.
-
Check 5
From safe accessible areas, inspect around the escutcheon, valve opening, adjacent wall, ceiling below, and exposed connections for active moisture or staining, and record whether the system has been pressure-tested before the wall was closed. Do not open the wall, turn on an untested supply, or manipulate a cartridge or connection as a leak test.
Expected result: The area may be dry with documented testing, dry without a test record, damp or actively leaking, stained from a prior event, or impossible to inspect because the wall is closed.
Next step: Keep the water supply in its current safe state, protect the finished area, and call a qualified plumber promptly for moisture, an active leak, or absent test evidence.
Stop if: Stop immediately for active leakage, water near electrical equipment, ceiling damage, mold, structural movement, or any need to disturb a concealed pressurized connection.
Why this matters
Why: Moisture or missing test evidence changes the job from a cosmetic trim correction to leak-risk and concealed-plumbing assessment. Moen instructs installers to pressure-test and check the system for leaks before closing wall openings.
-
Check 6
Give the plumber or installer the valve and trim identities, finished-wall layer measurement, plaster-guard/reference photos, opening and escutcheon observations, and leak/test status, then ask for a correction that is explicitly listed for that exact model combination. Do not select a generic extension, spacer, deeper trim, or buried piping change from a different manufacturer.
Expected result: The manufacturer documentation may identify a compatible trim-depth kit or adjustment, confirm that the current trim is incompatible, require rough-in or wall correction, or provide no safe user-accessible correction.
Next step: Follow the qualified professional's model-specific correction plan and require leak/pressure verification before the wall is resealed. If no exact solution is documented, replace or rework the incompatible installation under professional control.
Stop if: Do not conceal the mismatch, force the escutcheon, shorten or extend concealed piping, or reseal the wall until fit, support, service access, and leak status are verified.
Why this matters
Why: Only a documented exact-model solution can establish fit and compatibility; Kohler's chart demonstrates that deep rough-in kits are tied to specific valve and trim families and can be non-interchangeable.
Use your observations
Decision map
Find the observation that best matches what you see, then follow the next safe action.
-
PATH 01Next step
What you see
The exact valve and trim are documented as compatible, the finished-wall measurement matches the manufacturer's reference, the plaster guard/reference marks agree, and the escutcheon seats without force or gaps.
Do this next
Follow the exact trim installation sheet, preserve service access, and verify normal handle movement and leak status before final sealing.
Why this path and its safety boundary
Why it matters: The reported misalignment may be a trim-installation or cosmetic seating issue rather than a rough-in depth failure.
-
PATH 02Next step
What you see
The finished-wall plane does not match the valve maker's plaster-guard or reference datum, or the actual wall layers differ from the rough-in plan.
Do this next
Stop trim forcing and obtain a model-specific correction plan from a qualified plumber or installer before opening or resealing the wall.
Why this path and its safety boundary
Why it matters: The valve may be too deep or too proud for the selected trim, but the measurement does not by itself authorize moving concealed plumbing.
-
PATH 03Next step
What you see
The valve and trim are mixed, cross-brand compatibility is unconfirmed, the escutcheon screw pattern does not match, or the finished opening is wrong or off-center.
Do this next
Confirm the exact valve/trim family with the manufacturer and have the installer correct the opening or replace incompatible components under professional control.
Why this path and its safety boundary
Why it matters: A different trim, cartridge, guard, or opening may be required; an extender cannot establish compatibility.
-
PATH 04Next step
What you see
Moisture, active leakage, water near electrical equipment, absent pressure-test evidence, a loose valve, or no safe service access is present.
Do this next
Keep the water system in a safe state, protect the area, and call a qualified plumber promptly; do not close the wall.
Why this path and its safety boundary
Why it matters: This is a concealed plumbing and damage-risk issue, not a cosmetic escutcheon adjustment.
-
PATH 05Next step
What you see
The exact manufacturer documentation names a compatible rough-in/depth kit or trim correction for the identified valve and trim family.
Do this next
Have a qualified installer verify the kit against the exact model, finished-wall measurement, trim, cartridge, support, and leak-test requirements; do not substitute a generic extender.
Why this path and its safety boundary
Why it matters: A manufacturer-specific option may exist, but its fit and installation limits remain model-specific.
Helpful context
Understand the symptom
Depth is measured to the finished surface, not just the stud
A rough-in can look correctly placed before the wall is finished and still leave the escutcheon too far out or too deep after backer, waterproofing, mortar, tile, or a surround is added. Record the finished-wall build-up and the valve maker's specified reference rather than comparing the exposed body to a generic dimension.
The plaster guard is a model-specific reference
Manufacturers use plaster guards, printed faces, tabs, and reference marks differently. On some valves the guard stays during rough-in and is removed for trim; on others it also supports a thin wall. Treat the supplied guard and installation sheet as one system, and do not assume another brand's guard, escutcheon, cartridge, or trim will fit.
Protect the wall and the water system before correcting depth
If the wall is already closed, a trim gap or leak is evidence to document, not an invitation to cut a larger opening or alter buried connections. A qualified plumber should confirm shutoff, pressure-test and leak status, valve support, trim compatibility, and service access before any concealed change.
Safety boundary
Stop conditions
- Do not use a generic extender, spacer, escutcheon, cartridge, or cross-brand trim to hide a rough-in mismatch.
- Do not move concealed pressurized plumbing, open the finished wall, enlarge waterproofed openings, or reseal tile as a user correction without exact model instructions and qualified plumbing control.
- Stop for active leakage, water near electrical equipment, a loose valve, blocked service access, sharp or cracked trim, or missing pressure-test evidence.
- Do not close the wall until valve support, trim compatibility, finished-wall depth, service access, pressure testing, and leak status are verified.
When checks do not resolve it
Need a professional?
Call a qualified plumber or bathroom-remodeling professional when the rough-in depth does not match the finished wall, the escutcheon cannot seat, trim compatibility is unknown, the plaster guard/reference is missing or contradictory, the wall is already closed, or any leak or access problem is present. Provide the exact valve and trim identities, installation documents, finished-wall layer measurement, photos of the reference marks and opening, and pressure-test or leak history.
Safety scope: This article covers documentation and safe visual observation only. Concealed plumbing changes, pressure testing, opening or resealing the wall, and model-specific correction belong to qualified plumbing or remodeling service.
Common questions
FAQ
Is there a standard shower-valve depth for every escutcheon?
No. Depth depends on the exact valve body, trim, cartridge, finished-wall layers, and the manufacturer's reference system. Use the supplied installation sheet and plaster guard, not a generic table.
Can I fix a recessed valve with a generic extender?
Do not choose a generic extender. First identify the exact valve and trim; use a depth kit only when that manufacturer documents it for that exact combination, and have a qualified installer verify fit and leak safety.
What should the plaster guard tell me?
It may provide the model's finished-wall depth, opening, alignment, or support reference. Its role varies by manufacturer and wall type, so compare the actual guard and marks with the exact installation sheet.
What if the escutcheon gap appears after tile is installed?
Photograph the gap, handle, stops, opening, and finished-wall layers without forcing the trim. Do not cut the waterproofed wall or alter buried piping; have the valve manufacturer or a qualified plumber determine the model-specific correction.
Should I test for leaks before closing the wall?
Yes, but follow the exact valve instructions and have qualified plumbing control for pressure testing. If there is active moisture, staining, or no test record, keep the wall accessible and arrange prompt assessment.
Read the exact guide
Official sources
- PlasterguardDelta Faucet · Exact Delta RP46075 product page and manufacturer Q&A; statements apply to the named Delta plasterguard and rough-in models, not universal shower valves.
- POSI-Temp Valve InstallationMoen · Model-specific Moen Posi-Temp installation guidance used as an example of manufacturer-controlled rough-in and finished-wall references; it does not establish dimensions for other valve families.
- MultiChoice Universal Tub / Shower Rough - Universal Inlets / Outlets R10000-UNWSDelta Faucet · Exact Delta R10000-UNWS product page; compatibility statements apply to the listed Delta model and trim families only.
- Deep Roughing-In Kits for Rite-Temp Valve TrimKohler · Kohler Assist chart for listed Rite-Temp valve and trim families; it is not a general recommendation for another brand or unidentified valve.
Community feedback
Share a repair observation
Share a plain-text repair observation. Accepted observations are published automatically; this page may take a moment to update.