
On this page
Start here
Quick answer
Low shower flow can come from mineral scale or debris at the spray face, inlet screen, washer, or another part of the shower system, but a flow restrictor is not a clog to drill out or remove by guesswork. First compare the showerhead with another outlet, inspect the spray face and inlet from ordinary safe access, and clean scale only with a method allowed by the installed manufacturer's instructions. Keep any integral flow restrictor, pressure-compensating insert, washer, and mixing-valve arrangement intact; EPA guidance says to monitor that restrictors have not been removed and to confirm compatibility of showerhead and valve components. If cleaning does not restore flow, the whole bathroom has low flow, temperature or pressure fluctuates, there is a leak, or the head or valve is damaged, arrange qualified plumbing service rather than changing the limiter or forcing a replacement.
Before you begin
Safety first
- This article supports ordinary-access inspection and manufacturer-approved scale cleaning only. Do not drill or manually scrape openings, alter flow-control components, open walls or valves, or improvise a plumbing repair.
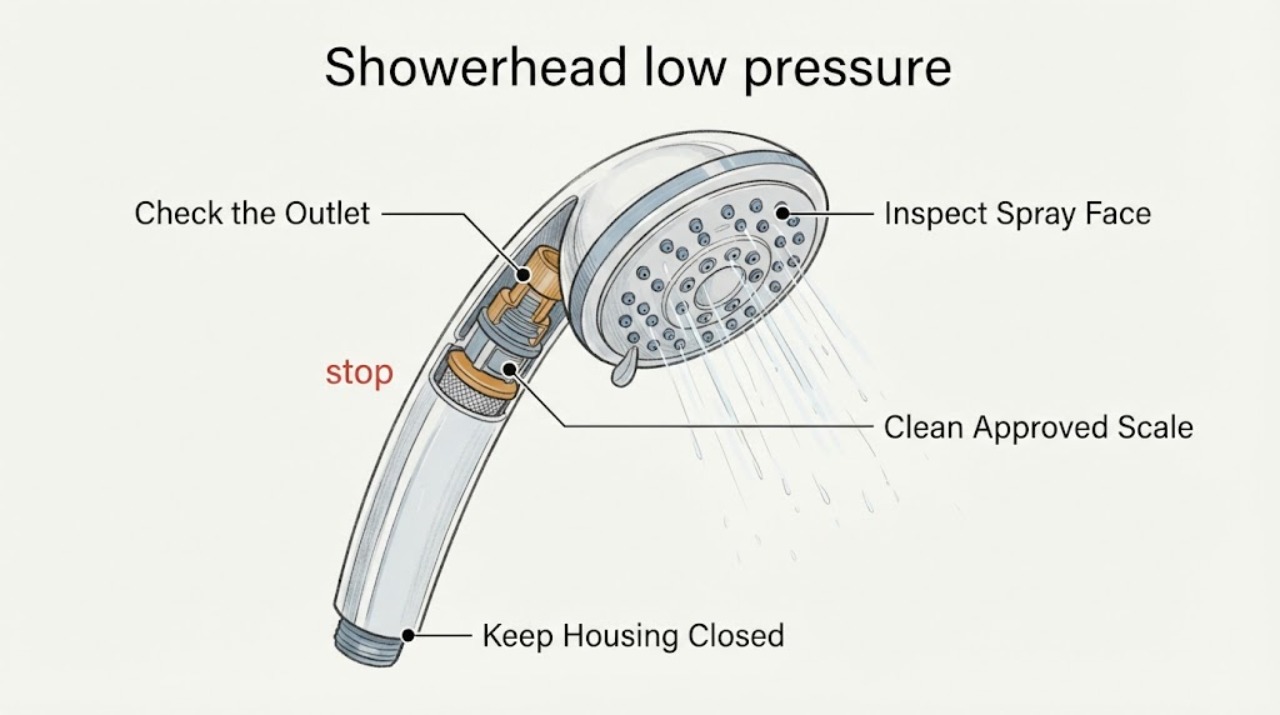
Work through in order
Diagnostic checks
Use only checks that match the exact appliance or system and its official guide.
-
Check 1
With the shower area clear and the controls operated normally, compare the affected showerhead with another nearby outlet, such as the tub spout or sink, without removing trim or opening the wall.
Expected result: Record whether low flow affects only this showerhead, both shower and tub outlets, all nearby fixtures, hot water only, cold water only, or the whole bathroom; note whether flow changes when another fixture runs.
Next step: Photograph the head and record the outlet comparison before cleaning; arrange plumbing service when multiple fixtures are affected, temperature fluctuates, or the cause is not isolated to the head.
Stop if: Stop for a leak inside the wall, hot-water instability, scalding risk, damaged trim, or any need to open the wall or disturb the valve.
Why this matters
Why: A problem isolated to one head supports a spray-face, inlet-screen, washer, or head-specific check. Low flow across outlets or pressure that changes with other fixtures points toward a valve, supply, pressure, or building-plumbing issue rather than a removable showerhead clog.
-
Check 2
From ordinary safe access, inspect the spray face and visible openings for white, chalky, or crusted scale, blocked nozzles, debris, damaged rubber jets, or a mis-seated faceplate; do not poke the openings or scrape the surface.
Expected result: Classify the face as visibly scaled or obstructed, damaged, clean but weak, or impossible to judge without force or disassembly.
Next step: Follow the installed manufacturer's care instructions for the next cleaning step, or provide the photos and head identity to a plumber or manufacturer when the face is damaged or inaccessible.
Stop if: Do not drill, pin, knife, wire, needle, abrasive-pad, or manually scrape spray openings, and do not force the faceplate apart.
Why this matters
Why: Visible scale or debris can explain localized low flow, but a clean spray face with weak flow suggests an inlet, restrictor, valve, supply, or pressure issue. A damaged face can leak or alter spray and may need a compatible head rather than aggressive cleaning.
-
Check 3
Only when the manufacturer's instructions permit the procedure and the head can be handled without force, use the approved cleaning product or white-vinegar method for mineral scale, then rinse thoroughly and restore the fixture without changing its internal flow-control arrangement.
Expected result: After cleaning, observe whether spray coverage and flow improve, remain unchanged, leak at the connection, or become uneven; note whether scale is still present without poking the openings.
Next step: Keep the cleaning method and result with the fixture record; stop further cleaning and arrange qualified service when flow is unchanged, a leak appears, or the head cannot be restored according to its instructions.
Stop if: Do not mix cleaning products, use an unapproved solvent or abrasive, heat the fixture, enlarge openings, or remove the integral flow restrictor or pressure-compensating insert.
Why this matters
Why: Improved, even spray supports scale as a contributor. No improvement points to an inlet screen, flow-control component, valve, supply, or pressure cause; a new leak or uneven spray indicates a sealing, damage, or compatibility problem rather than permission to clean more aggressively.
-
Check 4
If the head is removed only as the installed instructions allow, inspect the visible washer, inlet screen, and flow-control component for debris, scale, damage, or missing pieces without modifying or enlarging any opening.
Expected result: Record whether the washer is present and seated, the inlet screen is blocked, the flow restrictor or pressure-compensating insert is present and undamaged, or the internal arrangement is unknown or was altered by a prior person.
Next step: Use only the replacement and cleaning procedure specified for the exact fixture, or ask the manufacturer or plumber to restore the compatible arrangement; do not operate the fixture with loose parts or a leaking connection.
Stop if: Do not pry out, drill through, cut, enlarge, discard, or substitute the flow restrictor or pressure-compensating component, and do not force a threaded connection.
Why this matters
Why: Debris at a user-serviceable screen or a displaced washer can explain a localized restriction or leak. An intact restrictor may simply be the fixture's intended flow control; a missing, damaged, or unknown component creates a compatibility and compliance question, not a reason to substitute a generic insert or remove more material.
-
Check 5
Read the showerhead and valve markings or documentation from a safe position and, if needed, collect water for a simple timed flow observation without changing the limiter or opening the valve.
Expected result: Record the manufacturer's rated flow marking, WaterSense or other certification marking if present, showerhead and valve identity, whether the observed flow is consistent with the marking, and whether pressure or temperature fluctuates during use.
Next step: Provide the markings, flow observation, outlet comparison, and cleaning result to a plumber or manufacturer and ask for a compatible repair or replacement that follows applicable plumbing requirements.
Stop if: Stop if testing causes a leak, temperature instability, exposed wiring or electrical contact, or requires disassembling the valve or wall.
Why this matters
Why: A flow that matches the marked design may be normal rather than a clog. A mismatch, missing marking, incompatible valve, or temperature fluctuation requires product-specific or plumbing assessment; a flow observation cannot authorize removal of a limiter or prove a hidden supply fault.
Use your observations
Decision map
Find the observation that best matches what you see, then follow the next safe action.
-
PATH 01Safety boundary
What you see
Only this showerhead is weak and visible scale or debris is present on the spray face or a user-serviceable inlet screen.
Do this next
Use only the approved cleaning method, rinse and restore the fixture, then compare the flow and spray result without drilling or scraping openings.
Why this path and its safety boundary
Why it matters: A localized mineral or debris restriction is plausible, but the fixture's care instructions and internal flow-control arrangement still govern cleaning.
Safety stop: Do not remove the integral restrictor, enlarge spray openings, or continue cleaning when the head leaks or remains restricted.
-
PATH 02Safety boundary
What you see
The spray face and permitted inlet cleaning are complete, the head is intact, but flow remains weak or uneven.
Do this next
Stop experimenting and request manufacturer-specific or qualified plumbing diagnosis; provide the head identity, rated flow, outlet comparison, cleaning method, and result.
Why this path and its safety boundary
Why it matters: The restriction may be in a flow-control component, valve, supply, pressure condition, or a concealed part of the fixture rather than removable scale.
Safety stop: Do not drill, pry, remove, or substitute the flow restrictor or pressure-compensating component as a troubleshooting step.
-
PATH 03Safety boundary
What you see
The flow-control component is intact and the observed flow is consistent with the manufacturer's marking or intended low-flow design.
Do this next
Keep the original arrangement and, if more flow is needed, ask a plumber or manufacturer to identify a compatible replacement that meets applicable requirements.
Why this path and its safety boundary
Why it matters: The low flow may be normal for that fixture rather than a clog. Changing the component could alter water efficiency, spray performance, or valve compatibility.
Safety stop: Do not remove the restrictor or assume a higher-flow insert is safe with the existing shower valve.
-
PATH 04Safety boundary
What you see
The flow-control component is missing, damaged, altered, or cannot be identified after prior work.
Do this next
Give the exact fixture and valve identity to the manufacturer or a qualified plumber and request restoration or replacement of the compatible assembly.
Why this path and its safety boundary
Why it matters: The fixture's flow, spray behavior, certification, and compatibility are unresolved; a generic replacement or an open passage is not automatically appropriate.
Safety stop: Do not enlarge the opening, install an unverified insert, bypass a pressure-compensating feature, or use the fixture if it leaks or causes temperature instability.
-
PATH 05Safety boundary
What you see
Multiple bathroom outlets are weak, flow changes when another fixture runs, or hot and cold pressure or temperature fluctuates.
Do this next
Arrange qualified plumbing diagnosis and leave the showerhead's flow-control arrangement unchanged until the system is assessed.
Why this path and its safety boundary
Why it matters: The issue is not established as a showerhead clog and may involve the valve, supply, pressure, or building plumbing.
Safety stop: Stop for a leak inside the wall, unstable temperature, scalding risk, water damage, or any need to open a wall or valve.
-
PATH 06Safety boundary
What you see
The head leaks at the connection, the washer is damaged or missing, the spray face is cracked, or flow became worse after cleaning.
Do this next
Stop using the fixture if water can reach the wall or floor, restore only the manufacturer-specified washer or assembly, and request qualified service when fit or compatibility is uncertain.
Why this path and its safety boundary
Why it matters: The problem may be sealing, fixture damage, or an incorrect reassembly rather than remaining scale.
Safety stop: Do not overtighten, force threads, add unapproved sealant, or continue using a leaking or damaged fixture.
Helpful context
Understand the symptom
Separate a clogged showerhead from a low-flow shower system
If only one showerhead has weak spray while a nearby tub spout or sink is normal, scale, debris, the inlet screen, or the head itself becomes the focused check. If multiple outlets are weak, pressure changes with other fixtures, or hot and cold behavior differs, the cause may be upstream in the supply, valve, or building plumbing. A showerhead's rated flow is also part of its intended design, so weak spray is not permission to remove a flow-control component.
Clean scale without changing the fixture's regulated design
EPA WaterSense guidance recommends periodic inspection for scale and allows suitable cleaning products or white vinegar to dissolve buildup, while warning against boring holes or manually removing scale. Use the installed product's care instructions first, keep the flow restrictor and pressure-compensating parts in their original arrangement, and do not enlarge an opening to create more spray. If the manufacturer's instructions are missing or the head will not separate without force, stop and ask a plumber or the manufacturer for the compatible procedure.
Flow rate and valve compatibility are part of the safety decision
EPA's WaterSense specification applies tested performance and flow criteria to labeled showerheads and references the plumbing-fittings standard. A showerhead and pressure- or temperature-compensating valve need to be compatible at the intended flow. Replacing or altering the limiter without checking the fixture marking, manufacturer's instructions, valve compatibility, and applicable local plumbing requirements can create poor performance or temperature fluctuation rather than solve a clog.
Safety boundary
Stop conditions
- Do not drill, pin, wire, knife, scrape, or manually pry scale from spray openings; do not enlarge openings to increase flow.
- Do not remove, discard, bypass, alter, or substitute an integral flow restrictor or pressure-compensating component without exact manufacturer and plumbing compatibility guidance.
- Do not mix cleaning products, use an unapproved solvent or abrasive, heat the fixture, or force the head, screen, washer, or faceplate apart.
- Stop for a leak inside the wall, damaged valve or trim, hot-water instability, scalding risk, water damage, or any repair requiring wall or valve access.
- Do not treat low flow across multiple fixtures as a showerhead clog; arrange qualified plumbing assessment and keep the fixture's regulated arrangement intact.
Only after diagnosis
Potential parts
- showerhead washer or O-ring
Consider this category only if inspection confirms a missing, damaged, or displaced seal is causing a leak or restricting the connection after approved reassembly.
Confirm the exact fixture, seal dimensions, material, and manufacturer's fit information; do not compensate for a mismatch by overtightening or adding unapproved sealant. - showerhead inlet screen
Consider this category only if the exact fixture uses a replaceable inlet screen and inspection confirms that scale or debris has damaged it beyond manufacturer-approved cleaning.
Confirm the exact showerhead and screen design with the manufacturer or plumber; keep the original flow-control and pressure-compensating arrangement intact. - compatible showerhead assembly
Consider replacement only when the existing head is damaged, remains restricted after approved cleaning, or its flow-control arrangement cannot be restored, and a qualified compatibility check supports replacement.
Confirm exact flow marking, valve compatibility, certification, connection, local plumbing requirements, and manufacturer's installation guidance before ordering.
When checks do not resolve it
Need a professional?
Arrange qualified plumbing or manufacturer service when approved scale cleaning does not restore flow, the whole bathroom is weak, pressure or temperature fluctuates, the head or valve leaks, the flow restrictor is missing or altered, the rated flow and observed behavior do not match, or compatibility is uncertain. A showerhead replacement or flow-control change must account for the exact fixture, pressure- or temperature-compensating valve, manufacturer's instructions, applicable plumbing requirements, and the original efficiency or certification arrangement.
Safety scope: This article supports ordinary-access inspection and manufacturer-approved scale cleaning only. Do not drill or manually scrape openings, alter flow-control components, open walls or valves, or improvise a plumbing repair.
Common questions
FAQ
Can mineral scale cause low water pressure at one showerhead?
Yes. Scale or debris at the spray face or inlet can restrict one head, but low flow across multiple fixtures points elsewhere. Compare nearby outlets, inspect without poking openings, and use only the installed manufacturer's approved cleaning method.
Can I drill out the flow restrictor to get more shower pressure?
No. Do not drill, remove, or alter the restrictor or pressure-compensating insert. The fixture's flow, spray performance, certification, valve compatibility, and plumbing requirements may depend on the original arrangement. Ask a plumber or manufacturer about a compatible replacement if the design flow is not suitable.
Is vinegar safe for cleaning a showerhead?
EPA WaterSense guidance identifies white vinegar as a possible scale-cleaning option, but the installed manufacturer's care instructions control. Use it only when permitted, rinse thoroughly, and do not mix it with other cleaning products or scrape openings.
What if the showerhead is still weak after cleaning?
Do not keep enlarging openings or changing the limiter. Check whether the inlet screen and washer are intact as the instructions allow, compare other outlets, and arrange manufacturer-specific or qualified plumbing diagnosis for the head, valve, supply, pressure, or compatibility.
When does low shower flow need a plumber?
Call a plumber when multiple outlets are weak, pressure or temperature fluctuates, a leak appears, the head or valve is damaged, approved cleaning does not help, the flow-control component is missing or altered, or the fixture cannot be safely disassembled or matched to the valve.
Read the exact guide
Official sources
- WaterSense at Work Sanitary Fixtures and Equipment 3.4 Showerheads and Bath and Shower DivertersU.S. Environmental Protection Agency · EPA WaterSense technical guidance for showerheads and diverters; installed manufacturer instructions and applicable local plumbing requirements control a particular fixture.
- ShowerheadsU.S. Environmental Protection Agency · EPA WaterSense program information for labeled showerheads; it does not establish that an unlabeled or different fixture has the same performance or compatibility.
- WaterSense Specification for ShowerheadsU.S. Environmental Protection Agency · EPA WaterSense Version 1.1 specification for products seeking the label; it is not a substitute for the installed manufacturer's instructions or local plumbing code.
Community feedback
Share a repair observation
Share a plain-text repair observation. Accepted observations are published automatically; this page may take a moment to update.