
On this page
Start here
Quick answer
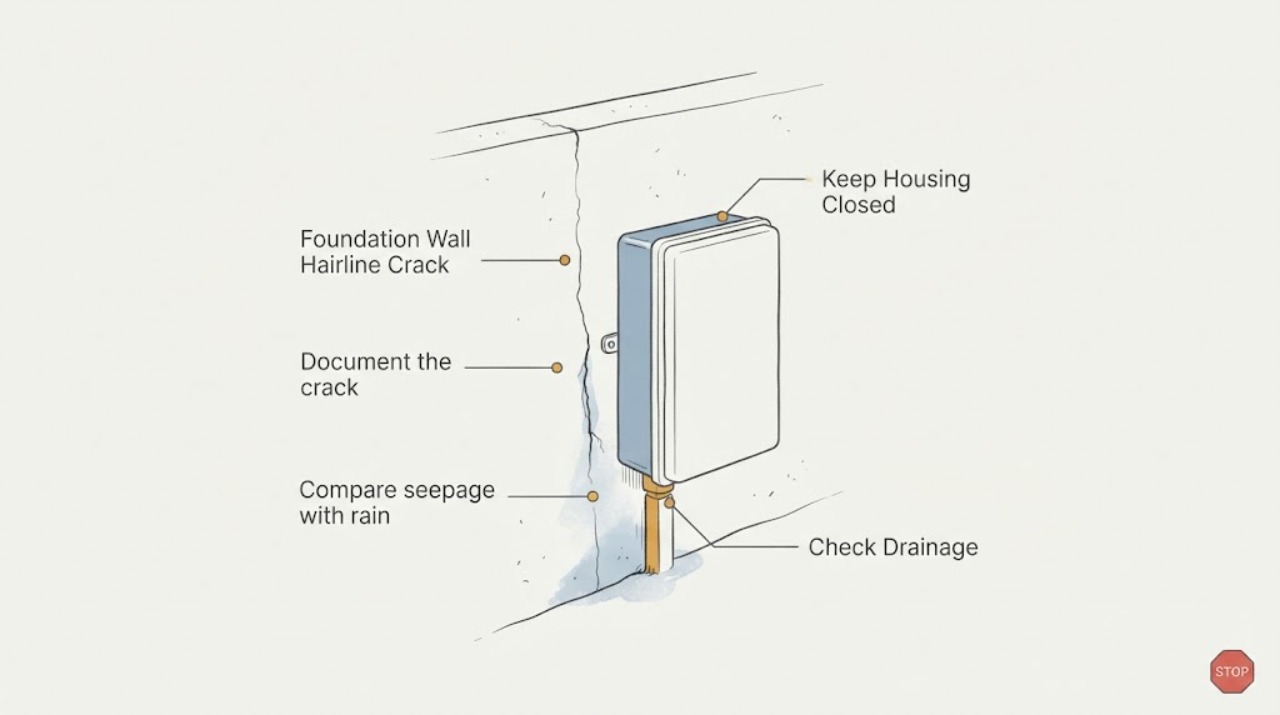
A hairline crack that lets water seep through a foundation wall should be documented and traced before it is sealed. Photograph the crack and surrounding dampness, note whether seepage follows rain or continues in dry weather, and check visible grading, gutters, downspouts, and interior moisture from a safe position. A stable, isolated crack with occasional weather-linked dampness may need a concrete or waterproofing professional to assess the crack and exterior water control; a widening or offset crack, bowed wall, persistent flow, multiple new cracks, or seepage near electrical equipment needs prompt professional assessment. Do not widen the crack, excavate beside the foundation, or cover active seepage with a cosmetic patch.
Work through in order
Diagnostic checks
Use only checks that match the exact appliance or system and its official guide.
-
Document the crack and the first moisture evidence
From a stable, dry position, photograph the full foundation-wall area and a close view of the crack without scraping, probing, widening, or pressing on it. Note the crack's direction, visible continuity, damp edge, water stain, efflorescence-like deposit, peeling finish, or nearby damage.
Expected result: The crack is dry, damp, actively beading or flowing, stained after an earlier event, accompanied by a surface deposit, or surrounded by movement or damaged finishes.
Next step: Keep dated photos and a simple event log, then continue only with safe exterior and timing observations; arrange assessment sooner for active water or visible movement.
Stop if: Stop for flowing water, sewage, a bulging or unstable wall, loose concrete, standing water near electricity, or any need to remove finishes or enter a confined area.
Why this matters
Why: Moisture at the crack supports a seepage path but does not prove the crack is the only source. A new stain, active flow, or adjacent movement raises urgency; a dry crack after a wet event may still be an intermittent entry route.
-
Compare seepage with rain and ground moisture
Record whether the dampness appears after rain, snowmelt, irrigation, or a dry period, and from a safe ground-level position observe visible pooling, settled soil, or water flowing toward the foundation. Do not climb, dig, or create a hose test against the wall.
Expected result: Seepage follows storms or snowmelt, follows irrigation or a nearby discharge, continues in dry weather, or has no repeatable timing.
Next step: Add the weather and visible runoff pattern to the service record, and keep the area monitored without intentionally loading the wall with more water.
Stop if: Do not excavate beside the foundation, remove soil at the footing, climb wet grades, redirect water toward another foundation area, or enter floodwater.
Why this matters
Why: Weather-linked seepage makes exterior water management part of the professional diagnosis; a dry-weather pattern may involve groundwater, plumbing, condensation, or a persistent pathway. Timing is useful evidence but does not identify a repair method by itself.
-
Check visible roof and site drainage
From ground level, inspect whether gutters, downspouts, surface drains, walkways, patios, and visible grading direct water away from the foundation. Look for a disconnected outlet, overflow mark, blocked visible opening, or soil settlement without moving a ladder or dismantling a drainage system.
Expected result: A downspout discharges near the wall, a gutter overflows, surface water pools beside the foundation, soil has settled, or the visible drainage path appears clear.
Next step: Photograph the drainage conditions and ask the concrete or waterproofing professional to include site drainage in the assessment; make only ordinary, ground-level housekeeping changes that do not disturb the foundation.
Stop if: Do not climb onto a roof, use a ladder near wet ground, dig, operate powered excavation equipment, or attach a new drain to an unknown underground line.
Why this matters
Why: Water directed toward the foundation can explain a weather-linked seepage pattern, but correcting one visible outlet does not prove the crack or wall is repaired. A clear exterior view does not rule out subsurface drainage or groundwater.
-
Look for changes that make the crack more than a moisture check
Compare dated photos from the same safe viewpoint and observe whether the crack has extended, changed direction, developed an offset, or is accompanied by a bowed wall, displaced finish, sticking opening, or several new cracks. Do not mark, pry, hammer, or load the wall to test it.
Expected result: The crack appears unchanged, has widened or extended, shows an offset, is part of a pattern of new cracks, or is accompanied by wall distortion or other building movement.
Next step: Stop nonessential work near the wall and request prompt assessment from an appropriately qualified foundation or structural professional when any movement or distortion is present.
Stop if: Leave the area and seek urgent help for a visibly bowing or unstable wall, falling material, sudden large flow, or a condition that threatens occupants or the building.
Why this matters
Why: An unchanged appearance does not prove safety, but extension, offset, wall distortion, or multiple new cracks changes the problem from a simple dampness observation to a possible structural or foundation movement concern.
-
Check the surrounding interior for moisture damage
From a safe, accessible position, inspect the wall, floor edge, stored items, and nearby finishes for dampness, staining, peeling, odor, efflorescence-like deposits, or mold-like growth; move only lightweight belongings that can be moved without entering water or disturbing the wall.
Expected result: Only the crack area is damp, moisture is spreading along the wall or floor, porous materials are wet, an odor or surface growth is present, or the area is dry but the stain returns later.
Next step: Keep wet materials away from normal use where practical, document the affected area, and coordinate concrete or waterproofing assessment with moisture remediation when materials remain damp.
Stop if: Do not scrape or clean mold-like growth, open the wall, enter standing water, or continue if anyone develops symptoms or water reaches electrical equipment.
Why this matters
Why: Spread, recurring stains, wet porous materials, or growth indicate a moisture-management problem beyond cosmetic crack filling. A dry inspection can miss water inside a wall or behind finishes, so it is not proof that seepage has stopped.
Use your observations
Decision map
Find the observation that best matches what you see, then follow the next safe action.
-
PATH 01Safety boundary
What you see
The crack appears stable in dated photos and seepage follows rain, snowmelt, irrigation, or runoff without wall distortion.
Do this next
Provide the photos and timing log to a concrete or waterproofing professional and ask for the crack, exterior drainage, and below-grade water-control conditions to be assessed together.
Why this path and its safety boundary
Safety stop: Do not treat a surface seal as proof that water pressure or the underlying moisture path has been corrected.
-
PATH 02Safety boundary
What you see
Seepage continues in dry weather, returns while the area is not exposed to rain, spreads along the wall or floor, or has no clear timing.
Do this next
Keep the affected area as dry and unused as practical and request prompt leak tracing and foundation-moisture assessment; include possible groundwater, plumbing, condensation, and drainage paths in the report.
Why this path and its safety boundary
Safety stop: Do not excavate, drill injection holes, open finishes, or seal over active water without professional diagnosis.
-
PATH 03Safety boundary
What you see
The crack extends or changes, has visible offset, occurs with multiple new cracks, or is accompanied by wall bowing or other movement.
Do this next
Stop nonessential work near the wall and arrange prompt foundation or structural assessment before choosing a crack repair or waterproofing product.
Why this path and its safety boundary
Safety stop: Leave the area for a visibly unstable or bowing wall, falling material, sudden large water entry, or immediate threat to occupants.
-
PATH 04Safety boundary
What you see
Water is flowing rapidly, reaches electrical equipment, causes standing water, carries sewage, or is damaging the ceiling, floor, or wall.
Do this next
Keep people away, use only a safe accessible shutoff if one is known and designed for the affected water source, and obtain urgent plumbing, concrete, or water-damage assistance.
Why this path and its safety boundary
Safety stop: Do not enter contaminated or electrically hazardous water or attempt emergency excavation or structural stabilization.
Helpful context
Understand the symptom
Hairline describes appearance, not structural safety
A narrow visible crack can be an entry point for water, but its appearance alone does not show whether the wall is stable or where the water originates. Rain, groundwater, runoff, condensation, and plumbing leaks can create similar damp marks. Start with location, timing, movement, and moisture evidence instead of choosing a sealant from the word hairline.
Keep the wall and nearby materials dry while you document it
Protect stored items and dry accessible surfaces only when the area is safe to enter. EPA guidance links persistent moisture with damage to building materials and biological growth, and recommends fixing leaks or seepage rather than hiding the damp area. Do not disturb mold-like growth, enter standing water, or open a finished wall to chase the crack.
Only after diagnosis
Potential parts
- elastomeric masonry crack sealant
Consider this category only after a qualified professional confirms that the crack is suitable for a surface seal, the wall is stable, and the active water path and exterior drainage have been addressed.
Confirm the substrate, crack movement, moisture condition, product instructions, and local requirements before selecting a sealant; no product fit is assumed from a hairline appearance.
When checks do not resolve it
Need a professional?
Request concrete or waterproofing assessment for any recurring seepage, a crack that cannot be traced safely, a below-grade or concealed water path, wet porous materials, or drainage conditions that need alteration. Seek prompt foundation or structural assessment for widening, extending, offset, multiple new cracks, wall bowing, or other movement. Escalate urgently for rapid flow, sewage, standing water near electricity, falling material, or an unstable wall.
Common questions
FAQ
Does a hairline foundation crack mean the wall is structurally unsafe?
Not by appearance alone. Document whether it extends, changes, has an offset, or appears with wall distortion or other new cracks. Any movement or bowing needs professional assessment before sealing.
Why does a foundation crack leak only after rain?
Rain, snowmelt, runoff, groundwater, and drainage conditions can change the water pressure or moisture around a foundation. Record the timing and visible pooling or downspout discharge, but do not assume exterior drainage is the only cause.
Can I caulk a hairline crack that is letting in water?
A sealant may be appropriate only after the wall is assessed as stable and the water path is understood. Do not use a cosmetic patch to hide active seepage, and do not widen, drill, or inject the crack as a self-test.
What should I do if the crack is dry now but the stain returns?
Treat it as intermittent seepage rather than a resolved repair. Keep dated photos and a weather log, protect nearby materials, and arrange professional assessment for drainage, groundwater, plumbing, condensation, and concealed moisture paths.
Read the exact guide
Official sources
- Moisture Control Guidance for Building Design, Construction and MaintenanceU.S. Environmental Protection Agency · Supports inspecting foundation cracks and signs of seepage or wicking, considering rainwater, groundwater, plumbing, and condensation, and recognizing concealed moisture risks.
- What are the main ways to control moisture in your home?U.S. Environmental Protection Agency · Supports distinguishing seepage from other moisture sources, fixing leaks and seepage, and preventing damp areas from supporting biological growth.
- Addressing Indoor Environmental Concerns During RemodelingU.S. Environmental Protection Agency · Supports checking grading and downspouts, managing water around foundation walls, and treating crack sealing as part of a broader moisture-control approach.
Community feedback
Share a repair observation
Share a plain-text repair observation. Accepted observations are published automatically; this page may take a moment to update.