
On this page
Start here
Quick answer
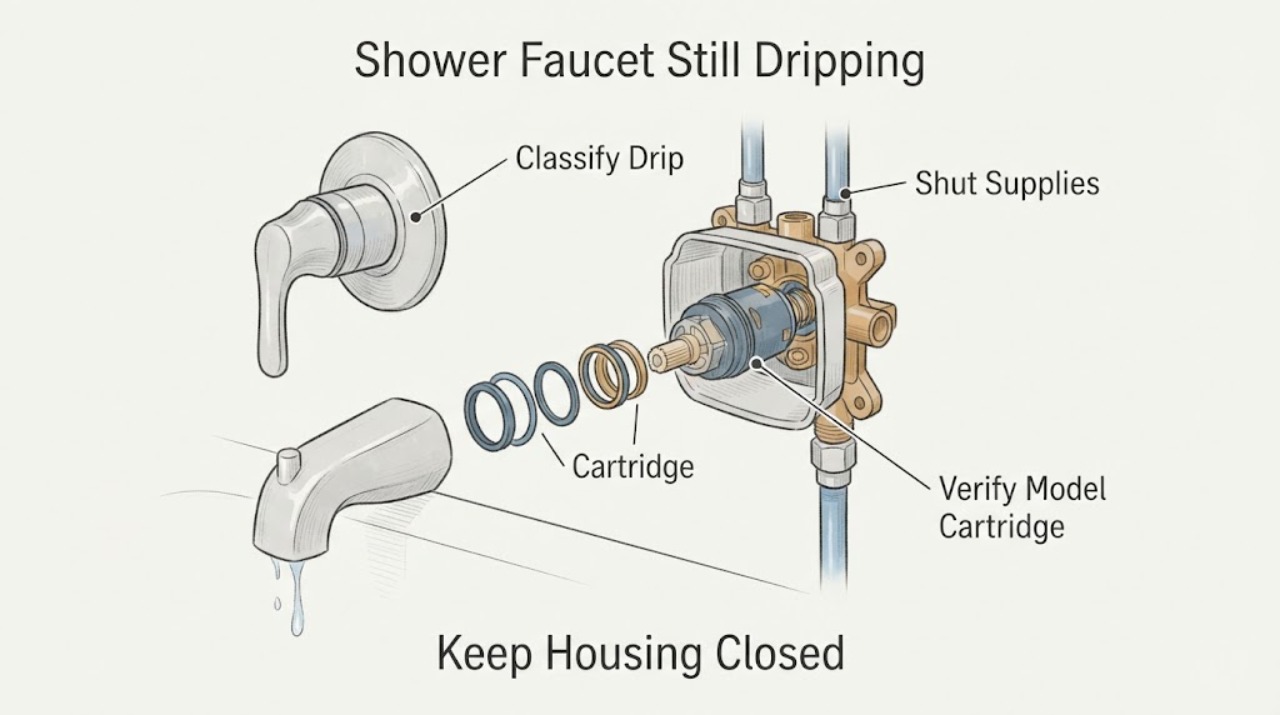
First separate a few drops that drain from the spout after use from a drip that continues while the handle is off. If the drip is continuous, shut off the water supplies before opening the valve and confirm the replacement cartridge is the exact one for the faucet and valve. A cartridge can fail to seal when the valve body still has debris, a seal or seat is displaced or damaged, the cartridge is not aligned for that valve, the retaining clip or bonnet is not fully seated, or the faucet uses separate seats and springs that were not addressed. Use the model-specific manufacturer instructions for orientation, flushing, lubrication, and reassembly; do not force a clip, over-tighten a nut, or guess at a cartridge or seat kit. If the leak persists after one careful model-matched inspection, the valve is inaccessible, or water is entering the wall, leave the supplies off and call a qualified plumber.
Work through in order
Diagnostic checks
Use only checks that match the exact appliance or system and its official guide.
-
Check 1
With the shower control fully off, observe the spout without touching the trim. Note whether water produces only a brief drain-down after use or continues as a regular drip, and confirm whether the water comes from the spout end rather than around the handle, escutcheon, or wall.
Expected result: The water stops after a short drain-down; the spout continues to drip or refill; or the leak is actually around the handle, trim, or wall opening.
Next step: For a continuing spout drip, keep the control off and continue with water isolation and model identification. For water at the wall or trim, leave the supplies off and arrange plumbing service rather than assuming another cartridge will fix it.
Why this matters
Why: A persistent spout drip keeps the cartridge and its sealing path in scope. A leak around the handle or trim is a different sealing or connection path, while a wall leak should not be chased by repeatedly cycling the valve.
-
Check 2
Shut off the valve's water supplies using the accessible stops or the home's plumbing shutoff, following the faucet instructions. Open the shower control briefly only as the model instructions direct to relieve residual pressure, then verify that the spout no longer receives supply. Keep parts over a drain or covered surface so a clip or screw cannot fall into the opening.
Expected result: The water stops and the valve can be approached dry; water continues despite the attempted shutoff; there is no accessible shutoff; or the valve is behind a wall with no safe access.
Next step: Do not remove the cartridge until both supplies are confirmed off. If isolation cannot be confirmed or the work would require opening the wall, stop and call a qualified plumber.
Why this matters
Why: A reliable shutoff is a prerequisite for cartridge work. Continued water means the wrong supply was isolated, the valve is still pressurized, or another supply path is involved; inaccessible isolation turns the work into a plumber's task.
-
Check 3
Use the faucet brand, model, valve series, handle type, and the removed cartridge's markings to compare the installed replacement with the exact manufacturer parts or maintenance guide. Do not treat a cartridge that looks similar, fits the opening, or changes the handle feel as proof of compatibility.
Expected result: The model guide confirms the cartridge and valve family; the part is from a different series; the faucet identity is unknown; or the replacement is an aftermarket or unverified match.
Next step: If the model or valve family is uncertain, stop before another replacement and have the faucet identified by the manufacturer or a plumber. If the part is confirmed, follow that model's orientation and sealing instructions rather than a generic diagram.
Why this matters
Why: Manufacturer documentation lists multiple shower cartridge families and gives examples of non-interchangeable parts. A visually similar cartridge can leave the flow ports, seals, stem, or retaining arrangement wrong and allow a spout drip.
-
Check 4
With the supplies off and only if the exact model instructions permit access, inspect the cartridge's visible seals or O-rings and the valve-body opening for displaced, cut, swollen, dry, or dirty sealing surfaces. For a valve design that uses separate seats and springs, check the model guide for those parts instead of assuming the cartridge contains them. Do not scrape the bore with a sharp tool.
Expected result: A seal is out of its groove, damaged, contaminated, missing, or the valve uses separate seats and springs; alternatively, the visible sealing surfaces look intact.
Next step: Replace only a model-confirmed seal or sealing kit using the manufacturer's procedure. If a seat is recessed, damaged, inaccessible, or the bore is scored, stop and have a plumber diagnose it; do not install a guessed part.
Why this matters
Why: A displaced or damaged seal can let supply water pass the cartridge even when the new cartridge is otherwise correct. Separate seats, springs, or leg O-rings are architecture-specific; a clean visible cartridge does not rule out a damaged valve seat or bore.
-
Check 5
Compare the installed cartridge orientation and retaining hardware with the exact guide. Depending on the valve, this may mean matching a tab or notch, keeping the cartridge flush, placing the manufacturer's hot-side stop correctly, and reinstalling the retaining clip or bonnet without force. Do not apply a 12/6/left/right rule from another brand or model.
Expected result: The cartridge is not flush, a tab or stop is misaligned, the clip or bonnet will not seat, the stem is in the wrong off position, or the hardware seats normally.
Next step: With water still off, correct orientation only from the model guide. Never force a retaining clip or turn water on without it; if the hardware resists or the cartridge is not flush, stop and call a plumber.
Why this matters
Why: Misalignment can leave the cartridge ports or seals off their intended surfaces, while a clip or bonnet that cannot seat indicates that the cartridge, hardware, or valve body is not correctly assembled. A normally seated handle does not prove the internal seal is correct.
-
Check 6
After the exact guide's cartridge, seals, and retaining hardware are correctly installed, follow its documented flushing and leak-check procedure. Delta's opened shower sheet calls for flushing the supply lines before evaluating the repaired valve; Moen also recommends cleaning and flushing the valve body for the covered cartridge procedure. Keep the test brief and observe the spout and trim.
Expected result: The spout remains dry with the control off; the same continuous drip returns; debris or discoloration appears; or water leaks from the trim or wall instead.
Next step: Do not run repeated cycles or swap parts by trial and error. Shut the supplies off again and arrange qualified service for a returning drip, hidden leak, or any leak that cannot be localized from the visible trim.
Why this matters
Why: A dry result after correct assembly supports the repair, but it does not prove universal compatibility. A returning spout drip points back to the sealing path, valve body, seats or springs where applicable, or a defective/mismatched cartridge. A trim or wall leak needs a different inspection.
-
Check 7
Record the faucet brand and model if known, valve type, cartridge marking, whether the drip began immediately after replacement, the orientation and retaining-hardware result, the condition of visible seals, and where the water appears. Give these observations to the manufacturer or plumber instead of ordering another generic cartridge.
Expected result: The faucet identity is incomplete, the replacement part cannot be verified, the drip persists after a model-matched inspection, the cartridge is stuck, or water is entering the wall.
Next step: Keep the water supplies off and arrange qualified plumbing service. Do not remove wall tile, enlarge the opening, force the cartridge, or repeatedly restore water to test an unresolved leak.
Why this matters
Why: These results leave compatibility, valve-body condition, seat condition, or concealed plumbing unresolved. A symptom alone cannot select a safe cartridge, seal, seat, spring, or valve-body repair.
Use your observations
Decision map
Find the observation that best matches what you see, then follow the next safe action.
-
PATH 01Next step
What you see
Do this next
Keep the supplies off and correct only the exact model's documented alignment. Do not force hardware or restore water until the cartridge is fully seated and retained; call a plumber if it will not seat.
-
PATH 02Next step
What you see
Do this next
Use only the model-confirmed seal or seat procedure. Stop for a damaged or inaccessible seat, scored bore, or uncertain part fit and have a plumber complete the diagnosis.
-
PATH 03Next step
What you see
Do this next
Do not buy another part based on the symptom. Identify the complete faucet/valve or arrange a plumber visit, keeping the supplies off if the spout continues to drip.
-
PATH 04Next step
What you see
Do this next
Close the supplies and leave the valve off. Do not force the cartridge, open the wall, or keep testing; call a qualified plumber with the model and repair history.
Helpful context
Understand the symptom
A post-use drip is a timing clue, not proof of a bad new cartridge
Watch the spout with the control fully off. A short drain-down after the shower is a different observation from a drip that continues and replenishes while the valve is off. For a continuing drip, record whether it started immediately after the replacement, whether the handle feels normal, and whether the water is coming from the spout end rather than around the trim or handle. That keeps a cartridge-seal problem separate from an installation leak at the trim or a downstream spout issue.
Do not transfer one cartridge's orientation to another valve
The opened manufacturer documents show why a universal orientation rule is unsafe. Moen's 1222, 1225, and M-Core systems use different alignment instructions, and Delta's covered series uses its own raised-stop and rotational-limit arrangement. A shower-only valve and a tub-and-shower valve can also use different internal arrangements. Identify the faucet and valve from the model documentation before reopening the wall-side trim.
The repair stops at the valve-body and sealing boundary
A careful second inspection can verify supply isolation, model match, visible seals, alignment, and retaining hardware. It cannot safely prove that a valve body is undamaged, that a hidden seat is correct, or that a cartridge sold for a similar-looking faucet fits this valve. If the clip will not seat, a cartridge is stuck, the leak reaches the wall, or the drip remains after a model-matched check, keep the water off and use a qualified plumber.
When checks do not resolve it
Need a professional?
Call a qualified plumber when the drip continues after one model-matched inspection, the cartridge or valve family is uncertain, a seat or valve bore is damaged or inaccessible, the retaining clip or bonnet will not seat, the cartridge is stuck, water is leaking around the trim or into the wall, or the water supplies cannot be safely isolated. Keep the supplies off while waiting. Do not force a cartridge, cut into the wall, over-tighten a retainer, or order a seal, seat, spring, or cartridge solely from the symptom.
Common questions
FAQ
Why is my shower faucet still dripping after I replaced the cartridge?
A new cartridge may not seal if it is the wrong valve family, misaligned, not fully flush, missing a seal, or installed in a valve that also uses separate seats and springs. Shut off the supplies, compare the installation with the exact model guide, and stop if the drip remains after one careful inspection. Do not assume the cartridge is compatible because it fits the opening.
Can a shower cartridge be installed upside down or in the wrong orientation?
Yes, depending on the valve design. Moen's 1222 and 1225 instructions use different alignment details, its M-Core guidance varies by shower-only versus tub-and-shower configuration, and Delta documents a model-specific hot-side stop. Use the exact guide; do not transfer a position from another brand or model.
Do I need seats and springs if I already replaced the cartridge?
Only some shower-valve designs use separate seats and springs, and some cartridges have their own sealing arrangement. Delta's support material identifies seats, springs, and leg O-rings for one covered series, so inspect the exact model parts diagram before ordering anything. A generic seat kit is not safe to assume.
Should I flush the shower valve after installing a cartridge?
Follow the exact manufacturer procedure. Moen recommends cleaning and flushing the valve body for the covered cartridge procedures, and Delta's shower sheet instructs flushing supply lines and checking for leaks after reassembly. Keep the water off until the cartridge and retaining hardware are correctly installed.
When should I stop troubleshooting a dripping shower spout?
Stop when you cannot confirm the water shutoff, the cartridge will not align or the retaining hardware will not seat, the valve is behind the wall, water reaches the wall or trim, the cartridge is stuck, or the drip persists after a model-matched inspection. Leave the supplies off and call a qualified plumber rather than forcing another part.
Read the exact guide
Official sources
- 1222 Cartridge: Single Handle Shower—PosiTempMoen Solutions · Exact Moen 1222 procedure used for supply isolation, valve-body cleaning/flush recommendation, rubber grommet placement, cartridge flushness, retainer clip, and stem orientation; it must not be generalized to other valve families.
- 1225 Cartridge: Single Handle Shower—Standard ValveMoen Solutions · Exact Moen 1225 procedure used for model-specific cartridge tabs, retaining clip, and stem orientation; it is not a universal shower-cartridge diagram.
- M-Core Cartridge BasicsMoen Solutions · Official Moen M-Core parts and alignment guidance; it is used only to demonstrate configuration differences between shower-only and tub-and-shower valves, not to select a cartridge for an unnamed faucet.
- 34459 Rev. A Shower Cartridge Installation InstructionsDelta Faucet Company · Official Delta installation sheet for its covered cartridge and tub/shower valve; the hot-side stop, rotational-limit stop, and flushing instructions are model-scoped.
- Bathroom Faucet: Dripping From The SpoutMoen Solutions · Official Moen explanation of a spout-end leak and cartridge-based flow control; it is a general symptom guide, not a universal installation manual for every shower valve.
- Faucet Cartridges: ShowerMoen Solutions · Official Moen identification guide showing that shower systems use multiple cartridge families; it does not identify a cartridge for an unnamed or non-Moen faucet.
- Cartridge Assembly—1300 / 1400 Series (04/2006 and earlier) RP19804Delta Faucet Company · Official Delta product support and customer-service answers used for model-specific non-interchangeability and seats/springs/O-ring considerations; it does not establish fit for an unnamed faucet.
- Bathroom—Faucet is Leaking or DrippingPfister · Official Pfister guidance used for model-guide matching, cartridge alignment, retainer handling, and the warning against over-tightening; it is not a parts guide for other brands.
Community feedback
Share a repair observation
Share a plain-text repair observation. Accepted observations are published automatically; this page may take a moment to update.