
On this page
Start here
Quick answer
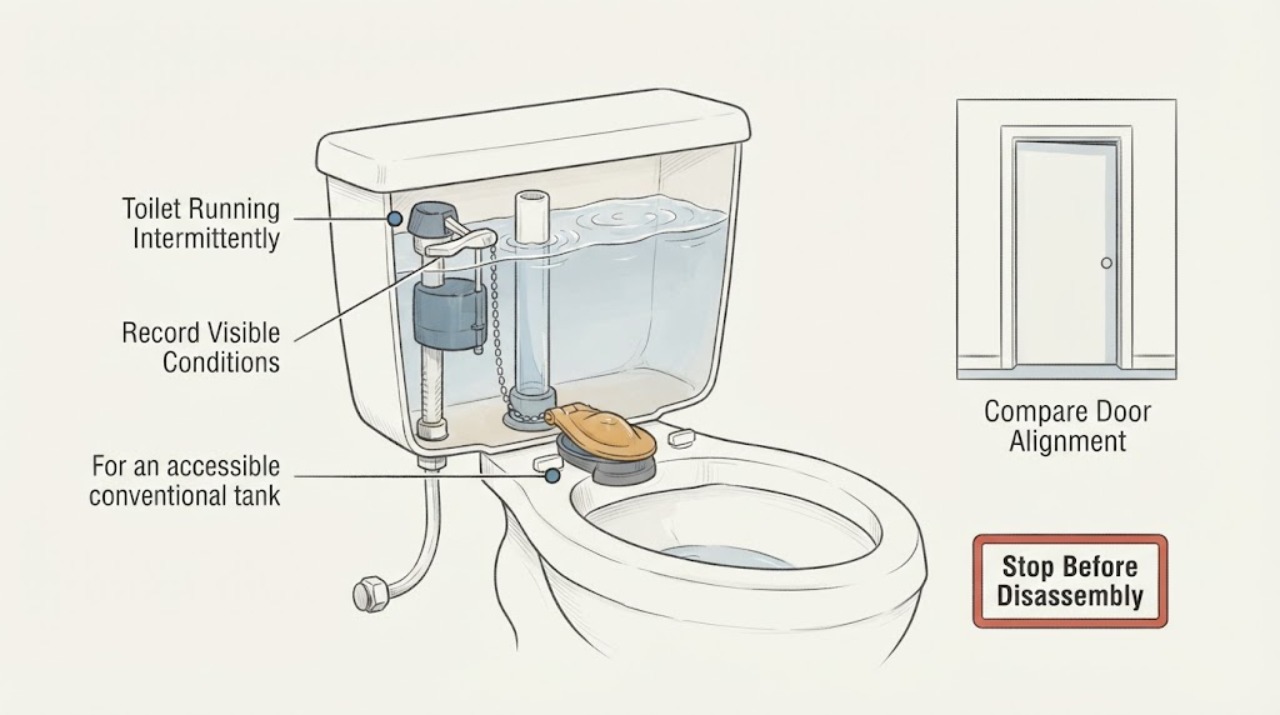
An intermittent running or ghost-flushing toilet usually has water escaping from the tank into the bowl, so the fill valve turns on to restore the tank level. Start by listening for the refill sound, then use a food-coloring or dye test without flushing: color appearing in the bowl confirms a tank-to-bowl leak, commonly at the flapper or canister seal. If no dye crosses but water rises into the overflow tube, the fill valve or water-level setting is the stronger lead; if the handle or chain is binding, it can hold the seal partly open. Keep the tank lid and parts intact, turn off the water before hands-on work, and use the toilet's model instructions. Replace a seal or adjust an accessible chain only when the observation supports it; arrange a plumber if the leak persists, the shutoff will not work, the tank or bowl is cracked, the toilet is pressure-assisted or concealed, or inspection would require unsafe disassembly.
Work through in order
Diagnostic checks
Use only checks that match the exact appliance or system and its official guide.
-
Check 1
Listen and watch for one complete episode without flushing: note whether the sound is a brief refill, a continuous trickle, a bowl surge that resembles a flush, or an actual movement of the handle or touchless control. If safe, lift only the tank lid and record whether the water level is below, at, or entering the overflow tube.
Expected result: The tank refills briefly and stops; water continuously enters the overflow; the handle or chain moves or binds; the bowl surges without a visible control action; or the tank is concealed or pressure-assisted.
Next step: Use the dye test for a conventional tank-to-bowl leak. Do not bypass a sensor, open a pressure vessel, or disassemble a concealed tank; arrange qualified service for those designs or for a visible leak.
Why this matters
Why: A brief refill after the tank level falls makes a tank-to-bowl leak more likely. Water entering the overflow shifts attention toward the fill valve or level setting. A moving or binding control can hold the flush seal open, while a concealed or pressure-assisted design needs model-specific service information.
-
Check 2
For an accessible conventional tank, add a few drops of food coloring or a dye tablet to the tank water and do not flush during the test. Wait at least 10 minutes, then inspect the bowl for color; flush afterward to clear the dye.
Expected result: Colored water appears in the bowl; the bowl stays clear; or the result is hard to read because the toilet was flushed or the tank water was already colored.
Next step: If dye reaches the bowl, turn off the water before inspecting the seal and seat. If the bowl stays clear, check the overflow and control linkage rather than replacing a flapper solely because the toilet made a sound.
Why this matters
Why: Color in the bowl confirms a tank-to-bowl leak. A clear bowl makes a flapper leak less likely at that moment but does not rule out overflow, a control that occasionally catches, or a small intermittent leak; an interrupted test is inconclusive.
-
Check 3
If the dye test indicates a leak, close the toilet's accessible water shutoff before reaching into the tank, flush once to lower the tank level, and inspect the flapper or canister seal and its valve seat for misalignment, mineral buildup, dirt, cracking, or deterioration. Do not force a stuck shutoff or use in-tank chemicals as a cleaner.
Expected result: The seal is visibly worn, dirty, warped, or not seated; the seat is damaged or corroded; the chain holds the seal up; or the seal and seat look normal.
Next step: Clean or replace the seal only according to the toilet's manufacturer instructions and confirm the replacement matches the toilet model. If the seat, flush valve, tank, or shutoff needs force or disassembly, stop and call a plumber.
Why this matters
Why: A worn, dirty, misaligned, or deteriorated seal can let tank water enter the bowl. A chain or trip lever that cannot release the seal can create the same symptom. A normal-looking seal does not rule out a leak under water pressure or a different flush-valve gasket.
-
Check 4
With the tank filled and the lid safely supported, inspect the handle, trip lever, and chain for binding or tension that prevents the flapper or canister from dropping fully. Move only the accessible handle through its normal range; do not force the flush valve or alter a concealed linkage.
Expected result: The handle sticks, the lever does not return, the chain is caught or too tight, the seal rises when the handle is released, or the linkage moves freely.
Next step: Correct only an accessible linkage adjustment permitted by the model instructions, then repeat one dye or refill observation. If the handle, lever, or linkage is broken or the symptom persists, arrange plumbing service.
Why this matters
Why: A binding trip lever or chain can keep the flush seal partially open and cause repeated refills. Free movement makes a control-linkage cause less likely but does not prove that the seal is watertight.
-
Check 5
If the bowl stayed clear in the dye test, watch the tank after a flush or refill and compare the water level with the overflow tube. Confirm whether the fill valve shuts off before water enters the overflow; do not adjust a float or valve beyond the model's documented range.
Expected result: Water enters the overflow tube; the fill valve keeps running without overflow; the water level stops below the overflow; or the level changes only when the handle or chain is disturbed.
Next step: Use the exact toilet instructions for a water-level adjustment or fill-valve replacement. If the valve will not shut off, the overflow continues, or the tank cannot be safely accessed, close the shutoff and call a plumber.
Why this matters
Why: Water spilling into the overflow is a fill-valve or water-level problem rather than a confirmed flapper leak. A level below the overflow with a clear dye test makes a hidden or intermittent seal/control issue more likely than continuous overflow.
-
Check 6
After one supported adjustment or seal replacement, reopen the shutoff slowly and observe a full refill and one normal flush. Check the floor, tank bolts, supply connection, and bowl for a new leak, and stop immediately if water escapes outside the normal flow path.
Expected result: The toilet fills and stops with no dye transfer or intermittent refill; the symptom returns; a base or tank leak appears; the shutoff will not close; or the repair requires opening a concealed or pressure-assisted assembly.
Next step: Keep the shutoff closed for an external leak or uncontrolled refill and arrange a plumber. Provide the dye result, overflow observation, toilet type, and part or adjustment already tried.
Why this matters
Why: A normal refill and clear follow-up test support the corrected seal, linkage, or water-level condition. A returning symptom means the first observation did not identify the whole fault; an external leak or inaccessible assembly is beyond a safe basic adjustment.
Use your observations
Decision map
Find the observation that best matches what you see, then follow the next safe action.
-
PATH 01Next step
What you see
The toilet makes a brief refill sound, the tank level has fallen, and dye appears in the bowl without a handle press.
Do this next
Turn off the water before inspecting the seal and seat. Replace a compatible seal only if the model instructions support it, then repeat the dye test once.
Why this path and its safety boundary
Why it matters: A tank-to-bowl leak is established; a worn, dirty, or misaligned flapper or canister seal is the leading accessible branch.
-
PATH 02Next step
What you see
The bowl stays clear in an undisturbed dye test, but water rises into or flows over the overflow tube.
Do this next
Follow the toilet's exact water-level or fill-valve instructions; close the shutoff and call a plumber if the valve will not stop or the overflow continues.
Why this path and its safety boundary
Why it matters: The fill valve or water-level setting is more likely than a flapper leak at that moment.
-
PATH 03Next step
What you see
The handle sticks, the trip lever does not return, or the chain holds the flapper or canister seal open.
Do this next
Correct only an accessible linkage condition allowed by the model instructions and retest. Replace or service the handle or linkage if it remains binding.
Why this path and its safety boundary
Why it matters: The flush control is mechanically keeping the seal from closing, which can imitate a failing flapper.
-
PATH 04Next step
What you see
The dye test is interrupted, the bowl stays clear, the overflow is normal, and the toilet still refills at unpredictable intervals.
Do this next
Repeat one properly undisturbed test if the toilet is safe to access. If the pattern remains unexplained, arrange a plumber rather than swapping multiple internal parts.
Why this path and its safety boundary
Why it matters: The evidence is inconclusive or points to a small intermittent seal, valve-seat, flush-valve gasket, or control problem; a part cannot be selected from sound alone.
-
PATH 05Next step
What you see
There is a crack, uncontrolled water, a shutoff that will not close, a leak at the base or tank connection, or a concealed or pressure-assisted assembly.
Do this next
Do not keep cycling the toilet or open a pressure vessel. Close the water supply only if it operates normally without force and contact a qualified plumber.
Why this path and its safety boundary
Why it matters: The symptom has crossed the safe boundary for a basic tank check and may cause water damage or require model-specific equipment.
Helpful context
Understand the symptom
Separate a tank leak from a real flush command
A conventional toilet that refills briefly at intervals is often losing tank water into the bowl rather than receiving a new flush command. The tank level drops, the fill valve runs, and the sound stops when the level is restored. A toilet with a touchless sensor, dual-flush mechanism, or concealed or pressure-assisted tank can have a different control path, so identify what actually moved or activated before ordering a seal.
The dye test is the useful first diagnosis
Add dye or food coloring to the tank and do not flush during the waiting period. Color in the bowl is evidence that tank water is crossing the flush-valve seal. No color in the bowl does not prove the toilet is healthy: check whether water is rising into the overflow tube and whether the handle, trip lever, or chain is holding the seal open. Flush after a dye test so the color does not remain in the bowl.
Replace only the part the observation supports
A leaking flapper or canister seal is a different diagnosis from a fill valve that lets water reach the overflow, and neither is proved by the sound alone. Check alignment, deterioration, the valve seat, chain movement, and water level with the supply shut off where the model instructions require it. If a seal replacement or adjustment does not stop the leak, stop repeating parts swaps and call a plumber.
Only after diagnosis
Potential parts
- toilet flapper or canister seal
Only consider this after an undisturbed dye test shows tank water entering the bowl and the seal is worn, dirty, misaligned, or no longer seating.
Match the seal to the toilet's exact flush-valve design and model; a flapper and a canister seal are not interchangeable by appearance alone. - toilet fill valve
Only consider this when the bowl stays clear but water enters the overflow or the fill valve fails to shut off after the water level is correctly set.
Confirm the toilet model, tank geometry, inlet arrangement, and manufacturer instructions before selecting a fill valve.
When checks do not resolve it
Need a professional?
The dye test remains positive after a correctly fitted seal or the leak source is the valve seat or flush-valve gasket., Water enters the overflow, the fill valve will not shut off, the shutoff is stuck, or water leaks outside the tank or bowl., The toilet is concealed or pressure-assisted, has a crack, or diagnosis would require opening a pressure vessel or hidden assembly.
Have this ready
- The toilet manufacturer and model or a clear photo of the tank and internal valve layout.
- Whether the sound is a brief refill, continuous flow, or a bowl surge, and whether a handle or sensor moved.
- The dye-test result, overflow observation, seal or linkage condition, and any visible external leak.
Common questions
FAQ
Why does my toilet run every few minutes and then stop?
The usual pattern is water slowly escaping from the tank into the bowl; the fill valve then runs briefly to restore the level. An old or worn flapper or canister seal, a binding trip lever or chain, or overflow from a fill-valve problem can create the same sound. Use an undisturbed dye test and observe the overflow before choosing a part.
How do I tell if the flapper is causing a ghost flush?
Add dye or food coloring to the tank without flushing and wait at least 10 minutes. Color appearing in the bowl confirms tank water is leaking past the flush-valve seal. If the bowl stays clear, inspect the overflow and handle or chain instead; a clear test does not justify replacing the flapper by sound alone.
Can a stuck toilet handle cause intermittent running?
Yes. A handle, trip lever, or chain that binds can keep the flapper or canister seal partly open. Check only the accessible linkage and make sure it returns normally after a flush. If it remains stuck or the toilet still runs, arrange plumbing service.
What if there is no dye in the bowl but the toilet still runs?
Watch the tank level and overflow tube. Water entering the overflow points more toward the fill valve or water-level setting; a handle or chain that catches can also cause intermittent running. If the overflow and linkage look normal, repeat one properly undisturbed test or call a plumber rather than replacing several parts.
When should I stop troubleshooting an intermittently running toilet?
Stop for a crack, uncontrolled water, an outside leak, a shutoff that will not close, a concealed or pressure-assisted tank, or any need to open a pressure vessel. Also call a plumber when a dye-positive leak or overflow remains after the model-supported seal, linkage, or water-level checks.
Read the exact guide
Official sources
- Toilet Occasionally Leaking or RunningKohler · Kohler one- and two-piece toilets; mechanism names and parts may differ on other toilets
- Leak Alerts: Find and Fix LeaksSan Francisco Public Utilities Commission · Common residential tank toilets; internal parts and adjustment methods vary by toilet
- How to find and fix a toilet leakCity of Portland Water Bureau · Common residential tank toilets; follow the manufacturer's instructions where the mechanism differs
- Fix a Leak WeekU.S. Environmental Protection Agency WaterSense · General tank toilets; replacement fit must be checked against the toilet model
- Home MaintenanceU.S. Environmental Protection Agency WaterSense · General tank toilet maintenance; use the toilet manufacturer's instructions for model-specific parts and adjustments
Community feedback
Share a repair observation
Share a plain-text repair observation. Accepted observations are published automatically; this page may take a moment to update.