
On this page
Start here
Quick answer
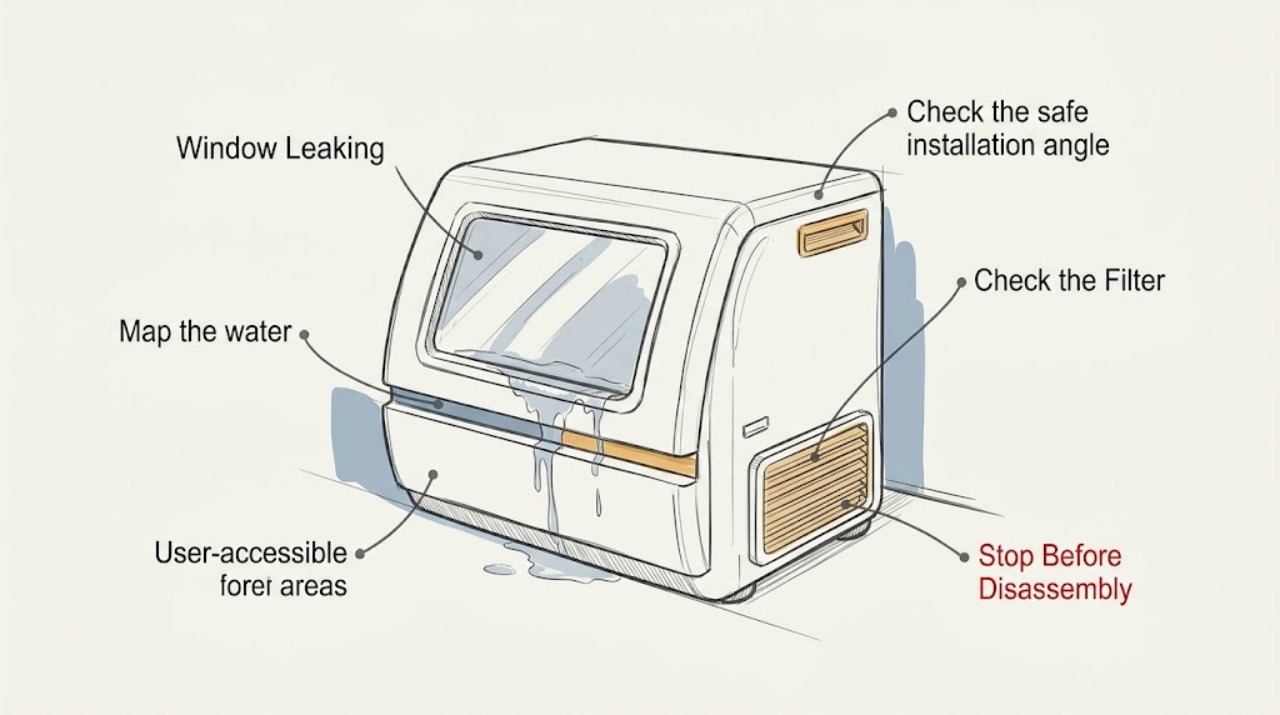
If by a leaking GE window you mean a GE window air conditioner, first identify where the water appears. Water dripping from the outdoor side can be normal because the unit collects condensate and rainwater in its base pan and uses the fan to move some of it across the outdoor coil. Water dripping or spraying into the room is not normal. Turn the unit off before cleaning, check the filter, inspect the visible installation, and confirm the unit is level or tilted slightly toward the outside so water can leave the indoor side. Do not add a drain hole, remove a plug while the unit is operating, pull the air conditioner out of the window, or work near wet electrical parts. If the indoor leak continues after the filter and safe installation checks, the unit is unstable, the window opening or seal is damaged, or water reaches the cord or outlet, leave it off and arrange qualified service.
Work through in order
Diagnostic checks
Use only checks that match the exact appliance or system and its official guide.
-
Map the water to the correct side
From a dry, stable position, switch the GE window air conditioner OFF and observe where water is appearing: outside behind the unit, inside the room, along the sill or frame, or near the cord and outlet. Note whether the event happens during cooling, after rain, or only when the unit is stopped.
Expected result: Water is only dripping outside, water is spraying or dripping inside, the sill or window frame is wet, or water is near electrical parts.
Next step: If water is only outside and the unit is stable, continue with the normal-operation check. For indoor water, a wet sill, or water near the cord or outlet, keep the unit off and continue only with dry external checks; arrange service if the hazard cannot be isolated safely.
Stop if: Do not touch wet electrical components, reach behind the cabinet, or keep cooling when water is entering the room or approaching the outlet.
Why this matters
Why: GE describes outdoor base-pan dripping as a normal condensate or rainwater path. GE explicitly says indoor dripping is not normal, while water at the sill can indicate installation or sealing trouble. Water near electrical parts is an immediate safety concern.
-
Check the safe installation angle and support
With power OFF, inspect from inside and outside without lifting the unit. Check whether the case appears level or slightly lower toward the outside, whether the window sash is closed behind the top mounting rail, and whether visible support brackets and side panels remain attached. Do not loosen mounting hardware while the unit is in the window.
Expected result: The case tilts toward the room, the unit has shifted, a bracket or panel is loose, the window sash is not seated as the installation requires, or the unit appears stable and correctly oriented.
Next step: If the unit is visibly shifted, unsupported, or tilted inward, switch it off and arrange qualified installation or service rather than correcting it while loaded in the window. If stable and correctly oriented, continue with filter and visible seal checks.
Stop if: Do not pull the air conditioner out, climb outside, remove support brackets, or work under an unstable unit as a troubleshooting step.
Why this matters
Why: GE identifies an inward tilt as a cause of indoor water and its installation instructions use a level or slight outward tilt for water disposal. A shifted or unsupported unit can create both a leak path and a falling-load hazard.
-
Clean the accessible filter with power removed
Turn the unit OFF and disconnect power only from a dry, safe position. Remove the user-accessible air filter as the exact GE model manual describes, wash it with warm soapy water if permitted, rinse it, and let it dry fully before reinstalling. Do not operate the unit without its filter or spray water into the cabinet.
Expected result: The filter is visibly dirty or blocked, the filter is clean and dry, the filter cannot be removed without cabinet access, or water has reached the electrical area.
Next step: Reinstall a fully dry filter and perform only a brief supervised test if the unit is stable and the room-side area is dry. If water returns inside, stop the unit and request service.
Stop if: Do not run the air conditioner without the filter, spray cleaner into the case, or reconnect power with wet hands, a wet plug, or water near the outlet.
Why this matters
Why: GE lists a filter that needs cleaning as one possible contributor to indoor water. A clean filter does not prove the drain path or installation is correct, and inaccessible or wet electrical areas require professional handling.
-
Inspect the visible window seal and water entry path
From indoors, inspect the sill, sash, foam or sash seal, side panels, and the area around the case for gaps, displaced material, or water marks. From outside only if the unit and access are safe, look for rainwater entering around the frame rather than through the appliance. Do not caulk over drain or ventilation openings and do not dismantle the window installation.
Expected result: Water marks follow the window frame or side panel, the sash seal or foam is displaced, the appliance case is wet on the room side, or the visible seal and frame are dry.
Next step: If the window or installation seal is displaced, keep the unit off during rain and arrange qualified installation service. If the appliance itself is wet inside with a sound installation, continue to model-specific service rather than adding sealant randomly.
Stop if: Do not seal over drainage openings, drill the case or sill, climb outside, or remove the installed unit to inspect it without qualified support.
Why this matters
Why: A window or side-panel gap can mimic an appliance leak, especially during rain. GE installation guidance uses a sash seal, foam top gasket, side panels, support brackets, and sealing around the unit to control air and water paths; the exact arrangement is model-specific.
-
Check whether the model has a documented drain condition
If the GE unit is a ClearView or another model with a documented drain procedure, record any FL display or Check Filter indication and read that model's instructions before opening a drain cap. Keep a bucket or suitable container ready only when the manual permits indoor draining, and do not remove plugs while the appliance is operating.
Expected result: The model shows the documented drain condition, the manual provides no user drain procedure, the water cannot be safely contained, or the indication remains after the model procedure.
Next step: Follow only the exact model procedure for a documented condition. If no procedure applies, water remains, or access would expose electrical parts, leave the unit off and arrange qualified service.
Stop if: Do not add a drain hole, remove an operating drain plug, open the cabinet, or drain water onto electrical connections or the window sill.
Why this matters
Why: GE says ClearView indoor draining is generally unnecessary except for conditions such as FL or a filter indicator, while outdoor draining is normally associated with removal or storage. A generic drain-hole or plug operation can reduce efficiency or create a spill.
-
Decide whether the leak needs service
After the dry external checks, record the model number, where water appears, weather and cooling conditions, filter state, installation angle, visible seal condition, and any display indication. Do not remove the unit from the window or open the cabinet to test the drain pan, fan, coils, or wiring.
Expected result: The leak stops after a safe filter or documented installation correction, outdoor dripping remains within normal operation, indoor water returns, the unit is unstable, or the leak source cannot be identified.
Next step: Keep the unit off and arrange qualified GE appliance or window-installation service for persistent indoor water, an unstable unit, a damaged seal, an unresolved display condition, or any internal diagnosis.
Stop if: Do not continue operating through indoor flooding, water near the cord or outlet, a loose or falling unit, smoke, burning odor, or repeated breaker trips.
Why this matters
Why: A resolved external cause can explain a room-side leak, but persistent indoor water or an unstable installation can damage the building and expose electrical or falling-unit hazards. A normal outdoor drip alone is not proof of a blocked drain.
Use your observations
Decision map
Find the observation that best matches what you see, then follow the next safe action.
-
PATH 01Next step
What you see
Water drips only from the outdoor side of a stable GE window air conditioner during cooling, humidity, or rain.
Do this next
Keep the unit correctly installed and monitor it; do not add a drain hole or remove a plug during operation.
Why this path and its safety boundary
Why it matters: The water is likely normal base-pan condensate or rainwater disposal.
-
PATH 02Next step
What you see
Water drips, sprays, or pools inside the room while the unit is otherwise stable.
Do this next
Turn the unit off, clean the accessible filter when dry and safe, verify the model installation guidance, and request service if the leak returns.
Why this path and its safety boundary
Why it matters: The indoor water path is abnormal and may involve the filter, cleaning condition, or installation angle.
-
PATH 03Next step
What you see
The case tilts toward the room, has shifted, or its visible support, sash seal, or side panel is loose.
Do this next
Keep the unit off and arrange qualified installation or service; do not loosen brackets or lift the unit while installed.
Why this path and its safety boundary
Why it matters: Installation or window-seal alignment may be directing water indoors and may create a falling-unit risk.
-
PATH 04Next step
What you see
A ClearView or model-specific display shows FL or a Check Filter condition and the manual documents indoor draining.
Do this next
Follow the exact manual with safe water containment. If the indication or leak remains, request service.
Why this path and its safety boundary
Why it matters: The model has a documented water-management condition rather than a reason to drill or improvise a drain.
-
PATH 05Next step
What you see
The filter and visible installation are correct but indoor water returns, or the source is inside the cabinet or base pan.
Do this next
Leave the air conditioner off and provide the model and leak observations to qualified GE appliance service.
Why this path and its safety boundary
Why it matters: An internal drain, fan, coil, pan, seal, or control issue needs professional diagnosis.
-
PATH 06Next step
What you see
Water reaches the cord or outlet, the unit is unstable, the window frame is damaged, smoke or burning odor appears, or the breaker trips repeatedly.
Do this next
Keep clear, isolate power only if it is safe to do so without touching wet parts, and obtain qualified electrical, window, or appliance service.
Why this path and its safety boundary
Why it matters: This is an immediate electrical, water-damage, or falling-unit safety stop.
Helpful context
Understand the symptom
First separate outside condensate from an indoor leak
A GE window air conditioner is designed to collect moisture in its base pan. GE explains that water can be thrown against the outdoor coil and drip from the exterior, especially in humid or rainy conditions. That is different from water entering the room: an indoor drip, spray, wet sill, or water near the cord needs a stop-and-check response.
Installation angle and airflow change the water path
GE's window installation guidance calls for the case to be level or tilted slightly toward the outside so collected water can leave the correct side. GE also lists a dirty filter and an appliance that needs cleaning among possible causes of indoor water. Use the model's installation and care instructions rather than drilling the case or improvising a drain.
Safety boundary
Stop conditions
- Never touch a wet plug, outlet, cord, or electrical compartment, and do not keep operating when water is entering the room or approaching electrical parts.
- Stop for an unstable or falling unit, damaged window frame, cracked case, smoke, burning odor, sparking, or repeated breaker trips.
- Do not add a drain hole, remove a drain plug while the unit operates, uninstall the air conditioner, open the cabinet, or work on the gas-free electrical system as a casual troubleshooting step.
- Do not climb outside or remove support brackets and side panels while the unit is mounted in the window; arrange qualified installation or service.
Only after diagnosis
Potential parts
- air filter or filter frame
Consider this category only when the exact model's filter is missing, damaged, or cannot be cleaned and a qualified diagnosis confirms it is contributing to airflow or water behavior.
Confirm the complete GE model and manufacturer's fit information; a dirty filter alone does not prove a replacement filter frame is needed. - window sash seal, foam gasket, or side-panel seal
Consider this category only when inspection confirms a displaced or damaged installation seal that allows rain or condensate into the room.
Confirm the complete GE model and installation arrangement before ordering; do not block ventilation or drainage openings with seal material. - condensate pan or drain-path component
Consider this category only when qualified service confirms an internal pan, drain, or water-management fault after the filter and installation checks are normal.
Verify the complete model and technician diagnosis before ordering; outdoor dripping can be normal and does not by itself justify a drain-part replacement.
When checks do not resolve it
Need a professional?
Arrange qualified GE appliance or window-installation service when water appears inside after safe filter and installation checks, the source is inside the cabinet or base pan, the unit is unstable, the window seal or frame is damaged, a model-specific FL or filter condition persists, or the unit must be removed or opened. Use qualified electrical help for water near an outlet, damaged wiring, smoke, burning odor, sparking, or repeated breaker trips.
Common questions
FAQ
Is water dripping outside my GE window air conditioner normal?
Often, yes. GE explains that condensate and rainwater can collect in the base pan and be moved across the outdoor coil before dripping from the exterior. Water dripping inside the room is not normal.
Why is my GE window air conditioner leaking water inside?
GE lists a dirty filter, an appliance tilted slightly into the room, or a unit needing cleaning as possible causes. Turn it off, clean the accessible filter when dry and safe, and verify the exact installation guidance.
Should I drill a drain hole in a GE window air conditioner?
No. GE says the base-pan water path supports efficiency and a drain hole is not a general fix. Use only a model-specific drain procedure, such as the documented ClearView condition, or request service.
How should a GE window air conditioner be tilted to prevent indoor leaks?
GE's installation guidance calls for the case to be level or tilted slightly toward the outside so water disposes on the correct side. Do not adjust brackets or lift an installed unit without qualified support.
When should I stop using a leaking GE window air conditioner?
Stop for water near the cord or outlet, indoor flooding, an unstable unit, damaged window support, smoke, burning odor, sparking, or repeated breaker trips. Isolate power only when safe and arrange qualified service.
Read the exact guide
Official sources
- Air Conditioner - Water Dripping OutsideGE Appliances · GE room and window air conditioners where water drips from the outdoor side or appears in the base pan
- 49-7437GE Appliances · GE window air conditioner installation instructions for a standard double-hung window and related support hardware
- Air Conditioner - Spitting or Spraying WaterGE Appliances · GE room and window air conditioners that spit, spray, or drip water indoors or outdoors
- Air ConditionersGE Appliances · GE room and window air conditioners where model-specific support or qualified service is needed
- ClearView Air Conditioner - Draining the ApplianceGE Appliances · GE ClearView saddle-style window air conditioners, including FL or filter-indicator conditions and safe indoor drain access
- 49-74053GE Appliances · GE room and window air conditioner models covered by the official manual, including filter care and indoor water disposal
Community feedback
Share a repair observation
Share a plain-text repair observation. Accepted observations are published automatically; this page may take a moment to update.