
On this page
Start here
Quick answer
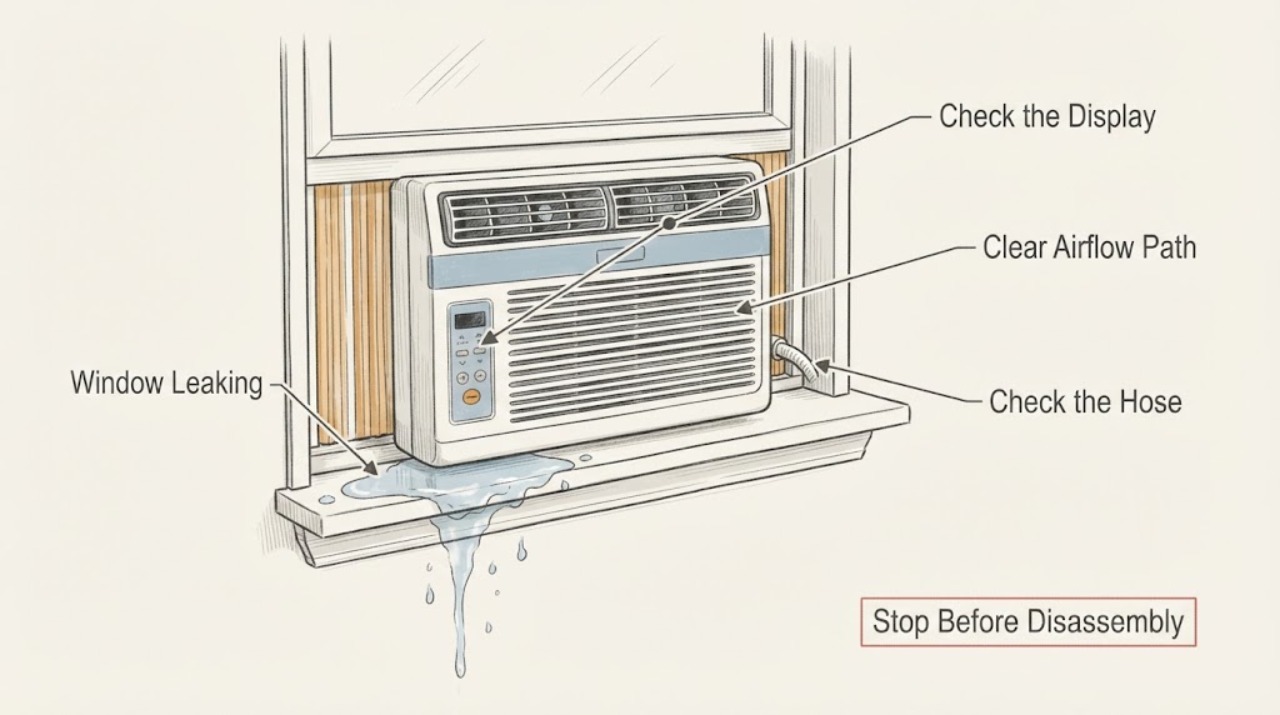
If a YORK window-type air conditioner is leaking, first identify whether the water is condensate from the unit, rain entering around the installation, or water tracking from another part of the window or wall. Turn the unit off if water is reaching electrical parts, the wall is becoming saturated, or the unit is unstable. Without pulling the appliance out, check the indoor drain path that the model manual exposes, the outdoor drainage direction, the window seal, and the level/support of the installation. Do not drill the cabinet, dismantle a refrigerant circuit, or improvise a drain connection. YORK's window-air-conditioner materials include model-specific operation manuals, and YORK directs owners to professional support for equipment issues.
Work through in order
Diagnostic checks
Use only checks that match the exact appliance or system and its official guide.
-
Check 1
Turn cooling off and trace the first wet point from inside the room and, only from a safe standing position, around the window sill and visible exterior. Check whether water is near the receptacle, plug, controls, or wall cavity.
Expected result: Water is near electrical parts or the wall is actively saturating; water starts at the indoor drain area; or water appears only at the window frame or after rain.
Next step: Keep the unit off and arrange qualified service for electrical or wall damage. If the area is dry and the source is accessible, continue with the visible drain, seal, and installation checks without moving the unit.
Why this matters
Why: Electrical exposure or structural water damage takes priority over drain troubleshooting. A drain-area drip and a rain-driven frame leak follow different repair paths.
-
Check 2
With power off and the unit stable, inspect the accessible filter and visible air path for heavy dust, ice, or an obstruction. Do not remove the cabinet or reach toward a fan or coil.
Expected result: The filter or visible intake is blocked, ice is present, or the air path is clear; and the leak is still present or stops when cooling is off.
Next step: Clean only the accessible filter according to the model manual and allow any ice to thaw without scraping or applying heat. If water returns, cooling is weak, or ice reforms, request service.
Why this matters
Why: Restricted airflow or icing can change condensate behavior, but visible ice does not identify the cause or make the unit safe to keep running. A leak that continues while cooling is off is less likely to be condensate from the current cycle.
-
Check 3
Check the visible condensate outlet, drain pan edge, or drain hose described by the exact YORK operation manual. Look for leaves, dirt, kinked tubing, a displaced hose end, or a collection point that sends water toward the room.
Expected result: The outlet is visibly blocked or misdirected; the drain route is clear; or the model does not expose a user-serviceable drain path.
Next step: Remove only loose debris that is plainly accessible without opening the cabinet and restore only a documented hose position. If the path is hidden, blocked internally, or leaks again, arrange qualified service.
Why this matters
Why: A visible obstruction or wrong hose direction can redirect condensate, while a clear or inaccessible path needs model-specific service. Do not assume every YORK window unit drains the same way.
-
Check 4
Inspect the window sash, side panels, sill, exterior trim, and visible sealant for gaps or a path where rain can enter. Check whether the unit and its support remain firmly seated; do not loosen the frame or reposition a mounted unit.
Expected result: The leak appears after rain or wind, a gap is visible around the window installation, or the leak occurs during dry weather while cooling.
Next step: For a minor accessible exterior gap, document it and use only the sealant method specified by the installation instructions. Do not seal over a drain outlet or change the unit's slope. Use an installer for a loose bracket, open frame, or recurring rain leak.
Why this matters
Why: Rain infiltration and condensate can look alike indoors. A perimeter gap points toward window installation or weather sealing; dry-weather cooling points back toward the unit's drainage or condensate management.
-
Check 5
After the area is dry and the installation is stable, record when the leak occurs: immediately on startup, only after extended cooling, only during humid weather, only after rain, or continuously even while the unit is off. Record any weak airflow, icing, unusual noise, or error indication.
Expected result: The leak tracks cooling and humidity; follows rain; continues when the unit is off; or accompanies icing, poor cooling, noise, or a control warning.
Next step: Keep the unit off if the leak recurs or any safety symptom is present. Give the model number, photos of the first wet point, weather/cooling timing, and visible checks to YORK support or a qualified technician.
Why this matters
Why: Timing helps a technician separate condensate management from building-envelope water and from a mechanical or control issue, but it does not prove a failed drain pan, pump, coil, or refrigerant component.
-
Check 6
Locate the exact YORK model number and retrieve the matching operation and installation manual before ordering parts or changing the window mounting. Compare the manual's drainage, support, and clearance instructions with the current installation.
Expected result: The exact model and manual are available; or the unit identity is unknown and the leak persists.
Next step: Provide the model number and leak history to a YORK dealer or qualified window-air-conditioner technician. Do not order a pan, hose, seal, or control based only on the symptom.
Why this matters
Why: YORK lists more than one window-type series and links separate manuals from its product page. A generic drain or seal instruction may be wrong for the unit's design.
Use your observations
Decision map
Find the observation that best matches what you see, then follow the next safe action.
-
PATH 01Next step
What you see
Water is near the plug, receptacle, controls, wiring, or a visibly damaged wall.
Do this next
Keep the YORK unit off, avoid touching wet electrical parts, and arrange qualified electrical/building and HVAC service as appropriate.
-
PATH 02Next step
What you see
The leak happens only during cooling and the accessible filter or drain outlet is visibly blocked.
Do this next
Clean only the accessible filter or loose debris described by the exact manual, keep all drain outlets open, and stop if the leak returns or the path is internal.
-
PATH 03Next step
What you see
The leak follows rain or wind and begins at the sash, sill, side panel, or frame rather than the unit.
Do this next
Treat it as an installation or weather-seal problem. Do not move the unit or seal across a drain; have a qualified installer inspect the frame, support, and exterior flashing/seal.
-
PATH 04Next step
What you see
Ice, weak cooling, unusual noise, repeated leakage, or a control warning accompanies the water.
Do this next
Turn cooling off and arrange qualified service. Do not scrape coils, access refrigerant, bypass controls, or run repeated cycles to reproduce the leak.
-
PATH 05Next step
What you see
The source is uncertain or water continues while the unit is off.
Do this next
Keep the unit off and trace the window, wall, roof, and plumbing paths with a qualified professional; do not assume the YORK unit is the source.
Helpful context
Understand the symptom
Start with the water path
A window air conditioner can produce condensate during cooling, but water appearing indoors can also come from a blocked or misdirected drain, a poor window seal, rain, or a saturated wall. Look at where the first wet mark appears rather than assuming the nearest drip is the source. Keep the unit off if water is near the plug, receptacle, controls, or wiring.
Do not create a new hazard
Do not pull a heavy window unit out of its opening, work outside on a ladder, drill the cabinet, or open the sealed refrigerant system to solve a leak. A support bracket or installation change can affect the unit's stability and drainage. Use the exact YORK operation manual or a qualified air-conditioning/window installer for anything beyond an accessible filter, visible debris, or exterior seal check.
Safety boundary
Stop conditions
- Stop using the unit for water near a plug, receptacle, controls, or wiring; smoke, sparking, a burning smell; an unstable bracket; or a visibly saturated wall.
- Stop if the leak returns after an accessible check, occurs with ice or weak cooling, or cannot be traced without moving the window unit or opening its cabinet.
- Do not drill the cabinet, seal over a drain outlet, pull or tilt a mounted unit, work on a ladder, open the refrigerant circuit, or bypass a safety control.
Only after diagnosis
Potential parts
- condensate drain pan or drain hose
Consider only after a qualified diagnosis confirms a cracked pan, damaged hose, or failed documented drain component as the source of the water.
Confirm the exact model and the installation manual before ordering; do not add a hose or alter the drain direction from a symptom alone. - window sealing or side-panel weather seal
Consider only if the leak is traced to a damaged installation seal or side-panel weather barrier rather than condensate inside the unit.
Confirm the unit series, window configuration, and installer-approved sealing method; never block an intentional drain outlet. - support bracket or mounting hardware
Consider only when a qualified installer confirms that a loose, damaged, or missing support component is allowing an unsafe position or drainage change.
Mounting hardware and load requirements are installation-specific. Do not move the unit or improvise a bracket.
When checks do not resolve it
Need a professional?
Arrange qualified YORK or window-air-conditioner service when water reaches electrical parts, the wall or frame is being damaged, the unit is unstable, the drain path is internal, the leak recurs, or icing, poor cooling, noise, or a control warning is present.
Common questions
FAQ
Why is my YORK window air conditioner leaking inside?
Possible paths include condensate drainage, a blocked visible drain, a poor window seal, or rain entering around the installation. Trace the first wet point and compare the drainage and installation with the exact model manual.
Should I keep running the YORK unit if it is leaking?
Turn it off when water is near electrical parts, the wall is saturating, the unit is unstable, or the leak is recurring. Arrange qualified service rather than running cycles to reproduce the problem.
Can I drill a hole to make a YORK window unit drain?
No. Drilling can damage the cabinet, coils, wiring, or intended drainage. Use the model-specific operation and installation instructions or a qualified technician.
What should I tell a YORK technician?
Give the exact model number, first wet point, whether the leak follows cooling or rain, the visible drain and seal observations, and any ice, weak cooling, unusual noise, or electrical symptom.
Read the exact guide
Official sources
- Technical SupportYORK · YORK equipment technical support and professional service routing
- Home HVAC Maintenance TipsYORK · YORK home air-conditioner maintenance, airflow, condensate, unusual-noise, and professional-service guidance
- Window Type and Split Type Air ConditionersYORK · YORK window-type air-conditioner product families and model-specific operation manuals
Community feedback
Share a repair observation
Share a plain-text repair observation. Accepted observations are published automatically; this page may take a moment to update.