
On this page
Start here
Quick answer
A window hinge that will not close is often a sash-alignment, obstruction, hinge, operator, lock, or frame problem, and the correct check depends on whether the window is casement, awning, or another hinged design. From a stable position, identify the window type, note where the sash first rubs or stops, check the lock and operator only with gentle normal movement, and look for visible debris, swelling, corrosion, or a displaced hinge without removing covers. Do not force the crank or handle, lift a heavy sash, disconnect hinge arms, remove glass or trim, or make generic hinge adjustments. Arrange window service when the sash binds, the window is high or heavy, hardware is damaged, the frame is distorted, or a model-specific adjustment does not restore smooth closing.
Before you begin
Safety first
- This article is limited to safe identification, gentle normal operation, non-contact observation, and removal of a plainly external obstruction. Do not force the crank or lock, lift or support a heavy sash, disconnect hinge arms, remove glass, trim, screens, covers, or hardware, drill, file, bend, lubricate, or make a generic adjustment.
Work through in order
Diagnostic checks
Use only checks that match the exact appliance or system and its official guide.
-
Check 1
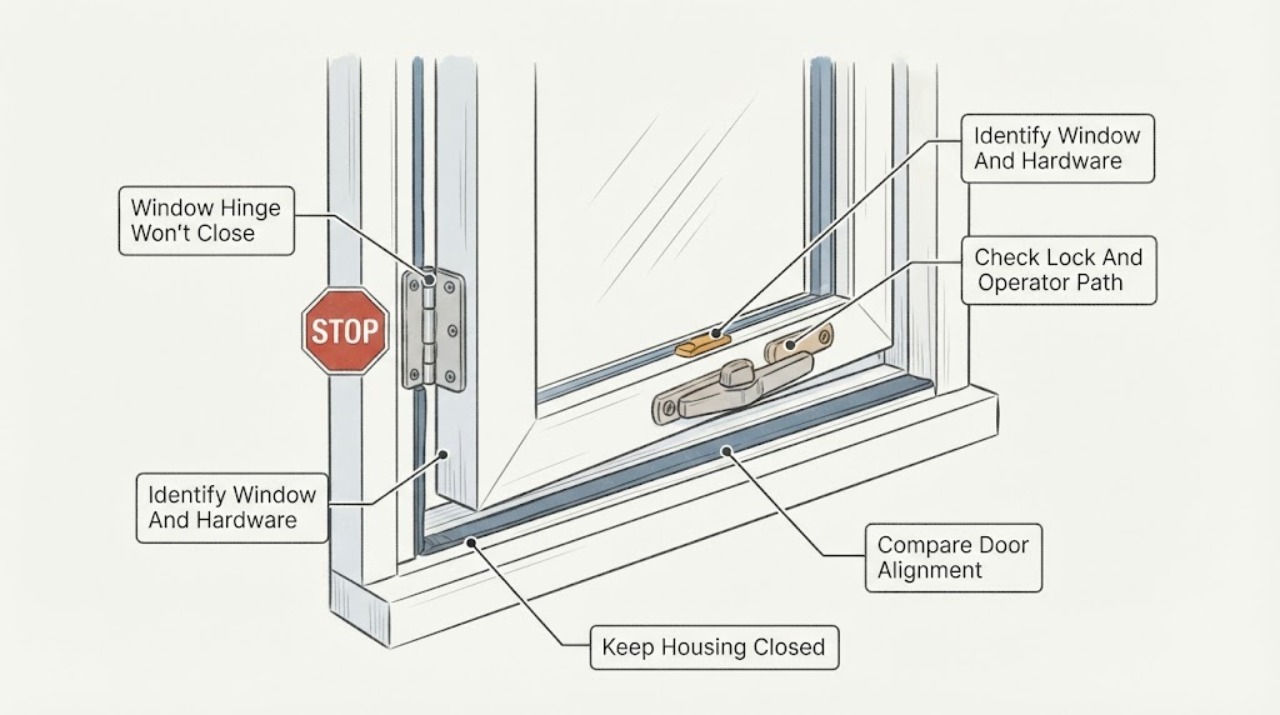
From inside the room and without forcing the handle, identify whether the window is a side-hinged casement, top-hinged awning, tilt design, or another style. Note which side the hinges are on, whether a crank or lever operator is present, and whether the lock handle is separate.
Expected result: The unit is a hinged casement or awning window with a visible operator, or the window type and hardware cannot be identified safely.
Next step: Photograph the interior hardware and locate the model label in an existing manual or safe-to-read location. If the type remains uncertain, stop at identification and ask a window professional to classify it.
Stop if: Do not remove trim, screen, glass, covers, or hardware to identify the window, and do not lean out, climb, or reach through an opening.
Why this matters
Why: A hinged sash uses an operator and hinge arrangement that varies by design, handing, vintage, and model. If the type is uncertain, instructions for another window style can misroute a part or cause damage and should not be followed.
-
Check 2
With the sash supported by its normal frame and no person or object in the opening, use only gentle normal handle or crank movement to see whether the lock is fully open and whether the operator begins retracting before the sash meets the frame. Stop at the first resistance.
Expected result: The lock remains partly engaged, the operator handle turns but the sash does not follow, the handle binds before the sash is seated, or the sash meets the frame before the operator reaches its normal closed position.
Next step: Record the point and direction of resistance and arrange model-specific window service if gentle normal operation does not close the sash. Do not keep cranking, bypass the lock, or disconnect the operator arm.
Stop if: Stop immediately for a slipping or suddenly loose handle, a cracking sound, a sash that shifts, exposed broken hardware, or any need to support or lift the sash by hand.
Why this matters
Why: A lock/keeper mismatch, operator fault, or sash alignment problem can each prevent closing. A handle that turns without moving the sash does not prove that the hinge is failed, and resistance is a reason not to apply more force.
-
Check 3
With the window in its current safe position, observe the sash-to-frame gap and visible hinge arms, tracks, weatherstrip, and corner clearances without touching or removing them. Compare the top, bottom, hinge side, and lock side for a first rub point, trapped debris, corrosion, a bent arm, displaced weatherstrip, or a visibly loose cover.
Expected result: The sash rubs at one corner or side, the reveal is uneven, debris is visible in an accessible clearance, the hinge or operator looks bent or corroded, the weatherstrip is displaced, or no external issue is visible.
Next step: Remove only loose debris that is clearly outside the hardware and safe to reach without opening the sash farther; otherwise photograph the first contact point and request a window professional. Do not file, bend, adjust, disconnect, or lubricate a hinge or operator as a generic test.
Stop if: Do not reach into a hinge track, support a heavy sash, remove a hinge clip or cover, use a tool, or continue if the window is above a safe standing height or the hardware is under visible strain.
Why this matters
Why: Andersen notes that dragging or rubbing can mean a crooked sash that may need a hinge adjustment, while manufacturer hardware and adjustment eligibility vary by product. Visible damage or an uneven gap does not identify whether the hinge, operator, frame, or sash is the failed part.
-
Check 4
From a stable interior position, inspect the frame, sill, sash edge, and nearby trim for swelling, cracked or peeling finish, water staining, distortion, ice, a fallen object, or a curtain or screen that is physically blocking the closing path. Do not press or pry the sash to test it.
Expected result: Wood or trim appears swollen or soft, the frame is visibly out of square, water or ice is present, the sash changed after rain or humidity, or a clearly external object is blocking the path; alternatively, the frame appears dry and undamaged.
Next step: Remove only a loose object that is plainly outside the window hardware and safe to handle; keep the window out of service and request window/building-envelope assessment for swelling, water, distortion, or recurring seasonal binding.
Stop if: Stop for active water entry, soft or collapsing wood, broken glass, unstable trim, an exterior-access requirement, or any need to dismantle the frame or apply force.
Why this matters
Why: Moisture-related swelling, frame movement, or an installation problem can mimic a hinge fault and may require building-envelope or window repair. A removable external obstruction can explain the symptom, but a dry frame does not rule out internal hardware wear or misalignment.
-
Check 5
Prepare a service record using the model or product information already available, the hinge side, operator style, first rub or stop point, lock position, frame condition, and photos taken without moving hardware. Ask whether the exact manufacturer guide identifies a safe adjustment for this model.
Expected result: The model and hardware identity are known and the manufacturer provides a model-specific service path; alternatively, the identity is missing, the sash is heavy or high, the hardware is damaged, or the guide does not resolve the closing problem.
Next step: Follow only the exact manufacturer instructions if the access and safety warnings can be met; stop and call a window professional if the sash, hinge, operator, or lock remains difficult to close or any step requires disconnection or lifting.
Stop if: Do not order a part from appearance alone, remove glass or trim, disconnect hinge arms, lift the sash, drill, file, bend, or force the lock or crank.
Why this matters
Why: Andersen's replacement operators and hinge adjustments depend on product type, handing, dimensions, and vintage, so a generic hinge or operator is not assumed to fit. An unresolved or unsafe sash needs professional assessment rather than more adjustment attempts.
Use your observations
Decision map
Find the observation that best matches what you see, then follow the next safe action.
-
PATH 01Next step
What you see
The window is high, heavy, unstable, cracked, under hinge or operator strain, or its hardware is bent, corroded, broken, or suddenly loose.
Do this next
Stop operating it, keep people away from the opening, and arrange qualified window service. Do not lift the sash, disconnect the arms, or remove glass or trim.
-
PATH 02Next step
What you see
The lock remains engaged, the handle binds, the operator turns without moving the sash, or resistance begins before the sash reaches the frame.
Do this next
Stop at the first resistance, document the handle and sash positions, and request model-specific window service rather than applying more torque or bypassing the lock.
-
PATH 03Next step
What you see
The sash rubs at one corner or side, the reveal is uneven, or the window closes only when pushed or pulled.
Do this next
Treat alignment, hinge, operator, keeper, sash, and frame condition as unresolved. Photograph the rub point and use an exact model guide or a qualified window professional; do not bend or file hardware.
-
PATH 04Next step
What you see
The sill, sash, or trim is swollen, soft, stained, or distorted, or closing trouble follows rain or humidity.
Do this next
Keep the window out of service and request window plus building-envelope assessment for water entry, frame movement, or material damage before replacing a hinge.
-
PATH 05Next step
What you see
A loose curtain, screen edge, fallen object, or other plainly external obstruction is visibly in the closing path and the hardware is otherwise undisturbed.
Do this next
Remove only the safe external obstruction, then try one gentle normal close. If resistance remains, stop and arrange service rather than forcing the sash.
-
PATH 06Next step
What you see
The window style or hardware identity is known, but the manufacturer guide gives a product-specific adjustment or replacement path that has not been verified for this unit.
Do this next
Use the model, handing, operator type, and dimensions to obtain the exact manufacturer instructions or qualified service; do not apply another brand's hinge procedure or select a universal-looking part.
Helpful context
Understand the symptom
Identify the window before blaming the hinge
Casement and awning windows use side hinges plus an operator or crank, while other windows may use different hardware. Andersen separates straight-arm and split-arm operators and limits some hinge adjustments to particular product generations. Without a brand, model, handing, and operator type, a generic adjustment can damage the mechanism or leave the sash unsupported.
A rubbing sash is a clue, not a measurement
A sash that drags or rubs can be out of alignment, but the same symptom can come from a bent hinge, worn operator, displaced keeper, swollen wood, debris, weatherstrip interference, or an installation or frame problem. Note the first contact point and whether it occurs before the handle reaches its normal closed position; do not force the hardware to prove the cause.
Keep the safety boundary narrow
Use only gentle, ordinary operation from a stable position and inspect visible surfaces. Windows and sashes can be heavy, and hinge arms or operators can release unexpectedly. Do not disconnect hardware, lift the sash, remove panels or glass, climb, or use a generic wrench or lubricant unless the exact manufacturer guide and a safe access plan support it; professional service is the right next step when that boundary is crossed.
Only after diagnosis
Potential parts
- casement or awning hinge assembly
Consider this category only if a qualified professional confirms a bent, worn, corroded, or model-specific hinge fault after ruling out the lock, operator, sash, and frame.
Confirm exact window brand, model, handing, hinge design, sash weight, and installation requirements; do not choose a hinge by appearance alone. - casement window operator
Consider this category only if the handle or operator fails to move the sash and a qualified professional confirms the operator is the cause. A sash that rubs can have an alignment or frame cause instead.
Match the exact operator style, handing, arm length, window vintage, and model information; manufacturer guidance shows these details can change the correct part. - window weatherstrip
Consider this only when a qualified window professional confirms displaced or damaged weatherstrip is interfering with closing or sealing after alignment and hardware are assessed.
Confirm the exact sash and frame profile, material, compression, and approved installation method; do not add material that prevents the lock from engaging.
When checks do not resolve it
Need a professional?
Arrange qualified window service for a sash that remains stuck, rubs, or will not latch after one gentle normal operation and a safe external-obstruction check. Escalate promptly for a high or heavy sash, bent or loose hinge/operator, broken glass, frame distortion, swelling or water entry, an opening that cannot be secured, or any need to disconnect, lift, remove, or adjust hardware.
Safety scope: This article is limited to safe identification, gentle normal operation, non-contact observation, and removal of a plainly external obstruction. Do not force the crank or lock, lift or support a heavy sash, disconnect hinge arms, remove glass, trim, screens, covers, or hardware, drill, file, bend, lubricate, or make a generic adjustment.
Have this ready
- Window brand, model, vintage, and hinge side if safely available
- Window style and operator type, such as casement or awning and crank or lever
- The first rub or stop point, lock position, handle behavior, and whether the issue is new or recurring
- Photos of the visible hinge, operator, sash-to-frame gap, weatherstrip, frame, and any moisture or damage
- Whether the sash is high, heavy, unstable, difficult to secure, or affected by rain or humidity
Common questions
FAQ
Why won't my window hinge close?
The sash may be rubbing because of alignment, a hinge or operator issue, a lock or keeper mismatch, weatherstrip interference, swelling, or frame movement. Identify the window style, note the first resistance point, and arrange model-specific service if gentle normal operation does not close it.
Should I force the crank or handle to close the window?
No. Stop at the first resistance. Forcing the operator or lock can damage the mechanism or shift a sash that may be heavy or under hinge strain. Document the handle and sash positions and call a qualified window professional.
Can I adjust the hinge myself?
Only an exact manufacturer guide can establish whether a particular window and operator are adjustable, and the safe access conditions still matter. Do not use another brand's procedure or a generic wrench; stop and request service if adjustment requires lifting, disconnecting, removing hardware, or working at height.
Could swollen wood make a window hinge stop closing?
Yes, swelling or frame movement can make a sash rub or bind, especially when the symptom follows rain or humidity. Look for visible staining, swelling, soft trim, or a changed gap without pressing or prying, and arrange window and building-envelope assessment when moisture is involved.
How do I choose a replacement hinge or operator?
Do not choose by appearance alone. Manufacturer guidance indicates that operator and hinge selection can depend on window style, handing, model, vintage, dimensions, and hardware arrangement. Give those details and photos to a qualified professional or use the exact manufacturer part-identification path.
Read the exact guide
Official sources
- Straight-Arm Operators for Casement WindowsAndersen Windows and Doors · Supports identifying operator type and model details before service or part selection; it is not evidence that an unspecified window uses an Andersen operator.
- Parts of a Window: Diagram of a WindowMarvin · Supports the terminology and distinction between hinge, operator, weatherstrip, sill, and frame observations; not a diagnosis or generic repair procedure.
- How To Adjust a Hinged Window: Adjusting Casement and Awning WindowsMilgard · Supports the distinction between hinged window styles and the fact that drag or sticking may have a model-specific adjustment path; no Milgard adjustment steps are presented here.
- Adjust Sashes on Andersen® 400 Series Casement WindowsAndersen Windows and Doors · Used as a model-specific example that dragging or rubbing can indicate sash misalignment and that hinge adjustment eligibility varies by operator type and window vintage; not a universal procedure.
- Caring for Your Windows and DoorsMarvin · General maintenance context for visible weatherstrip, hardware, hinge, sill, moisture, and safe-access observations; exact repair methods vary by Marvin product and other brands.
Community feedback
Share a repair observation
Share a plain-text repair observation. Accepted observations are published automatically; this page may take a moment to update.