
On this page
Start here
Quick answer
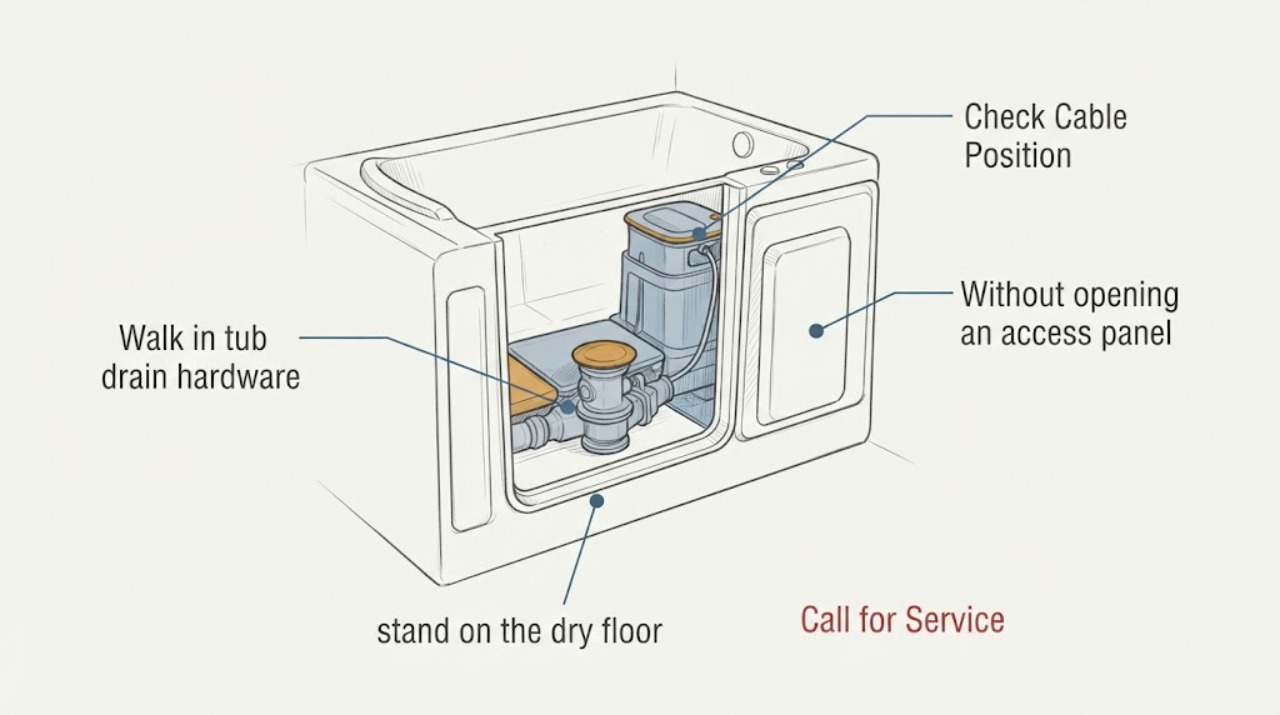
Keep the walk-in tub empty and dry while you assess worn drain hardware. From a dry standing position, inspect the drain grate or stopper, overflow cover, visible linkage or control, and any accessible staining or moisture without opening hidden panels. Operate the normal drain control only through its ordinary range and stop if it binds, spins, or does not return. Do not fill the tub to test it, enter a filled tub, force the hardware, cut pipes, disassemble the drain line, or open concealed access. If there is any leak history, visible moisture, abnormal control response, or uncertainty about the model, have a qualified walk-in-tub or plumbing professional inspect it before use.
Work through in order
Diagnostic checks
Use only checks that match the exact appliance or system and its official guide.
-
Inspect visible drain and overflow hardware
With the tub empty and dry, stand on the dry floor outside the bathing area and visually inspect the drain grate or stopper, overflow cover, visible escutcheon, fastener heads, and surrounding tub surface. Use only a light visual check; do not pry, twist, remove trim, or reach into the drain opening.
Expected result: Note looseness, wobble, missing or corroded visible fasteners, cracked or discolored finish, a cover that sits away from the surface, a stopper that looks off-center, or a gasket edge that is visible where it normally should not be.
Next step: Photograph the visible parts and record their location and appearance. Continue only with the normal dry control observation; do not try to tighten or reseat anything based on appearance alone.
Stop if: Stop if the hardware is sharp, loose enough to fall, cracked, or would require force, a tool, a panel, or contact with a concealed drain connection.
Why this matters
Why: Visible wear can identify the hardware family that needs professional attention, but it cannot confirm the hidden seal or drain connection. A shifted cover, corrosion, or exposed gasket is a reason to keep the tub out of use until the assembly is identified.
-
Observe the normal drain control response
With the tub still empty and dry, operate the installed drain control or stopper handle only through its ordinary user range. Do not fill the tub, turn the control past resistance, force a cable, or attempt to reach the linkage behind trim or a panel.
Expected result: Note whether the control moves smoothly, returns to its normal position, and appears to move the visible stopper. Record free spinning, clicking, binding, delayed movement, a stopper that remains open or closed, or any new sound.
Next step: Leave the tub empty and give the control behavior and photographs to a qualified service professional. If the control binds or the stopper cannot be left in a known safe position, do not use the tub until it is serviced.
Stop if: Stop immediately if the control binds, spins without effect, requires force, detaches, or could leave the tub unable to drain.
Why this matters
Why: A control that feels loose or does not move the visible stopper may indicate worn linkage or a failed drain component. A normal dry response still does not prove a watertight seal under bathing conditions, so it is not a reason to perform a filling test.
-
Check the dry area for leak history
Without opening an access panel or moving the tub, visually inspect the dry floor and any already-visible wall or cabinet surface around the drain side. Look only from an accessible standing position; do not crawl under the tub, touch damp materials, or remove a cover.
Expected result: Look for a water ring, fresh dampness, mineral trail, softened finish, musty odor, staining below the overflow area, or a record that water appeared after a previous use. Note whether the moisture was near the drain, overflow, door area, or an unrelated fixture.
Next step: Keep the tub out of service, photograph the trail without disturbing it, and request a professional inspection of the drain, overflow, door area, and concealed connections.
Stop if: Stop if the floor is wet, the smell is strong, the surrounding material is soft or damaged, or further inspection would require entering a concealed space or moving the tub.
Why this matters
Why: A visible trail or repeated moisture history makes the worn hardware a possible leak path, but the source cannot be confirmed from outside the hidden plumbing. Any leak history means a bathing or filling test could worsen damage and should be avoided.
-
Record model and hardware identity safely
From the dry standing area, photograph the visible drain and overflow arrangement and read any model or service label that is already exposed. Do not remove trim, open a hidden access panel, disconnect a drain line, or rely on a generic part image.
Expected result: Record the tub brand and model if plainly visible, drain side, control style, overflow-cover shape, and whether the drain appears to be a standard visible assembly or part of a model-specific system.
Next step: Give the model information, photographs, control response, and leak history to the service professional before any part is selected. Do not order a generic kit solely from the opening diameter or finish.
Stop if: Stop if identification requires removing a panel, entering a concealed space, disconnecting plumbing, or disturbing a seal.
Why this matters
Why: Walk-in tubs can use different drain, overflow, door-drain, pump, and access arrangements. Correct identification determines whether a replacement trim part is appropriate or whether the complete assembly needs professional service.
Use your observations
Decision map
Find the observation that best matches what you see, then follow the next safe action.
-
PATH 01Safety boundary
What you see
Visible trim is worn or loose-looking, but the tub is dry, there is no leak history, and the control responds normally without resistance.
Do this next
Keep the tub empty until a qualified professional confirms whether the trim, gasket, linkage, or complete drain assembly is the correct service item. Provide the visible model and hardware details.
Why this path and its safety boundary
Safety stop: Do not use a bathing or filling test to prove the repair, and do not force or remove the trim.
-
PATH 02Safety boundary
What you see
The drain control binds, free-spins, does not return, fails to move the visible stopper, or leaves the drain in an unknown position.
Do this next
Stop using the tub and arrange walk-in-tub or plumbing service. Report the exact control behavior and whether anything detached; do not reach behind the trim or attempt a linkage adjustment.
Why this path and its safety boundary
Safety stop: Do not fill the tub, enter it, force the control, or use a tool to operate a stuck drain.
-
PATH 03Safety boundary
What you see
There is a water trail, dampness, mineral deposit, odor, soft material, or any history of leakage around the drain, overflow, or concealed access area.
Do this next
Keep the tub out of service and request a professional leak inspection. Provide photographs and the timing of the moisture; the professional should inspect the drain and overflow connections before any water test.
Why this path and its safety boundary
Safety stop: Do not fill the tub, remove the access cover, cut a pipe, disassemble the drain line, or apply sealant as a guess.
-
PATH 04Safety boundary
What you see
The hardware cannot be identified without hidden access, the tub has a model-specific pump or door-drain arrangement, or the visible condition is ambiguous.
Do this next
Give the professional the model label, visible photographs, and the control and leak observations. Ask for a compatibility check before a repair kit or overflow cover is selected.
Why this path and its safety boundary
Safety stop: Do not assume a universal drain part fits a walk-in tub or open concealed plumbing to measure it.
Helpful context
Understand the symptom
What worn hardware can mean
The visible drain trim is only one part of a walk-in tub's drain path. A stopper, overflow cover, linkage or control, gasket, and model-specific drain arrangement can all affect sealing and drainage. A loose-looking cover is not proof that the hidden drain connection is sound, and a control that feels normal is not proof that the tub will hold water. Because a walk-in tub is used with a door and a seated bather, a leak or drain problem should be assessed before a bathing test.
Keep the tub out of service when uncertain
Leave the tub empty and dry until the visible checks are complete and a professional has cleared any suspected leak. Photograph the hardware and note the tub brand, model, drain side, and any visible service label if those details can be read without removing a panel. Do not send keys, access codes, or other private information in an open service message.
Only after diagnosis
Potential parts
- tub-drain-repair-kit
Consider this category only after a professional confirms that the worn visible hardware or identified drain mechanism is the failed component and the tub model is known.
Match the exact walk-in-tub model, drain and overflow arrangement, control type, drain side, seals, and access constraints; a standard tub kit is not proof of compatibility. - overflow-cover
Consider this category only if the professional confirms that the overflow cover or its visible gasket is worn and the hidden connection remains sound.
Confirm the cover shape, mounting pattern, finish, gasket, and model-specific overflow design before ordering; do not use a cosmetic cover to mask a leak.
When checks do not resolve it
Need a professional?
Arrange service when the drain hardware is visibly worn, the control binds or spins, the stopper does not respond, any water trail or leak history exists, or hidden access would be needed. Use a qualified walk-in-tub specialist or plumber familiar with accessible bathing equipment.
Have this ready
- Provide the tub brand and model if visible, drain side, photographs of the dry hardware, control response, location and timing of any moisture, and whether the tub has a door drain, pump, or other visible special arrangement. Do not fill the tub or open hidden access to obtain more information.
Common questions
FAQ
Can I fill the walk-in tub to see whether the worn drain leaks?
Do not perform a filling test when the hardware is worn or there is any leak history. A walk-in tub can trap a bather behind its door, and an uncontrolled leak can damage the room; keep it empty and have the assembly inspected first.
Can I remove the drain cover or access panel to inspect the hardware?
Limit yourself to visible, dry observations. Hidden access can disturb seals or expose model-specific plumbing, so let a qualified professional open it and identify the correct repair.
Is a standard tub drain kit suitable for a walk-in tub?
Not necessarily. Walk-in tubs can use different drain, overflow, door-drain, pump, and access arrangements. Match the exact model and assembly with a professional before ordering any part.
Read the exact guide
Official sources
- Gelcoat Entry Series Walk-In Tub With Air Spa SystemAmerican Standard · Supports the caution that walk-in tubs can have model-specific drain configurations and access arrangements; it does not establish a universal repair procedure.
- Universal Bathtub DrainAmerican Standard · Supports identifying visible drain controls, overflow covers, linkages, and model documentation before selecting a part; it is not a compatibility claim for an unidentified walk-in tub.
- Bath Waste Assembly in ChromeDelta Faucet Company · Used only to illustrate that drain assemblies include multiple model-specific components and documents; it does not establish fitment for a walk-in tub.
Community feedback
Share a repair observation
Share a plain-text repair observation. Accepted observations are published automatically; this page may take a moment to update.