
On this page
Start here
Quick answer
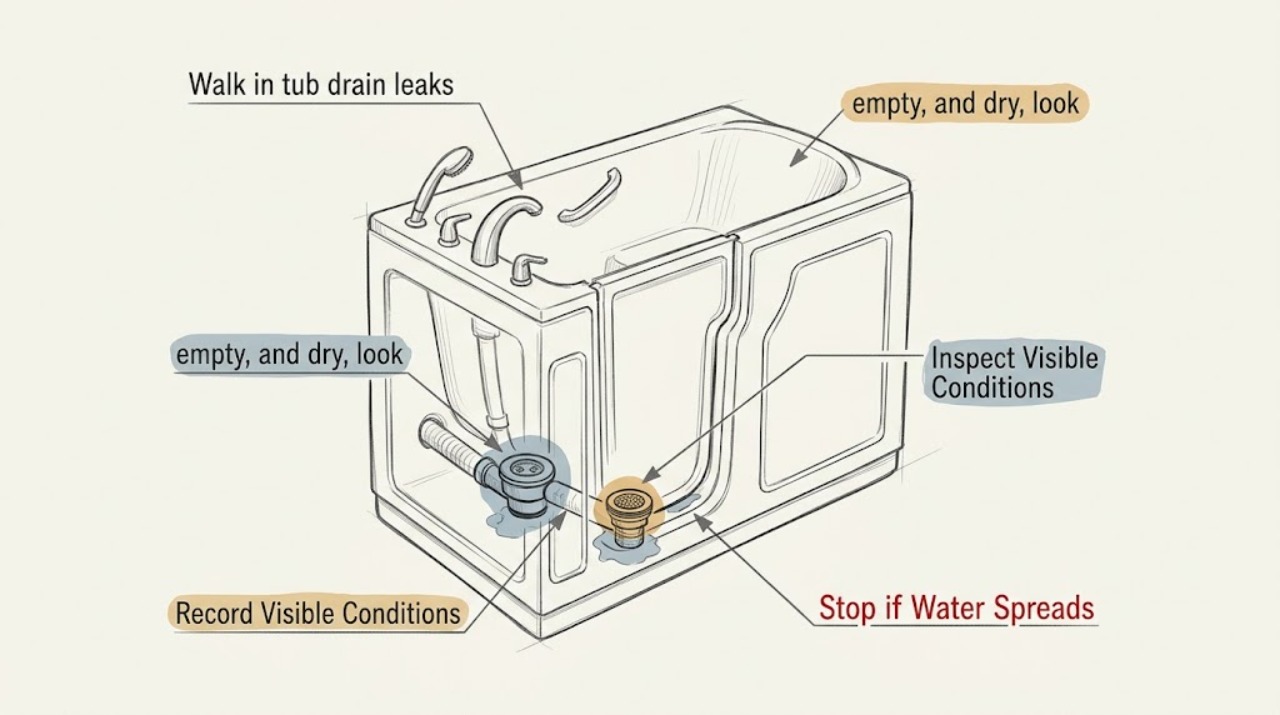
Do not fill a walk-in tub just to reproduce a drain leak. With the tub empty and dry, observe where moisture appears—at the drain or overflow trim, around the door or threshold, beneath the tub, or on the surrounding floor—and record whether it follows an earlier bath or drain operation. A walk-in tub combines a door seal, drain and overflow fittings, and sometimes powered drain equipment, so a visible drip does not identify the failed part. Keep the tub out of use, do not enter it to inspect, force the drain, cut pipe, open flooring, or access hidden plumbing, and arrange prompt professional service if water is active, reaches electrical equipment, or could affect the floor or the person using the bath.
Work through in order
Diagnostic checks
Use only checks that match the exact appliance or system and its official guide.
-
Check 1
With the walk-in tub unused, empty, and dry, look from outside at the surrounding floor, base, threshold, and any normally visible drain or overflow trim. Do not step into the tub or reach behind panels.
Expected result: Note the first visible wet point, a trail or puddle, staining, swelling, or a dry area. Moisture at the drain or overflow is different from moisture at the door threshold or beneath the tub.
Next step: Photograph the area from outside, dry only the surrounding accessible floor if it is safe, and record whether moisture returns while the tub remains unused. Do not move the tub or open a hidden access area.
Stop if: Stop using the bathroom fixture and arrange prompt service if water is active, spreading, reaching an electrical outlet or powered equipment, or softening the floor.
Why this matters
Why: The first wet point narrows the service diagnosis, but water can migrate, so the visible edge is not proof of the failed seal or pipe.
-
Check 2
Use the leak history to record when moisture was noticed: after a completed bath, after the tub drained, after the drain or powered drain was operated, after showering, or while the tub had not been used. Do not add water or repeat a bath to reproduce the leak.
Expected result: Moisture that follows draining suggests a waste, overflow, hose, or pump-path concern; moisture that appears after a bath but before draining may involve another tub or door-area path. Moisture while unused raises concern for a continuing supply or concealed leak.
Next step: Write down the last known dry time, the activity before moisture appeared, and whether the amount increased or tapered. Give that timeline to the technician instead of performing a fill test.
Stop if: Stop all use if the leak appears without bathing, grows between observations, or could leave water under the tub or around the user's walking path.
Why this matters
Why: Timing helps a professional choose a safe diagnostic path without creating another leak or trapping a user behind a closed door.
-
Check 3
From outside the tub, look at the normally visible drain handle or control, overflow cover, and door gasket or threshold for an unusual position, visible gap, cracking, displacement, or residue. Do not turn a stiff control, remove a cover, or press on the door seal.
Expected result: A control that does not return to its normal position, a visibly displaced cover, or a damaged door gasket gives the technician a useful lead. A clean-looking trim surface does not rule out a loose fitting or hidden drain connection.
Next step: Record the tub brand and model if it is visible on paperwork or an accessible label, note the hardware position, and have a professional identify the correct repair path.
Stop if: Do not force, tighten, disassemble, or remove the drain, overflow, door, gasket, trim, or powered drain controls.
Why this matters
Why: Visible hardware history may distinguish a door-seal concern from a drain or overflow assembly concern, but it cannot establish compatibility or justify a repair by itself.
-
Check 4
Inspect only the accessible, dry area around the tub and adjacent wall or floor for staining, swelling, odor, mold-like discoloration, or a change in the floor surface. Do not lift flooring, open a wall, move the tub, or probe for hidden damage.
Expected result: A dry surface with one isolated historical mark differs from recurring dampness, swelling, a persistent odor, or moisture that extends beyond the tub footprint. Those signs can indicate a longer-running leak or water damage.
Next step: Keep people away from any slippery or weakened area and tell the service provider what surfaces are affected. Preserve photos and do not disturb hidden finishes before the assessment.
Stop if: Stop entry into the area if the floor is slippery, soft, damaged, or near electrical equipment; seek prompt professional help.
Why this matters
Why: The extent of visible building impact affects urgency and may require plumbing, tub, and water-damage assessment rather than a simple drain-part replacement.
-
Check 5
Review the tub's manual, installation record, warranty, and any prior repair invoice without changing the fixture. Note whether it has a powered drain, jets, a recent installation, a recent service visit, or a warranty requirement.
Expected result: A model-specific drain system, recent installation, or recent repair changes which fittings and service steps a professional should check. Missing records increase uncertainty and make a generic drain kit unsafe to select.
Next step: Send the model information, photos, timeline, prior work, and warranty status when booking service. Ask for a dry diagnostic plan and whether the tub must remain out of service.
Stop if: Do not authorize pipe cutting, drain-line disassembly, floor opening, or hidden access based only on a generic repair suggestion.
Why this matters
Why: The records help the technician identify the tub design and protect warranty coverage without requiring hidden access or a risky water test.
Use your observations
Decision map
Find the observation that best matches what you see, then follow the next safe action.
-
PATH 01Next step
What you see
The tub and surrounding floor remain dry while unused, and the only evidence is a past isolated mark.
Do this next
Keep the tub unused until the history is understood, document the mark, and schedule non-emergency professional inspection if it recurs. Do not create a fill test.
-
PATH 02Next step
What you see
Moisture returns after a drain operation or is first visible at the drain, overflow, or beneath the tub.
Do this next
Stop using the tub and arrange prompt tub or plumbing service. Provide the timing, visible first wet point, drain type, and model records; do not remove the drain or open hidden access.
-
PATH 03Next step
What you see
Moisture is at the door threshold, gasket, or surrounding walking surface, or the tub door or seal appears displaced.
Do this next
Do not enter or use the tub. Keep the walking path dry and clear, and arrange professional service for the door and seal system.
-
PATH 04Next step
What you see
Water is active while the tub is unused, spreading under the tub, affecting a ceiling or adjacent room, or near electrical equipment.
Do this next
Treat it as a high-urgency leak. Keep people away, avoid electrical contact, and contact appropriate plumbing or emergency water-mitigation help without opening the floor or wall.
-
PATH 05Next step
What you see
The tub has a powered drain, pump, jets, or other equipment and the leak follows operation or reaches a powered component.
Do this next
Stop using the equipment and arrange qualified walk-in-tub service. Do not operate pumps dry, open the equipment compartment, or perform live testing.
Helpful context
Understand the symptom
Why the leak location matters
A walk-in tub may drain through a conventional waste and overflow assembly or through a model-specific powered drain arrangement. Water at the drain trim, overflow, door threshold, or beneath the tub can have different causes, and water can travel along a floor before it becomes visible. The safe first question is where the first moisture was noticed, not which seal or kit to buy.
Keep the inspection outside the tub
Use a dry, stable position outside the tub and take photos only from a safe reach. Do not step into the tub, fill it for a leak test, remove panels or trim, disconnect the drain, open the floor, cut pipe, or force a lever or door. If the user cannot safely see the area, leave it for a qualified tub or plumbing technician.
Only after diagnosis
Potential parts
- drain-repair-kit
Consider a drain repair kit only after a qualified technician identifies the failed drain or overflow component and confirms the tub's exact assembly.
Walk-in tub drain arrangements vary, especially when a powered drain is present; confirm the manufacturer, model, seal type, fittings, and installation method before ordering. - water-leak-alarm
A water-leak alarm may be useful as a temporary notification aid after the area is safe and dry, but it does not repair or locate a hidden drain leak.
Place only in an accessible, dry location away from electrical hazards and mobility paths; follow the alarm manufacturer's instructions and do not use it to justify continued tub use.
When checks do not resolve it
Need a professional?
Arrange prompt walk-in-tub or plumbing service for recurring moisture, a leak after draining, water beneath the tub, a door or threshold leak, active water while unused, visible floor damage, or any leak involving powered drain or jet equipment. Treat water near electricity or an unsafe walking surface as urgent.
Have this ready
- Provide the tub brand and model from records, the first wet location, the activity before moisture appeared, whether the tub was empty, drain and pump type, photos from outside, floor or adjacent-room effects, prior repairs, and warranty or installation details.
Common questions
FAQ
Should I fill a walk-in tub to find the drain leak?
No. A fill test can increase water damage or create an unsafe situation for a user who cannot safely exit. Record when the leak occurred and where moisture first appeared, then have a qualified technician diagnose it.
Why can water under a walk-in tub be hard to trace?
Water can travel from a drain, overflow, door threshold, hose, or powered drain connection before appearing at the floor edge. The first visible wet point and timing are useful clues, but hidden access should be left to a professional.
Can I replace the walk-in tub drain seal myself?
Do not remove drain or overflow hardware as a first check. Walk-in tub assemblies and powered drains vary by model, and hidden plumbing work can create a larger leak or affect the door and floor. Use qualified service.
What if the tub leaks only after it drains?
Stop using it and record the drain type, the time between draining and visible moisture, and the first wet location. That pattern can point the technician toward the waste, overflow, hose, or pump path without requiring a new water test.
Read the exact guide
Official sources
- Fast-Drain Technology | Walk-In BathKohler · Supports that walk-in bath drain designs can include accessible controls and model-specific connections to existing plumbing; it does not establish a universal repair or leak test.
- Walk-in TubAmerican Standard · Supports that walk-in tubs use model-specific quick-drain and leak-resistant door systems and that plumbing, waterproofing, installation, and post-installation assessment are professional project concerns.
Community feedback
Share a repair observation
Share a plain-text repair observation. Accepted observations are published automatically; this page may take a moment to update.