
On this page
Start here
Quick answer
If a battery charger is not working, test the wall outlet, connect the charger directly without an extension, inspect the plug and cable, and confirm the battery connections and polarity. A charger with no indicators after those checks needs service or battery testing.
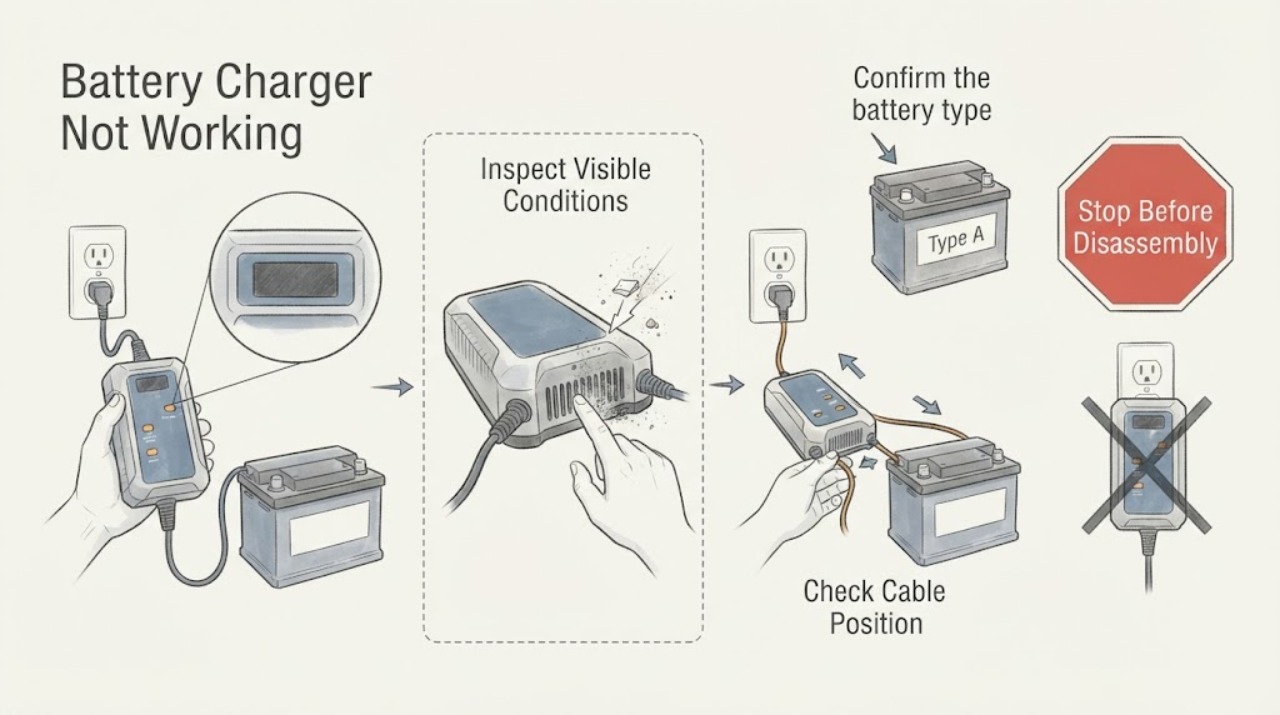
Work through in order
Diagnostic checks
Use only checks that match the exact appliance or system and its official guide.
-
Check 1
Plug the charger directly into a known-good mains outlet without an extension and observe its indicators.
Expected result: The charger powers on, or no indicator appears at a confirmed live outlet.
Next step: Try one alternate outlet only; stop if the charger or plug is damaged.
Why this matters
Why: No indicator after a direct live connection points toward the charger, plug, or cable; an active indicator shifts the check to the battery connection.
-
Check 2
Inspect the charger cable, plug, clamps, and battery terminals for cuts, looseness, corrosion, heat, or reversed polarity.
Expected result: A connection or visible condition is wrong, or all connections are sound.
Next step: Correct only an accessible clean, secure connection with power removed and the manual permitting it.
Why this matters
Why: A poor connection or reversed polarity can prevent charging; a sound path with no charge needs battery or charger diagnosis.
-
Check 3
Confirm the battery type and voltage range match the charger’s instructions, then connect the clamps or leads exactly as shown.
Expected result: The charger enters its expected charging state, or a fault indicator appears or charging does not begin.
Next step: Record the indicator pattern and do not force a charge mode.
Why this matters
Why: A correct battery and connection with no charge can expose a battery fault, charger fault, or protected mode.
-
Check 4
Check the battery itself for swelling, leakage, cracks, unusual heat, or a strong odor while disconnected.
Expected result: The battery is visibly unsafe, or it is intact but remains uncharged.
Next step: Do not continue charging a suspect battery; obtain qualified battery or charger service.
Why this matters
Why: An unsafe battery is a stop condition; an intact battery with a verified charger path needs battery testing or service.
Use your observations
Decision map
Find the observation that best matches what you see, then follow the next safe action.
-
PATH 01Next step
What you see
No indicators appear at two known-good outlets with a direct connection, and the cable or plug is intact.
Do this next
Stop using it and contact the charger manufacturer or qualified service.
Why this path and its safety boundary
Why it matters: A charger internal fault is more likely than a battery connection issue.
-
PATH 02Next step
What you see
Indicators appear but charging does not begin after correct polarity and a matching battery connection.
Do this next
Record the indicator and battery details and obtain model-specific testing.
Why this path and its safety boundary
Why it matters: A battery condition, protection state, or charger fault is more likely.
-
PATH 03Next step
What you see
The battery is swollen, leaking, cracked, hot, or smells strongly.
Do this next
Disconnect only when safe, keep it away from ignition, and use qualified battery disposal or service guidance.
Why this path and its safety boundary
Why it matters: This is a battery safety stop.
Helpful context
Understand the symptom
CTEK’s no-power guidance starts at the mains outlet, direct connection, and the charger cable or plug. A charger that powers up but does not charge has a separate battery, connection, or fault-code path.
Do not infer charger failure until the battery type, polarity, clamps, and visible condition are recorded. Never test a damaged or leaking battery.
Only after diagnosis
Potential parts
- model-specific charger cable, clamp, or battery component
Consider a replacement only after the indicator and connection tests identify the failed item.
Charger voltage, chemistry, and connector fit must be confirmed for the exact model and battery.
When checks do not resolve it
Need a professional?
Contact the charger manufacturer or qualified battery service when a direct live connection produces no indicators, a fault returns, or the battery remains uncharged after correct connections.
Common questions
FAQ
Should I use an extension cord with a battery charger?
CTEK’s support guidance recommends a direct mains connection while troubleshooting a charger that does not turn on.
Can a charger symptom prove the battery is bad?
No. Verify the outlet, direct connection, cable, polarity, charger indicator, and battery condition before seeking a charger or battery diagnosis.
Read the exact guide
Official sources
- CTEK Assist for M100CTEK · Opened manufacturer or official support guidance; exact model details vary.
Community feedback
Share a repair observation
Share a plain-text repair observation. Accepted observations are published automatically; this page may take a moment to update.