
On this page
Start here
Quick answer
Start with the exact Electrolux model because dehumidifier controls, codes, bucket design, and drainage options vary. From a dry position, check that the plug is fully seated, the normal power control is selected, the bucket is empty and correctly seated, and any timer or humidity target is not telling the unit to stop. For the documented EXD16DN3W/EXD20DN3W family, a bucket-full indication, P1 defrost, AS/ES sensor code, or E3 malfunction code has a different next step; frost can also be temporary after startup or caused by a room that is too cold. Clean and dry the user-accessible filter and grilles and restore airflow, but do not open the cabinet, probe the coil, handle refrigerant, or test live voltage. Stop for a burning smell, sparks, smoke, damaged or hot cord/plug, water entering the electrical area, or repeated breaker trips; persistent no-start, sensor, fan, compressor, refrigerant, or control faults need an authorized Electrolux service assessment.
Before you begin
Safety first
- This article covers model identification, safe power-state observation, bucket/drain seating, settings and room conditions, external airflow, user-accessible filter care, and waiting for automatic defrost. An authorized technician must handle the cabinet, fan motor, compressor, refrigerant circuit, sensors, control board, wiring, and protection devices.
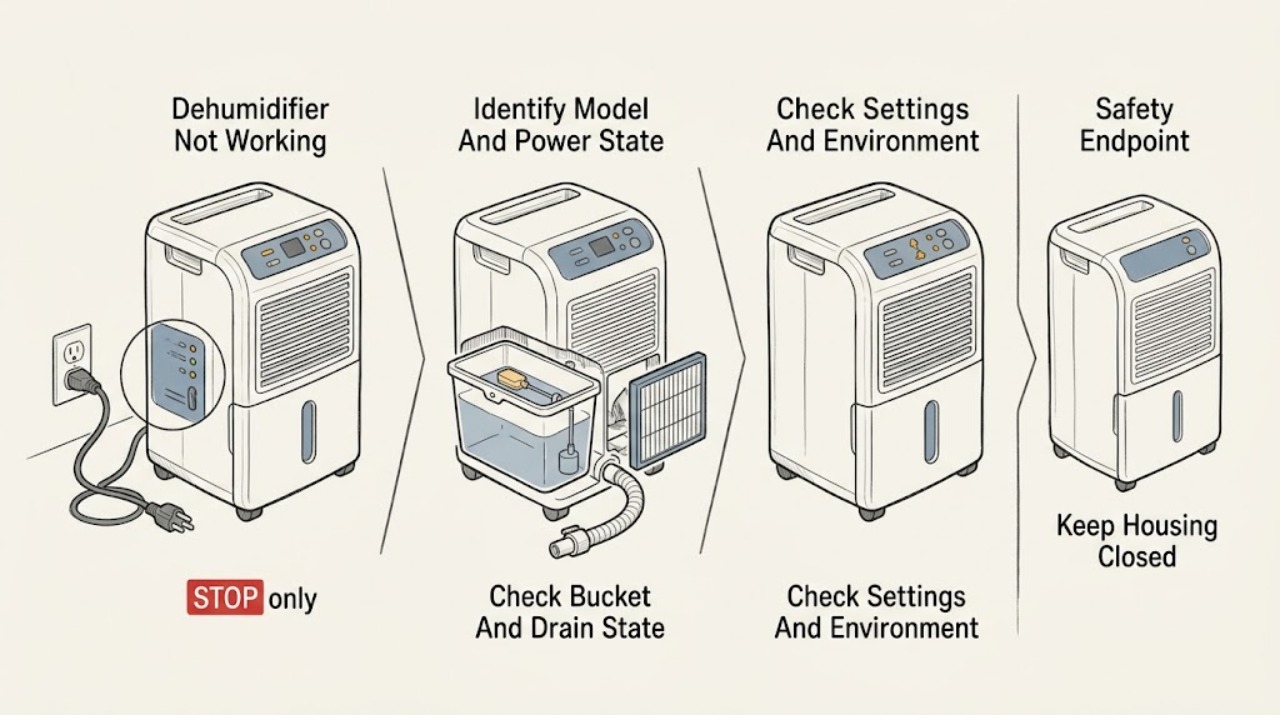
Work through in order
Diagnostic checks
Use only checks that match the exact appliance or system and its official guide.
-
Check 1
Read the model and serial label on the side or back, usually near the water bucket, and record the exact product number. With the floor and hands dry, confirm the plug is fully seated in the intended grounded outlet and press the normal ON/OFF control once. Check the display or indicator state without opening the cabinet.
Expected result: There are no lights or fan, the unit powers up but immediately stops, a bucket/full or fault indication appears, the plug/outlet is loose or damaged, or the control responds normally.
Next step: If the outlet, plug, or cord shows damage, heat, moisture, or scorching, keep the unit disconnected and arrange qualified service/electrical inspection. Otherwise continue to the bucket and setting checks; do not keep cycling a unit that loses power.
Stop if: Do not remove an outlet cover, use a meter, bypass the power control, or start/stop the unit by disconnecting the cord as a substitute for its normal control.
Why this matters
Why: No display points first to the supply, cord, control, or a protection state; a clear display with no water is a different airflow, humidity, temperature, frost, or drainage branch. A model number is necessary because Electrolux manuals use different controls and codes.
-
Check 2
Switch the unit off and disconnect power before handling water. Empty the bucket, check that it is not cracked, and reinstall it squarely so the float switch and bucket-full sensor can reset. If continuous drainage is fitted, inspect only the visible hose connection, drain cap, route, and outlet for a kink, upward loop, loose end, or water backup; keep the unit level.
Expected result: The bucket-full indicator or P2 is shown, the bucket is full or not seated, the drain cap is open when bucket mode is intended, the hose leaks or is kinked, or the bucket/drain path is correctly installed.
Next step: Empty and reseat the bucket, or restore the manual’s drain-cap/hose arrangement. If the unit still refuses to run, repeatedly reports full, leaks from the cabinet, or the float does not behave normally, keep it off and arrange service.
Stop if: Do not force the bucket, pry or bypass the float switch, move a full unit carelessly, drill a drain connection, or open the pump/cabinet.
Why this matters
Why: The EXD manual says a full or incorrectly positioned bucket stops operation and P2 can indicate that state. Continuous drainage depends on a secure connection and an unobstructed route; a hose fault can look like a no-water or leak problem rather than a compressor failure.
-
Check 3
With the model manual beside you, check that the unit is in the intended dehumidify or continuous mode rather than timer, standby, or a reached humidity target. Close nearby exterior doors and windows, allow the unit to stand upright at room temperature if it was moved, and leave the intake and outlet clear with the manufacturer’s specified clearance. Do not place wet items or containers on the unit.
Expected result: The selected humidity is already reached, a timer or automatic stop is active, doors/windows are open, the room is unusually large or wet, airflow is crowded, the unit was recently moved, or the room is below the documented operating range.
Next step: Correct only the setting or room condition permitted by the manual and allow the appliance to stabilize upright. If it still will not operate or remove moisture in a suitable environment, continue to filter/frost checks and record the symptom.
Stop if: Do not cover grilles, direct a heater at the unit, use it near flammable vapor, or alter a timer/control board to force operation.
Why this matters
Why: The EXD manual says the machine can stop when the selected dryness level is reached, run continuously by design, take longer in a wet or recently restarted room, and perform poorly when airflow is blocked or the temperature is too low. A quiet period under those conditions is not necessarily a component failure.
-
Check 4
Switch off and unplug. Remove only the user-accessible air filter described by the exact manual, wash it with clean water if that manual permits, let it dry completely, and reinstall it. Vacuum dust from the external intake/outlet grilles with a brush attachment; do not push anything through the grille or spray the cabinet.
Expected result: The filter is clogged or wet, the intake/outlet is dusty or blocked by furniture, the fan is moving air but airflow is weak, or the filter and grilles are clean and unobstructed.
Next step: Restore a fully dry filter and clear external airflow. If the fan remains absent, noisy, weak, or the unit still does not dehumidify after the model-directed cleaning, keep it off and arrange service.
Stop if: Do not operate with the filter removed or wet, insert fingers/tools into the grilles, remove fan guards, or open the cabinet.
Why this matters
Why: Restricted airflow can reduce moisture removal and make the machine appear ineffective; the EXD manual directs filter cleaning and says not to block the intake or outlet. Clean external airflow does not rule out a fan motor, sensor, compressor, or refrigerant issue.
-
Check 5
Look through the accessible grille only; do not scrape or touch the evaporator coil. Note whether frost is a thin temporary film after startup, a whole coil that remains iced, or a displayed P1/defrost indication. Compare the room condition with the exact manual’s operating range and let an automatic defrost cycle complete without forcing the unit to run.
Expected result: Frost disappears during the documented defrost period, P1 is displayed, the room is too cold, frost rapidly returns, or the coil remains heavily iced while airflow is poor.
Next step: Allow automatic defrost and correct only the room temperature or external airflow condition permitted by the manual. If icing persists, the fan stops, water reaches electronics, or the unit cannot resume normally, keep it unplugged and request service.
Stop if: Do not chip ice, apply heat, puncture the coil, add refrigerant, or bypass defrost protection.
Why this matters
Why: The EXD manual describes automatic defrost with the compressor off while the fan continues and says recently started frost can disappear; low room temperature can also reduce performance. Persistent or rapid icing can indicate airflow restriction, a temperature sensor, fan, control, or sealed-system fault.
-
Check 6
Record the exact model, displayed code, bucket/drain state, fan sound, airflow, frost pattern, room condition, settings, and whether the unit ever collects water. For the EXD16DN3W/EXD20DN3W manual only, distinguish AS/ES sensor indications, P1 defrost, P2 bucket/full-position, and E3 malfunction. Use the normal power control once as the manual directs; do not repeatedly reset a returning code.
Expected result: A code returns after the manual’s user step, the display is blank, the fan runs without dehumidification, the compressor never starts, a sensor indication persists, or the unit has an abnormal sound, odor, leak, or electrical event.
Next step: Stop use and contact an authorized Electrolux servicer with the model/serial information and symptom log. If there is smoke, burning smell, water at electrical parts, or a hot/damaged cord, disconnect from a dry safe position and treat it as urgent.
Stop if: Do not open the cabinet, test live voltage, bypass sensors or overload protection, handle refrigerant, or replace a compressor, fan, board, or wiring part yourself.
Why this matters
Why: The manual’s sensor and malfunction instructions direct repeated errors to service; persistent no-water with clear bucket, setting, airflow, and temperature can involve the fan, compressor, sensor, control, or refrigerant circuit. Those cannot be selected or repaired safely from external symptoms.
Use your observations
Decision map
Find the observation that best matches what you see, then follow the next safe action.
-
PATH 01Safety boundary
What you see
There are no lights or fan, the plug/outlet is loose, the cord is hot/damaged, or the breaker trips when the unit is connected.
Do this next
Keep the unit disconnected. Arrange authorized appliance service and qualified electrical inspection for a damaged outlet or circuit; provide the model/serial information.
Why this path and its safety boundary
Why it matters: A supply, cord, control, or internal electrical fault is more likely than a humidity-setting problem; a trip is not evidence that the appliance is safe to reset.
Safety stop: Do not reconnect repeatedly, use an extension/adaptor to retry, bypass a breaker, or test live voltage.
-
PATH 02Safety boundary
What you see
The BUCKET FULL/P2 indication is on, the bucket is full or mis-seated, or continuous-drain water is not moving through a secure, downward, unobstructed hose.
Do this next
Switch off, empty and reseat the bucket, or restore the exact manual’s drain-cap and hose setup. Escalate for persistent full indication, cabinet leaks, or a failed float/pump.
Why this path and its safety boundary
Why it matters: The bucket interlock/float or drainage arrangement is more likely than a failed compressor.
Safety stop: Do not bypass the bucket switch, force the bucket, or open a pump or drain assembly beyond the manual’s user procedure.
-
PATH 03Safety boundary
What you see
The fan is weak/noisy, the filter is dirty or wet, grilles are blocked, or the unit runs but removes little water in a warm, humid room.
Do this next
Unplug, clean and dry the filter as directed, clear the external airflow path, and reassess only during normal operation without hazardous signs. Arrange service for persistent weak/no airflow.
Why this path and its safety boundary
Why it matters: Restricted airflow or a user-maintainable filter/placement issue is possible; if airflow remains abnormal after a dry filter and clear grilles, an internal fan or control fault is more likely.
Safety stop: Do not run without the filter, insert objects into grilles, or remove fan guards.
-
PATH 04Safety boundary
What you see
Frost appears shortly after startup, P1 is displayed, the room is below the manual’s suitable range, or frost remains/returns rapidly.
Do this next
Allow automatic defrost and correct only external temperature/airflow conditions. If the coil remains iced or the unit cannot resume, unplug and arrange authorized service.
Why this path and its safety boundary
Why it matters: A startup or automatic-defrost event can be normal on the documented models, while persistent icing points toward airflow, fan, temperature sensing, control, or sealed-system trouble.
Safety stop: Do not chip or melt ice, puncture the coil, or handle refrigerant.
-
PATH 05Safety boundary
What you see
The unit is in a timer/auto state, the selected humidity has been reached, doors/windows are open, the room is too large or wet, or the unit has just been restarted or moved.
Do this next
Use the exact manual’s dehumidify/continuous setting, close exterior openings, restore clearance, and let the upright unit stabilize. Service is appropriate if it still fails under suitable conditions.
Why this path and its safety boundary
Why it matters: The unit may be operating as configured or may need more time and a suitable enclosed room; this pattern does not establish a failed part.
Safety stop: Do not force continuous operation by modifying controls or cover the unit to accelerate drying.
-
PATH 06Safety boundary
What you see
AS or ES returns, E3 persists, the unit has abnormal fan/compressor behavior, water enters the cabinet, or no user-level check restores operation.
Do this next
Keep the unit off and unplugged and contact an authorized Electrolux servicer with the exact model, serial, code, and symptom timeline.
Why this path and its safety boundary
Why it matters: A humidity/temperature sensor, control, fan, compressor, refrigerant circuit, wiring, or other internal fault is more likely and is outside user service.
Safety stop: Do not open the cabinet, bypass a sensor or overload protector, add refrigerant, or conduct live tests.
-
PATH 07Safety boundary
What you see
Sparks, smoke, burning smell, scorching, a hot or damaged cord/plug, water near electrical parts, or repeated breaker trips occur.
Do this next
Stop operation and disconnect power only from a dry safe position if it can be reached without touching a wet/damaged part. Keep clear and arrange qualified appliance service and electrical inspection as appropriate.
Why this path and its safety boundary
Why it matters: This is an immediate fire, shock, or water/electrical hazard rather than a bucket, filter, or humidity setting issue.
Safety stop: Do not restart, reset repeatedly, move a wet unit, or open it.
Helpful context
Understand the symptom
Identify the symptom before resetting anything
“Not working” may mean no lights or fan, a running fan with no water, a full-bucket stop, a drain hose that does not carry water, a frost-covered coil, or a fault indication. The opened Electrolux manual is for the EXD16DN3W and EXD20DN3W models and includes a bucket, humidity control, filter, automatic defrost, and optional continuous drainage. Use it only when its controls and model number match your appliance; for another Electrolux model, use that model’s manual rather than importing these codes or button sequences.
Keep electricity, water, and refrigerant work out of DIY checks
Stop the unit with its normal ON/OFF control before removing the bucket or filter. Disconnect power from a dry position before cleaning or inspecting user-accessible parts, and keep water out of the cabinet, controls, plug, and outlet. Stop immediately for sparks, a burning smell, smoke, a hot or damaged cord/plug, water at electrical parts, or repeated trips. Do not insert objects into the grilles, run without the filter, bypass the bucket switch, open the cabinet, test live voltage, touch the refrigerant circuit, or attempt fan, compressor, sensor, control-board, or wiring repair. The EXD manual states that there are no user-serviceable parts and calls for an authorized Electrolux servicer.
Safety boundary
Stop conditions
- Stop immediately for sparks, smoke, burning smell, scorching, a hot/damaged cord or plug, water in the electrical area, or repeated breaker trips.
- Use the normal ON/OFF control for routine stopping; disconnect power from a dry safe position before cleaning or bucket/filter handling, and never bypass the bucket, sensor, defrost, or overload protection.
- Do not insert objects into grilles, operate without a dry filter, spray the cabinet, open the housing, test live voltage, handle refrigerant, or repair the fan, compressor, sensors, controls, or wiring.
- A returning sensor/malfunction indication, persistent no-start, no-airflow, heavy frost, no-water condition, cabinet leak, or abnormal noise requires an authorized Electrolux service assessment.
When checks do not resolve it
Need a professional?
Safety scope: This article covers model identification, safe power-state observation, bucket/drain seating, settings and room conditions, external airflow, user-accessible filter care, and waiting for automatic defrost. An authorized technician must handle the cabinet, fan motor, compressor, refrigerant circuit, sensors, control board, wiring, and protection devices.
Common questions
FAQ
Why is my Electrolux dehumidifier not turning on?
Check the exact model’s normal power control, plug seating, bucket position/full indication, timer or humidity target, and any returned code. If the cord/plug is damaged or hot, the outlet is wet/scorched, or the breaker trips, keep it disconnected and arrange qualified service rather than resetting it repeatedly.
Why is my Electrolux dehumidifier running but not collecting water?
Check that the selected humidity target has not been reached, the room is suitably enclosed and warm, airflow is clear, the filter is clean and dry, and the bucket/drain arrangement is correct. Persistent no-water with normal external conditions can involve the fan, compressor, sensor, control, or refrigerant circuit and needs service.
What does P1 mean on an Electrolux dehumidifier?
On the opened EXD16DN3W/EXD20DN3W manual, P1 indicates automatic defrost; allow the unit time to defrost. Do not scrape the coil or apply heat. If frost remains or the code returns after suitable room temperature and clear airflow, arrange service. Other Electrolux models may use different indications.
What does P2 or Bucket Full mean?
For the documented EXD16DN3W/EXD20DN3W models, P2 or a bucket-full indication means the bucket is full, removed, or not positioned correctly. Switch off, empty and reseat it as the manual shows. Persistent indication, a stuck float, or a cabinet leak requires service; do not bypass the bucket switch.
When should I stop using an Electrolux dehumidifier?
Stop for sparks, smoke, burning smell, scorching, a hot or damaged cord/plug, water near electrical parts, repeated breaker trips, persistent sensor/malfunction codes, heavy recurring frost, or abnormal fan/compressor behavior. Disconnect from a dry safe position and arrange authorized Electrolux service; do not open or live-test the unit.
Read the exact guide
Official sources
- DF Dehumidifier manual V1 - 141211_EN-FR-IT.pdfElectrolux · Official Electrolux-hosted manual whose cover identifies EXD16DN3W and EXD20DN3W; model-specific codes and settings must not be generalized to other Electrolux models.
- Where can I find my model and serial number?Electrolux · Official Electrolux support article for all appliances; the dehumidifier-specific location is the side or back near the water bucket.
Community feedback
Share a repair observation
Share a plain-text repair observation. Accepted observations are published automatically; this page may take a moment to update.