
On this page
Start here
Quick answer
Start with the dishwasher stopped and safe to inspect. Remove tall plates, pan handles, utensils, or rack items that protrude into the door path, confirm that the upper rack is seated and level, and turn the spray arm by hand to check for a load obstruction. Inspect the gasket and the door frame for food soil, a fold, displacement, or damage, then look at the lower kick plate and adjacent cabinetry for anything preventing the door from reaching the frame. Electrolux identifies CL or Cd as a door that has not closed and latched successfully. If the door is crooked, drops, springs open, needs force, will not catch, or stays open after the load and gasket checks, stop using the dishwasher and arrange model-specific service; do not work on the heavy door, springs, hinges, latch mount, or wiring yourself.
Before you begin
Safety first
- This article covers ordinary-access load, gasket, visible clearance, rack, and control-state observations only. Qualified service is required for the heavy door, springs, hinges, latch or strike, interlock, harness, inner panels, concealed leveling, and installation hardware.
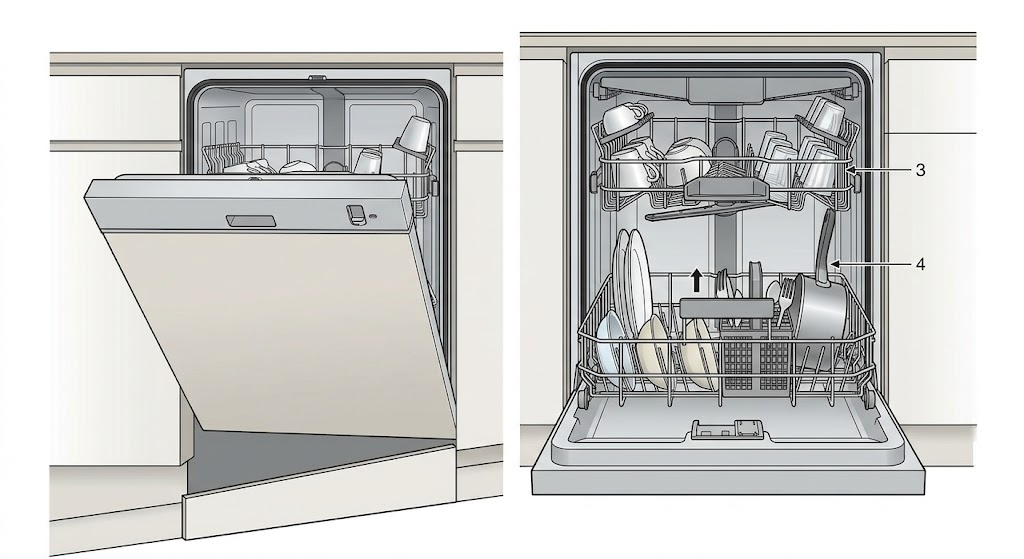
Work through in order
Diagnostic checks
Use only checks that match the exact appliance or system and its official guide.
-
Check 1
Stop the cycle using the normal control if it is running, keep hands clear of hot steam and the door edge, and wait for splashing or spray action to stop before opening. If the door is not safely movable, leave it closed and record the display or light pattern from outside.
Expected result: There is no active leak, exposed wet electrical area, smoke, burning smell, sparking, or uncontrolled hot-water/steam hazard, and the door can be opened normally; or one of those hazards is present.
Next step: For a safe door, continue only after the wash action has stopped. For any immediate hazard, keep people away, stop using the dishwasher, and arrange appropriate qualified or emergency help from a safe location.
Stop if: Do not force a pressurized, steaming, leaking, or falling door, and do not touch wet electrical areas or perform a live electrical test.
Why this matters
Why: A safe, normally movable door allows an ordinary external inspection. A leak near electrical parts, smoke, burning smell, sparking, or a door that cannot be controlled is a stop-use condition rather than a loading adjustment.
-
Check 2
Remove or reposition only loose dishes and utensils that are plainly accessible, then check the door path, the front of both racks, tall items, pan handles, and basket contents without pulling out a loaded rack abruptly.
Expected result: The door closes after an item is removed; an item or rack edge still contacts the door; the upper rack is visibly out of level or not fully seated; or no load contact is found.
Next step: Reload so nothing protrudes into the door path or through the rack base. If rack adjustment is needed, use the exact Electrolux model manual; do not force a wheel, rail, clip, or rack-height lever.
Stop if: Do not bend rack wires, force a rail, reach into a jammed mechanism, or continue if a sharp, broken, or heavy item could fall.
Why this matters
Why: A change after removing one item supports a loading obstruction. A rack that sits unevenly or remains out of position can hold the door open, while no contact shifts attention to the gasket, cabinet clearance, alignment, or latch.
-
Check 3
With the door open and the appliance idle, inspect the visible gasket around the tub opening and the mating door frame for food soil, a folded edge, displacement, a tear, or an object caught at one corner. Wipe ordinary residue with a soft cloth and the care method allowed for the exact model.
Expected result: The seal is clean, continuous, and seated; residue or a foreign object was removed and the door now meets evenly; or the gasket is torn, permanently distorted, loose, or still prevents contact at one area.
Next step: Close the door gently to check for even contact only after the seal is seated. If the seal is damaged or the gap remains, stop repeated cycles and request the exact model's service or gasket guidance.
Stop if: Do not glue, heat, stretch, cut, or pry the gasket into shape, and do not remove trim or panels to reach hidden seal hardware.
Why this matters
Why: A removable obstruction can keep the door from seating. A clean seal that remains distorted or a one-sided gap is more consistent with a gasket, door alignment, tub, or installation issue than with a dirty load.
-
Check 4
From outside the appliance, inspect the lower kick plate, the adjacent cabinet edges, and the visible front gap for a loose panel, protruding screw, stored object, or installation piece that meets the door before it reaches the frame. Check that the appliance front is not visibly twisted or pulled out of its opening.
Expected result: The kick plate or cabinetry clearly contacts the door; the door front sits square with even gaps; or the appliance is visibly shifted, tilted, or rubbing one side.
Next step: Remove only a loose object that is safely accessible without tools or appliance movement. If the panel, cabinet, leveling, or securing arrangement needs adjustment, stop and arrange qualified installation or appliance service.
Stop if: Do not pull out the dishwasher, loosen mounting hardware, lift the appliance, or adjust concealed feet, brackets, water lines, drain hoses, or wiring as a home test.
Why this matters
Why: Electrolux notes that a kick plate can prevent complete door closure. A shifted or tilted built-in dishwasher can change door and latch alignment, but its leveling and securing method are model- and installation-specific.
-
Check 5
After the load, seal, and external-clearance checks, close the empty door gently and observe whether it reaches the frame evenly and the latch catches with normal hand pressure. Note any need to lift or push one corner, a door that rebounds, a door that drops or springs open, or a latch that never catches.
Expected result: The empty door closes squarely and latches; it closes only when pushed or lifted; it sits low or crooked; it drops or springs open; or it remains unlatched with no visible obstruction.
Next step: Do not run the dishwasher if the door cannot latch normally. Photograph the gap and record the symptom, model number, and any CL/Cd or door-not-closed indication for qualified service.
Stop if: Do not remove the door, handle, hinge, spring, latch, strike, inner panel, or harness, and do not bypass the door interlock or test energized wiring.
Why this matters
Why: A square door that latches empty but fails when loaded supports returning to rack and load checks. Force, one-sided contact, a dropped or spring-loaded door, or a latch that will not catch points toward alignment, hinge/spring loading, latch/strike, cabinet mounting, or model-specific wiring rather than a user-adjustable obstruction.
-
Check 6
If the controls show CL or Cd, flash a door-not-closed pattern, or refuse to start after the door is visibly closed, document the exact display, control layout, and timing without repeatedly restarting the appliance.
Expected result: The indication clears when the door is closed and latched; it persists with a normally seated empty door; or another code, delay-start, child-lock, or control condition is present.
Next step: Use the exact owner's manual for a documented control-state cancellation only. If the latch indication persists, the door geometry is abnormal, or a panel, spring, hinge, interlock, or wiring area would need access, leave the dishwasher out of service and call qualified appliance service.
Stop if: Do not bypass the interlock, repeatedly cycle a fault, remove control or door panels, or perform continuity/voltage tests unless qualified and equipped for the appliance.
Why this matters
Why: Electrolux describes CL/Cd and door-not-closed flashing as a closed/latch condition, while its starting guidance also identifies delay start and child lock as separate control states. A persistent indication after the external checks needs model-specific diagnosis.
Use your observations
Decision map
Find the observation that best matches what you see, then follow the next safe action.
-
PATH 01Safety boundary
What you see
The door closes after a tall item, pan handle, utensil, basket item, or rack position is changed, or the spray arm/rack clearly contacts the load.
Do this next
Reload within the rack boundaries and follow the exact model manual for any permitted rack adjustment. If the door still binds when empty, use the alignment branch.
Why this path and its safety boundary
Why it matters: The obstruction is more likely to be a loading or rack-seating issue than a failed latch.
Safety stop: Stop for a jammed rail, broken rack, sharp fragment, or any need to force the rack.
-
PATH 02Safety boundary
What you see
Residue or a foreign object is visible at the seal and the contact becomes even after safe cleaning, or the gasket remains folded, loose, torn, or proud at one corner.
Do this next
Run only when the door closes and latches normally with an even seal. Arrange service for a damaged or persistently displaced gasket instead of reshaping it.
Why this path and its safety boundary
Why it matters: A removable seal obstruction may have caused the symptom; a damaged or displaced gasket makes a model-specific seal or door-fit problem more likely.
Safety stop: Do not heat, glue, cut, or stretch the gasket.
-
PATH 03Safety boundary
What you see
The kick plate or cabinet contacts the door, the front gap is uneven, or the built-in appliance appears shifted or tilted.
Do this next
Keep the dishwasher out of service if the door cannot latch squarely and request qualified installation or appliance service. Supply photos of the kick plate, cabinet gap, and door alignment.
Why this path and its safety boundary
Why it matters: External clearance or installation alignment is more likely than a standalone latch failure; the exact leveling and securing design must be verified for the model.
Safety stop: Do not pull out, lift, unfasten, or level the dishwasher as an improvised test.
-
PATH 04Safety boundary
What you see
An empty door needs force or lifting, sits crooked, drops, springs open, rebounds, rubs one side, or will not catch after the load, gasket, and clearance checks.
Do this next
Stop using the dishwasher and arrange qualified service. Record the model, door position, gap pattern, and any CL/Cd or flashing indication; do not attempt internal adjustment.
Why this path and its safety boundary
Why it matters: The pattern makes hinge or spring loading, latch/strike, door mounting, tub alignment, or model-specific interlock/wiring more likely than a user-accessible obstruction.
Safety stop: Keep hands out of the hinge, spring, latch, and wiring areas and do not remove the heavy door or panels.
-
PATH 05Safety boundary
What you see
The door appears square and unobstructed, but CL/Cd, a door-not-closed flashing pattern, or a no-start condition persists after a normal close; or delay start/child lock is indicated instead.
Do this next
Use the owner's manual for the documented control-state procedure. If the latch indication remains or any internal access would be needed, leave the appliance out of service and call qualified service.
Why this path and its safety boundary
Why it matters: A persistent latch indication needs model-specific diagnosis, while delay start or child lock is a control-state path rather than proof of a broken door.
Safety stop: Do not bypass the interlock, repeatedly reset the dishwasher, or test the control wiring while energized.
Helpful context
Understand the symptom
Separate a load obstruction from a door fault
A door that stops at the same point every time may be meeting a tall item, pan handle, basket item, upper rack edge, or lower kick plate. Electrolux's loading guidance says items should not protrude through the racks or interfere with spray-arm rotation; its rack guidance also makes clear that adjustment features differ by model. Empty the door path and use the exact manual before changing a rack position. Do not slam the door to overcome an obstruction.
Read the gasket and frame contact pattern
With the dishwasher not running, inspect the visible gasket and the mating door frame for soil, a folded or displaced seal, a tear, or a foreign object. A uniform contact path after cleaning supports a separate latch or alignment decision; one corner that stands proud or a seal that will not remain seated points to a model-specific gasket or installation issue. Use only a soft cloth and mild cleaning method allowed by the owner's manual, and do not glue, heat, stretch, or reshape the seal.
Treat latch and heavy-door symptoms as a service boundary
A normal door reaches the frame without force and the latch catches when the controls require a closed door. Electrolux links the CL/Cd indication and door-not-closed flashing behavior to a door that is not closed or latched. If the door is visibly low, twists, drops, springs open, rubs one side, or will not latch after the external checks, the pattern can involve alignment, hinge or spring loading, a latch or strike, cabinet installation, or a door harness depending on the model. Keep the appliance out of service and give the technician the model number and any code or flashing pattern; do not remove the door or reach into the hinge, spring, latch, or wiring area.
Safety boundary
Stop conditions
- Stop using the dishwasher for smoke, burning smell, sparking, a leak near electrical parts, exposed wiring, uncontrolled hot steam, or a door that cannot be safely controlled.
- Do not force or slam the door, bypass the door interlock, pull out or lift the built-in appliance, or perform live electrical testing.
- Door removal, hinge or spring work, latch or strike replacement, inner-panel access, harness inspection, and concealed leveling or installation adjustments require qualified appliance service for the exact model.
Only after diagnosis
Potential parts
- door gasket
Consider this only if the visible gasket is torn, displaced, or remains unable to seal after residue and load obstructions are removed.
Confirm the complete Electrolux model and the manufacturer's fit information; gasket shape and installation differ by model. - rack wheel or rack adjustment hardware
Consider this only when a damaged wheel, rail, clip, or adjustment mechanism leaves the rack out of position and the exact manual or technician confirms the fault.
Rack construction and adjustment differ by Electrolux model; do not order from appearance alone. - door latch or strike
Consider this only after the empty door is square, the gasket and clearances are sound, and qualified diagnosis finds that the latch or strike does not catch normally.
Verify the exact model and the technician's diagnosis before selecting a latch or strike. - hinge, spring, or door mounting hardware
Consider this only when the door drops, springs open, sits crooked, or has abnormal resistance and qualified service identifies a hardware fault.
Door balance and mounting arrangements are model-specific; this is professional-service work, not a general replacement recommendation. - door interlock or harness
Consider this only when a persistent closed-door indication remains with an unobstructed, square door and qualified diagnosis isolates the interlock or harness.
Confirm the exact model and safe diagnostic result; never bypass the interlock or select a generic electrical part.
When checks do not resolve it
Need a professional?
Arrange qualified Electrolux or appliance service when the door is heavy, crooked, dropped, spring-loaded, rubbing one side, unable to latch empty, or still shows a door-latch indication after the external checks. Call sooner for a leak, wet electrical area, smoke, sparking, or any risk that the door could fall.
Safety scope: This article covers ordinary-access load, gasket, visible clearance, rack, and control-state observations only. Qualified service is required for the heavy door, springs, hinges, latch or strike, interlock, harness, inner panels, concealed leveling, and installation hardware.
Common questions
FAQ
Why will my Electrolux dishwasher door not close after loading dishes?
A tall plate, pan handle, utensil, basket item, or rack that is out of position can stop the door before the latch. Remove the load obstruction, confirm the upper rack is seated, and check spray-arm clearance by hand; if the empty door still binds, inspect the gasket and external clearance instead of forcing it.
Can a dishwasher kick plate keep the door from closing?
Yes. Electrolux specifically warns that a kick plate can prevent complete door closure. Look for visible contact or a loose panel from outside, but do not pull out or re-level a built-in dishwasher as a home test; installation adjustment belongs to qualified service.
What does CL or Cd mean on an Electrolux dishwasher?
Electrolux describes CL or Cd as a door that has not successfully closed and latched. If the door is unobstructed and square but the indication persists, leave the dishwasher out of service and arrange model-specific diagnosis rather than bypassing the interlock.
Should I adjust the Electrolux dishwasher rack to make the door close?
Only use the adjustment described for the exact model. Electrolux says upper-rack adjustability varies and that a stainless-steel rack should remain level front-to-back with both sides at the same height. Do not force rails, wheels, clips, or levers.
When is a dishwasher door problem a service call?
Call qualified service when the empty door needs force or lifting, drops, springs open, sits crooked, rubs one side, will not latch, or continues to show a closed-door indication. Door removal, hinge or spring work, latch and strike access, interlock or harness inspection, and concealed installation adjustment are not ordinary loading checks.
Read the exact guide
Official sources
- Dishwasher Error Code CL or Cd - Door is openElectrolux · Electrolux owner support guidance for dishwashers that show CL or Cd.
- Dishwashers - How do I adjust the upper rack of my dishwasher?Electrolux · Electrolux owner support guidance; the exact upper-rack mechanism depends on model and the owner manual.
- Dishwasher - Water LeakingElectrolux · Electrolux owner support guidance for dishwasher leakage and installation checks.
- DishwashersElectrolux · Electrolux official dishwasher support category linking to owner articles for loading, rack adjustment, door, and starting issues.
- What is the difference between integrated controls and controls that are on the front of the dishwasher?Electrolux · Electrolux owner support explanation for integrated-top and front-control dishwashers.
- Dishwasher Not StartingElectrolux · Electrolux owner support guidance for a dishwasher that will not start.
- Dishwasher - Loading GuideElectrolux · Electrolux owner support loading guidance for dishwasher racks and spray arms.
- Dishwashers Flashing LightsElectrolux · Electrolux owner support guidance for flashing dishwasher indicators.
Community feedback
Share a repair observation
Share a plain-text repair observation. Accepted observations are published automatically; this page may take a moment to update.