
On this page
Start here
Quick answer
Start with the dishwasher stopped and cool enough to inspect: push both racks fully in, remove any plate, pan handle, or utensil projecting past a rack, and wipe loose debris from the door edge and gasket. From outside, check whether the door rubs the counter, cabinet, toe-kick, or floor; an out-of-level or poorly fitted built-in unit can prevent free movement. If your exact model has Auto Dry or automatic door opening, do not force the door closed while it is opening and wait at least five minutes after it opens before closing it. A door that reaches the frame but gives no normal latch click after these checks needs qualified service for possible latch, lock, hinge, seal, or alignment faults; never bypass the interlock. Stop for a leak, wet cord or outlet, smoke, sparking, or damaged door or glass; isolate water and power only from a dry, safe position.
Before you begin
Safety first
- This article covers model identification, dry external observation, rack/load repositioning, gentle seal cleaning, and model-manual timing only. Do not open door or control panels, bypass the interlock, pull a built-in unit, disconnect hoses, perform live tests, or work on wet, hot, pressurized, or damaged components.
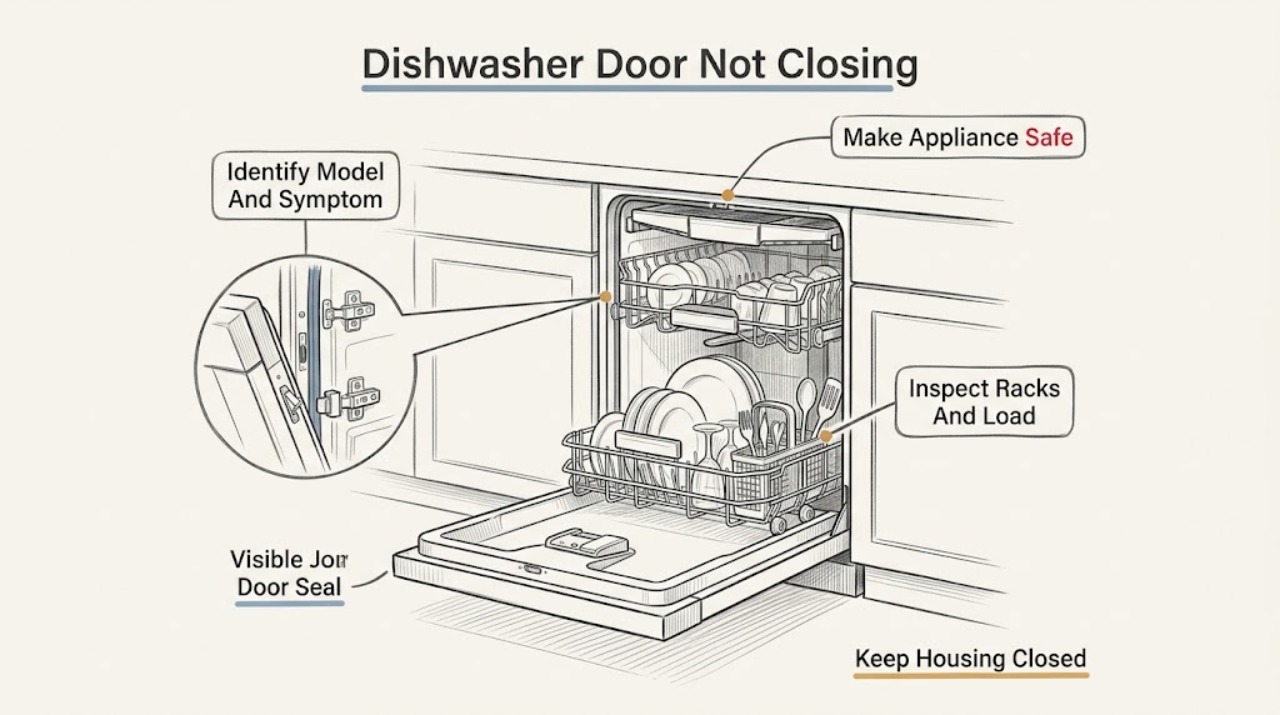
Work through in order
Diagnostic checks
Use only checks that match the exact appliance or system and its official guide.
-
Check 1
Read the full model number from the rating label without moving the appliance. Note whether the door stops before the frame, reaches the frame without a latch click, springs back, rubs cabinetry or flooring, or has just opened automatically at cycle end. Record whether the controls respond when the door is pressed closed.
Expected result: The model is known or unknown; the symptom is rack interference, cabinet contact, no click, Auto Dry opening, or visible damage/wetness.
Next step: Use the exact Owner's Manual and the matching branch below; do not use another Hisense model's lock sequence.
Stop if: Stop for a leak, wet cord or outlet, smoke, burning odor, damaged glass or door, or any need to move a built-in unit.
Why this matters
Why: Hisense rack, lock, installation, and Auto Dry behavior varies by model, so the symptom selects the safe branch.
-
Check 2
If a cycle is active, use the normal pause or cancel control only from a dry, responsive panel and wait for spray and heat to stop. For a visible leak, stop using the machine; close the accessible water tap and isolate power only from a dry, safe position.
Expected result: The cycle stops normally and the floor remains dry, the door is hot or under spray, water is escaping, or power and water access are unsafe.
Next step: After a normal stop and cool-down, continue with dry external checks. For a hazard, leave the unit off and arrange service without pulling it out.
Stop if: Do not reach into a running dishwasher, handle a wet plug, remove panels, or restore power to a wet or damaged unit.
Why this matters
Why: Forcing a hot or active door can expose the user to spray and heat. A leak or wet electrical area overrides mechanical diagnosis.
-
Check 3
With the appliance stopped and cool, slide the upper and lower baskets out and back in. Remove any plate, pan handle, utensil, or tall item projecting past a rack, and confirm each basket sits horizontally on its rails.
Expected result: A dish or utensil protrudes, a basket is not seated or level, a rail is obstructed, or the racks and load clear the door.
Next step: Reposition the item or basket and make one gentle closure check. If it still stops at the same place, do not force it; continue with the seal and clearance checks.
Stop if: Do not force a basket, bend a rail, or use the door as a shelf.
Why this matters
Why: Hisense troubleshooting lists baskets not positioned horizontally and dishes blocking baskets as direct causes of a door that cannot close.
-
Check 4
Inspect the gasket and door edges with the door supported. Remove only loose food, labels, or debris with a soft cloth; clean the seal and door sides with a slightly damp cloth and dry them. Look for a folded gasket, cracked seal, bent door, or chipped glass without removing hardware.
Expected result: The seal is displaced or dirty, debris sits at the lower edge, the door is visibly damaged, or the perimeter is clean and undamaged.
Next step: After a minor surface obstruction is removed, make one gentle closure check. For damage, recurring seal displacement, or no improvement, leave the machine unused and document the area for service.
Stop if: Do not use a knife, heat, solvent, abrasive cleaner, or adhesive repair on the seal, door, or glass.
Why this matters
Why: Debris or a displaced seal can prevent full compression and stop the latch. Damage or a clean perimeter with no engagement needs service rather than a stronger push.
-
Check 5
From outside, watch the door close slowly and note contact with the counter, side panel, toe-kick, or floor. Check only whether the machine is obviously rocking; do not pull a built-in unit or adjust feet, brackets, hoses, or wiring.
Expected result: There is a repeatable contact point, the unit rocks or is visibly tilted, the door binds after installation or cabinet work, or clearance is normal.
Next step: If contact or rocking is present, stop closure attempts and have the installer or qualified technician correct the fit. If clearance is normal, continue to the model-specific Auto Dry and latch check.
Stop if: Do not force the door past cabinetry, remove mounting screws, pull the machine out, or reach behind it.
Why this matters
Why: Hisense requires firm, level placement and free door movement; incorrect fit can interfere with the lock. Normal clearance shifts suspicion toward latch, hinge, seal, or lock alignment.
-
Check 6
If the exact model has Auto Dry or automatic door opening, wait until movement finishes and at least five minutes have elapsed before gently closing it. Listen for the normal latch click and note whether the panel recognizes a closed door. Follow a door-lock sequence only when the exact model guide documents it, and only once.
Expected result: The door latches after the wait, the latch does not click, the panel still reports an open door, or the door reopens without an obstruction.
Next step: Leave the dishwasher unused and arrange Hisense appliance service with the model, contact point, and latch response; do not defeat the interlock.
Stop if: Do not close an Auto Dry door while it is opening, slam or repeatedly cycle it, enter diagnostics, or remove panels.
Why this matters
Why: The documented delay protects the lock on applicable Auto Dry models. No click after correct load, seal, clearance, and timing points to a latch, hinge, lock, sensor, or control fault.
Use your observations
Decision map
Find the observation that best matches what you see, then follow the next safe action.
-
PATH 01Safety boundary
What you see
The door stops against a plate, utensil, pan handle, or a basket that is not horizontal or fully pushed in.
Do this next
Remove or reposition the item, reseat the basket, and make one gentle closure check.
Why this path and its safety boundary
Why it matters: The load or basket position is more likely than a failed latch; Hisense lists both conditions.
Safety stop: Do not force the rack or bend a rail.
-
PATH 02Safety boundary
What you see
The door contacts cabinetry or flooring, or the dishwasher rocks or sits skewed.
Do this next
Stop closure attempts and have the installer or qualified technician correct the fit and feet.
Why this path and its safety boundary
Why it matters: Leveling, cabinetry clearance, or installation alignment is more likely than a defective lock.
Safety stop: Do not remove brackets, adjust hidden feet, or pull the built-in unit.
-
PATH 03Safety boundary
What you see
The exact model has automatic door opening and it is still opening, has just opened, or was pushed closed during movement.
Do this next
Leave the door alone until movement finishes, wait at least five minutes, then close gently. If it still will not latch, arrange service.
Why this path and its safety boundary
Why it matters: The automatic-door movement may not have completed; Hisense warns that closing during opening can damage the lock.
Safety stop: Do not force or hold an automatically opening door, and do not apply this branch to models without Auto Dry.
-
PATH 04Safety boundary
What you see
The racks, load, seal, and clearance are normal, but the door reaches the frame without a click or the controls still treat it as open.
Do this next
Keep the dishwasher unused and arrange qualified Hisense service with the model and latch response.
Why this path and its safety boundary
Why it matters: A latch, lock, hinge, sensor, or control problem is more likely than loading error; the symptom does not select a safe part.
Safety stop: Do not bypass or shim the interlock, slam the door, or remove panels for continuity or live testing.
-
PATH 05Safety boundary
What you see
Water escapes onto the floor, the cord or outlet is wet, the door or glass is damaged, or there is smoke, burning odor, or sparking.
Do this next
Stop using the dishwasher. From a dry, safe position close the accessible water tap and isolate power, then arrange qualified service.
Why this path and its safety boundary
Why it matters: A water, electrical, or structural hazard overrides door diagnosis.
Safety stop: Do not touch wet electrical parts, restore power to a wet unit, pull it out, or run a test cycle.
Helpful context
Understand the symptom
Separate a load blockage from a latch failure
A dish, utensil, or basket that is not fully horizontal can catch the door and mimic a broken latch. Open the door slowly, remove anything projecting past the rack, and slide each basket fully in. If the door then closes evenly and latches, reload below the rack line; if the same point still catches, continue with the external alignment checks.
Automatic opening is model-specific
Some Hisense models advertise Auto Dry or automatic door opening. Their manuals warn that closing the door while it is opening can damage the lock and say to wait at least five minutes before closing it. Do not apply that timing or a button sequence to a model whose exact manual does not document the feature.
Rubbing points to installation or clearance
Watch the door close from outside and note contact with the counter, side panel, toe-kick, or floor. Hisense installation guidance calls for firm, level placement and a door that opens freely; incorrect installation can disrupt lock function. Do not pull a built-in machine, loosen mounting hardware, or adjust hidden feet as an owner check.
Treat the latch click as the service boundary
If the door reaches the frame but does not produce the model's normal click, or the controls continue to treat it as open, do not press harder. Hisense manuals include model-specific door-lock guidance, so use only the sequence in the exact manual. A latch, hinge, lock, sensor, or control fault cannot be identified safely by opening the door panel.
Water or electricity changes the priority
If water is escaping onto the floor, the appliance or cord is wet, or the door or glass is damaged, stop using the dishwasher. From a dry, accessible position close the water tap and disconnect power only if safe. Hisense installation instructions assign electrical, water, and drain connections to qualified professionals; do not remove a kick plate or reach behind the machine.
Safety boundary
Stop conditions
- Stop using the dishwasher for a floor leak, water near the cord or outlet, smoke, burning odor, sparks, damaged wiring, or damaged door or glass.
- Do not force an Auto Dry door while it is opening; on applicable models, wait at least five minutes after opening before closing it.
- Do not bypass or shim the interlock, remove the latch or door panel, perform live tests, or reach into a running dishwasher.
- Do not pull a built-in dishwasher, adjust hidden installation hardware, disconnect hoses, or handle water and electrical connections without qualified service.
Only after diagnosis
Potential parts
- model-specific door gasket or seal
Consider only when the exact model and inspection show a torn, hardened, displaced, or incorrectly seated seal after load and installation checks are normal.
Seal profiles vary by Hisense model; do not order a generic gasket from the symptom alone. - model-specific door latch or lock assembly
Consider only after a qualified technician confirms correct alignment and that the latch or lock does not engage.
Auto Dry, door-sensor, and latch arrangements vary; do not bypass or substitute a lock by appearance. - model-specific hinge or door-support hardware
Consider only when a technician finds a bent, loose, or worn hinge after ruling out rack obstruction and leveling.
Door weight, spring routing, and built-in geometry are model-dependent.
When checks do not resolve it
Need a professional?
Arrange qualified Hisense appliance service when the correct load, clean seal, external clearance, and exact-model Auto Dry timing do not restore a latch click; when the door is skewed, damaged, or rubs cabinetry; or when the controls still report an open door. Treat a leak, wet electrical area, smoke, sparking, burning odor, or damaged glass as an immediate stop-use condition.
Safety scope: This article covers model identification, dry external observation, rack/load repositioning, gentle seal cleaning, and model-manual timing only. Do not open door or control panels, bypass the interlock, pull a built-in unit, disconnect hoses, perform live tests, or work on wet, hot, pressurized, or damaged components.
Common questions
FAQ
Why will my Hisense dishwasher door not close after loading?
A plate, utensil, pan handle, or basket that is not fully horizontal can block it. Remove the item and reseat both baskets; Hisense manuals specifically list these conditions.
Can I close the door immediately when Hisense Auto Dry opens it?
Not while it is opening. On applicable Auto Dry models, wait until movement finishes and at least five minutes have passed before gently closing it; confirm the exact manual first.
The door closes but the dishwasher still says it is open. What should I do?
Confirm that the racks, seal, and cabinet clearance are normal and listen for the latch click. If there is still no click, do not bypass the interlock or remove the panel; arrange qualified service.
Should I pull out a built-in Hisense dishwasher to adjust the door?
No. If the door rubs the cabinet or floor, document the contact point and have the installer or qualified appliance technician correct the fit; do not reach behind the unit yourself.
Read the exact guide
Official sources
- Hisense 24" Top control Built-in DishwasherHisense USA · Exact HUI66360XCUS product page; its Auto Door Open evidence is model-specific.
- HSGP15FB Owner's ManualHisense · Official Hisense HSGP15FB manual; its Auto Dry and lock procedure are model-specific examples.
- C06010336-D-12456604-WD16-E720Xi Owner's ManualHisense · Official Hisense manual for the WD16/E720Xi family; use its procedures only when identity matches or the exact manual confirms the same feature.
Community feedback
Share a repair observation
Share a plain-text repair observation. Accepted observations are published automatically; this page may take a moment to update.