
On this page
Start here
Quick answer
Do not operate a GE microwave whose door will not close and latch securely. First remove only an obvious dish, rack, packaging, residue, or other object touching the door or front frame, and use the model's intended handle or centered Door Latch Release button; do not force the door. A new GE microwave can have a firmer latch spring and close more loudly, and GE says about 1/8 inch of door movement can be normal on some models, but the door must still align and latch without damage. Inspect the visible door, hinges, latches, mesh, inner plastic shield, choke-seal area, and sealing surfaces without removing anything. Cracks, bent or loose hinges or latches, peeling or burn marks, a damaged coating or shield, a door that will not latch, or a door that needs adjustment requires qualified microwave service. GE says door adjustment or repair must be followed by a qualified leak test; do not open the cabinet, defeat the safety interlocks, or attempt a latch, hinge, handle, or door repair yourself because microwave components can remain hazardous after unplugging.
Before you begin
Safety first
- The user may stop use, identify the model, remove an obvious external obstruction, use the documented release mechanism, and inspect visible surfaces without removing parts. Qualified service must handle door adjustment, latch, hinge, handle, mesh, shield, choke seal, interlock, cabinet, and any required leak or safety test.
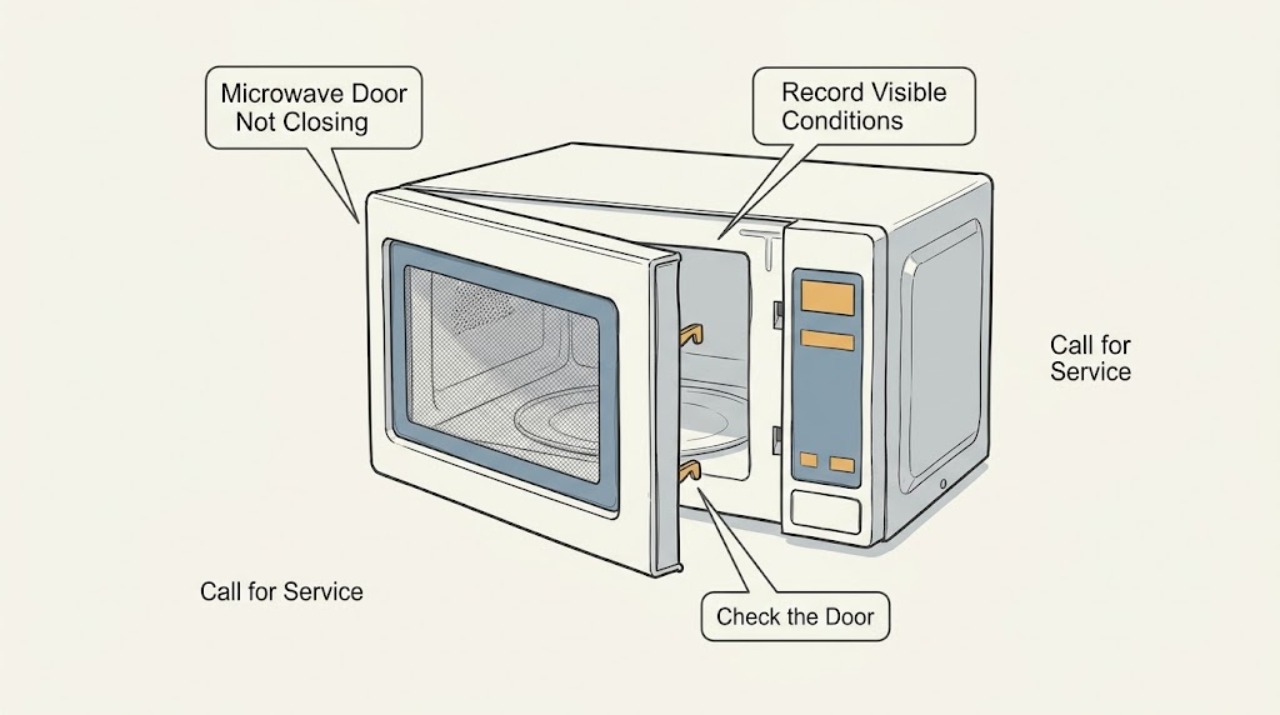
Work through in order
Diagnostic checks
Use only checks that match the exact appliance or system and its official guide.
-
Check 1
Stop using the microwave and note whether the door is physically blocked, springs back open, sits crooked, closes but does not latch, or latches only when pushed or lifted. Record whether the unit is a countertop, over-the-range, built-in, or drawer-style model and read the complete model number from an accessible label or paperwork.
Expected result: The door cannot reach the frame, reaches it but will not latch, is visibly crooked or loose, closes with abnormal force, or has visible cracks, peeling, burn marks, or a damaged seal or screen.
Next step: Keep the door closed and use the model manual to identify its opening mechanism. Continue only with the non-invasive obstruction and release checks below if there is no damage or electrical hazard.
Stop if: Stop immediately for smoke, arcing, burning odor, exposed metal or wiring, a broken or loose hinge or latch, a cracked window, or a coating or inner shield that is peeling or damaged.
Why this matters
Why: A loading or operating-position issue may be externally correctable; a latch, alignment, or damage pattern is a service condition. GE's normal-play guidance does not make a door that will not latch safe to use.
-
Check 2
With the microwave off and cool, remove only items that are plainly touching the door or front frame, such as a dish, turntable accessory, packaging, food residue, or cleaner residue on the contact area. Wipe accessible surfaces with a suitable soft cloth and leave the inner door shield, mesh, choke-seal area, and latch openings intact.
Expected result: The door closes and latches normally after an obstruction or residue is removed, the same interference remains, or the door still will not meet or latch with the cavity empty.
Next step: Use the microwave only if the door now closes squarely and latches fully with no visible damage. If it still will not latch, leave it unused and arrange service.
Stop if: Do not scrape the sealing surfaces, remove the plastic shield or mesh, spray liquid into the latch, or place an object in the gap to make the door close.
Why this matters
Why: A successful correction supports a loading or surface-interference explanation. A clear opening with a persistent latch problem makes alignment, hinge, latch, or interlock service more likely.
-
Check 3
If the microwave has no handle, use the center of the Door Latch Release button as the model instructs rather than pressing an off-center edge. If it is a drawer-style or built-in model, use only its documented open and close control. Close the door once without slamming and without holding the release button.
Expected result: The door opens and closes normally when the intended release point is used, the release button is stuck or uneven, or the door remains hard to close or will not latch.
Next step: Follow the exact manual for one normal close. If the button or latch is damaged, sticks, or requires force, stop use and arrange qualified service.
Stop if: Do not pry the release button, insert tools into the latch, force the door, or bypass a latch position.
Why this matters
Why: GE says pressing off-center on a handle-less model can make the latch harder to operate. A normal release that still cannot produce a secure latch points beyond user technique to the latch, alignment, or interlock.
-
Check 4
From the outside and with the door open only as far as it moves normally, inspect the visible door edges, window mesh, inner plastic shield, perimeter choke-seal area, hinges, latches, and front sealing surfaces. Look for a bent door, loose hardware, cracks, scratches, peeling, burn marks, distortion, or a gap that changes when the door is lifted.
Expected result: The visible door and sealing parts are intact and the fit is square, or any hinge, latch, seal, shield, mesh, coating, or alignment damage is present.
Next step: If any damage or abnormal alignment is visible, leave the microwave off and provide the model and photos or description to qualified service. Do not attempt to straighten, glue, sand, or replace door parts.
Stop if: Do not remove the inner plastic shield, mesh, choke seal, hinge pins, screws, handle, or door trim.
Why this matters
Why: An intact door that closes and latches can be monitored for a one-time obstruction. GE treats door damage or compromised coating as a no-use condition; a changed gap or loose hardware needs qualified alignment and safety evaluation.
-
Check 5
If the door appears intact but feels loose or closes more firmly than expected, compare the behavior with the exact model manual and GE's normal characteristics without operating the microwave. Observe whether movement is limited and the latch still engages evenly, or whether the door hangs, springs open, scrapes, or needs pressure to remain shut.
Expected result: There is limited play but a square, secure latch; the door is louder or firmer on a new model but latches; or the door is loose, crooked, scraping, or unable to latch.
Next step: Use a normally latching, undamaged door only as the manual permits. For a failed latch or changed alignment, stop and arrange service; do not attempt to adjust the hinges or interlocks.
Stop if: Do not run a microwave with an unlatched or damaged door, hold it shut during operation, or test for radiation or interlock operation yourself.
Why this matters
Why: GE says some movement and a firmer latch spring can be normal. A latch that does not engage, a door that needs force, or a changed alignment is not resolved by the normal-play explanation.
-
Check 6
If the reported door problem is actually that the microwave will not start, note whether the control panel responds and whether a dish or rack touches the door. Do not press Start to test an unlatched door; use the visible fit and model instructions to document the symptom instead.
Expected result: The panel works but the door cannot engage the latch, the door appears closed but an item touches it, or the panel and microwave have another fault as well.
Next step: Clear only an obvious item and close the door normally once. If the microwave still will not latch or has any damage, keep it out of service and arrange qualified diagnosis.
Stop if: Do not defeat the interlocks, operate with the door open or held shut, or open the cabinet to investigate a start symptom.
Why this matters
Why: GE says the safety interlocks require a securely closed door and that an item touching the door can prevent firm closure. A separate control or power issue does not make a damaged or unlatched door safe.
-
Check 7
Stop owner troubleshooting for any failed latch, hinge or door alignment, damaged mesh or shield, peeling or burned coating, broken handle or release, persistent hard closure, or a door that remains unsafe after visible obstruction checks. Give qualified service the exact model, installation style, symptom timing, and visible condition.
Expected result: A plainly removable obstruction was the only cause and the door now latches squarely, or the closure problem remains or damage is present.
Next step: For the unresolved branch, leave the microwave unplugged or otherwise isolated from a safe dry position and arrange qualified microwave service. Do not recreate the fault to demonstrate it.
Stop if: Do not open the cabinet, remove the door, replace the handle or latch, adjust hinges, or perform a live or radiation test.
Why this matters
Why: A simple obstruction can be corrected without altering the door. Persistent closure or damage can affect the interlocks and containment; GE says door adjustment or repair requires qualified service and a follow-up leak test.
Use your observations
Decision map
Find the observation that best matches what you see, then follow the next safe action.
-
PATH 01Safety boundary
What you see
An obvious dish, rack accessory, packaging piece, or residue was touching the front or door, and the empty door now closes squarely and latches without force or damage.
Do this next
Use the exact manual's loading guidance and monitor the next normal use. If the symptom returns with no obstruction, stop and arrange service.
Why this path and its safety boundary
Why it matters: A surface or loading obstruction is more likely than a failed latch or hinge.
Safety stop: Do not add an object to hold the door shut or operate if the latch is not fully engaged.
-
PATH 02Safety boundary
What you see
The model is new or the door is simply firmer or louder than an older microwave, but it closes evenly, latches completely, and has no visible damage.
Do this next
Follow the model manual and monitor normal operation. Do not alter the latch to make it feel softer.
Why this path and its safety boundary
Why it matters: GE describes a firmer latch spring and limited movement on some models as normal characteristics. This is different from a door that cannot latch or is misaligned.
Safety stop: Stop using the microwave if the latch stops engaging, the fit changes, or damage appears.
-
PATH 03Safety boundary
What you see
A handle-less door opens or closes differently depending on where the Door Latch Release is pressed, or the release, latch, or handle sticks, breaks, or needs force.
Do this next
Use the center release once as documented. If normal operation does not return, keep the microwave off and arrange qualified service.
Why this path and its safety boundary
Why it matters: GE says off-center operation can make a latch-release button harder to use, but a sticking, broken, or persistently difficult mechanism needs service.
Safety stop: Do not pry the release, disassemble the handle, or bypass the latch.
-
PATH 04Safety boundary
What you see
The door is bent, crooked, loose, cracked, scratched, peeling, burned, has a damaged coating or inner shield, or cannot latch evenly after visible obstructions are removed.
Do this next
Leave the microwave off and arrange qualified service. A technician must evaluate fit, operation, alignment, and the required leak test after repair or adjustment.
Why this path and its safety boundary
Why it matters: This is a microwave door safety and service branch, not an adjustment a user should make. GE says damaged doors or compromised coatings require the appliance to remain unused and qualified service.
Safety stop: Do not run the oven, straighten the door, remove door parts, or attempt a home leak or interlock test.
-
PATH 05Safety boundary
What you see
The controls respond but the microwave will not start because the door never engages, or the unit also shows a separate control, power, or operating fault.
Do this next
Record the display and door condition, clear only an obvious obstruction, and arrange qualified microwave service if the secure latch is not restored.
Why this path and its safety boundary
Why it matters: A door interlock may be preventing operation, but the visible symptom does not identify the latch, switch, control, or another internal part. The microwave should not be used to test an unlatched door.
Safety stop: Do not operate with the door open or held shut, defeat interlocks, or open the cabinet.
Helpful context
Understand the symptom
Secure latch is the decision point
A door can look nearly closed yet fail to engage the safety interlocks. A plate or rack touching the front, a latch-release mechanism that is not being used as designed, or a bent hinge can all change the feel. Do not test the microwave by running it with a gap or by holding the door shut.
Some movement or closing force can be normal
GE notes that some models have a firmer latch spring and that limited door play can be normal, especially on over-the-range models. The useful distinction is not whether the door feels identical to an older microwave; it is whether it closes squarely, latches completely, and has no damage to the door, hinge, latch, mesh, shield, choke seal, or coating.
Door repairs are not an owner adjustment
GE's door-adjustment guidance directs qualified service for damage, handle replacement, and door adjustment, followed by a leak test. The microwave cabinet and door interlocks should remain closed; unplugging a unit does not turn cabinet or high-voltage work into a safe do-it-yourself repair.
Safety boundary
Stop conditions
- Stop using the microwave for a door that will not latch, a bent or loose door, damaged hinges or latches, cracks, peeling or burn marks, a damaged coating or inner shield, exposed metal, smoke, arcing, or burning odor.
- Do not operate with the door open, hold it shut, defeat or bypass the safety interlocks, or perform a home microwave-leak or interlock test.
- Do not remove the door, handle, latch, hinge, mesh, choke seal, inner plastic shield, trim, or cabinet covers. Unplugging does not make internal microwave or high-voltage work an owner repair.
- Use the exact GE Owner's Manual for the opening mechanism and model behavior. Door adjustment or repair belongs to qualified service and must be followed by the required safety verification.
Only after diagnosis
Potential parts
- door latch or release mechanism
Consider this category only when qualified diagnosis confirms a failed or damaged latch or release after visible obstruction and model-specific operation checks.
Latch and release designs vary by GE microwave model and installation style; do not order or install from the symptom alone. - door assembly, hinge, or handle
Consider this category only for a qualified repair of a bent, loose, cracked, or misaligned door, hinge, or handle.
GE says handle replacement requires door disassembly and service; verify the complete model and have the repaired door checked for safe fit and operation. - door mesh, shield, seal, or related door component
Consider this category only when service confirms damage to the mesh, inner shield, choke-seal area, coating, or another door component.
The door's containment and interlock design is model dependent. The inner plastic shield should not be removed by the user, and a repaired door requires qualified safety verification.
When checks do not resolve it
Need a professional?
Arrange qualified microwave service whenever the GE door will not close and latch securely after visible obstruction and model-specific release checks, or whenever it is crooked, loose, bent, cracked, scratched, peeling, burned, or has damage to the mesh, inner shield, choke-seal area, hinges, latches, or coating. GE also directs qualified service for door adjustment and handle replacement, followed by a leak test. Stop immediately for smoke, arcing, burning odor, exposed parts, or any attempt to operate with an unlatched door.
Safety scope: The user may stop use, identify the model, remove an obvious external obstruction, use the documented release mechanism, and inspect visible surfaces without removing parts. Qualified service must handle door adjustment, latch, hinge, handle, mesh, shield, choke seal, interlock, cabinet, and any required leak or safety test.
Common questions
FAQ
Is it normal for a GE microwave door to be hard or loud to close?
Sometimes. GE says a new model may use a firmer latch spring, making the door louder or harder to close than an older microwave. It should still close evenly and latch securely without force or damage; a door that will not latch needs service.
How much movement in a GE microwave door is normal?
GE says some models, especially over-the-range models, can have up to about 1/8 inch of movement. That limited play is not a safety diagnosis by itself. Stop using the microwave if the door is crooked, loose, damaged, or does not latch securely.
What should I check when a GE microwave door will not latch?
Remove only an obvious dish, rack, packaging piece, or residue touching the door or frame, and use the exact model's normal handle or centered Door Latch Release. If the door still does not latch, do not force it or open the cabinet; arrange qualified service.
Can I adjust the hinges or replace the GE microwave handle myself?
No. GE directs qualified service for microwave door adjustment and says handle replacement requires door disassembly. A repaired or adjusted door also needs qualified safety verification, including a leak test.
Can I use a GE microwave if the inner plastic door shield is loose or peeling?
No. GE says the inner plastic shield should not be removed, and a damaged coating or door component requires the microwave to remain unused until service checks it. Do not tape, glue, or peel the shield.
Why will my GE microwave not start even though the door looks closed?
GE says the door must be securely closed to engage its safety interlocks, and a dish touching the door can prevent a firm closure. Clear only an obvious obstruction and close it normally once; if it still will not latch or another fault is present, arrange service without opening the cabinet.
Read the exact guide
Official sources
- Microwave - Door Latch ReleaseGE Appliances · Applies to GE microwave models without door handles; release layout and operation are model dependent.
- Microwave - Door DesignGE Appliances · Applies to GE microwave door design; exact layout and model details vary.
- Microwave - Normal Operational CharacteristicsGE Appliances · General GE microwave and 5-in-1 Advantium characteristics; model construction and normal movement vary.
- Microwave - Will Not StartGE Appliances · General GE microwave no-start guidance; exact controls and model features vary.
- Microwave - Door Adjustment or RepairsGE Appliances · Applies to GE microwave and Advantium door repair guidance; exact parts and construction vary by model.
- Microwave - Door Loud, Hard To Close, Starts as Soon as the Door ClosesGE Appliances · General GE microwave guidance; normal design and closing force vary by model.
Community feedback
Share a repair observation
Share a plain-text repair observation. Accepted observations are published automatically; this page may take a moment to update.