
On this page
Start here
Quick answer
If a Roper dryer will not turn on, first decide whether the whole appliance is dead or the console lights up but the drum will not run. With the dryer safely idle, check the plug and accessible receptacle, then confirm the door is fully closed, the selected cycle is valid, and the PUSH TO START control is held as the exact model requires. An electric dryer can lose one side of its supply and use two breakers or fuses; a gas dryer still needs electrical power for its controls and motor. Do not open the terminal block or cabinet to check power. If the display works, also look for Control Lock, a damp touch panel, a delayed or special cycle, an overloaded drum, a blocked lint screen, or a restricted exhaust path. Smoke, burning odor, a hot or damaged cord, sparks, repeated breaker trips, gas odor, or abnormal heat means stop using the dryer and arrange emergency or qualified service.
Before you begin
Safety first
- This article supports ordinary-access observations, a normal door closure, model-documented Start or Control Lock actions, and user-accessible lint/exhaust care only. Do not access live wiring, terminal blocks, motor, thermal devices, control boards, gas connections, or door interlocks.
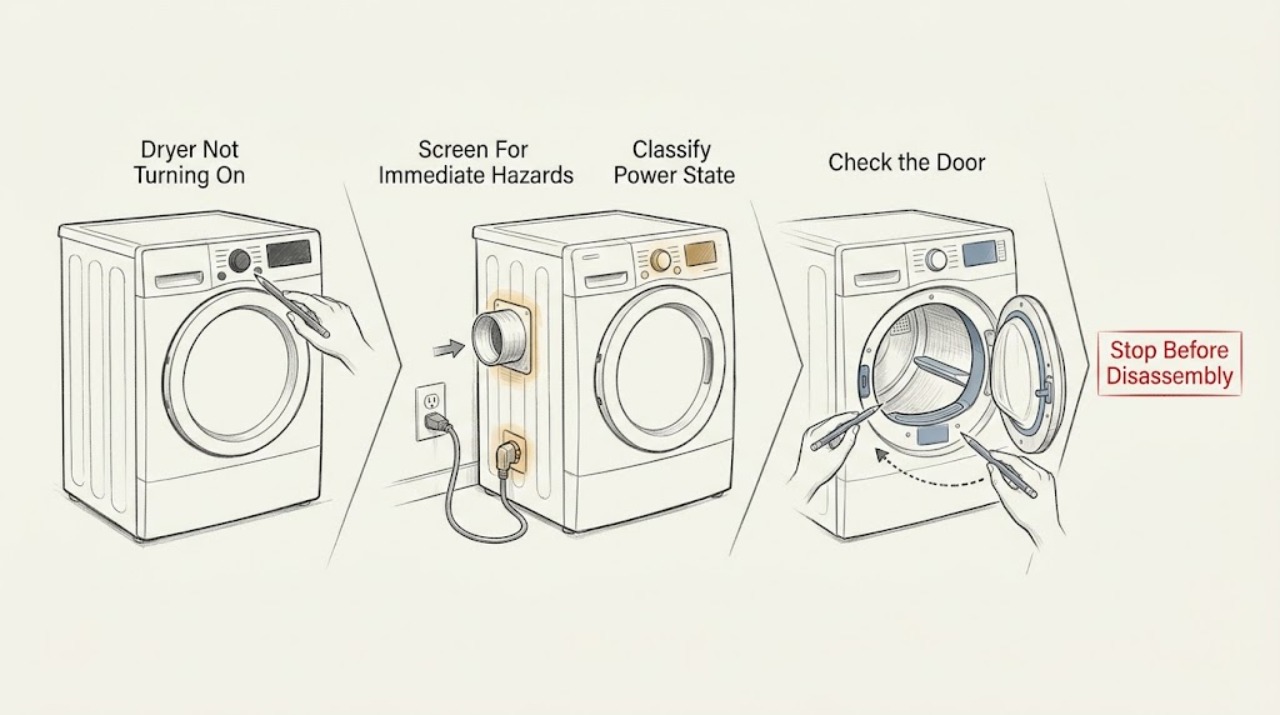
Work through in order
Diagnostic checks
Use only checks that match the exact appliance or system and its official guide.
-
Check 1
Leave the dryer off and look from a safe position for smoke, a burning or gas odor, sparks, a hot or damaged cord or plug, liquid on the controls, unusual cabinet heat, or a breaker that trips again.
Expected result: Record whether the console is blank, whether any indicator is lit, whether the drum is warm or moving, and whether any odor, smoke, spark, heat, or repeat trip is present.
Next step: For smoke, sparks, burning odor, abnormal heat, a damaged cord, or repeated tripping, stop using the dryer, avoid unsafe switching or opening it, and arrange appropriate emergency, electrical, gas, or qualified appliance help from a safe location. Otherwise continue with the dryer unplugged only when a manual-directed visual check requires it.
Stop if: Do not retry the dryer, repeatedly reset a breaker, touch a hot or damaged plug, or operate it with gas odor, smoke, sparks, or uncontrolled heat.
Why this matters
Why: A hazard symptom changes this from a routine no-start check to a fire, gas, or electrical safety event. A normal-looking dryer can proceed only when there is no immediate hazard.
-
Check 2
Determine whether the console is completely blank or responds to controls. Without opening the dryer, inspect that the plug is fully seated and that the accessible receptacle has not been switched off; if the receptacle is uncertain, use a simple lamp at the receptacle only when it can be done without touching damaged equipment.
Expected result: Note whether the lamp or another known-good appliance works, whether the dryer display returns, and whether an accessible breaker or fuse appears tripped. For an electric dryer, remember that the appliance uses two supply legs; a gas dryer still needs electrical power for controls and motor.
Next step: If there is no supply, do not remove covers or inspect terminals; arrange a qualified electrician or appliance technician. If the supply is normal and the console is lit, continue to the door and control checks.
Stop if: Do not measure or probe live voltage, remove the terminal cover, use an extension cord, bypass a fuse, or keep resetting a breaker that trips.
Why this matters
Why: A blank dryer with no supply at the receptacle points to the house circuit, receptacle, cord, or installation. A lit console points away from a total power loss and toward door, controls, Start, cycle, or internal service causes.
-
Check 3
Open and close the door normally, remove any garment caught at the seal or latch, and make sure the door closes fully without forcing it. Do not reach into a moving or hot drum.
Expected result: Note whether the latch engages, whether the door indicator changes, whether the drum is empty or overloaded, and whether the dryer starts after the door is closed normally.
Next step: Remove only an accessible obstruction and close the door once. If the latch still will not engage or the dryer does not respond, leave it off and report the door behavior to a qualified technician.
Stop if: Do not tape, hold, or bypass the door switch, force the door, or continue if the door is damaged, the drum is unexpectedly hot, or an internal part is exposed.
Why this matters
Why: Roper and Whirlpool guidance identify an unclosed door or an obstruction at the latch as a no-start condition. A door that will not latch, a loose hinge, or a dryer that remains dead with a properly closed door needs service diagnosis.
-
Check 4
Select a normal, documented cycle and hold PUSH TO START or Start for the period stated in the exact Roper manual; check for Control Lock, a delayed or special cycle, or moisture on a touch panel before trying once.
Expected result: Record whether the controls respond, whether a lock indicator is shown, whether the cycle changes, whether a beep or error appears, and whether the drum begins moving only after a firm Start hold.
Next step: Dry an accessible touch surface, release Control Lock only with the manual's documented control, cancel an unintended delay or special cycle once, then try one ordinary cycle. If the console stays unresponsive or the symptom returns, arrange service.
Stop if: Do not use undocumented key combinations, repeatedly cancel and restart, bypass a lock, or continue if the dryer starts and then becomes unusually hot, noisy, or smoky.
Why this matters
Why: Roper guides say the Start control may need to be pressed firmly or held until the drum moves, while Whirlpool guidance notes that Control Lock, a damp touch panel, or an unsuitable cycle can make the dryer appear not to start. The exact key sequence is model-specific.
-
Check 5
If the dryer starts briefly, stops, or had recently run hot, inspect only the user-accessible lint screen, load size, exterior exhaust hood, and visible vent path for lint, a crushed section, or a blocked flap; clean them only as the model guide permits.
Expected result: Note whether the lint screen is present and clean, whether the load is tightly packed, whether air exits the exterior hood, and whether the cabinet or laundry area is unusually hot. Do not run the dryer with a loose, missing, or damaged screen.
Next step: Correct an accessible load, lint, or exhaust obstruction and allow the dryer to cool fully. If no-start or stopping continues, or airflow remains weak, leave the dryer off and request vent and appliance service.
Stop if: Stop immediately for smoke, burning odor, abnormal heat, sparks, a damaged vent or cord, or repeated thermal stops. Do not bypass a thermal device or operate without the lint screen.
Why this matters
Why: Roper guides connect poor airflow, a clogged hood or vent, an oversized load, and a blocked or missing lint screen with poor operation or overheating. These observations can explain heat-protection stops but cannot identify an internal component.
-
Check 6
After one safe correction, make one attended start attempt on a normal cycle and stop if the dryer does not behave normally; collect the exact model number from the area inside the door and the sequence of symptoms.
Expected result: Record whether the console stays on, the motor and drum start, the dryer stops normally, the no-start condition returns, or a breaker, code, odor, or heat symptom appears.
Next step: Arrange Roper-authorized or qualified appliance service, or an electrician for a supply fault, and provide the model, fuel type, blank/lit console state, breaker behavior, door state, Start response, load, airflow, and any hazard symptoms.
Stop if: Do not make additional reset attempts, open the cabinet, access wiring or gas parts, or continue a test run after smoke, odor, sparks, abnormal heat, a hot cord, or repeated tripping.
Why this matters
Why: A normal start after a door, control, or accessible airflow correction supports that user-level cause. A persistent blank console, failed Start response, failed latch, immediate stop, or repeat trip requires diagnosis of supply, motor, control, thermal, or other internal circuits.
Use your observations
Decision map
Find the observation that best matches what you see, then follow the next safe action.
-
PATH 01Safety boundary
What you see
Smoke, burning or gas odor, sparks, a hot or damaged cord, abnormal heat, liquid on controls, or a breaker that trips again is present.
Do this next
Stop using the dryer, avoid flames and unsafe switching, leave the area if needed, and contact appropriate emergency, gas, electrical, or qualified appliance help from a safe location.
Why this path and its safety boundary
Why it matters: This is a fire, gas, or electrical safety event, not a routine no-start symptom.
Safety stop: Do not relight, run another cycle, open panels, touch damaged wiring, or repeatedly reset power.
-
PATH 02Safety boundary
What you see
The dryer console is blank and an accessible receptacle or breaker check does not restore normal supply.
Do this next
Leave the dryer disconnected as appropriate and arrange a qualified electrician or appliance technician; obtain the exact model manual before any model-specific service.
Why this path and its safety boundary
Why it matters: The cause may be the house circuit, one side of an electric dryer's supply, cord, receptacle, or an internal power path.
Safety stop: Do not probe the receptacle, open the terminal block, replace an unknown fuse, or use an extension cord.
-
PATH 03Safety boundary
What you see
The console is lit, the door closes normally, and there is no hazard, but the drum does not start after one correct cycle selection and Start hold.
Do this next
Check the exact manual for Control Lock and Start timing, then stop and arrange service if the response does not change.
Why this path and its safety boundary
Why it matters: The door switch, control lock, Start input, motor circuit, or another internal control or safety circuit may be involved.
Safety stop: Do not bypass the door switch or lock, open the cabinet, or keep restarting the motor.
-
PATH 04Safety boundary
What you see
The drum starts but the dryer stops early, will not restart until cool, or the cabinet/laundry area becomes unusually hot.
Do this next
Clean the user-accessible lint screen and exterior hood, correct the load and visible vent restriction, allow a full cool-down, and request service if the symptom returns.
Why this path and its safety boundary
Why it matters: Restricted exhaust, lint, an overloaded drum, or a thermal or internal fault is possible; airflow observations do not prove a particular part.
Safety stop: Stop for smoke, odor, sparks, abnormal heat, or repeated thermal stops. Never bypass a thermal safety device or operate without the lint screen.
-
PATH 05Safety boundary
What you see
A Roper gas dryer has controls and motor activity but no heat, or any gas odor is present.
Do this next
For no heat without odor, use the exact gas-model manual and request qualified appliance service if the supply and user settings are normal. For gas odor, stop, avoid flames and electrical switching, leave if needed, and contact gas emergency help from safety.
Why this path and its safety boundary
Why it matters: No heat can involve the gas supply or ignition path, but gas odor is an immediate safety issue rather than a troubleshooting invitation.
Safety stop: Do not relight, search for a leak, remove gas parts, or run another cycle when gas odor is present.
Helpful context
Understand the symptom
Start by separating a dead dryer from a dryer that has power
A blank console and a lit console lead to different checks. A completely blank dryer can have a supply, plug, breaker, fuse, or installation problem. If the display or indicators work but the drum stays still, the door, cycle selection, Start input, lock state, or an internal motor or safety circuit becomes more plausible. Roper controls vary by model, so use the manual for the full model number found on the label inside the door area.
Electric and gas Roper dryers do not have identical power paths
An electric dryer needs its specified 240-volt supply and may use two breakers or fuses; a gas dryer uses gas for heat but still relies on electrical power for the motor and controls. A breaker that looks on can still be the reason an electric dryer will not run if one side has tripped. Reset an accessible breaker only once when there is no smell, heat, smoke, spark, or visible damage. Persistent trips are an electrician or appliance-technician issue, not a reason to open the dryer.
Airflow can explain a stop, but it does not justify bypassing a safety device
Lint at the screen, a blocked exterior hood, a crushed vent, or a large or tightly packed load can reduce drying airflow and contribute to heat protection. Clean only user-accessible lint and exhaust areas as the model guide describes, and do not run the dryer with a missing, damaged, or loose lint screen. If the dryer is unusually hot or repeatedly stops, leave it off and have the vent and appliance inspected.
Safety boundary
Stop conditions
- Stop immediately for smoke, burning or gas odor, sparks, a hot or damaged cord or plug, liquid on controls, abnormal heat, or a breaker that trips again.
- Do not open the cabinet or terminal block, probe live wiring, bypass a door, lock, fuse, thermal, or gas safety device, or use an extension cord.
- Do not repeatedly reset a breaker, power-cycle the dryer, or continue a cycle after a thermal stop, uncontrolled heat, odor, smoke, or spark.
- Do not operate with a missing, loose, damaged, or blocked lint screen, and do not use sharp tools or direct heat to clear a vent or frozen obstruction.
- Arrange qualified service when the console remains blank with normal house supply, the door will not latch, Start remains unresponsive, the motor stops repeatedly, or the dryer restarts only after cooling.
When checks do not resolve it
Need a professional?
Arrange Roper-authorized or qualified appliance service when the dryer remains blank after an accessible supply check, the door does not latch, the controls remain unresponsive, the drum will not start after one model-correct Start attempt, or the dryer starts and then stops repeatedly. Use a qualified electrician for a receptacle, cord, supply, or recurring breaker issue. Treat gas odor, smoke, sparks, burning odor, abnormal heat, or a hot/damaged cord as immediate safety escalations.
Safety scope: This article supports ordinary-access observations, a normal door closure, model-documented Start or Control Lock actions, and user-accessible lint/exhaust care only. Do not access live wiring, terminal blocks, motor, thermal devices, control boards, gas connections, or door interlocks.
Common questions
FAQ
Why is my Roper dryer completely blank?
Start by separating a dead console from a dryer whose controls light up. Check only the accessible plug, receptacle, and breaker/fuse state; an electric dryer can use two supply legs, while a gas dryer still needs electricity for its controls and motor. If the receptacle is not powered, a breaker trips again, or the cord is hot or damaged, stop and use a qualified electrician or appliance technician. Do not open the terminal block.
Why does my Roper dryer have power but not start?
Close the door normally, remove any accessible obstruction, select a normal documented cycle, and hold PUSH TO START for the period stated in the exact model manual. Check for Control Lock, a damp touch surface, or an unintended delay/special cycle. If the door will not latch or the drum remains still after one correct attempt, leave it off and arrange service rather than bypassing the door switch.
Can a blocked vent make a Roper dryer stop?
Yes, lint, a blocked exterior hood, a crushed vent, or an overloaded drum can reduce airflow and contribute to overheating or repeated stopping. Clean only user-accessible lint and exhaust areas as the Roper guide permits, and never run with a missing, loose, or damaged lint screen. A dryer that runs hot or stops again needs qualified vent and appliance inspection.
Should I keep resetting the breaker when my Roper dryer will not turn on?
No. An accessible breaker may be reset once only when there is no odor, heat, smoke, spark, visible damage, or repeat trip and the model guidance supports it. If it trips again, leave the dryer off and arrange qualified electrical or appliance service. Do not use an extension cord or open the dryer to investigate.
When should I stop troubleshooting a Roper dryer no-start problem?
Stop immediately for smoke, burning or gas odor, sparks, a hot or damaged cord, abnormal heat, liquid on controls, or a breaker that trips again. Do not bypass a door, lock, fuse, thermal, or gas safety device, and do not open the cabinet. Give the technician the exact model, blank or lit console state, Start response, door behavior, breaker observations, airflow, and any hazard symptoms.
Read the exact guide
Official sources
- Roper Manuals and GuidesRoper Appliances · Use the exact model number; the page explains where to find a dryer model number and does not define universal dryer controls.
- No Power - Electric DryerWhirlpool Product Help · Cross-reference for electric-dryer power safety; do not infer Roper model-specific wiring or service instructions.
- Owner Support | Roper AppliancesRoper Appliances · Brand-level support navigation; use the exact dryer model manual for controls and troubleshooting details.
- Roper RED4516FW Use and Care GuideRoper Appliances · Specific RED4516FW electric-dryer guide; controls, requirements, and code behavior may differ on another Roper model.
- Controls are Not Working - DryerWhirlpool Product Help · Cross-reference for common control behavior; Roper labels and lock sequence remain model-specific.
- Not Starting or Not Operating - DryerWhirlpool Product Help · Cross-reference only; use the exact Roper manual for Roper-specific labels and timing.
- Roper RGD4516FW Use and Care GuideRoper Appliances · Specific RGD4516FW gas-dryer guide; do not generalize its exact controls or parts to another Roper model.
- Dryer Not Starting or No OperationWhirlpool Product Help · General manufacturer support reference, not a substitute for the exact Roper model guide.
Community feedback
Share a repair observation
Share a plain-text repair observation. Accepted observations are published automatically; this page may take a moment to update.