
On this page
Start here
Quick answer
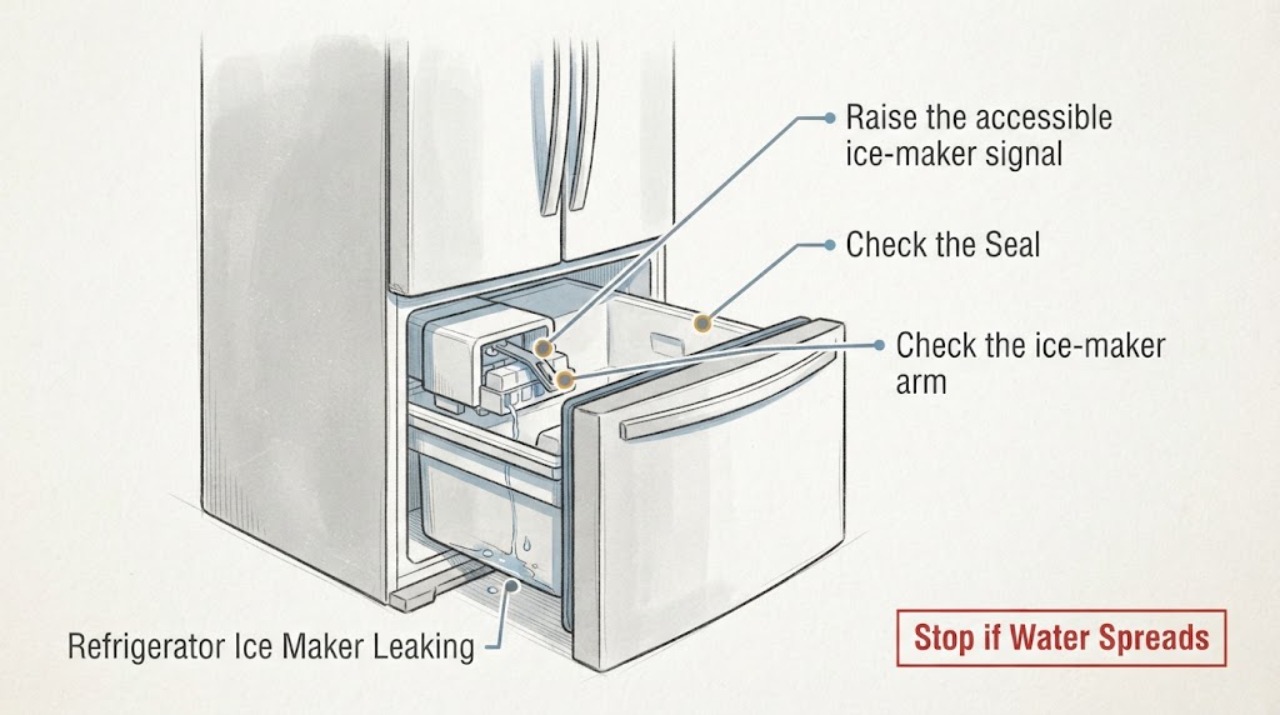
If water is pooling or freezing around a Viking ice maker in a freezer drawer, raise the accessible ice-maker arm to stop ice production and shut off the ice-maker water supply if the leak continues. After the area is safe and dry, check the accessible water line for leaks, confirm the arm is in the intended on position when testing, and verify that the freezer is cold enough to make ice. A returning leak, a leak from an inaccessible connection, or water near electrical parts needs authorized Viking service; do not force the arm or dismantle the water system.
Work through in order
Diagnostic checks
Use only checks that match the exact appliance or system and its official guide.
-
Check 1
Raise the accessible ice-maker signal arm to the off position and, if water is still entering or pooling, close the refrigerator's ice-maker water supply from the accessible shutoff.
Expected result: The leak stops immediately, slows after residual ice melts, or continues even with the ice maker stopped and its water supply closed.
Next step: Leave ice production off while the area is cleaned and inspected. If water continues with the supply closed, stop using the affected water path and arrange service rather than opening the valve or ice-maker assembly.
Why this matters
Why: Stopping the arm and water supply separates an active ice-maker fill problem from water that is already present or coming from another accessible path.
-
Check 2
With the water supply closed and the drawer area dry, inspect only the visible water tubing and connections around the refrigerator for fresh droplets or a wet joint.
Expected result: The accessible line or connection is wet, or the visible water path is dry while the freezer drawer and ice maker remain wet.
Next step: Keep the water supply off for a wet connection and obtain qualified appliance service. Do not tighten, cut, or replace tubing without the exact model installation instructions.
Why this matters
Why: A wet accessible connection points to the supply path; a dry exterior with water concentrated at the ice maker leaves the internal fill path unresolved and does not identify a failed part.
-
Check 3
Check the ice-maker arm from the front and confirm it moves only through its normal stop positions; when testing is appropriate, verify it is down in the on position and that nothing is stored in or pressing on the ice bucket.
Expected result: The arm is raised, jammed, forced past a stop, or the bucket contains an obstruction; alternatively, the arm and bucket are normal.
Next step: Correct only an obvious placement issue without force, then keep the water supply controlled and observe one normal fill. If the arm is damaged or the leak returns, stop testing and arrange Viking service.
Why this matters
Why: An off or obstructed arm can stop production, while a damaged or forced mechanism needs service. A normal arm does not by itself rule out a water-path leak.
-
Check 4
Verify that the freezer is reaching a temperature cold enough for ice production and allow the freezer to stabilize after a temperature adjustment before judging the next batch.
Expected result: The freezer is not cold enough, has just been adjusted or restarted, or is cold enough but the leak recurs during ice production.
Next step: Keep the ice maker off if water is escaping, allow the documented stabilization period after a safe setting correction, and escalate a recurring leak rather than repeatedly cycling the fill.
Why this matters
Why: Viking's manual treats insufficient freezer temperature as a reason for ice-maker performance problems and advises waiting for stabilization; it does not make temperature alone a diagnosis for a water leak.
-
Check 5
Record the full model and serial numbers, the leak location, whether it occurs during a fill, and what happened after the arm and water supply were turned off.
Expected result: The leak is resolved after the external correction, or it returns from the ice-maker area or an inaccessible connection.
Next step: Contact an authorized Viking service agency for a returning or inaccessible leak. Keep the ice maker and its water supply off until the service decision is made.
Why this matters
Why: A repeatable leak pattern and model identity give an authorized technician the information needed to select the correct Viking manual and service path; they do not prove a specific valve or ice-maker failure.
Use your observations
Decision map
Find the observation that best matches what you see, then follow the next safe action.
-
PATH 01Next step
What you see
The leak stops when the ice-maker arm is raised and the ice-maker water supply is closed.
Do this next
Leave the ice maker off, dry the drawer, and have an authorized Viking technician inspect the exact model's fill path if the leak returns.
Why this path and its safety boundary
Why it matters: The event is tied to the ice-maker water path or an active fill rather than a general refrigerator leak, but the failed component is not identified by this observation.
-
PATH 02Next step
What you see
A visible supply connection is wet while the ice maker is off.
Do this next
Keep the water supply closed and arrange qualified appliance service; do not dismantle the connection or substitute tubing without the exact installation instructions.
Why this path and its safety boundary
Why it matters: The accessible water connection is the immediate leak location and continued water flow could cause property damage.
-
PATH 03Next step
What you see
The accessible water path is dry, the freezer is cold enough, and water returns from the ice-maker area during a fill.
Do this next
Keep the ice maker and water supply off and contact authorized Viking service with the model, serial number, leak timing, and photographs of the drawer area.
Why this path and its safety boundary
Why it matters: The remaining issue is inside the model-specific ice-maker or fill path, and the manual's external checks cannot identify the part safely.
-
PATH 04Next step
What you see
Water reaches electrical parts, the cabinet or cord is damaged, the breaker trips, or the leak cannot be isolated from a safe dry position.
Do this next
Stop using the refrigerator and isolate power or water only from a safe position, then obtain qualified service. Do not open covers or perform live electrical or sealed-system work.
Why this path and its safety boundary
Why it matters: The safety risk takes priority over ice-maker troubleshooting.
Helpful context
Understand the symptom
A leak in the freezer drawer can be leftover meltwater, an external supply-line leak, or water entering the ice-maker path during a fill. The opened Viking manual covers built-in bottom-freezer and side-by-side refrigerator families, so the checks below stay at that family level. The exact refrigerator model still controls the location of the shutoff and the service procedure.
Keep the ice maker stopped while water is escaping. Work only from accessible, dry areas. Do not force the signal arm, chip ice with a sharp object, remove a water valve, or open electrical covers to chase the leak.
When checks do not resolve it
Need a professional?
An authorized Viking appliance technician should identify the exact refrigerator model, inspect the ice-maker water path and connections, and select any replacement component from the matching service documentation. Do not infer a valve or ice-maker replacement from water in the drawer alone.
Common questions
FAQ
Should I keep using the Viking ice maker if water is freezing in the freezer drawer?
No. Raise the ice-maker arm and close the ice-maker water supply if water is still entering. Clean up only from a safe, dry position and keep the ice maker off until the leak source is identified or service is arranged.
Does water in the ice drawer prove that the ice-maker valve is bad?
No. Water in the drawer can come from more than one point in the water path. Viking's family manual supports checking the accessible water line and freezer conditions, but a leak in the ice-maker area requires exact-model service diagnosis before selecting a part.
What should I give Viking service?
Provide the full model and serial numbers, where the water appears, whether it happens during a fill, whether the leak stops with the arm raised and water supply closed, and photographs taken from a safe dry position.
Read the exact guide
Official sources
- Professional/Custom Panel Built-In Bottom-Freezer and Side-by-Side Refrigerator-Freezer Use & Care ManualViking Range, LLC · Opened Viking official use-and-care manual for the built-in bottom-freezer and side-by-side family. The task gives no exact model, so the guidance is limited to its documented family-level ice-maker and water-path checks; it does not establish an exact part or internal repair procedure.
Community feedback
Share a repair observation
Share a plain-text repair observation. Accepted observations are published automatically; this page may take a moment to update.