
On this page
Start here
Quick answer
Keep the door open while checking whether the latch and lock operate smoothly, then close it gently and observe where the latch or bolt meets the strike. Note any rubbing, a shifted gap, a loose-looking hinge, a door that sags, or a change with season or humidity. Do not force the handle, pry the door, drill, pick or bypass the lock, cut the jamb, remove hardware, or make a destructive adjustment. If the door can trap someone, will not release normally, or the frame or hardware is damaged, keep the area safe and call a qualified locksmith or door professional; otherwise provide the observed contact point and gap pattern for a normal alignment repair.
Before you begin
Safety first
- Use gentle observation only. Do not pick, bypass, pry, drill, cut, force, remove hardware, deepen a jamb, or make a destructive alignment adjustment. Keep egress clear.
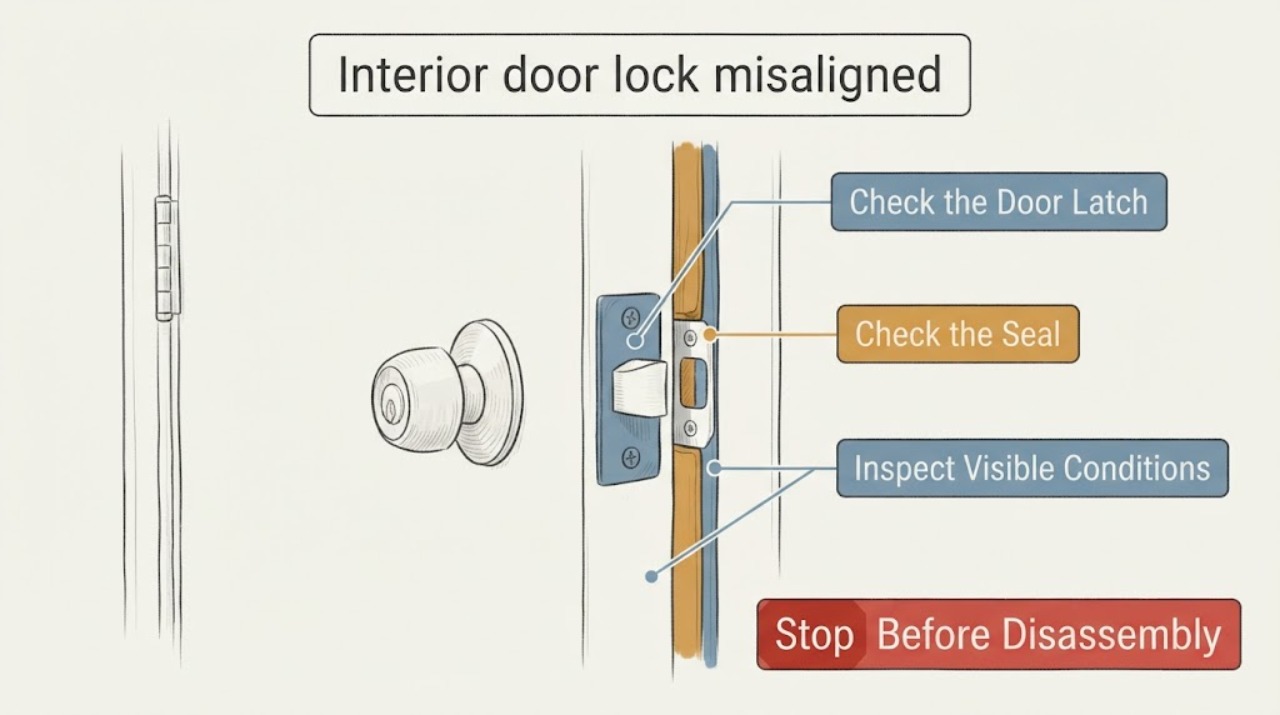
Work through in order
Diagnostic checks
Use only checks that match the exact appliance or system and its official guide.
-
Check 1
With the door fully open and people clear of the swing, operate the knob, lever, or thumbturn normally and observe whether the latch and lock extend and retract smoothly without unusual scraping or resistance.
Expected result: The latch works smoothly with the door open, or it binds, fails to retract, or feels abnormal even when open.
Next step: If operation is smooth, continue only with a gentle closed-door observation. If it binds while open, stop using force and arrange locksmith or hardware service.
Stop if: Stop if the handle or lock jams, the latch does not retract normally, hardware loosens, or the door could swing into someone.
Why this matters
Why: Smooth open-door operation points toward the door-to-frame or strike relationship; binding with the door open points toward the lock or latch hardware itself.
-
Check 2
Close the door gently without pushing, pulling, lifting, or slamming it, and observe whether the latch enters the strike opening, touches an edge, sits above or below it, or misses it entirely.
Expected result: The latch catches cleanly, rubs one side or the top/bottom edge, requires pressure to catch, or misses the strike.
Next step: Record the contact point and keep the door in a safe position; request a locksmith or door professional to assess alignment before any adjustment.
Stop if: Stop if the door resists, the latch remains partly engaged, the lock cannot release normally, or anyone could become trapped.
Why this matters
Why: The contact direction identifies an alignment clue, while pressure or a miss means the door should not be forced because the latch may not secure reliably.
-
Check 3
From both sides with the door open and then gently closed, look at the visible gap along the latch edge, the strike plate position, and any fresh rub or paint marks; do not remove the strike or deepen the jamb opening.
Expected result: The gap is even, wider or narrower at one end, the strike appears shifted relative to the latch, or visible rub marks show one-sided contact.
Next step: Photograph or note the direction of the gap and contact, then provide it to a professional for a non-destructive alignment plan.
Stop if: Stop if the frame is cracked, the strike is loose, the door edge is splintering, or closer inspection would require tools or hardware removal.
Why this matters
Why: A changed gap or one-sided mark can indicate sag, frame movement, swelling, or strike placement, but it does not show which correction is safe or compatible.
-
Check 4
With the door open and supported by its normal hinges, look at the visible hinge leaves, gaps around the hinge edge, and the door's vertical line; do not lift the door, tighten or remove screws, or pull on the hinges.
Expected result: Hinges appear seated and the gaps are consistent, or a hinge looks loose, shifted, bent, or accompanied by a sagging door edge.
Next step: Keep the door from being slammed and request a door or locksmith professional to inspect the hinge and frame relationship.
Stop if: Stop if the door is dropping, the hinge is pulling from the frame, the frame is splitting, or the door could fall or trap someone.
Why this matters
Why: Visible hinge movement or a sagging edge can change latch-to-strike alignment, but hinge appearance alone does not establish a safe repair.
-
Check 5
Record whether the latch problem appears only in humid, cold, or warm periods, after a recent door or frame change, or at all times; compare only normal gentle operation and do not force the door to reproduce the issue.
Expected result: The issue is seasonal or recent, or it is constant regardless of weather and recent changes.
Next step: Give the timing and recent-change history to the professional and avoid destructive adjustment or bypass attempts.
Stop if: Stop if the door will not release normally, the room could become inaccessible, or further testing requires force.
Why this matters
Why: A seasonal pattern can be consistent with temporary movement or swelling, while a constant or sudden problem can point to hardware, frame, or installation change; neither establishes the cause alone.
Use your observations
Decision map
Find the observation that best matches what you see, then follow the next safe action.
-
PATH 01Safety boundary
What you see
The latch operates smoothly with the door open but rubs or misses when the door is gently closed.
Do this next
Treat it as an alignment clue and request a locksmith or door professional to assess the strike, gap, hinges, and frame.
Why this path and its safety boundary
Safety stop: Do not push, pull, lift, slam, pry, or drill the door or jamb to make the latch catch.
-
PATH 02Safety boundary
What you see
The latch binds or fails even with the door open.
Do this next
Keep the lock out of service and arrange hardware or locksmith assessment for the latch or lock body.
Why this path and its safety boundary
Safety stop: Do not disassemble, pick, bypass, or force the lock.
-
PATH 03Safety boundary
What you see
The visible gap changes, the hinge side sags, or a hinge or frame appears loose or damaged.
Do this next
Request a door professional to evaluate the hinge and frame relationship before any strike adjustment.
Why this path and its safety boundary
Safety stop: Do not lift the door, remove hinges, tighten unknown hardware, or use the door if it can fall or trap someone.
-
PATH 04Safety boundary
What you see
The issue appears only during certain seasons or humidity conditions.
Do this next
Record the conditions and schedule a normal alignment assessment while the problem is visible; do not make a permanent cut or forced adjustment based on one season.
Why this path and its safety boundary
Safety stop: Stop if the door will not release or close safely.
-
PATH 05Safety boundary
What you see
The door is required for privacy, accessibility, fire separation, or safe egress and cannot be secured or released normally.
Do this next
Keep occupants safe and request prompt qualified locksmith or door service; use an appropriate temporary safety plan that does not block egress.
Why this path and its safety boundary
Safety stop: Do not bypass the lock, block the doorway, or leave someone dependent on a jammed door.
Helpful context
Understand the symptom
What misalignment can look like
A latch that works with the door open but rubs or misses the strike when closed points toward door-to-frame alignment. A sagging hinge side, seasonal swelling, a changed gap, a thick seal, or a shifted strike can each alter that relationship. The visible symptom does not establish which component needs adjustment.
Use observation before adjustment
Keep the door open for the first functional check and close it only gently. Look at visible contact marks, gaps, hinge position, and strike location without removing screws or applying force. A locksmith or door professional can make a compatible adjustment after the cause and hardware type are identified.
When to call
Give the professional the door type, whether the latch works open, the exact point where it rubs or misses, whether the handle needs pressure, the visible hinge and gap condition, and whether the issue changes with weather or season. State if the door is a privacy door, a fire-rated or special-use door, or a room that must remain accessible.
Only after diagnosis
Potential parts
- strike-plate
Consider only if a professional confirms that the strike is damaged, incompatible, or the correct alignment solution after checking the door and frame.
Confirm the latch type, strike dimensions, corner shape, screw pattern, and jamb preparation; do not enlarge the opening to force fitment. - door-hinge-screws
Consider only if a professional identifies loose, damaged, or incorrect hinge fasteners as the cause of sag or movement.
Confirm hinge, frame, and screw fit and length for the specific door; do not substitute fasteners without checking the frame and door construction. - door-latch
Consider only if the latch binds or fails with the door open and a professional confirms hardware failure rather than alignment.
Confirm backset, faceplate, corner style, spindle interface, and door preparation for the lockset; avoid mixing incompatible latch and trim components.
When checks do not resolve it
Need a professional?
Arrange locksmith or door service when the latch misses, rubs, requires force, or the problem persists; call promptly when the door cannot release normally, can trap someone, or is part of a required fire or egress route.
Safety scope: Use gentle observation only. Do not pick, bypass, pry, drill, cut, force, remove hardware, deepen a jamb, or make a destructive alignment adjustment. Keep egress clear.
Common questions
FAQ
Why does the latch work with the door open but not closed?
That pattern points toward the door-to-frame or strike relationship, such as a changed gap, sag, swelling, or strike position. Record where it rubs and ask a professional to assess it.
Should I force the handle or push the door until it locks?
No. Force can damage the latch or frame and can leave the door unreliable. Use gentle observation only and arrange qualified service if it does not catch smoothly.
Can seasonal weather cause an interior door lock to misalign?
A seasonal pattern can reflect temporary movement or swelling, but it does not prove the cause. Record when it occurs and have the alignment checked while the problem is present.
Can I drill or cut the strike opening to make it fit?
Not in this workflow. Do not drill, cut, pry, bypass, or remove hardware. A locksmith or door professional can determine a compatible, non-destructive repair path.
Read the exact guide
Official sources
- Support for Latch IssuesKwikset · Supports comparing lock behavior with the door open versus closed and treating latch-strike binding as an alignment clue.
- How do I check door alignment for my smart lock?Kwikset · Supports observing resistance or jamming only when closed and identifying the strike relationship without applying force.
- How to fix a door that won’t latchSchlage · Supports recording seasonal behavior, gap/contact direction, and visible hinge or sag symptoms while keeping destructive adjustments out of this workflow.
Community feedback
Share a repair observation
Share a plain-text repair observation. Accepted observations are published automatically; this page may take a moment to update.