
On this page
Start here
Quick answer
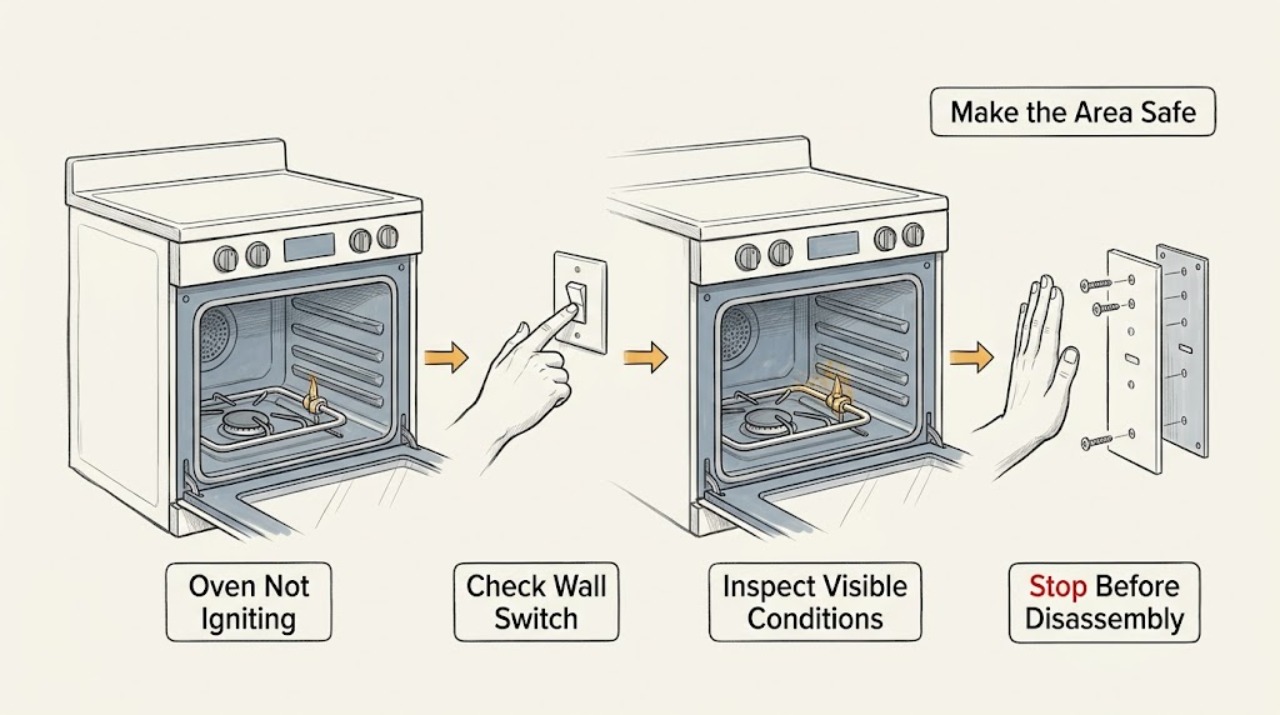
If a Belling gas oven will not ignite, turn the control back to off and stop immediately if you smell unburned gas. When there is no gas odor and the appliance is safe, confirm that the cooker is switched on, the clock or timer is ready for cooking, and the correct oven function is selected. Use the exact model guide for one ignition attempt only; Belling gas-oven guides say to stop the attempt if the burner does not light within the guide's limit, leave the compartment open, and wait before any further attempt. If there is no spark, the burner will not light, the flame will not stay on, or the problem returns, stop using the oven and contact an approved gas or appliance professional. Do not remove the burner cover, adjust gas pressure, or test live wiring.
Work through in order
Diagnostic checks
Use only checks that match the exact appliance or system and its official guide.
-
Check 1
Turn the oven control to off, keep the oven door open, and observe whether there is a gas smell, smoke, unusual heat, or a visible fault in the cord or controls. Do not touch ignition controls if gas odor is present.
Expected result: There is gas odor or another hazard, or the area is free of gas odor and appears safe for a control-only check.
Next step: For gas odor, smoke, damaged wiring, or unusual heat, leave the oven off and use the safety-service branch. Otherwise continue without opening panels or touching the burner assembly.
Why this matters
Why: Unburned gas or an electrical/heat hazard makes repeated ignition unsafe. No odor does not prove that the ignition system is healthy, but it allows the next low-risk observations.
-
Check 2
Check the visible timer and control state: make sure the cooker is switched on at its accessible supply control, the clock is not flashing, any model-specific timer is in its manual or cooking-ready mode, and the intended oven function and temperature are selected.
Expected result: The clock or timer is unset, a delayed or automatic mode is active, the oven function is not selected, or the control state is already correct.
Next step: Correct only a visible timer or function setting using the exact model guide, then make one controlled ignition attempt. If the setting is already correct, continue to the spark observation.
Why this matters
Why: Belling's oven FAQs state that a flashing clock can prevent the oven from functioning and that some timers must be in manual mode. A gas oven can therefore appear not to ignite when it has not been released to cook.
-
Check 3
With no gas odor and the oven controls ready, follow the exact model guide's ignition sequence while watching and listening from a safe position. Observe whether the ignition system produces a spark and whether a burner flame appears; do not hold a knob longer than the guide permits.
Expected result: A spark appears and the burner lights, a spark appears but no flame lights, or there is no spark or ignition response.
Next step: If the burner does not light within the model guide's limit, turn the control off, leave the compartment open as directed, and wait before any further attempt. Do not substitute a match or reach into the burner area unless the exact user guide explicitly and safely authorizes it.
Why this matters
Why: A spark with no flame can indicate a gas-supply or burner-path problem. No spark can indicate an ignition control or electrical supply fault. A flame that appears is not yet proof that the flame-safety device has accepted it.
-
Check 4
If a flame lights, release the control only according to the exact model guide and observe whether the flame remains steady at the selected setting. Keep the oven door and nearby surfaces clear of anything that could catch fire.
Expected result: The flame stays lit, goes out as soon as the control is released, burns unevenly, or produces soot, unusual noise, or an odor.
Next step: Turn the control off if the flame goes out or combustion looks abnormal. Do not repeatedly relight, adjust the burner, or remove its cover; use the gas-service branch.
Why this matters
Why: A flame that will not remain established can involve the flame-safety device, burner condition, gas supply, or an incorrect model-specific ignition sequence. Soot, abnormal combustion, or odor is not a normal adjustment issue for the owner.
-
Check 5
After one successful ignition, observe whether the oven heats and whether the heating indicator or flame remains consistent during a short, supervised period. If ignition failed, do not keep testing; record the sequence, timer state, spark result, and flame behavior instead.
Expected result: The oven heats normally, the flame cycles abnormally, the flame goes out, or the oven remains cold despite a valid control state.
Next step: Turn the oven off after this single observation. If it remains cold, loses the flame, produces soot or odor, or repeats the failure, stop using it and arrange approved gas or appliance service.
Why this matters
Why: Normal heat after correcting a timer or ignition sequence supports a control-state issue. Recurring flame loss or no heat after a valid ignition points to a gas, flame-safety, thermostat, burner, or control fault requiring diagnosis.
-
Check 6
Record the model and serial information, gas or dual-fuel configuration, timer display, whether a spark was heard or seen, whether a flame appeared, and whether it stayed lit. Use the exact guide and provide these observations to the service professional.
Expected result: The same no-ignition symptom recurs, the timer and controls are correct, or ignition requires access behind the control panel or burner area.
Next step: Stop using the oven and contact an approved gas or appliance technician. Do not remove covers, alter gas pressure, bypass the flame-safety device, or perform live electrical diagnosis.
Why this matters
Why: A repeatable failure after the visible controls are ready is evidence for an ignition, gas-flow, flame-safety, or control fault rather than a reason to change parts by guesswork.
Use your observations
Decision map
Find the observation that best matches what you see, then follow the next safe action.
-
PATH 01Next step
What you see
Gas odor, smoke, soot, abnormal combustion, damaged gas or electrical parts, or unusual heat is present.
Do this next
Turn the oven control off if it is safe to do so without operating a switch near gas odor, move away, and contact the local gas emergency service or a qualified gas professional. Do not relight, inspect internally, or operate electrical switches near the odor.
Why this path and its safety boundary
Why it matters: The appliance may present a gas, fire, or electrical hazard.
-
PATH 02Next step
What you see
The clock is flashing, the timer is not in its cooking-ready mode, or the oven function and temperature are not selected.
Do this next
Set the visible control state according to the exact model guide and make one controlled ignition attempt. If it still fails, use the professional-service branch.
Why this path and its safety boundary
Why it matters: The oven may not be enabled to begin heating even though its ignition hardware is intact.
-
PATH 03Next step
What you see
The guide-approved attempt produces no spark, produces a spark without a flame, or lights a flame that goes out when the control is released.
Do this next
Turn the control off and do not repeat attempts beyond the exact guide's limit. Arrange approved gas or appliance service, especially if there is any odor or abnormal combustion.
Why this path and its safety boundary
Why it matters: The observation separates an ignition/electrical response problem from a gas-flow or flame-safety problem, but does not identify a repairable part by itself.
-
PATH 04Next step
What you see
Timer and controls are correct but ignition still fails, the flame will not stay lit, the oven remains cold, or diagnosis requires burner, gas, panel, or electrical access.
Do this next
Stop using the oven and arrange service with an approved gas or appliance professional. Provide the model, serial information, timer state, spark result, and flame behavior; do not open the appliance or perform live testing.
Why this path and its safety boundary
Why it matters: An internal ignition, flame-safety, gas-flow, thermostat, or control fault remains possible.
Helpful context
Understand the symptom
Identify where ignition stops
A Belling gas oven can fail before a spark appears, after a spark but before gas lights, or after a flame lights and then fails to remain established. A flashing or unset timer can also prevent the oven from operating even when the gas side is intact. These observations lead to different next steps, and the exact knob sequence depends on the model.
Gas odor changes the procedure
If you smell gas, do not attempt another ignition, operate electrical switches, or search inside the oven. Move away from the appliance, ventilate only if this can be done without operating a switch, and contact the local gas emergency service or a qualified gas professional from a safe location. For any suspected electrical fault, isolate only from an accessible safe control and use a qualified professional; never open the oven or adjust the gas system yourself.
Only after diagnosis
Potential parts
- ignition electrode or spark module
Consider this category only if an approved technician confirms that the oven's ignition response is absent or defective after the timer, supply, and control state are correct.
Verify the exact model and approved fit before ordering; no universal ignition part compatibility is assumed. - flame-safety sensor or thermocouple
Consider this category only if a qualified gas technician confirms that a flame lights but is not being safely maintained after the model-specific ignition sequence.
Confirm the exact model and gas configuration with approved service before replacement; do not infer a failed sensor from one failed ignition attempt.
When checks do not resolve it
Need a professional?
Contact an approved gas or appliance professional when the oven does not ignite after the single model-guided attempt, the flame will not remain lit, the burner or ignition system needs access, the timer and visible supply are correct but the oven stays cold, or any part of the gas system needs adjustment. Stop immediately for gas odor, smoke, soot, abnormal combustion, damaged wiring, or unusual heat.
Common questions
FAQ
Why does my Belling gas oven spark but not light?
A spark without a flame can reflect a gas-supply or burner-path issue, but it cannot identify a safe owner repair. Turn the control off after the exact guide's bounded attempt, wait as directed, and arrange approved gas service if the burner still will not light.
Why does my Belling oven flame go out when I release the knob?
The flame-safety device may not be accepting the flame, the sequence may not match the model guide, or a gas or burner fault may exist. Do not keep relighting or adjust the burner; turn it off and use qualified gas service.
Can a flashing Belling oven clock stop ignition?
Yes. Belling says a flashing timer display may need the correct time set before the oven will function, and some models require manual timer mode. Use the guide for the exact timer controls before attempting ignition again.
What should I do if I smell gas when my Belling oven will not ignite?
Do not attempt another ignition or operate electrical switches near the odor. Move away, ventilate only without operating a switch if safe, and contact the local gas emergency service or a qualified gas professional. Do not remove panels or burner parts.
Read the exact guide
Official sources
- KENSINGTON User manual - Gas (100 cm)Belling · Belling Kensington gas cooker user manual
- Built In Ovens FAQsBelling · Belling built-in oven timer, gas connection, and control FAQs
- Range Cooker FAQsBelling · Belling range-cooker timer and main-oven operation FAQs
- USER GUIDEBelling · Belling BI602G built-in gas oven user guide
Community feedback
Share a repair observation
Share a plain-text repair observation. Accepted observations are published automatically; this page may take a moment to update.