
On this page
Start here
Quick answer
This guide applies only when the Crosley refrigerator has a built-in automatic ice maker; models without one need the exact model documentation before any accessory is considered. Record the complete model number, then check the ice-maker switch or feeler arm using that model's instructions, the freezer temperature and time since installation, the cold potable-water valve and visible tubing, any model-specific water filter, and whether the ice bin or chute is full or obstructed. A new installation may need 12–24 hours to begin making ice and up to 48 hours to fill the bin. Do not move the ejector, touch the heating element, bypass the feeler arm, reach into the mechanism, disconnect a water line, or remove panels. If the supply and accessible controls are normal but there is still no fill or production, or there is a leak, unusual noise, damage, or an internal fault, leave the ice maker off and arrange qualified Crosley service.
Before you begin
Safety first
- Do not move the ice-maker ejector, touch its heating element while plugged in, bypass the feeler arm or another interlock, reach into the mechanism, chip ice with a sharp tool, disconnect a water line, remove panels, or perform live electrical tests. Stop using the ice maker for a leak, damaged tubing, water near electrical parts, a damaged cord, or unusual internal operation.
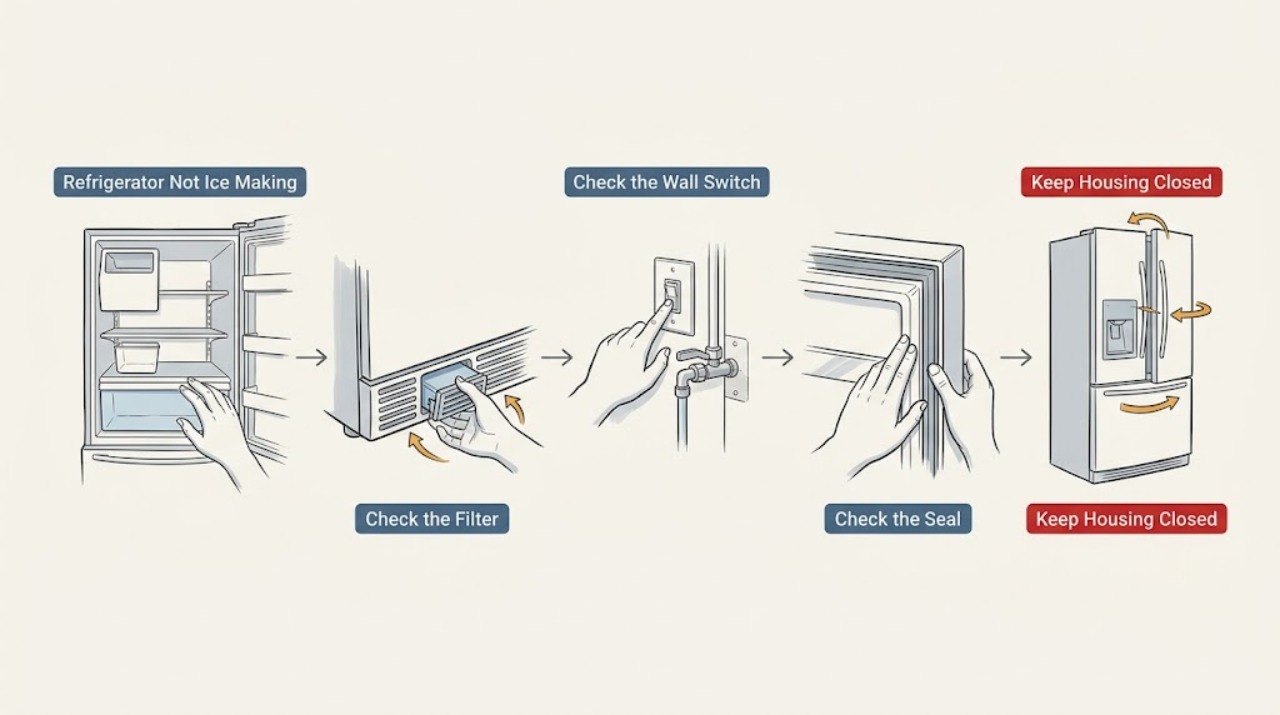
Work through in order
Diagnostic checks
Use only checks that match the exact appliance or system and its official guide.
-
Check 1
Confirm the complete Crosley model number and verify from its product information or Use and Care Guide that the refrigerator has a factory-installed or exact-model-specified automatic ice maker. Note whether the ice maker is in the freezer, whether there is an external dispenser, and whether the model lists a water filter.
Expected result: The refrigerator has a built-in ice maker, has an accessory-only design, or the model identity and feature set are uncertain.
Next step: Continue only with the exact model guide when a built-in ice maker is confirmed. If the feature or model is uncertain, stop ordering parts or changing controls and obtain the model-specific Crosley guide or service assistance.
Why this matters
Why: A built-in ice maker and an accessory kit are different architectures. The switch, feeler arm, filter, bin, and water path vary by model, so an instruction from another Crosley refrigerator may be wrong.
-
Check 2
Use the exact model instructions to check that the ice-maker switch is on or the feeler arm is in its enabled position. Look only at the accessible ice bin and arm path: confirm the bin is not full, the arm is not held up by stored food or ice, and no removable cube is visibly bridging the bin or chute.
Expected result: The ice maker is off, the feeler arm is held up, the bin is full or obstructed, or the setting and accessible bin path appear normal.
Next step: Correct only the accessible condition described by the exact guide and allow the normal harvest cycle to resume. Do not force the arm, move the ejector, touch the heater, reach into the mechanism, or bypass an interlock; if the setting and bin are normal, continue to the time, temperature, and water checks.
Why this matters
Why: An off control, raised arm, full bin, or obstruction can stop an otherwise working automatic ice maker. A normal setting and clear accessible bin make a water, temperature, ice-maker, or internal control problem more likely.
-
Check 3
Consider installation time and freezer condition. If the refrigerator was newly installed, restored after a long shutdown, or recently connected to water, wait through the startup period stated in the exact guide. Check the freezer's normal temperature indication and door sealing without changing controls beyond the model instructions.
Expected result: The unit has had less than the manual's startup period, the freezer is not at its normal cold condition, doors are being opened frequently, or the unit has had adequate time and appears normally cold.
Next step: Allow the documented startup period when appropriate and keep the freezer closed as much as practical. If the freezer does not maintain its normal condition, stop troubleshooting the ice maker and arrange refrigerator service; if it is normally cold after the waiting period, check the water path.
Why this matters
Why: Crosley's refrigerator manual says a new unit may take 12–24 hours to begin making ice and up to 48 hours to fill the bin, with production affected by freezer temperature, room temperature, and door openings. Adequate time with a normally cold freezer makes the water path or ice-maker mechanism more likely.
-
Check 4
Inspect only the accessible cold-water supply: verify the supply valve is open, the visible tubing is not kinked or crushed, and there is no moisture at the visible connection. If the exact model has a water filter, check its model-approved status, seating, and replacement instructions; do not substitute a cartridge by appearance.
Expected result: The valve is closed, tubing is kinked or damaged, a visible connection is wet, the filter is missing or not seated, the filter indicator or service interval applies, or the accessible water path appears normal.
Next step: If there is a leak or damaged tubing, stop using the ice maker, close the water supply only if it is safe to reach, and obtain qualified help. Otherwise follow only the exact model's filter replacement and flushing procedure; never loosen a pressurized connection or open the internal water system.
Why this matters
Why: The ice maker needs a connected cold potable-water supply, and a restriction, filter condition, or leak can prevent filling. A normal-looking exterior does not rule out an internal inlet valve, frozen line, filter head, or pressure fault.
-
Check 5
Check the ice bin and dispenser path without entering the ice-maker mechanism. Look for a full bin, cubes fused together, or a visible chute blockage, and use only the exact model guide's user-accessible bin or chute-clearing method. Do not chip ice with a sharp object or force a stuck component.
Expected result: The bin is full, cubes are joined or bridging the path, a visible chute blockage is present, or the bin and accessible path are clear but no new ice is produced.
Next step: Use the normal model-approved bin procedure and allow the ice maker to cycle. If no new ice appears after the documented time and the supply checks are normal, leave the ice maker off and arrange qualified Crosley service rather than reaching into the mechanism.
Why this matters
Why: The manual notes that production stops when the bin is full and that joined cubes can occur. Clearing an accessible storage obstruction may restore dispensing, but a clear bin with no new ice points back to temperature, water fill, ice-maker, or control diagnosis.
-
Check 6
Stop at the external checks if there is no water fill, a persistent leak, an error or unusual noise, a damaged cord, or a normally cold refrigerator with an enabled ice maker and clear bin that still makes no ice. Record the model number, symptom timing, water/filter observations, and any visible fault for the service call.
Expected result: The symptom persists after the matching accessible check, water is near an electrical area, an internal line or valve is suspected, or the ice-maker mechanism does not operate normally.
Next step: Leave the ice maker off and arrange qualified Crosley service. If water has reached an electrical area or the cord is damaged, isolate power and water only from a safe position and seek qualified electrical or appliance help; do not remove panels or perform live tests.
Why this matters
Why: These patterns are outside a safe user diagnosis and can involve an inlet valve, internal tubing, filter head, wiring, sensor, motor, mold heater, or control. Crosley directs owners to the dealer or the Use and Care Guide for product-specific service support.
Use your observations
Decision map
Find the observation that best matches what you see, then follow the next safe action.
-
PATH 01Next step
What you see
The model has no confirmed built-in automatic ice maker, or the feature and control layout cannot be identified.
Do this next
Obtain the exact model guide or Crosley service assistance before installing an accessory or ordering a part.
Why this path and its safety boundary
Why it matters: A missing or accessory-only ice maker is not the same fault as a built-in unit that stopped producing ice. Brand-level instructions and parts cannot establish the correct fit or procedure.
-
PATH 02Next step
What you see
The built-in ice maker is off, its feeler arm is held up, the bin is full, or the accessible storage path is blocked.
Do this next
Keep the arm and bin path unobstructed and use the exact guide's normal operation. If production does not resume after the documented cycle time, move to the temperature and water branches without touching the mechanism.
Why this path and its safety boundary
Why it matters: Recovery after the documented control or storage correction supports a user-accessible stop condition rather than an internal component failure.
-
PATH 03Next step
What you see
The refrigerator is newly installed or recently reconnected, or the freezer is not yet at its normal operating condition.
Do this next
Allow the exact guide's startup period when appropriate. If the freezer cannot maintain normal operation, arrange refrigerator service; if it is normally cold, inspect the accessible water supply and model-specific filter.
Why this path and its safety boundary
Why it matters: A new unit can legitimately produce no ice during its startup period, while a normally cold freezer after that period makes water fill or ice-maker operation more likely causes.
-
PATH 04Next step
What you see
The ice maker is enabled and the freezer is normally cold, but there is no fill, a filter or supply abnormality, or a visible leak.
Do this next
Stop using the ice maker for leaks or damaged tubing and arrange qualified help. For persistent no-fill with no safe external cause, leave it off and contact Crosley service; do not loosen lines or open panels.
Why this path and its safety boundary
Why it matters: Improvement after a documented supply or filter correction supports a water-path restriction. Persistent no-fill with a normal visible path makes an internal valve, line, filter head, wiring, or ice-maker fault more likely.
-
PATH 05Next step
What you see
The supply, filter status, temperature, settings, and accessible bin are normal, but the built-in ice maker still does not produce ice or operates with unusual noise.
Do this next
Leave the ice maker off and arrange qualified Crosley service. Do not reach into the mechanism, bypass the feeler arm, remove panels, or perform a live electrical test.
Why this path and its safety boundary
Why it matters: The remaining possibilities include internal water valves or tubing, an ice-maker motor or sensor, a heater, wiring, or control. Those components require model-specific diagnosis and can involve water and electrical hazards.
Helpful context
Understand the symptom
A Crosley refrigerator that is not making ice can have a disabled built-in ice maker, a freezer that has not reached the required operating condition, a restricted water path, an incorrectly seated filter on models that use one, or a full or obstructed bin. Start by identifying the complete model number and confirming that the refrigerator actually has an automatic ice maker. Crosley uses more than one refrigerator architecture: a specific side-by-side model lists an exterior ice-and-water dispenser and water filter, while a bottom-mount model lists a factory-installed ice maker in the freezer. The controls, filter, and service procedure therefore cannot be inferred from another model.
Keep the inspection at the user-accessible boundary. Check settings, time, temperature indication, the visible cold-water supply, a model-specific filter, and the removable bin only as the exact manual permits. Do not move the ejector, touch the heater, defeat the feeler arm, reach into the ice-maker mechanism, loosen a water connection, or open an electrical panel. Internal valves, tubing, wiring, sensors, motors, and the ice-maker assembly need qualified service.
When checks do not resolve it
Need a professional?
Arrange qualified Crosley service when the ice maker remains enabled but produces no ice after the exact model's startup period and accessible setting, temperature, water, filter, and bin checks; when there is no fill, a recurring error or unusual noise, a leak, a suspected internal line or valve fault, or any electrical concern. Crosley says appliance service should be obtained through the dealer or the Use and Care Guide, with model-specific support.
Safety scope: Do not move the ice-maker ejector, touch its heating element while plugged in, bypass the feeler arm or another interlock, reach into the mechanism, chip ice with a sharp tool, disconnect a water line, remove panels, or perform live electrical tests. Stop using the ice maker for a leak, damaged tubing, water near electrical parts, a damaged cord, or unusual internal operation.
Have this ready
- Provide the complete Crosley model number, whether the ice maker is factory-installed, the freezer condition and time since installation or water reconnection, switch or feeler-arm position, bin and chute observations, water-valve and tubing observations, filter identity and status if fitted, any leak or noise, and which safe external check changed the symptom.
Common questions
FAQ
How long should a new Crosley refrigerator take to make ice?
Crosley's top-freezer manual says a new refrigerator may take 12–24 hours to begin making ice and up to 48 hours to fill the bin. Freezer temperature, room temperature, and door openings affect production. If the freezer is not reaching its normal condition or there is still no ice after the documented period, arrange service.
What should I check when a Crosley ice maker is not filling with water?
Confirm the exact model has a built-in ice maker, then check its normal enabled setting, the accessible cold-water valve, visible tubing, and any model-specific filter. Do not loosen a water connection or open the refrigerator. Persistent no-fill with a normal visible supply needs qualified service.
Does every Crosley refrigerator use a water filter for ice making?
No feature should be assumed across the brand. Crosley lists a water filter on specific side-by-side models, while other manuals and product architectures differ. Use the complete model number and its guide to determine whether a filter is fitted, which cartridge applies, and how it is serviced.
Is it safe to move the Crosley ice-maker arm or ejector by hand?
Do not move the ejector, touch the heating element, reach into the ice-making mechanism, or defeat the feeler arm. Crosley's manual warns against touching the mechanism while the refrigerator is plugged in. Use only the exact model's normal control and obtain service for a stuck or nonworking mechanism.
Read the exact guide
Official sources
- Use and Care Manual — Top-Freezer RefrigeratorsCrosley · Automatic ice-maker operation, startup timing, feeler-arm and bin behavior, cold-water supply, water-line safety, and service boundary for covered Crosley refrigerators
- CFDMH2257AS — CROSLEY HOME PRODUCTSCrosley · Example of a Crosley refrigerator with a factory-installed ice maker in the freezer
- Customer Service — Crosley Home ProductsCrosley · Finding product-specific appliance service through the dealer or Use and Care Guide
- CRSEH267 — CROSLEY HOME PRODUCTSCrosley · Example of a Crosley refrigerator with an exterior ice-and-water dispenser and water filter
Community feedback
Share a repair observation
Share a plain-text repair observation. Accepted observations are published automatically; this page may take a moment to update.