
On this page
Start here
Quick answer
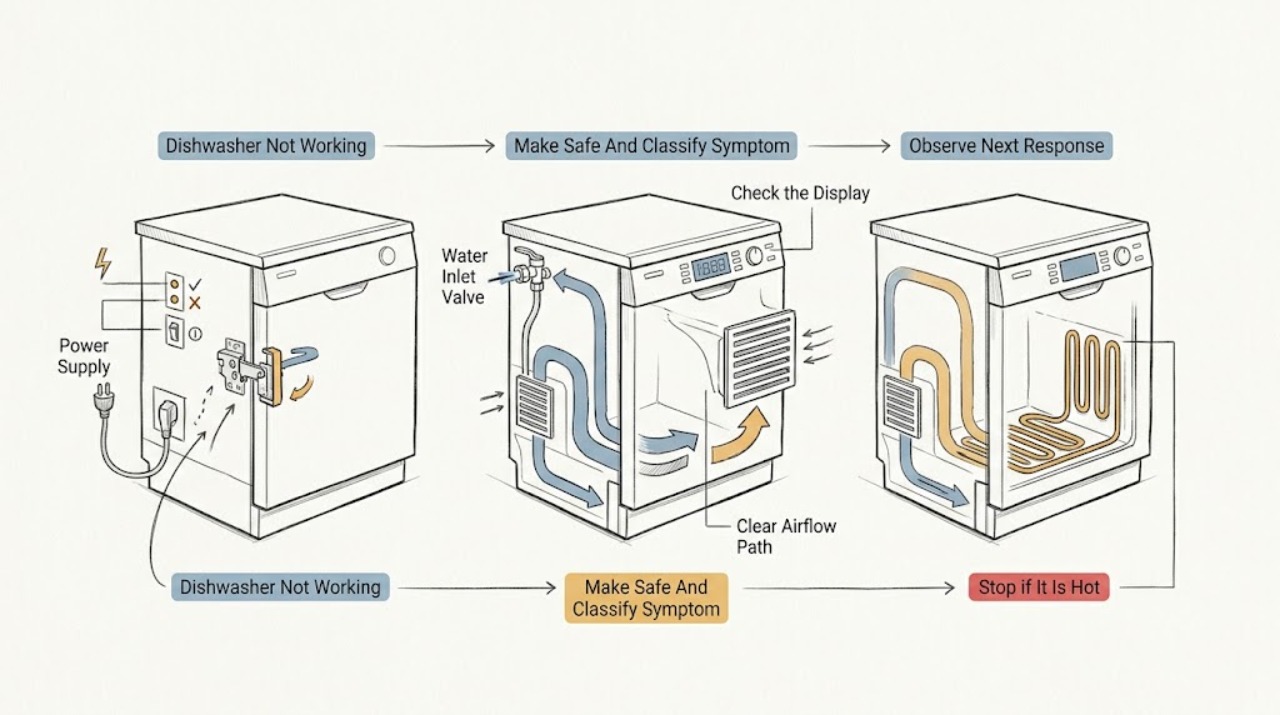
If a Danby dishwasher is not working, first make it safe: stop the cycle, keep hands out of hot water, and isolate power from a dry, safe position before handling the appliance. Decide which symptom you actually have. No lights or response points first to the outlet, breaker, plug, or a door that is not latched; lights on but no cycle points to the selected program, Start/Pause/Cancel control, door latch, or an active fault; a cycle that fills but does not wash or drain points to the water inlet, spray/filter path, drain hose, filter, or pump; and a cycle that stops with cold water or flashing indicators may involve water intake, heating, overflow, or a control fault. Danby's manuals and FAQs identify these as model-dependent checks. Verify only the accessible power, door, water supply, visible hose, filter, spray-arm, loading, and control conditions described by the exact model manual. Do not open the electrical base, bypass the door latch, probe a live circuit, replace a pump, inlet valve, heater, or control, or work under a built-in unit; those repairs require a qualified Danby technician.
Before you begin
Safety first
- The user may stop the cycle, isolate power safely, verify a dry plug and household breaker, close the door, confirm an accessible water supply, clean and refit user-removable filters or spray arms as the exact manual permits, and inspect visible hose or sink conditions. Qualified service must handle the latch switch, float, pump, inlet valve, heater, motor, wiring, control, lower base, live tests, and internal plumbing.
Work through in order
Diagnostic checks
Use only checks that match the exact appliance or system and its official guide.
-
Check 1
Stop the dishwasher and wait for wash action to stop before opening the door. From a dry, safe position, note whether the panel is completely dark, lights respond but Start does not begin a cycle, water enters but the spray or wash action does not start, water remains at the bottom, or the cycle stops with a flashing indicator. Record the exact model and any displayed indication.
Expected result: There is no power or panel response, the panel responds but the cycle will not latch/start, the tub fills but does not wash, the tub will not drain, or the unit stops partway through.
Next step: Follow only the matching branch below. If water is near electrical parts, the cord is damaged, or hot water is uncontrolled, keep the appliance off and arrange qualified service.
Stop if: Do not repeatedly restart a flooded, electrically exposed, or hot appliance to collect more symptoms.
Why this matters
Why: These observations separate supply and door-interlock checks from water intake, wash, drain, heating, overflow, and control branches. The same word ‘not working’ does not identify the same component across Danby models.
-
Check 2
For a dark or non-starting panel, check from a dry position that the plug is fully inserted, the household breaker or fuse has not tripped, and the dishwasher is connected as the exact manual requires. Close the door firmly and check for a rack, dish, utensil, or gasket obstruction. Select a documented program and press the model's Start or Start/Pause/Cancel control once; do not hold or bypass a latch unless the manual explicitly describes a normal user command.
Expected result: The breaker is tripped, the plug or cord is damaged, the door does not latch, the panel lights but no program starts, or the cycle starts after a safe power, door, or control correction.
Next step: Restore only a safe household supply and remove a visible door obstruction. If the breaker trips again, the cord is damaged, or the panel still will not start with a correctly latched door, leave the unit off and call qualified service.
Stop if: Do not reset a breaker repeatedly, hold the door switch closed, remove the console, or test the outlet or dishwasher wiring while wet or energized.
Why this matters
Why: Danby's manual lists a breaker, power surge, incompletely inserted plug, and incorrectly closed door under no-power symptoms. A door that does not latch can prevent operation even when the display works; a correct latch with no response moves suspicion toward a control or internal electrical fault.
-
Check 3
If the program starts but no water enters, confirm that the household or faucet water supply is open and that a visible inlet hose is not kinked. For a portable model, verify the faucet adapter and drain arrangement only as the manual shows. Do not remove an inlet valve, reach behind a built-in unit, or open a connection under pressure.
Expected result: The water supply is closed, the hose or adapter is visibly kinked or mis-seated, an intake indicator flashes, water enters normally, or the unit still does not fill after the accessible supply check.
Next step: Correct only the visible supply or adapter condition and try the exact manual's normal start procedure once. If intake remains absent, intermittent, or associated with an overflow indication, close the water supply when appropriate and arrange service.
Stop if: Do not force a faucet fitting, bypass a float or inlet valve, disconnect internal tubing, or run a cycle with a leaking connection.
Why this matters
Why: A restricted supply or low pressure can prevent a cycle from progressing; the DDW1805EWP manual identifies restricted water intake and low water pressure as an indicator condition. Correcting a visible supply issue is different from diagnosing an inlet valve, float, wiring, or control.
-
Check 4
If the tub fills but washing is weak or stops, turn the dishwasher off and let hot water cool. Remove only the racks or filter and spray arm that the exact manual identifies as user-removable. Rinse the filter, remove loose debris, and ensure dishes do not block spray-arm rotation or the detergent dispenser. Refit every part fully; do not reach below the filter well or remove the circulation pump cover.
Expected result: The filter is clogged, a spray arm is blocked by a dish or debris, the load is excessive, a dispenser cannot open, or the wash path is clear but there is no circulation or the cycle stops.
Next step: Correct the visible loading or filter issue and monitor one normal cycle only if there is no leak or electrical hazard. If the pump remains silent, hums abnormally, or the unit stops with water present, arrange qualified service.
Stop if: Do not run the unit without its filter, force the spray arm, insert tools into the sump, or dismantle the wash pump.
Why this matters
Why: Danby links poor cleaning to overload, blocked spray arms, and a clogged filter. A clear accessible path with no wash action can indicate a circulation pump, motor, water-level, heater, or control fault and is not a reason to probe the pump.
-
Check 5
If clean water remains in the tub or the cycle stops during draining, switch the dishwasher off and inspect only the visible drain hose for a kink or obvious external blockage. Clean the accessible filter as the model manual directs and, where connected to a sink disposal, confirm the sink and disposal drain normally. Do not remove the drain pump, reach under a built-in appliance, or put a hand into standing water without isolating power safely.
Expected result: The drain hose is kinked, the filter is clogged, the sink or disposal is blocked, a drain indicator or error remains, the pump hums but water does not leave, or the tub drains normally after a visible correction.
Next step: Correct only the visible hose, filter, or sink condition, then use the exact manual's cancel/drain command once. If water remains or the pump is abnormal, keep the appliance off and arrange qualified repair.
Stop if: Do not bail water toward the base, dismantle the pump, use a chemical drain opener in the dishwasher, or restart with a suspected electrical leak.
Why this matters
Why: Danby's official drain guidance points to hose kinks or clogs, the filter, a connected disposal, and the drain pump. A clear visible path with persistent standing water makes pump, wiring, check-valve, or control diagnosis more likely and requires service.
-
Check 6
If the dishwasher stops partway through, flashes an indicator, leaves cold water, overflows, leaks, or returns to the same fault after the accessible checks, record which stage stopped and which indicators flashed. Only use a power reset if the exact manual authorizes it and the unit is dry and safe; otherwise leave it disconnected. Arrange Danby service for any internal diagnosis.
Expected result: The model reports restricted intake, heating malfunction, overflow, or another fault; a reset clears the symptom temporarily; the fault returns; or the unit leaks, trips a breaker, or remains full of water.
Next step: Stop using the dishwasher and provide the exact model, indicator pattern, water level, and cycle stage to a qualified technician. Close the water supply for an overflow or inlet leak when safe and isolate power for electrical exposure.
Stop if: Do not bypass the door or float switch, perform live tests, replace the heater or pump, or open the control housing.
Why this matters
Why: The DDW1805EWP manual gives model-specific meanings for some flashing indicators, including intake, heater, and overflow conditions, but those meanings cannot be transferred to another Danby model. A repeat fault can involve the inlet valve, heater, float, pump, sensor, wiring, or control.
Use your observations
Decision map
Find the observation that best matches what you see, then follow the next safe action.
-
PATH 01Safety boundary
What you see
The panel is dark or the unit has no response when a cycle is selected.
Do this next
Check only a safe household supply, plug seating, visible cord condition, and door obstruction. If power is unsafe, a breaker trips again, or the correct door latch produces no response, use qualified service.
Why this path and its safety boundary
Why it matters: A supply, plug, fuse/breaker, surge, door-latch, or control issue is more likely than a drain or wash-path issue. The official manual lists these power and door conditions separately from drain and intake symptoms.
Safety stop: Do not hold the latch closed, remove panels, or reset a tripping breaker repeatedly.
-
PATH 02Safety boundary
What you see
The panel lights, but the chosen program does not start or the cycle stops immediately after the door is closed.
Do this next
Close the door firmly, select the exact manual's program and Start control, and use an authorized reset only once if the unit is dry and safe. Persistent failure needs service.
Why this path and its safety boundary
Why it matters: An incompletely latched or obstructed door, a wrong start/cancel sequence, an active timer or fault state, or a control/latch fault is more likely. The display alone does not prove that the motor, heater, or pump is defective.
Safety stop: Do not bypass a door switch or open the console to inspect wiring.
-
PATH 03Safety boundary
What you see
Water enters but spray action is absent or weak, dishes remain dry/dirty, or the cycle stalls after filling.
Do this next
Turn the unit off, cool the water, clean and refit only accessible filter and spray components, and run one normal cycle if safe. Persistent silence, abnormal hum, cold water, or a stall goes to qualified service.
Why this path and its safety boundary
Why it matters: A blocked filter or spray arm, overload, low water level, circulation pump, motor, heater, or control issue may be involved. Danby supports checking loading, spray arms, filter, and water flow before internal diagnosis.
Safety stop: Do not reach into the sump, run without the filter, or replace a pump or heater from the symptom alone.
-
PATH 04Safety boundary
What you see
The cycle ends or stops with clean water remaining, the drain pump hums without removing water, or a drain indicator persists.
Do this next
Isolate power safely, inspect the visible hose, filter, and sink/disposal route, then use the exact manual's drain/cancel command once. Persistent standing water requires qualified repair.
Why this path and its safety boundary
Why it matters: A kinked/clogged hose, clogged filter, sink/disposal restriction, drain pump, check valve, wiring, or control fault is possible. Danby's public drain guidance names the first three accessible checks and identifies pump malfunction as a service possibility.
Safety stop: Do not dismantle the pump or put hands into standing water while the dishwasher is connected.
-
PATH 05Safety boundary
What you see
The unit flashes a model-specific intake, heating, or overflow indication, leaks, trips a breaker, or stops partway through with an abnormal water level.
Do this next
Stop the cycle, close the water supply for an overflow or inlet leak when safe, isolate power for electrical exposure, and arrange qualified Danby service with the indicator pattern and cycle stage.
Why this path and its safety boundary
Why it matters: The exact model may be reporting restricted intake, a heater fault, overflow, door/latch, inlet valve, float, pump, sensor, wiring, or control trouble. Indicator meanings cannot be generalized across Danby models.
Safety stop: Do not bypass safety switches, run repeated fills, perform live tests, or replace a valve, heater, or control without model-specific diagnosis.
Helpful context
Understand the symptom
Classify the symptom before checking parts
Not working can mean no power, a lit panel that will not start, no water entering, no washing action, no draining, or a cycle that stops partway through. Danby sells countertop, portable, and built-in dishwashers, so the faucet connection, drain routing, controls, and filter access vary. Use the full model number to open the matching Danby manual, then follow the branch that matches what you observe rather than applying a countertop procedure to a built-in unit.
Water, heat, and mains power set the boundary
Stop the cycle before opening the door fully if hot water or spray action is present. Keep water away from the plug, outlet, cord, controls, and floor-level electrical connections. Unplug only from a dry, safe position and do not touch a wet connection. Danby's manual requires grounding and routes service to a qualified technician; do not bypass the door latch, operate with a damaged cord, remove the lower electrical panel, or perform a live test.
A displayed light or sound narrows the branch, not the part
A Danby model may use flashing program indicators for restricted water intake, heating malfunction, or overflow, but indicator meanings are not universal across models. A drain hum, a silent pump, a fill sound, or a cycle stopping does not by itself prove that one component has failed. Record the exact indicators and stage of the cycle, then use the model manual; if the fault remains after the accessible checks, leave the pump, inlet valve, heater, wiring, and control diagnosis to service.
Safety boundary
Stop conditions
- Stop immediately for water near the plug, outlet, cord, controls, or base; isolate power only from a dry, safe position and do not touch wet electrical connections.
- Do not bypass the door latch, float, overflow protection, or any safety switch, and do not run a cycle with a damaged cord, leaking connection, or uncontrolled fill.
- Do not remove the lower electrical panel, console, pump, inlet valve, heater, motor, wiring, or control board, or perform live voltage tests.
- Do not put hands into hot or energized standing water, use chemical drain opener in the dishwasher, or force a spray arm, filter, or hose fitting.
- Do not apply a flashing-indicator meaning, reset sequence, part, or repair procedure from one Danby model to another; verify the exact manual first.
Only after diagnosis
Potential parts
- door latch or door-switch assembly
Consider only after a qualified diagnosis confirms that a correctly aligned and unobstructed door is not signaling closed, preventing a lit panel from starting the cycle.
Confirm the complete Danby model and service procedure; do not bypass or substitute the safety switch. - water inlet valve or inlet hose assembly
Consider only after the external supply, faucet/adapter, and visible hose are correct and service confirms restricted intake or an inlet-valve fault.
Connections and valve fit vary by Danby model; internal water work requires qualified service. - drain pump or drain-path component
Consider only when standing water persists after the accessible filter, visible hose, and sink/disposal checks and a qualified diagnosis identifies the pump or drain path.
Do not order from a no-drain symptom alone; built-in, portable, and countertop layouts use different parts and access. - heating element or temperature-control component
Consider only when the exact model reports a heating fault or service testing confirms a heater or temperature-control failure after intake and wash checks.
Heating components are energized and model-specific; installation and electrical testing are for qualified service. - dishwasher control or sensor assembly
Consider only after persistent no-start, cycle interruption, overflow, or indicator symptoms are diagnosed as a control or sensor fault rather than a door, supply, pump, or filter issue.
Confirm exact model fit and programmed requirements through Danby service; never infer a control part from a flashing light alone.
When checks do not resolve it
Need a professional?
Arrange qualified Danby service when a correctly supplied and latched dishwasher still will not start; when the breaker trips, the cord or base is damaged, or water reaches electrical parts; when intake, heating, overflow, drain, pump, motor, sensor, or control faults persist; when water remains after the accessible hose, filter, sink/disposal, and loading checks; or whenever panel removal, live testing, or internal electrical, plumbing, pump, valve, heater, or control work is required.
Safety scope: The user may stop the cycle, isolate power safely, verify a dry plug and household breaker, close the door, confirm an accessible water supply, clean and refit user-removable filters or spray arms as the exact manual permits, and inspect visible hose or sink conditions. Qualified service must handle the latch switch, float, pump, inlet valve, heater, motor, wiring, control, lower base, live tests, and internal plumbing.
Common questions
FAQ
Why is my Danby dishwasher not turning on?
First check from a dry, safe position for a tripped breaker or fuse, an incompletely inserted plug, a damaged cord, and a door that is not latching. If the panel remains dark or the breaker trips again, stop testing and arrange qualified service. A lit panel that will not start is a separate door, control, or model-specific program branch.
What should I check if a Danby dishwasher starts but does not fill?
Verify that the household or faucet water supply is open and that the visible inlet hose or portable adapter is not kinked. Use the exact model manual for the connection. If the supply is correct but intake remains absent or an indicator flashes, close the supply when appropriate and arrange service for the inlet valve, float, wiring, or control.
Why does my Danby dishwasher stop with water in the bottom?
A kinked or clogged drain hose, clogged filter, or blocked connected sink/disposal route is an accessible possibility. Isolate power safely, inspect those visible conditions, and use the exact manual's cancel/drain command once. If water remains or the pump only hums, do not dismantle it; arrange qualified service.
What do flashing lights mean on a Danby dishwasher?
Indicator meanings are model-dependent. The DDW1805EWP manual, for example, assigns particular flashing indicators to restricted intake, heating malfunction, and overflow, but another Danby model may use different indicators. Record the model and pattern, use its manual, and call service if the indication returns after an authorized reset or if there is a leak or electrical hazard.
Can I replace the Danby dishwasher pump or heater myself?
Not from the symptom alone. A pump, heater, valve, sensor, wiring, or control fault can look like a no-start, no-wash, no-drain, or interrupted cycle. Danby's manuals and support route internal repair to qualified service. Do not open the base, bypass a latch or float, or perform live testing.
Read the exact guide
Official sources
- Support CenterDanby Appliances Canada · Supports retrieving the exact manual and troubleshooting material and routing repairs to a service provider; region and model availability may differ.
- OWNER'S MANUALDanby · Model-specific evidence for safe operation, door/start sequence, filter and spray-arm cleaning, intake/heating/overflow indicators, reset behavior, and no-power/no-drain troubleshooting. It must not be treated as a universal Danby code table or procedure.
- Faqs Category: DishwashersDanby · Supports the broad symptom map: drain hose/filter/disposal, cycle heating delay, leaks, loading, spray arm, water inlet, dishwasher types, power source, water supply, drain connection, and professional installation/service boundaries.
- The dishwasher is not draining. How can I fix this?Danby · Supports checking visible drain-hose kinks or clogs, the filter, a connected garbage disposal, and the boundary that a drain-pump malfunction requires further diagnosis.
Community feedback
Share a repair observation
Share a plain-text repair observation. Accepted observations are published automatically; this page may take a moment to update.