
On this page
Start here
Quick answer
First confirm the exact Hisense model and whether the symptom is no ice in the mold, slow production, or ice made but stuck in the bin. Hisense manuals show that ice makers may be enabled from a freezer control or an ICE ON/OFF key, and that the correct control depends on the model. Check that the ice function is on, the refrigerator has had the model's required time to cool after installation or a water-line connection, the water valve is open, the line is not kinked, and the freezer is at the model's specified setting. Inspect only the accessible ice bin for a clump; if the manual allows it, discard the clump using a plastic utensil, never a sharp tool. If water pressure is inadequate, a water filter is not seated, the ice maker remains off, a code persists, or the refrigerator leaks, keep internal valves, wiring, and panels untouched and arrange qualified service. Do not force an ice-maker arm, bypass a sensor, test live parts, or order a valve or ice-maker assembly from the symptom alone.
Before you begin
Safety first
- The owner may identify the model, use a documented ice control, wait for normal production, check freezer settings, inspect an external valve and line, handle a documented filter, and clear an accessible clump only with an approved plastic utensil. Qualified personnel must handle pressurized tubing, internal valves, fill tubes, wiring, sensors, controls, heaters, motors, refrigerant, and panels.
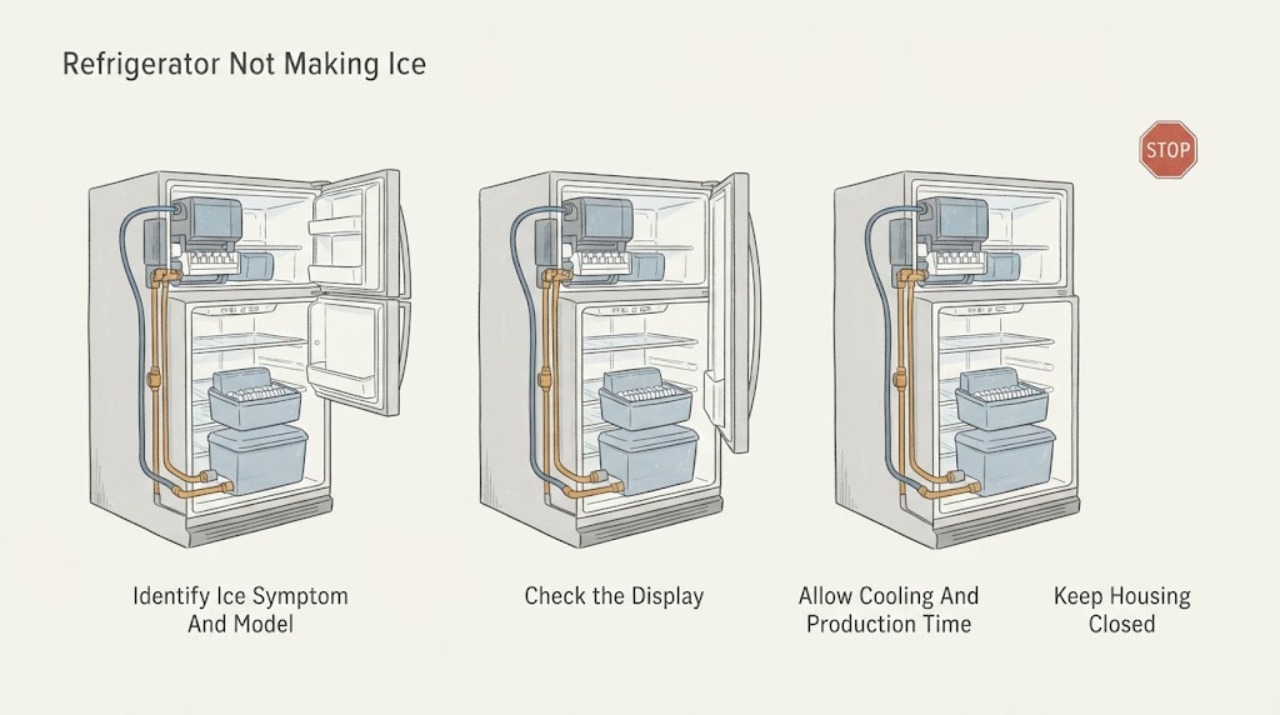
Work through in order
Diagnostic checks
Use only checks that match the exact appliance or system and its official guide.
-
Check 1
Record the complete Hisense model and serial information. Look at the accessible ice mold or bin and classify the symptom as no cubes, slow or hollow cubes, a full bin that will not deliver, a clump, or a code. Note whether the refrigerator is bottom-freezer, French-door, or another documented layout.
Expected result: The mold is dry, the mold has water but no frozen cubes, cubes are hollow or slow, the bin is full but jammed, the maker is disabled, or an error indication is present.
Next step: Use the matching control, cooling, water, bin, or service branch below and the exact manual; do not copy a control or reset sequence from another Hisense model.
Stop if: Stop for a leak, smoke, sparks, burning odor, damaged cord, exposed wiring or tubing, or any need to remove a panel or force an ice-maker mechanism.
Why this matters
Why: Production, water filling, freezing, bin movement, and dispensing are different decisions. Hisense documents more than one refrigerator architecture and ties support materials to a specific model.
-
Check 2
Find the ice-maker control in the exact Hisense manual or on the labeled control panel. Confirm that the ice function is enabled and, where the model provides one, that its indicator shows the maker is operating. Do not force a wire arm, tray, door, or sensor.
Expected result: The model's ICE or ice-maker control is off, the indicator is off, the control is on, or the model has no user-accessible ice control matching the suspected procedure.
Next step: Enable the function only through the documented control, then allow the manual's production wait. If the control will not respond or the maker remains off, arrange model-specific service.
Stop if: Do not bypass the ice-level sensor, force the arm, short a switch, remove the control panel, or repeatedly cycle power to clear an unknown state.
Why this matters
Why: An accidentally disabled ice maker can produce no ice, but Hisense uses different controls: one opened manual uses a freezer control, another uses an Ice On/Off key. A missing or unrecognized control means the model manual is required.
-
Check 3
Check whether the refrigerator was newly installed, recently connected to water, switched off for a long period, or loaded with warm food. Compare the freezer setting with the exact manual and allow the model's stated first-batch and recovery period without opening the door unnecessarily.
Expected result: The unit is new or recently reconnected, the freezer is warmer than the model setting, the door has been opened frequently, or the required wait has passed with a dry mold and no ice.
Next step: Allow the documented wait and maintain the model's setting. If no ice appears after the wait, continue to the water-supply check rather than lowering the setting indefinitely.
Stop if: Do not set an unidentified model to an extreme temperature, block vents with food, or continue operation if cooling is failing, water is leaking, or an alarm persists.
Why this matters
Why: Hisense manuals state that first ice can require a waiting period and that a freezer that is too warm can delay or prevent production. A passed wait with correct cooling shifts attention to the water path or service branch.
-
Check 4
From outside the refrigerator, check that the water shutoff valve is open and the supply line is not kinked, crushed, or visibly leaking. If the exact model uses a water filter, confirm that its installation and replacement instructions were followed; do not loosen tubing or remove an internal valve.
Expected result: The valve is closed, the line is kinked, a filter is not seated as documented, water pressure is inadequate, the line leaks, or the external water path appears correct.
Next step: Open only a clearly closed external valve and correct a visible line kink without disconnecting the line. Use the exact manual for filter handling; call a qualified plumber or appliance technician for low pressure, a leak, or no fill with a correct external path.
Stop if: Do not disconnect pressurized tubing, add a booster pump without qualified assessment, open the rear cover, test a water valve electrically, or operate with a leak.
Why this matters
Why: Hisense lists an open valve, an unobstructed line, and adequate water pressure as prerequisites for ice production. Inadequate pressure, leaks, or internal valve problems are plumbing or appliance-service conditions.
-
Check 5
With the ice maker stopped as the exact manual directs, inspect only the accessible bin, chute, or mold area for an obvious clump or ice blocking normal movement. If the manual permits it, break up and discard a clump with a plastic utensil; never use a knife, screwdriver, or other sharp tool.
Expected result: The bin is empty, ice is clumped, the bin or drawer is mis-seated, ice is blocking a visible chute, or the obstruction is hidden behind a panel or mechanism.
Next step: Correct only a documented bin position or visible clump and allow a normal cycle. If the bin is correctly seated but the mold remains dry or the maker will not cycle, stop owner diagnosis and arrange service.
Stop if: Do not force the bin, reach behind the ice-maker housing, pry frozen parts, bypass a sensor, or use sharp tools, hot water, or heat.
Why this matters
Why: A visible clump can stop collection or movement, while hidden ice or a misbehaving ejector, motor, sensor, or fill assembly is not identifiable from the bin alone. Hisense specifically warns against sharp tools.
-
Check 6
After recording the model and completing only the documented enable, wait, freezer-setting, external water, filter, and accessible-bin checks, document whether the mold fills, freezes, ejects, and replenishes. Record any code, leak, abnormal sound, or cooling problem without recreating a hazard.
Expected result: Ice production resumes; the mold stays dry; the mold fills but does not freeze or eject; production is hollow or very slow; a code persists; or a leak, noise, odor, or cooling fault accompanies no ice.
Next step: Keep the refrigerator in service only when it makes ice normally without a hazard. Otherwise arrange qualified Hisense service and provide the model, timing, controls, water observations, freezer setting, and production pattern.
Stop if: Do not remove panels, test live wiring, force a harvest cycle, bypass a sensor or valve, thaw hidden tubing with heat, or keep operating with a leak, smoke, sparks, or damaged cord.
Why this matters
Why: Recovery supports an off setting, initial wait, temperature, water-line, filter, or visible-bin condition. Persistent no ice can involve an inlet valve, fill tube, ice-maker motor, heater, sensor, control, wiring, or cooling system, and the symptom does not select a part safely.
Use your observations
Decision map
Find the observation that best matches what you see, then follow the next safe action.
-
PATH 01Safety boundary
What you see
The exact model's ice indicator or control shows the ice maker is off, or the user cannot identify the control described by a different Hisense manual.
Do this next
Use the exact model manual to enable the function and allow its documented wait. Escalate a nonresponsive control or persistent off indication.
Why this path and its safety boundary
Why it matters: An off function is a likely user-state cause, but Hisense controls differ between models and should not be guessed.
Safety stop: Do not force an arm, short a switch, or use another model's reset sequence.
-
PATH 02Safety boundary
What you see
The refrigerator or water line was recently installed or reconnected, the freezer is warmer than its documented setting, or the required first-batch period has not passed.
Do this next
Keep doors closed as practical, use the exact setting, and wait the model's specified period. If the mold remains dry afterward, move to the water path branch.
Why this path and its safety boundary
Why it matters: Initial cooling and water-line stabilization are more likely than a failed ice-maker assembly.
Safety stop: Do not keep lowering an unknown setting or ignore poor overall cooling, leaks, or alarms.
-
PATH 03Safety boundary
What you see
The maker is enabled and the freezer is sufficiently cold, but the mold is dry; the external valve is closed, the line is kinked, the filter is mis-seated, or pressure is inadequate.
Do this next
Correct only a clearly closed valve, visible kink, or documented filter seating issue. Use a qualified plumber or appliance technician for inadequate pressure, leaks, internal valves, or no fill after the external path is correct.
Why this path and its safety boundary
Why it matters: A water-supply or fill condition is more likely than a freezing or bin problem.
Safety stop: Do not disconnect pressurized lines, add a pump by guesswork, open panels, or electrically test a valve.
-
PATH 04Safety boundary
What you see
The mold has made ice or the bin contains a clump, but the bin, chute, or drawer does not move or deliver ice normally.
Do this next
Follow the model's accessible bin-removal instruction and use only a plastic utensil for an explicitly permitted clump. Escalate a correctly seated bin with persistent no delivery or hidden obstruction.
Why this path and its safety boundary
Why it matters: A visible clump or seating problem can block movement; a hidden ejector, motor, sensor, or dispenser fault cannot be identified safely from the bin.
Safety stop: Do not pry, use sharp or heated tools, reach behind the housing, or bypass a sensor.
-
PATH 05Safety boundary
What you see
The ice function is enabled, the model's wait has passed, the freezer is correctly set, the external water path is correct, and no accessible bin issue explains the symptom, or a code, leak, abnormal noise, or cooling fault remains.
Do this next
Arrange qualified Hisense refrigerator service and supply the model, exact controls, freezer setting, water and filter observations, bin state, production timing, and code or hazard information.
Why this path and its safety boundary
Why it matters: An internal valve, fill tube, ice-maker motor or heater, sensor, control, wiring, or refrigeration problem is possible; no single part is justified by the symptom alone.
Safety stop: Stop use for smoke, sparks, burning odor, exposed wiring, water near electrical parts, damaged tubing or cord, or any need to open the appliance.
Helpful context
Understand the symptom
Start by separating no production from a blocked bin
Look in the ice mold or storage bin, not only at the dispenser. An empty mold suggests an enable, cooling, water-supply, or internal ice-maker branch; a full bin with no delivery is a separate dispensing or clump problem. Hisense support pages identify multiple ice-maker refrigerator models, so record the model and the exact panel wording before pressing a control.
Use the exact model's ice control
The opened Hisense HQD20 manual turns the ice maker on or off from a freezer control, while the HRB208 manual uses an “Ice On/Off” control and illuminates an indicator when the maker is functioning. These are examples of model differences, not a universal button sequence. If the model manual does not identify an ice control, do not force an arm or copy a control sequence from another refrigerator.
Give a new or recently connected unit time to make ice
Hisense manuals specify a waiting period after installation or connection of the water supply before the first batch, and note that additional time may be needed to fill the container. If the freezer is not cold enough, the maker can also be slow or stop. Use the exact manual's wait and temperature guidance rather than treating a first empty bin as a failed part.
Check the external water path without opening the appliance
For an ice-maker model, verify from the outside that the water valve is open and the supply line is not kinked or crushed. A filter-equipped model may also require the filter to be correctly installed. Hisense identifies inadequate pressure as a plumbing or service issue; do not add a booster, remove a valve, or disconnect pressurized tubing based on a generic diagnosis.
A clump in the bin is not an invitation to pry inside
If the manual identifies a removable ice bin and a visible clump is stopping movement, use only the manual-approved plastic utensil method and discard the affected ice. Hisense warns against sharp tools. Do not disassemble the ice maker, reach for a hidden ejector, bypass a sensor, or pull on a frozen fill tube; persistent no-ice operation after the external checks needs qualified service.
Safety boundary
Stop conditions
- Stop use for a water leak near electrical parts, smoke, sparks, burning odor, a hot or damaged cord, exposed wiring or tubing, or a persistent cooling or electrical fault.
- Do not use a knife, pick, screwdriver, metal tool, flame, hair dryer, boiling water, or other heat to break or thaw ice; use only a model-approved plastic utensil for an accessible clump.
- Do not force an ice-maker arm, bin, tray, valve, fill tube, or sensor, and do not bypass an ice-level or water protection device.
- Do not disconnect pressurized water tubing, electrically test an inlet valve or ice-maker circuit, remove panels, or enter the sealed refrigeration system.
- Do not apply a control, code, temperature, water-pressure threshold, wait period, filter, or part from another Hisense model; use the exact manual or qualified service.
When checks do not resolve it
Need a professional?
Arrange qualified Hisense refrigerator service when the exact-model ice control is enabled, the required cooling and installation wait has passed, the freezer setting and external water path are correct, and the ice maker still produces no ice or only hollow or very slow ice. Call a qualified plumber for inadequate water pressure or an external water-line leak. Stop immediately for water near electrical parts, smoke, sparks, burning odor, a damaged cord or tube, persistent error indication, or any need to open the appliance.
Safety scope: The owner may identify the model, use a documented ice control, wait for normal production, check freezer settings, inspect an external valve and line, handle a documented filter, and clear an accessible clump only with an approved plastic utensil. Qualified personnel must handle pressurized tubing, internal valves, fill tubes, wiring, sensors, controls, heaters, motors, refrigerant, and panels.
Common questions
FAQ
Why is my Hisense refrigerator not making any ice?
Confirm the exact model's ice function is on, allow the documented first-batch or water-line wait, check the freezer setting, and inspect the external valve and line for a closed valve or kink. If the mold remains dry after those checks, arrange service rather than opening the ice maker.
How do I turn on the ice maker on a Hisense refrigerator?
The control is model-dependent. One opened Hisense manual uses a freezer control, while another uses an Ice On/Off key with an indicator. Use the exact manual or panel label; do not force a wire arm or copy a sequence from another model.
How long should a new Hisense refrigerator take to make ice?
The required wait varies by model and whether the water line was newly connected. Hisense manuals describe an initial wait before the first batch and additional time to fill the container. Use the matching manual rather than treating the first empty bin as a failed part.
What if the Hisense ice maker has a clump in the bin?
Follow the exact bin-removal instruction. If the manual permits it, break up and discard a visible clump with a plastic utensil. Never use a knife or other sharp tool, and escalate ice hidden behind the housing or a correctly seated bin that still will not operate.
When does a Hisense refrigerator ice-maker problem need service?
Call service when the ice control is enabled, the model's wait has passed, the freezer is correctly set, the valve and line are open and unkinked, and no accessible bin issue explains the symptom. Internal water valves, fill tubes, motors, sensors, wiring, and cooling faults are not safe guess-and-replace repairs.
Read the exact guide
Official sources
- Hisense HQD20 User ManualHisense USA · Opened Hisense USA manual for the HQD20 model family; the control and timing details are model-specific and are not universal to all Hisense refrigerators.
- Hisense 20.9-cu ft Bottom-Freezer Refrigerator with Ice Maker (Stainless Steel) Support - Guides & ManualsHisense USA · Official Hisense support page for the listed HRB208N6BSE bottom-freezer model; it establishes one supported ice-maker architecture, not universal controls for every Hisense refrigerator.
- Hisense 36 inch 21.2 CF French Door Refrigerator with Ice Maker Support - Guides & ManualsHisense USA · Official Hisense support page for the listed HRF209N6CSE French-door model; it establishes a different supported ice-maker architecture and does not make HRB208 procedures universal.
- HRB208N6BSE User ManualHisense USA · Opened Hisense USA manual for model HRB208N6BSE; its Ice On/Off control, timing, pressure, and bin instructions must not be generalized to an unidentified model.
Community feedback
Share a repair observation
Share a plain-text repair observation. Accepted observations are published automatically; this page may take a moment to update.