
On this page
Start here
Quick answer
First confirm that this Hitachi refrigerator actually has an automatic ice maker and record its model number; a refrigerator with no ice-maker function needs a different answer. Check that ice making is set to On rather than Off, fill the water tank with potable water to its marked level, and push it fully into the slot past the model's setting line. Check that the ice compartment is not over the full mark and that nothing other than ice is touching the ice-detection area. After installation or a full warm-up, allow at least the model's stated initial cooling time—Hitachi manuals and support pages describe up to 24 hours before first ice—rather than judging it after a short wait. If the tank and controls are correct but no water reaches the tray, the tray will not rotate, an ice layer is stuck, an indicator keeps blinking, or cooling is inadequate, stop at accessible checks and use the exact manual or qualified Hitachi service. Do not reach into the moving ice-maker mechanism, bypass the ice sensor, remove panels, or perform live electrical tests.
Before you begin
Safety first
- This article covers model identification, documented user settings, potable-water tank and accessible filter handling, ice-box clearance, cooling wait time, and only model-approved accessible cleaning. Pumps, valves, tray drives, sensors, fans, controls, hidden tubing, panels, wiring, and live tests require qualified service.
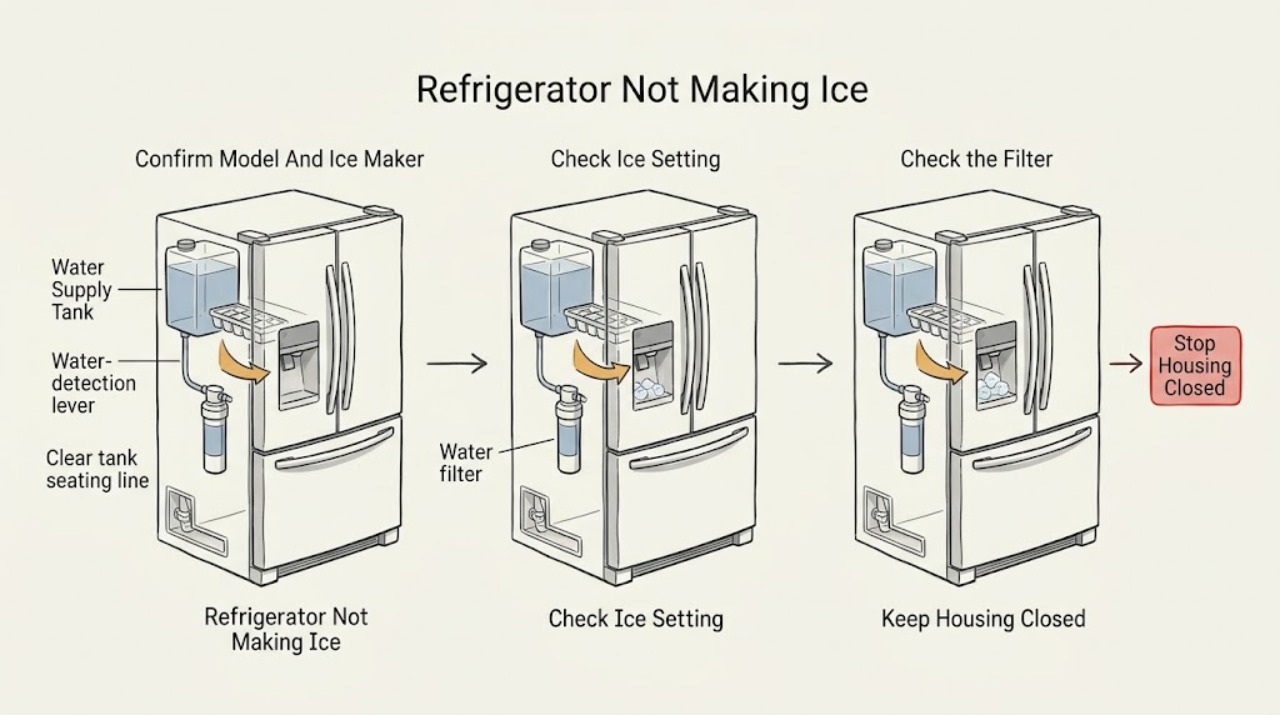
Work through in order
Diagnostic checks
Use only checks that match the exact appliance or system and its official guide.
-
Check 1
Record the complete Hitachi model and check the control panel, manual, or product label for an automatic ice-maker function. Identify whether the complaint is no ice production, a partial batch, or ice that exists but will not dispense.
Expected result: An automatic ice-maker function and ice compartment are present, the model has a water tank, the model uses a different water connection, or ice is already present but is not dispensing.
Next step: Use the exact Hitachi manual and continue with the setting, water, ice-box, and cooling checks that match the identified architecture. If the model has no automatic ice maker, stop and do not invent a mechanism.
Stop if: Stop for smoke, burning odor, sparking, exposed wiring, water near electrical parts, damaged insulation, or a hand injury risk around the ice-maker mechanism.
Why this matters
Why: Only the first three observations fit this ice-making workflow, and the exact tank, tray, and control procedure is model-dependent. Ice that exists but does not leave the bin is a separate dispensing path.
-
Check 2
With the doors closed as much as practical, check whether the ice-maker control is set to On and whether an Off, tank-empty, key-lock, or service indication is displayed. Change only a clearly documented user setting using the exact model manual.
Expected result: Ice making is Off, the control is locked, a tank-empty indication is lit, or the ice-maker is On with no warning indication.
Next step: Turn the function On or cancel the documented control lock only if the manual permits it, then check the tank. Do not interpret a model-specific blink count without that model's manual.
Stop if: Do not bypass a lock, sensor, or service indication, remove the control panel, or test wiring while powered.
Why this matters
Why: An Off or locked control can stop production without a mechanical failure. A tank-empty indication narrows the next check to water level and tank seating. An On state with no indication makes water supply, full-bin detection, cooling, or the tray mechanism more likely.
-
Check 3
Remove and inspect only the accessible water-supply tank and its lid or filter as described by the model manual. Fill with potable water to the tank's marked full line, then push the tank fully into its slot beyond the model's setting line; look for a visible crack or leak without opening hidden tubing.
Expected result: The tank is low, filled with a non-water liquid, not seated past the line, the accessible filter is dirty, the tank leaks, or the tank is correctly filled and seated.
Next step: Empty and rinse an unsuitable liquid, refill with potable water, clean only the accessible filter by the exact manual, and reseat the tank. Arrange service for a cracked tank, leak, or persistent failure after correct seating.
Stop if: Do not use detergent or sharp tools on a model-specific water filter unless its manual expressly permits it; stop if water reaches electrical parts or the tank is cracked.
Why this matters
Why: Low water or incomplete seating can prevent the automatic fill cycle. Non-potable or hot liquid is unsuitable for the documented Hitachi tank design. A leak or a correctly seated tank with no water movement points beyond a simple refill.
-
Check 4
Inspect the accessible ice compartment and ice-detection area without putting a hand into the mechanical section. Check whether the bin is above its full mark, whether anything other than ice is stored there, or whether a visible cube or food item is touching the detection lever. Remove only loose, accessible items with the appliance in a safe state.
Expected result: The ice box is full or over the line, a non-ice item is present, a cube is touching the detection lever, or the compartment is clear and below the limit.
Next step: Level or empty the bin as the manual directs, remove non-ice items, close the door, and allow the next documented cycle. If an indicator continues blinking with a clear compartment, stop at service escalation.
Stop if: Do not hold, bend, bypass, or manually force the detection lever or ice tray; do not reach into a moving ice-maker.
Why this matters
Why: Hitachi says the full-bin sensor stops automatic production, and an item touching the detection lever can also stop or signal an ice-maker issue. A clear, under-limit bin makes a full-bin stop less likely.
-
Check 5
If the refrigerator was newly installed, recently powered off, heavily loaded, or frequently opened, allow the exact manual's initial cooling period and keep cold-air vents unobstructed. Observe whether the freezer is becoming cold and whether ice production starts after the waiting period.
Expected result: The refrigerator is still in its first day, the freezer is not cold, food blocks an air outlet, the freezer is cold but no ice forms, or ice production resumes after cooling and reduced door opening.
Next step: Reposition food away from vents, minimize door opening, and wait the documented period. If the freezer remains warm or does not make ice after the period, arrange service rather than changing undocumented temperatures or opening panels.
Stop if: Do not remove evaporator covers, probe vents, add heat to melt ice, or perform live cooling or electrical tests.
Why this matters
Why: Hitachi notes that first ice can take 24 hours or more because the refrigerator must cool first, and crowded storage or blocked ventilation can reduce cooling. A cold freezer with no production after the waiting period shifts suspicion toward water delivery, tray drive, sensor, or control rather than initial cool-down.
-
Check 6
Only if the exact Hitachi manual permits removal of an accessible ice tray, observe whether it is visibly stuck, not horizontal, or not locked in its normal position. Otherwise leave it in place. After any model-approved cleaning or reseating, monitor one complete cycle and record indicators, water level, and ice-box state.
Expected result: The tray has a visible ice layer or residue, is not level or locked, a model-approved cleaning restores operation, or no accessible correction restores ice making.
Next step: Use only the exact manual's cleaning and reseating sequence. If the tray cannot be removed safely, the indicator returns, water does not reach the tray, or the cycle still fails, stop troubleshooting and contact qualified Hitachi service with the model and observations.
Stop if: Do not touch the mechanical section, force the tray or lever, remove panels, bypass sensors, or measure energized components.
Why this matters
Why: Hitachi support describes a tray that does not turn completely or has ice stuck inside as a cause of a layered ice compartment and recommends model-specific cleaning, level seating, and locking. Continued failure after safe external checks may involve the pump, valve, tray motor, fan, sensor, or control.
Use your observations
Decision map
Find the observation that best matches what you see, then follow the next safe action.
-
PATH 01Safety boundary
What you see
The refrigerator is newly installed, recently powered off, heavily loaded, or the freezer is not yet cold, and no ice has been made.
Do this next
Keep vents clear, limit door opening, allow the exact manual's waiting period, and reassess freezer cooling before service.
Why this path and its safety boundary
Why it matters: Initial cool-down or restricted air circulation is more likely than a failed ice-maker mechanism; Hitachi documents a first-ice wait of 24 hours or more in some conditions.
Safety stop: Do not add heat, remove cooling panels, or perform live tests.
-
PATH 02Safety boundary
What you see
The ice maker is Off, a tank-empty indication is lit, the water level is low, or the tank is not fully behind its setting line.
Do this next
Set the function to On if documented, fill with potable water to the marked line, and reseat the tank. Escalate a leak or persistent no-fill condition.
Why this path and its safety boundary
Why it matters: A user setting or accessible water-supply condition is more likely than an internal tray or control failure.
Safety stop: Do not use other beverages or hot water, bypass the tank sensor, or open hidden tubing.
-
PATH 03Safety boundary
What you see
The ice compartment is full or above its line, a non-ice object is present, or a cube or food item touches the ice-detection lever.
Do this next
Clear and level the accessible ice compartment according to the model manual, then close the door and allow a new cycle. Persistent blinking with a clear bin needs service.
Why this path and its safety boundary
Why it matters: The automatic stop sensor may be working as designed, or its detection area may be obstructed; this does not by itself prove a failed motor.
Safety stop: Do not bend, hold, or bypass the detection lever or reach into the mechanical section.
-
PATH 04Safety boundary
What you see
The refrigerator is cold, the tank is correctly filled and seated, but a visible ice layer remains, the tray does not turn completely, or the tray is not horizontal or locked.
Do this next
Use the exact manual's safe tray-cleaning and reseating procedure once; arrange service if the tray cannot be accessed safely or the problem returns.
Why this path and its safety boundary
Why it matters: A tray obstruction or incorrect accessible seating is more likely than a water-level problem, but the exact removal and cleaning sequence varies by model.
Safety stop: Do not force the tray, chip ice with sharp tools, touch the moving mechanism, or remove covers.
-
PATH 05Safety boundary
What you see
The ice function is On, the tank is full and correctly seated, the ice box is below its limit, the freezer is cold, and no model-approved external correction restores ice making.
Do this next
Stop at external troubleshooting and contact qualified Hitachi service. Provide the model, indicator behavior, water level, freezer condition, and whether the tray ever moves or fills.
Why this path and its safety boundary
Why it matters: A water pump or valve, tray drive, detection sensor, fan, control, or another model-specific fault becomes more likely; the public checks cannot identify which part safely.
Safety stop: Do not disassemble, bypass a sensor, test energized wiring, or continue operating with smoke, burning odor, sparking, leaks near electricity, or exposed parts.
Helpful context
Understand the symptom
Confirm the Hitachi ice-maker architecture
This page applies only when the refrigerator has an automatic ice-maker function. Hitachi models differ: some use a removable water-supply tank and separate ice box, while controls, filters, tray access, and cleaning functions vary by model. Find the rating label and exact manual first. If the complaint is that ice is present but will not dispense, that is a dispensing or chute problem rather than a failure to make ice.
Start with settings, water, and waiting time
Hitachi's support guidance puts the ice-maker On/Off indication, water level, tank seating, and a full ice compartment ahead of service. A newly installed refrigerator may still be cooling down; Hitachi describes the first ice as taking 24 hours or more in some conditions. Use only potable water and the fill line printed on the tank—do not substitute juice, soft drinks, or hot water.
Separate a supply problem from a tray or cooling problem
If the indicator says the tank is empty or the tank level does not change, reseat the accessible tank and follow the model manual. If water is present but the tray is frozen into a layer, the tray is not level, or the detection area is obstructed, use only the model-approved cleaning or reset procedure. Persistent failure with a clear tank, correct setting, adequate cooling, and a clear ice box can involve a pump, valve, tray drive, sensor, fan, or control; those are service checks rather than safe user repairs.
Safety boundary
Stop conditions
- Stop immediately for smoke, burning odor, sparking, exposed wiring, a damaged cord, water near electrical parts, or a cracked leaking tank near the appliance wiring.
- Do not reach into the mechanical section of the automatic ice maker or touch, bend, hold, or bypass the ice-detection lever or tray.
- Do not remove refrigerator panels, open hidden water tubing, bypass a sensor or interlock, or perform live electrical, pump, valve, fan, or control tests.
- Do not force a stuck tray, chip ice with sharp tools, add heat to melt internal ice, or use beverages or hot water in the water tank.
- Protect perishable food and arrange qualified service if the freezer is not cooling, the door cannot seal, or the refrigerator remains warm while ice making is being diagnosed.
When checks do not resolve it
Need a professional?
Arrange qualified Hitachi refrigerator service when the ice maker remains inactive after the exact model's On setting, potable-water refill, tank seating, bin clearance, and documented waiting period; when water does not reach the tray, the tray drive or detection indication repeats, the freezer is not cold, or a leak or damaged component is visible. Stop immediately for smoke, burning odor, sparking, exposed wiring, water near electricity, or an injury risk around the ice-maker mechanism.
Safety scope: This article covers model identification, documented user settings, potable-water tank and accessible filter handling, ice-box clearance, cooling wait time, and only model-approved accessible cleaning. Pumps, valves, tray drives, sensors, fans, controls, hidden tubing, panels, wiring, and live tests require qualified service.
Common questions
FAQ
Why is my Hitachi refrigerator not making ice after installation?
The refrigerator may still be cooling down. Hitachi support and manuals say first ice can take 24 hours or more in some conditions. Keep vents clear, limit door opening, confirm the ice function is On, and wait the exact model's documented period before escalating.
How do I check the Hitachi refrigerator water tank for an ice-making problem?
Use potable water to the tank's marked full line and push the tank fully into its slot beyond the model's setting line. If it is cracked, leaking, or correctly seated but water is not delivered, stop at that check and arrange model-specific service.
Can a full ice box stop a Hitachi refrigerator from making more ice?
Yes. Hitachi says the automatic cycle stops when the sensor detects a full ice compartment. Check the model's limit line and remove anything other than ice, but do not hold or bypass the detection lever.
What if my Hitachi ice tray is stuck or makes a layer instead of cubes?
Hitachi support attributes a layered ice compartment to a tray that does not turn completely or ice stuck in the tray, and directs users to clean, level, and lock the tray for applicable models. Follow your exact manual; do not force the tray, chip ice with a sharp tool, or reach into the mechanical section.
Can I put juice or hot water in a Hitachi refrigerator ice-maker tank?
No. The Hitachi support guidance and RS38KPT manual specify potable water and warn against beverages; the manual also warns against hot water. Use only the liquid and fill level permitted by your exact model manual.
When should I call for Hitachi refrigerator ice-maker service?
Call when the function is On, the tank is filled and seated, the bin is below its limit, the freezer is cold, and the model-approved checks do not restore a cycle; also call for repeated indicators, no water delivery, a non-moving tray, leaks, or internal symptoms. Stop immediately for smoke, burning odor, sparking, exposed wiring, or water near electricity.
Read the exact guide
Official sources
- Refrigerators: Products FAQsArçelik Hitachi Home Appliances Sales (Singapore) Pte. Ltd. · Official Hitachi Singapore refrigerator FAQ covering multiple Hitachi refrigerator families; model-specific controls and cleaning availability must be confirmed in the product manual.
- Refrigerators: Technical FAQsArçelik Hitachi Home Appliances Sales Malaysia Sdn. Bhd. · Official Hitachi refrigerator technical FAQ; controls and physical details vary by model, so the exact product manual governs any adjustment or cleaning sequence.
- RS38KPT User ManualHitachi Global / Hitachi Australia · Official manual for the Hitachi RS38KPT model; its tank, labels, buttons, and sequence are model-specific examples and must not be assumed for every Hitachi refrigerator.
Community feedback
Share a repair observation
Share a plain-text repair observation. Accepted observations are published automatically; this page may take a moment to update.