
On this page
Start here
Quick answer
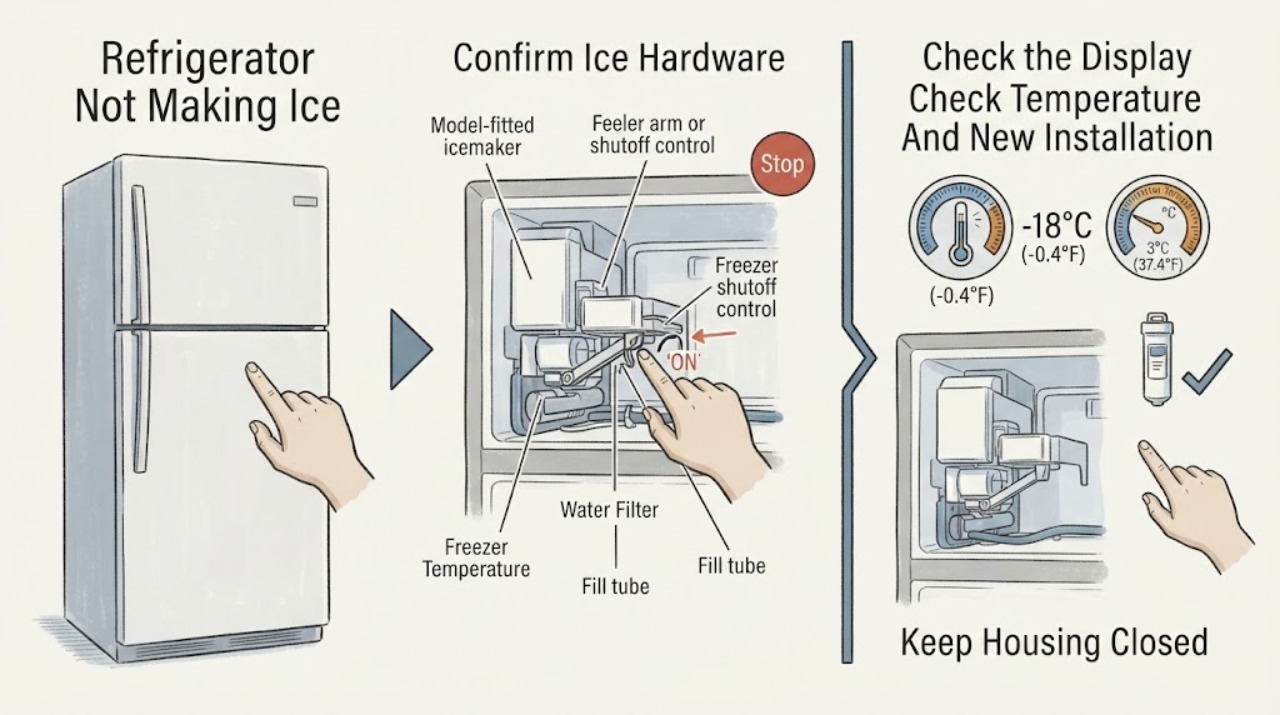
First confirm that your Hotpoint refrigerator actually has an automatic icemaker: Hotpoint product pages show both factory-installed icemaker models and models equipped only to accept an optional icemaker, so a refrigerator without the fitted assembly cannot make ice. If an icemaker is fitted, verify from the exact owner manual that its switch, control-panel setting, or feeler arm is in the ON position and that the ice bin or ejector is not blocked. Check freezer temperature using the model's display or manual; GE Appliances' refrigerator guidance says ice production waits for a cold enough mold and gives 0°F as its general freezer setting, but do not treat that as a substitute for your model's instructions. For a new installation, allow the model's stated time for cooling and water-line air to clear. If the freezer is cold, the icemaker is on, water flow is restricted, the fill tube is frozen, an ice maker fault appears, or no ice returns after these accessible checks, arrange qualified service. Do not force the ejector, reach into a powered icemaker, thaw a fill tube with a flame or heat gun, or remove panels or water valves.
Work through in order
Diagnostic checks
Use only checks that match the exact appliance or system and its official guide.
-
Check 1
Record the Hotpoint model or product number and inspect the freezer for the automatic icemaker assembly, its ice bin, and the model's stated icemaker feature. Compare the product specification or manual rather than assuming every refrigerator has one.
Expected result: The model lists a factory-installed icemaker; it is equipped only for an optional kit; or no automatic icemaker is listed or visible.
Next step: If there is no fitted automatic icemaker, stop this path and use the exact model's installation or accessory information. If it is fitted, continue with the control and temperature checks.
Stop if: Do not buy or install a kit based only on cabinet appearance, and do not remove freezer panels to search for hidden hardware.
Why this matters
Why: A factory-fitted or correctly installed assembly supports an icemaker diagnosis. An optional-only or non-icemaker model cannot be diagnosed as a failed automatic icemaker until the compatible kit and installation are confirmed.
-
Check 2
Using the exact owner manual, check whether the icemaker is controlled by a panel setting, slide or toggle switch, or feeler arm. Verify that the ice bin is seated and that the feeler arm or paddle can move freely without a clump of ice blocking it.
Expected result: The icemaker is OFF, the feeler arm is in STOP, the bin is not seated, an ice clump blocks movement, or the documented ON state is already active and clear.
Next step: Correct only the documented setting, seat the bin, or remove an accessible loose ice obstruction with the appliance handled safely. If the control will not change or a mechanism is damaged, arrange service.
Stop if: Do not force the arm, touch the ejector or heater while powered, or bridge a switch or sensor.
Why this matters
Why: An OFF state, unseated bin, or blocked feeler arm can intentionally pause production. A clear ON state with free movement leaves temperature and water flow as the next decision points.
-
Check 3
Check the freezer temperature on the model's display or with the manual's approved method, and note whether the refrigerator or icemaker was newly installed, recently powered off, or heavily loaded with warm food. Use the exact model setting guidance; do not make a large temperature change to force ice.
Expected result: The freezer is warmer than the model's target, the appliance is newly installed or recently restarted, the freezer has a low or unstable load, or temperature appears normal and the icemaker has had enough time.
Next step: Allow the model's documented startup or recovery time and keep doors closed as practical. If temperature remains high or normal temperature does not restore production, continue to the water and ice-path checks or arrange service.
Stop if: Do not adjust sealed-system controls, remove evaporator covers, or use a torch, heat gun, or boiling water to accelerate thawing.
Why this matters
Why: A warm or recently installed freezer can delay the first cycle; GE Appliances says a new icemaker may need up to 24 hours and must reach a cold mold before cycling. Normal temperature after adequate time makes water, ejector, or control causes more likely.
-
Check 4
If the model has a water filter and dispenser, check for a visibly overdue or incorrectly seated filter using the exact manual, and verify the refrigerator's accessible water supply is turned on. Observe whether the ice mold is empty and whether the dispenser flow is weak, absent, or normal; do not disconnect water tubing behind the appliance.
Expected result: The filter is overdue or not seated, dispenser flow is weak or absent, the mold is empty despite a cold freezer, or water flow and the mold appear normal.
Next step: Replace or reseat a filter only when the exact model supports that owner step and follow its purge guidance. Arrange service for a frozen fill tube, valve, internal connection, or persistent no-fill condition.
Stop if: Do not remove an internal fill tube, thaw it with direct heat, pull the refrigerator forcefully, or open a water valve or rear panel.
Why this matters
Why: A restricted filter or supply can limit the fill. An empty mold with normal accessible flow leaves a fill valve, frozen tube, icemaker control, or sensor path possible; normal mold filling shifts attention to ejection or storage-bin blockage.
-
Check 5
With the refrigerator in the safe state specified by the manual, look only at the accessible ice mold, rake or ejector area, and storage bin. Note whether cubes are present but stuck, the mold is full but not ejecting, or the mold is empty; do not reach into moving parts.
Expected result: Loose cubes or an ice bridge blocks the ejector; the mold contains frozen cubes but does not release them; the mold is empty; or the mold or mechanism appears damaged or unusually warm.
Next step: Remove only a loose, accessible obstruction as the manual permits and monitor one normal cycle. If the ejector remains stuck, the mechanism is damaged, or the issue returns, arrange qualified service.
Stop if: Do not pry cubes with metal tools, touch the heater or ejector while powered, or disassemble the icemaker.
Why this matters
Why: A stuck cube can prevent a cycle from completing, while an empty mold points back to temperature, water, or control. A damaged or unusually warm mechanism needs service and should not be handled as a simple jam.
-
Check 6
Document the model, whether the icemaker is factory-fitted or optional, ON state, freezer temperature, installation age, water-flow result, mold state, bin or feeler-arm position, and any exact display or LED indication before arranging service.
Expected result: No ice returns after the accessible checks, the freezer is cold but the mold remains empty, water is present but cubes do not eject, an E0, EE, or other model-specific indication appears, or there is a leak, damaged cord, frost mass, or electrical hazard.
Next step: Arrange qualified Hotpoint or appliance service with the exact model and observations. If water is near electrical parts, isolate power only from a safe accessible point and arrange urgent service.
Stop if: Do not remove panels, test live wiring, bypass a feeler arm or sensor, handle refrigerant components, or continue using an appliance with a water or electrical hazard.
Why this matters
Why: An internal valve, fill tube, icemaker motor, heater, sensor, wiring, control, water leak, or refrigeration issue may be involved. A broad no-ice symptom cannot identify a part or code meaning across Hotpoint families.
Use your observations
Decision map
Find the observation that best matches what you see, then follow the next safe action.
-
PATH 01Safety boundary
What you see
The Hotpoint model specification says no automatic icemaker is fitted, or says the refrigerator is only equipped to accept an optional icemaker.
Do this next
Use the exact product specification and manual to confirm whether an approved icemaker kit and water connection apply. Do not continue with failure diagnosis until the hardware identity is established.
Why this path and its safety boundary
Why it matters: The refrigerator is not failing to make automatic ice; the required assembly may not be installed or may not be a supported option for that model.
Safety stop: Do not assume an empty ice shelf proves a hidden icemaker or install an unverified kit.
-
PATH 02Safety boundary
What you see
A fitted icemaker is OFF, the feeler arm is in STOP, the bin is unseated, or a clump of ice blocks the documented shutoff movement.
Do this next
Use the exact manual to set ON, seat the bin, or clear an accessible loose obstruction, then monitor one normal cycle.
Why this path and its safety boundary
Why it matters: The control is intentionally pausing production or cannot sense available storage; a failed water valve is not established.
Safety stop: Do not force the arm, bridge a switch, or touch the ejector or heater while powered.
-
PATH 03Safety boundary
What you see
The icemaker is ON, but the refrigerator is newly installed, recently restarted, warmer than the model target, or has not had the documented startup time.
Do this next
Allow the model's documented recovery time with normal loading and door use. Escalate if the freezer cannot reach its target or no ice appears after adequate time.
Why this path and its safety boundary
Why it matters: The mold may not yet be cold enough to begin a cycle; GE Appliances says a new installation can take up to 24 hours and requires cold conditions before filling.
Safety stop: Do not force production by removing panels, changing sealed-system controls, or using direct heat.
-
PATH 04Safety boundary
What you see
The freezer is cold and the icemaker is ON, but the mold remains empty; dispenser flow is weak or absent, the filter is restricted, or the refrigerator was recently connected to water.
Do this next
Follow only the model's accessible filter and water-supply guidance. Arrange service for a frozen fill tube, internal valve, leak, or persistent no-fill condition.
Why this path and its safety boundary
Why it matters: A restricted filter, supply, air-filled line, valve, or frozen fill tube is more likely than an ejector jam. The specific water component remains model-dependent.
Safety stop: Do not disconnect internal tubing, direct heat at a fill tube, or open the rear panel.
-
PATH 05Safety boundary
What you see
The mold contains frozen cubes but they do not eject, the ejector is blocked or damaged, water and temperature are normal but no cycle completes, or a model-specific E0, EE, or other icemaker indication appears.
Do this next
Clear only an accessible obstruction permitted by the manual; otherwise arrange qualified service with the exact code and model. Do not generalize the code to another Hotpoint family.
Why this path and its safety boundary
Why it matters: An accessible ice obstruction may be present, but a motor, heater, sensor, control, or other internal icemaker fault is also possible. Hotpoint's E0 and EE meanings apply only to the covered integrated models and only if an icemaker is fitted.
Safety stop: Do not pry the ejector, reach into a powered mechanism, bypass a sensor, or remove the icemaker.
Helpful context
Understand the symptom
Confirm the refrigerator has an icemaker
Not every Hotpoint refrigerator has the same ice hardware. An official Hotpoint product page identifies a model with a factory-installed automatic icemaker and ice bin, while another identifies a model that is merely equipped for an optional icemaker and lists the icemaker as non-factory. Check the model label and product specification before treating an empty freezer shelf or ice tray as a failed automatic system.
Use the exact control style
A fitted Hotpoint icemaker may use a switch on the icemaker, a feeler arm, or a refrigerator control-panel setting. GE Appliances describes both slide and toggle switch arrangements and directs owners to the exact manual. Do not move a feeler arm or press a control repeatedly when ice is jammed, and do not infer an ON position from another model's layout.
Temperature and installation time matter
Ice production begins only after the icemaker and freezer are cold enough. GE Appliances gives a general freezer setting of 0°F and says the mold must reach about 16°F before a cycle can begin; its new-installation guidance says a newly installed icemaker may need up to 24 hours. These are support benchmarks for the covered model families, not permission to override a Hotpoint manual or set a refrigerator colder without considering food storage guidance.
Water and ice movement are separate failure paths
A cold freezer with an empty mold points toward a water, filter, fill-tube, or control path; an ice-filled mold with cubes that do not eject points toward the ejector or an obstruction. GE Appliances notes that a clogged filter can restrict flow and that stuck cubes can keep the cycle from completing. A frozen fill tube requires service-oriented diagnosis on the covered guidance rather than a heat source or sharp tool.
Treat codes and powered mechanisms as model-specific
Hotpoint's integrated-fridge-freezer page describes E0 and EE as icemaker-related indications only if an icemaker is fitted and sends unresolved faults to an engineer. Do not copy an E0, EE, or other code meaning from another Hotpoint refrigerator family. Keep hands away from a powered ejector and its heater, and leave water valves, fill tubes behind panels, wiring, sensors, and control boards to qualified service.
When checks do not resolve it
Need a professional?
Arrange qualified service when a confirmed fitted Hotpoint icemaker remains inactive after the model-specific ON, temperature, filter or accessible water, and obstruction checks; when the mold stays empty in a cold freezer; when cubes do not eject after a safe accessible check; or when a model-specific icemaker indication appears. Stop for water near electrical parts, damaged wiring or cord, a large frost mass, or a mechanism that is hot or damaged. Do not remove panels, test live wiring, bypass a feeler arm or sensor, or work on the water valve, fill tube, sealed system, or icemaker internals.
Have this ready
- Exact model or product number, whether the icemaker is factory-installed or optional, control or feeler-arm state, freezer temperature, installation or restart timing, water-filter and dispenser-flow result, mold and ejector state, and any exact code or leak observation.
Common questions
FAQ
Do all Hotpoint refrigerators have an automatic icemaker?
No. Hotpoint's official product pages show models with a factory-installed automatic icemaker and other models that are only equipped to accept an optional icemaker. Confirm the exact model before troubleshooting no ice.
How long should a newly installed Hotpoint icemaker take to make ice?
GE Appliances' new-icemaker guidance says the icemaker may need up to 24 hours to become cold enough, may ship OFF, and may cycle to purge air from the water line. Use the exact Hotpoint model manual for the final startup expectation.
Why is my Hotpoint freezer cold but the icemaker mold empty?
After confirming the icemaker is ON, an empty mold points toward the water path, filter, fill tube, valve, or icemaker control rather than an ejector jam. Check only the model-approved filter and accessible water supply; internal fill-tube and valve work needs service.
What do E0 or EE mean on a Hotpoint refrigerator?
Hotpoint's integrated-fridge-freezer support labels E0 as an ice-maker fault and EE as an ice-maker circuit fault only if an ice maker is fitted on the covered models. Do not apply those meanings to another Hotpoint family without its exact manual; arrange service for an unresolved indication.
Read the exact guide
Official sources
- Hotpoint Integrated Fridge Freezer Error CodesHotpoint UK · Official Hotpoint UK support for the integrated fridge-freezer models covered by its error-code page.
- Refrigerator - Icemaker Not Producing IceGE Appliances · Official GE Appliances refrigerator icemaker troubleshooting for supported model families, including applicable Hotpoint-branded products in the GE owner-support system.
- Refrigerator - New Icemaker Not Producing IceGE Appliances · Official GE Appliances guidance for newly installed refrigerator icemakers in supported model families.
- Hotpoint CTX18DIBAA Hotpoint 18.2 Cu. Ft. Top-Mount No-Frost Refrigerator with IcemakerHotpoint / GE Appliances · Official Hotpoint product specification for model CTX18DIBAA in the North American Hotpoint product catalog.
- Refrigerator - Accessory Icemaker KitsGE Appliances · Official GE Appliances guidance for refrigerator accessory icemaker compatibility and installation boundaries.
- Refrigerator - Icemaker Doesn't Fill With WaterGE Appliances · Official GE Appliances refrigerator icemaker fill-path troubleshooting for supported model families.
- Hotpoint CTX18LYZRWH Hotpoint 17.6 Cu. Ft. Top-Mount No-Frost RefrigeratorHotpoint / GE Appliances · Official Hotpoint product specification for model CTX18LYZRWH in the North American Hotpoint product catalog.
- Use and Care of Hotpoint Refrigerator with Automatic IcemakerHotpoint · Official Hotpoint refrigerator owner manual preserved by GE Appliances for the model family identified in the document.
Community feedback
Share a repair observation
Share a plain-text repair observation. Accepted observations are published automatically; this page may take a moment to update.