
On this page
Start here
Quick answer
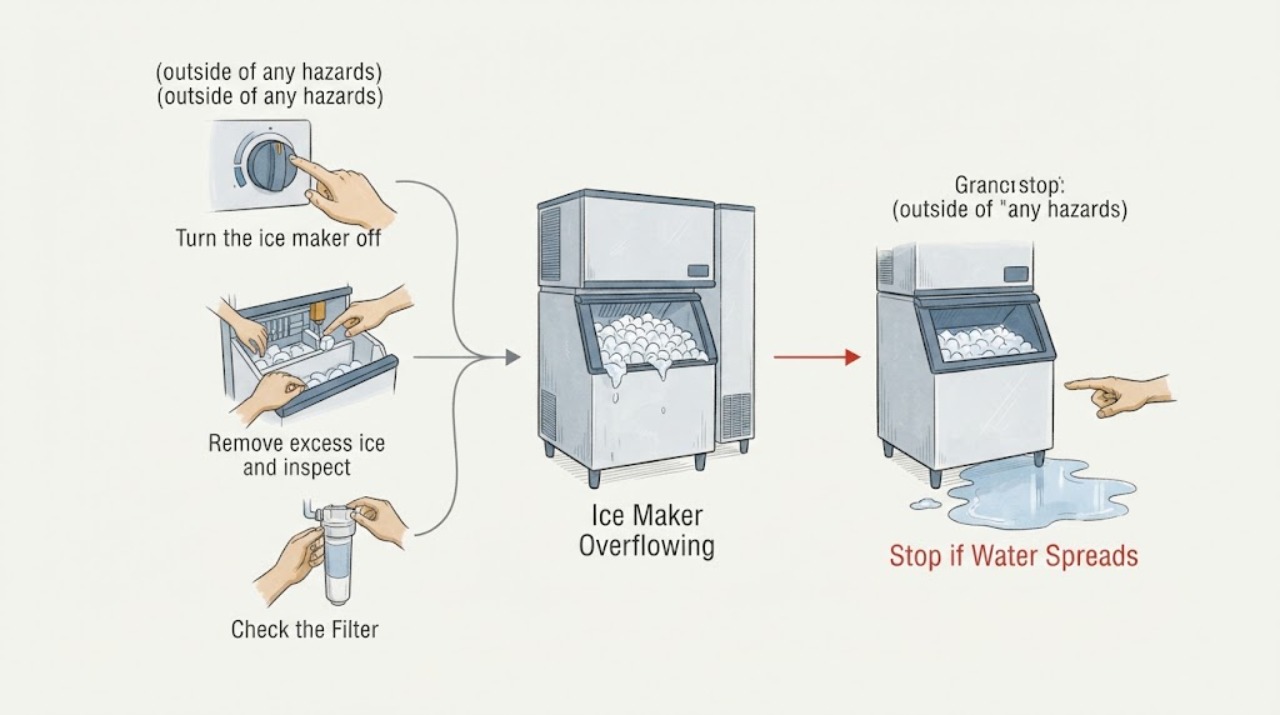
First stop the ice maker and protect the floor from water. Determine whether overflow is loose ice in the bin, water from the fill tube or filter, a chute blockage, or a continuous fill fault. Check the bin/chute and accessible water connections without opening sealed components; if water keeps entering, there is a cracked line or filter, or the maker refills continuously, leave it off and arrange service.
Work through in order
Diagnostic checks
Use only checks that match the exact appliance or system and its official guide.
-
Check 1
Turn the ice maker off and, if water continues flowing, close the refrigerator water supply valve. Place towels or a shallow pan below the affected area.
Expected result: Flow stops when the maker is switched off, stops only when the supply valve is closed, or continues despite both controls.
Next step: Keep the maker off. Do not restore water until the source is dry and identified.
Why this matters
Why: Stopping with the maker off suggests a fill/control event; stopping only at the water valve points to an active supply or valve problem; continued flow suggests a separate leak or stored water.
-
Check 2
Remove excess ice and inspect the bin, auger/chute, and ice level path for a bridge or blockage. Confirm the bin is seated and that ice can dispense without backing up.
Expected result: Ice is piled at the chute, a clump blocks dispensing, or the bin is overfilled; or the bin is clear but water is present.
Next step: Clear only loose accessible ice, reseat the bin, and test one supervised cycle with the maker on. If water enters without a normal cycle, leave it off.
Why this matters
Why: A blocked outlet or mis-seated/overfilled bin can make ice appear to overflow even when water fill is normal.
-
Check 3
With the water supply off, inspect accessible tubing, rear connections, the water valve area, and filter housing for wetness, cracks, or a filter that is not fully seated.
Expected result: A connection, tubing section, valve area, or filter is wet or cracked.
Next step: Do not open the sealed valve or cabinet. Replace a damaged filter only with the exact model-compatible part and arrange service for a leaking line or valve.
Why this matters
Why: The wet point is the likely leak path; a cracked filter or loose connection should not be operated.
-
Check 4
After the area is dry and the bin path is clear, run one supervised ice-making cycle only if the maker is off when commanded and no water leaks are visible.
Expected result: The maker fills once and stops normally, or it keeps adding water/overflows again.
Next step: Turn it off again if overflow recurs. Record where water first appeared and arrange service rather than repeatedly cycling it.
Why this matters
Why: A single fill followed by stop supports normal control timing; repeated fill indicates a valve, sensor, mold, or control fault requiring model-specific diagnosis.
-
Check 5
Check whether the overflow began after installation, filter replacement, defrosting, or a power interruption.
Expected result: The event follows one of those changes, or has no identifiable trigger and repeats.
Next step: Provide the model number, water connection location, filter history, and whether water entered with the maker switched off to the service technician.
Why this matters
Why: Installation and filter seating can affect the water path; an untriggered repeated refill is more concerning for a component/control fault.
Use your observations
Decision map
Find the observation that best matches what you see, then follow the next safe action.
-
PATH 01Next step
What you see
Ice is piled at the chute or the bin is overfilled but no water is leaking from connections.
Do this next
Clear loose ice, reseat the bin, and observe one controlled cycle.
Why this path and its safety boundary
Why it matters: Stored ice or a blocked dispensing path is the more likely overflow mechanism.
-
PATH 02Next step
What you see
Water enters or continues after the ice maker is switched off, and stops only when the household water valve closes.
Do this next
Keep the maker off and the water valve closed; arrange service for the leaking/continuously filling component.
Why this path and its safety boundary
Why it matters: The water supply, inlet valve, or fill path is active and should not be left pressurized.
-
PATH 03Next step
What you see
The filter housing or tubing is cracked or wet at a connection.
Do this next
Do not operate the maker; address only a clearly accessible filter seating issue and have damaged lines/housings serviced.
Why this path and its safety boundary
Why it matters: The observed point is an external water leak rather than an ice-capacity issue.
-
PATH 04Next step
What you see
A supervised cycle fills once and stops with a dry bin and connections.
Do this next
Monitor the next cycle and stop immediately if water or ice again escapes the intended path.
Why this path and its safety boundary
Why it matters: The overflow may have been a one-time blockage or bin-position event.
Helpful context
Understand the symptom
An overflowing ice maker can release water or ice unexpectedly. Turn the ice maker off at its control before moving the bin, and close the household water supply valve if water continues to enter while the maker is off.
Locate the material that is overflowing
Look for water at the rear water connection, below the ice maker, in the fill tube, at the filter housing, or for ice piled in the bin and chute. Each location points to a different next check.
When checks do not resolve it
Need a professional?
Keep the ice maker and water supply isolated when water continues to flow, a line/filter/valve is cracked or wet, electrical parts are exposed, or overflow repeats after the bin and chute are clear.
Common questions
FAQ
Should I leave an overflowing ice maker running?
No. Switch it off, and close the water supply valve if water continues entering. Protect the floor and keep it isolated until the source is identified.
Could a blocked chute look like an overflowing ice maker?
Yes. Ice piled at the chute or a mis-seated/overfilled bin can make ice back up. Clear only loose accessible ice, reseat the bin, and supervise one cycle.
What if water leaks below the ice maker?
Dry the area and inspect accessible connections and filter seating. Frigidaire identifies rear connections, the water valve, filter installation, and water under the maker as leak clues; recurring leaks need service.
Read the exact guide
Official sources
- Refrigerator Taste and Odor GuideFrigidaire · ice-bin hygiene and fresh ice
- Refrigerator Water LeaksFrigidaire · refrigerator water-line and ice-maker leak checks
- My refrigerator was just installed and the ice maker is not working, how do I fix it?Frigidaire · refrigerator ice-maker water supply and fill behavior
Community feedback
Share a repair observation
Share a plain-text repair observation. Accepted observations are published automatically; this page may take a moment to update.