
On this page
Start here
Quick answer
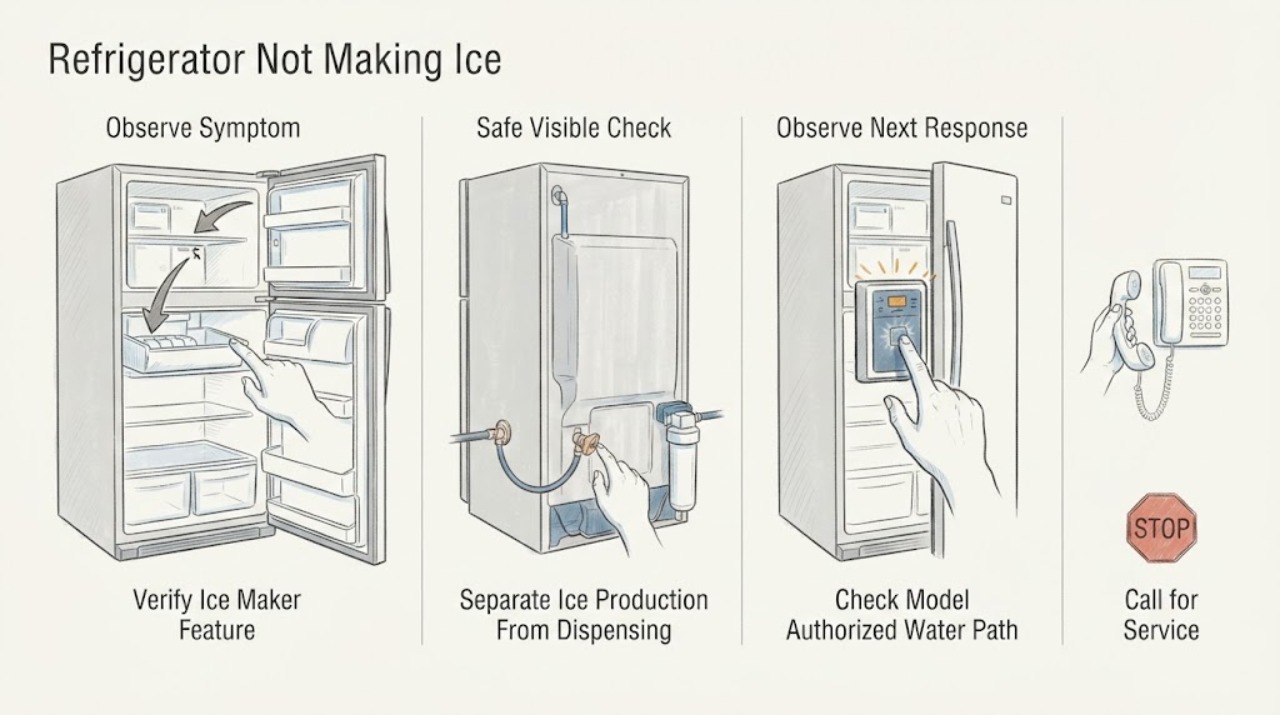
First confirm that your exact IKEA refrigerator has an automatic ice maker. IKEA's ÖVERSKÅDLIG product page documents a door-mounted water/ice maker and through-the-door ice, while the LAGAN product page explicitly says No Through-The-Door Ice, so the IKEA name alone does not prove that an ice maker is fitted. Record the model, article number, serial number, and manufacturer or supplier, then use the matching manual. For a model whose manual documents a plumbed ice maker, check from outside that the water shutoff is open and the source line is not kinked, the ice maker is turned on, the freezer door closes completely, and a recently installed or emptied bin has had the documented time to make ice. In the opened IKEA NUTID French Door manual, the ice maker is model-specific, the first batch may take 24 hours, a full production rate may take 72 hours, and an accessible ejector jam or filter condition has its own instructions; do not apply those timings or controls to another IKEA model. If a confirmed fitted ice maker still makes no ice, the freezer is normal, or the manual points to an internal valve, sensor, motor, wiring, or control fault, stop and arrange qualified service. Do not open the refrigeration enclosure or force the ejector arm.
Before you begin
Safety first
- The owner may identify the model and fitted feature, record the symptom, check visible door/bin/setting conditions, inspect a visible water line or user-accessible filter only as the exact manual allows, and wait the model-documented production period. Qualified personnel must handle internal valves, ice-maker motors/ejectors, sensors, wiring, controls, tubing, sealed refrigeration components, live testing, and part replacement.
Work through in order
Diagnostic checks
Use only checks that match the exact appliance or system and its official guide.
-
Check 1
Read the IKEA refrigerator rating plate and record the model, article number, serial number, and manufacturer or supplier. Confirm from the exact IKEA product page or manual that an automatic ice maker is fitted; distinguish a door-mounted water/ice maker, an internal automatic ice maker, a manual ice tray, and a model with no through-the-door ice.
Expected result: The exact documentation confirms an automatic ice maker; it shows only an ice tray; it says no through-the-door ice; the feature is optional; or the model/supplier cannot be matched.
Next step: If automatic ice making is confirmed, continue with the matching manual. If the feature is absent or identity is uncertain, stop this workflow and obtain the correct product documentation or IKEA/OEM support.
Stop if: Do not install an aftermarket ice maker, add a water line, or remove interior panels to search for an undocumented mechanism.
Why this matters
Why: IKEA sells refrigerators with different ice features. ÖVERSKÅDLIG documents a through-the-door water/ice maker, while LAGAN documents no through-the-door ice. Without an identified fitted ice maker, no-ice output may be normal and the controls, water path, and parts cannot be inferred.
-
Check 2
Determine whether the problem is no ice being made, ice made but not delivered, or both. From outside the appliance, note whether the ice bin contains cubes, whether the dispenser and control panel respond, whether the ice-maker indicator is on, and whether the freezer door closes fully. Do not reach into the auger or ejector.
Expected result: The bin is empty; cubes are present but do not dispense; the ice maker is off; the door is open or blocked; the panel is locked/unresponsive; or the exact model has no dispenser.
Next step: Use the exact manual's ice-maker versus dispenser branch. Correct only a documented setting or visible door/bin condition, and arrange service for an internal jam or control issue.
Stop if: Do not force the ice bin, auger, ejector arm, or door sensor; do not chip ice with sharp tools or operate with a damaged door.
Why this matters
Why: No cubes points toward the ice-making and water/temperature side. Cubes present but no delivery points toward the bin/auger/dispenser side. A disabled ice maker or door condition can stop production without proving a failed motor or valve. A non-dispenser model cannot have a through-door dispensing failure.
-
Check 3
For a confirmed plumbed model, use the exact manual to identify the external water arrangement. If the manual permits it, check that the water shutoff is open and the visible source line is not kinked; inspect only a user-accessible filter or reservoir as the manual directs. Do not disconnect tubing or force the filter.
Expected result: The shutoff is closed; the line is kinked; a documented filter is missing, clogged, or incorrectly seated; the external path is normal; or the appliance uses a different undocumented arrangement.
Next step: Correct only the visible condition permitted by the exact manual, then allow the documented time for ice production. Escalate persistent no ice, a leak, or any internal water-path access.
Stop if: Do not disconnect a pressurized line, use compressed air, bypass a filter, test a valve live, or continue if water is near electrical components.
Why this matters
Why: The NUTID manual links insufficient ice to the water shutoff, a kinked source line, and a clogged or incorrectly installed filter. Those findings are architecture-dependent; a normal external path makes an internal valve, sensor, wiring, or control issue more likely but does not identify the part.
-
Check 4
Using the exact manual, confirm that the ice maker is turned on, the ice bin or shutoff arm is in its documented operating position, and the refrigerator/freezer door closes fully. Record the installation date, last large ice removal, and time since enabling the feature; apply a waiting period only when the manual gives one.
Expected result: The ice maker is off; the bin is full or not seated; the door is blocked or ajar; the unit was recently installed or emptied; the documented wait has elapsed; or all settings and timing are normal.
Next step: Correct only the model-documented setting or seating condition and wait the model-documented period. If timing and settings are normal but production does not resume, move to the service branch.
Stop if: Do not force a wire arm, bypass a sensor, force the bin into the auger, or use a NUTID timing/control instruction on another model.
Why this matters
Why: A disabled control, full-bin automatic shutoff, missing bin, open door, or insufficient production time can explain no ice without a failed component. The NUTID manual documents 24 hours for the first batch, 72 hours for full production, and 24 hours after a large removal; other IKEA models may differ.
-
Check 5
After the fitted architecture, model identity, water path, ice-maker setting, door/bin state, and model-authorized timing have been checked, keep the refrigerator out of service as needed and prepare a technician report. Include the product code, supplier, exact symptom, code or indicator, and every safe check already completed.
Expected result: Ice production returns after a documented correction; no ice persists with normal external conditions; ice is jammed internally; an indicator or alarm returns; or there is a leak, smoke, burning odor, damaged power hardware, or exposed wiring.
Next step: Use the refrigerator only when the ice maker operates normally and no hazard is present. Otherwise contact IKEA or the identified manufacturer with the model and serial details; use qualified refrigeration service for internal diagnosis.
Stop if: Stop immediately for smoke, sparks, burning odor, hot/damaged cord or plug, exposed wiring, uncontrolled water, water near electrical components, refrigerant-system damage, or any need to open the ice-maker or control enclosure.
Why this matters
Why: A resolved setting, supply, bin, door, or timing issue is different from persistent no ice. Persistent failure can involve an internal valve, filter head, sensor, motor, ejector, wiring, control, or sealed system. A leak or electrical hazard makes continued operation unsafe.
Use your observations
Decision map
Find the observation that best matches what you see, then follow the next safe action.
-
PATH 01Safety boundary
What you see
The IKEA product page or manual shows no automatic ice maker, says no through-the-door ice, or the model cannot be identified.
Do this next
Stop this workflow and identify the correct product feature or manual. Do not retrofit an ice maker or apply through-door ice instructions to an ice-tray-only model.
Why this path and its safety boundary
Why it matters: The official IKEA LAGAN page demonstrates that an IKEA refrigerator may have no through-the-door ice, while ÖVERSKÅDLIG documents a built-in water/ice maker. No ice output is not a fault when the feature is absent.
Safety stop: Do not open the cabinet to search for a hidden ice maker or connect unverified plumbing.
-
PATH 02Safety boundary
What you see
A confirmed automatic ice maker is off, recently installed or emptied, has a closed documented shutoff, a kinked line, a filter/bin condition, or a door that is not fully closed.
Do this next
Correct only the documented external condition and allow the exact model's production time. If no ice persists, preserve the observations and escalate.
Why this path and its safety boundary
Why it matters: A model-authorized setting, water path, bin, door, or production-time condition is more likely than an internal ice-maker failure. The exact corrective step and timing must come from the matching manual; NUTID values cannot be universalized.
Safety stop: Do not bypass the shutoff arm or door sensor, force a filter or bin, disconnect a water line, or run with a leak.
-
PATH 03Safety boundary
What you see
Cubes are present in the correctly seated bin but the dispenser does not deliver them, or the panel/lock prevents dispensing.
Do this next
Follow the exact manual's external bin, ice-type, and lock checks. Arrange service for an internal auger, motor, sensor, or control fault.
Why this path and its safety boundary
Why it matters: This is an ice-delivery or dispenser-side symptom rather than proof that the ice maker is not producing. The NUTID manual documents bin/auger alignment, dispenser controls, and a model-specific lock; other IKEA models may differ.
Safety stop: Do not force the auger or ice bin, chip ice with sharp tools, bypass the dispenser lock, or reach into moving parts.
-
PATH 04Safety boundary
What you see
The exact model has an automatic ice maker, water/door/bin conditions and documented timing are normal, but no ice returns or an internal indicator/fault remains.
Do this next
Keep the refrigerator isolated as appropriate and arrange qualified IKEA or OEM refrigeration service with the model, serial number, supplier, and symptom record.
Why this path and its safety boundary
Why it matters: An internal valve, filter head, sensor, motor, ejector, wiring, control, or refrigeration condition may be involved. No single part can be selected from the no-ice symptom, and IKEA routes support by manufacturer and model.
Safety stop: Do not open panels, perform live tests, bypass a sensor or thermostat, disturb sealed tubing, or order a generic ice-maker assembly.
Helpful context
Understand the symptom
Not every IKEA refrigerator has an automatic ice maker
The feature must be established before troubleshooting. IKEA's ÖVERSKÅDLIG page identifies a door-mounted water/ice maker, through-the-door ice, a water line, and a water filter. By contrast, the official LAGAN page identifies a top-freezer refrigerator whose ice function is No Through-The-Door Ice. Those are materially different products: a missing dispenser or automatic ice maker is not a failed ice-making system. Use the exact product page, article number, rating plate, and manual; do not infer an ice-maker assembly from the IKEA brand or from an ice tray.
Use the exact manual because IKEA appliances have different support routes
IKEA's appliance support page says that the next step depends on who manufactured the appliance and asks owners to have the manufacturer, model, and serial number ready. This is important for older and current refrigeration products. The opened NUTID French Door manual describes a water-connected automatic ice maker with its own controls, bin, timing, filter, and dispenser architecture. Those details should be treated as NUTID-specific examples, not a universal IKEA refrigerator procedure. If your manual does not show an automatic ice maker, stop this workflow.
For a documented plumbed model, water and ice checks are separate
On the NUTID manual's model-specific ice-and-water troubleshooting page, insufficient ice is associated with the water shutoff, a kinked source line, the ice-maker on/off state, door closure, recent installation or large ice removal, an ejector-arm jam, and a filter that is clogged or incorrectly installed. A water-line or filter check is relevant only when the exact IKEA manual documents that arrangement. Do not disconnect a line, change a filter housing by force, or use a pressure value from another model.
Allow the model's documented production time
A newly installed or recently emptied ice maker may not produce immediately. The NUTID manual says to allow 24 hours for the first batch and 72 hours for full ice production, and to allow 24 hours after a large amount of ice has been removed. These are NUTID manual values, not a promise for every IKEA refrigerator. Record when the appliance was installed, when the ice maker was enabled, and when the bin was emptied before deciding that no ice is a fault.
Internal ice-maker work is not a generic owner repair
If a confirmed ice-maker model has a normal door, water supply, filter/bin condition, operating temperature, and documented wait time but still makes no ice, the remaining possibilities can include an internal valve, sensor, motor, ejector, wiring, or control. The NUTID manual includes service and safety instructions, and IKEA routes external-vendor appliances to the responsible manufacturer. Disconnect power before any authorized part replacement; do not open panels, bypass the shutoff arm or door sensor, or disturb sealed refrigeration tubing.
Safety boundary
Stop conditions
- Stop using the refrigerator for an uncontrolled water leak, water near electrical parts, smoke, sparks, burning/electrical odor, a hot or damaged cord or plug, exposed wiring, or repeated breaker trips.
- Disconnect power before any model-authorized part replacement. Do not work on an energized ice maker, dispenser, door sensor, valve, or control.
- Do not bypass the ice-maker shutoff arm, door sensor, filter interlock, thermostat, or control; do not perform live electrical tests.
- Do not force an ejector arm, auger, ice bin, filter, or water connection, and do not chip ice with sharp tools or disturb sealed refrigeration tubing.
- Do not apply NUTID, ÖVERSKÅDLIG, or another IKEA model's water arrangement, timing, control sequence, pressure value, or part fit to a different refrigerator.
Only after diagnosis
Potential parts
- IKEA refrigerator water filter or filter-head component
Consider only when the exact model documents a user-accessible filter and the manual or qualified diagnosis identifies a clogged, damaged, or incorrectly installed filter after safe external checks. No ice alone does not identify this part.
Filter format, head, connection, and replacement procedure vary by IKEA refrigerator model and supplier. Confirm the exact article/model number and matching manual before ordering. - IKEA automatic ice-maker assembly or motor
Consider only after the exact model confirms an automatic ice maker and qualified diagnosis identifies a failed internal assembly after water, setting, door, bin, and timing checks.
Ice-maker, motor, ejector, sensor, connector, and bin interfaces are model- and supplier-specific. Do not infer fit from the IKEA brand or an EAN/article number alone. - IKEA refrigerator inlet valve or internal water component
Consider only for a confirmed water-connected model after qualified testing establishes an internal valve or water-path fault with the visible supply path clear.
Valve connectors, pressure arrangement, tubing route, and supplier design vary. Internal water and electrical work require qualified installation and exact model verification.
When checks do not resolve it
Need a professional?
Arrange qualified IKEA or manufacturer refrigeration service when a confirmed automatic ice maker remains inactive after the exact manual's documented water, filter/bin, door, setting, and timing checks; when an internal jam, valve, sensor, motor, wiring, control, or sealed-system issue is possible; or when the model's manual directs service. Use IKEA's manufacturer route with the exact model, serial/product number, supplier, and receipt/order details. Stop immediately for leaks near electrical parts, smoke, sparks, burning odor, damaged power hardware, repeated trips, or any need to open the ice-maker or refrigeration enclosure.
Safety scope: The owner may identify the model and fitted feature, record the symptom, check visible door/bin/setting conditions, inspect a visible water line or user-accessible filter only as the exact manual allows, and wait the model-documented production period. Qualified personnel must handle internal valves, ice-maker motors/ejectors, sensors, wiring, controls, tubing, sealed refrigeration components, live testing, and part replacement.
Common questions
FAQ
Does every IKEA refrigerator have an automatic ice maker?
No. IKEA's official ÖVERSKÅDLIG page documents a door-mounted water/ice maker and through-the-door ice, while the official LAGAN page identifies No Through-The-Door Ice. Confirm the exact model's product page or manual before troubleshooting; an ice-tray-only or no-ice model needs no automatic ice-maker repair.
What should I check first when an IKEA refrigerator ice maker makes no ice?
Confirm the exact model has an automatic ice maker, then use its manual. On the opened NUTID manual, the external checks include the water shutoff and source line, ice-maker on/off state, door closure, recent installation or large ice removal, ejector-arm obstruction, and filter condition. Those checks are NUTID-specific; do not transplant them to another IKEA model.
How long should an IKEA ice maker take to make ice?
The opened NUTID French Door manual says to allow 24 hours for the first batch, 72 hours for full ice production, and 24 hours after a large amount of ice has been removed. Treat those times as NUTID manual guidance only; another IKEA refrigerator may have different timing.
Why does my IKEA refrigerator make ice but not dispense it?
Separate production from delivery. If cubes are in a correctly seated bin, the issue is on the dispenser/bin/auger side rather than proof that the ice maker is not producing. Use the exact manual for bin alignment, ice type, lock, and door conditions; do not force the auger or chip ice with sharp tools.
When should I call for service on an IKEA refrigerator ice maker?
Call IKEA or the identified manufacturer when a confirmed automatic ice maker still produces no ice after its exact manual's safe water, filter/bin, door, setting, and timing checks, or when an internal valve, sensor, motor, wiring, control, or sealed-system fault is possible. Stop immediately for leaks near electrical parts, smoke, sparks, burning odor, damaged power hardware, repeated trips, or any need to open the enclosure.
Read the exact guide
Official sources
- W11033821A v02.fm - Refrigerator User InstructionsIKEA · Exact IKEA NUTID French Door refrigerator manual only; its controls, water arrangement, timing, filter, bin, and troubleshooting steps are model-specific.
- ÖVERSKÅDLIG French door refrigerator, 4-door/stainless steel, 22 cu.ftIKEA · Exact IKEA ÖVERSKÅDLIG model 604.621.54; demonstrates a door-mounted water/ice maker, through-the-door ice, water line, and water filter. Do not generalize to all IKEA refrigerators.
- What can I do if my appliance isn’t working as it should?IKEA · IKEA household appliances, including refrigerators; use the rating-plate manufacturer, model, and serial information to choose IKEA or external-vendor support.
- LAGAN top-freezer refrigerator, white, 18.0 cu.ftIKEA · Exact IKEA LAGAN model 305.876.26; demonstrates an IKEA refrigerator with no through-the-door ice and must not be treated as an automatic-dispenser model.
Community feedback
Share a repair observation
Share a plain-text repair observation. Accepted observations are published automatically; this page may take a moment to update.