
On this page
Start here
Quick answer
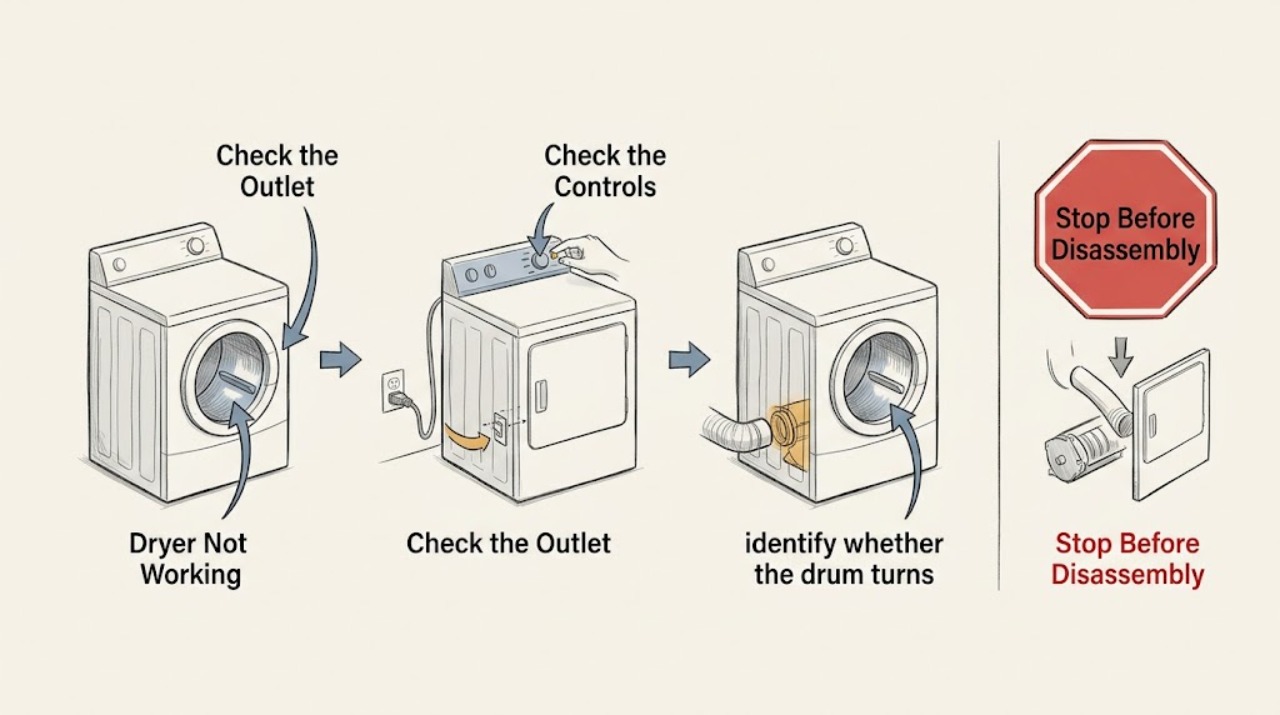
When a KitchenAid dryer is not working, first identify whether the panel is dead, the drum will not turn, the drum turns without heat, or clothes stay damp despite a running cycle. From a dry, safe position, check the door, controls, plug, outlet, and breaker, then confirm that Air Only was not selected and that the lint screen and visible exhaust path are clear. Gas models also need a qualified check of the gas supply and burner; electric models may have a supply or heating-circuit fault. Stop immediately for gas odor, burning smell, smoke, sparks, unusual heat, a damaged cord, or a breaker that trips again, and do not open the cabinet or test live wiring.
Work through in order
Diagnostic checks
Use only checks that match the exact appliance or system and its official guide.
-
Check 1
Screen for immediate hazards before touching controls: stop if there is gas odor, burning or chemical smell, smoke, flame, sparking, unusual heat, a damaged cord, water near the outlet, or a breaker that trips again.
Expected result: No hazard is present and the dryer is cool and dry, or one of the warning signs is present.
Next step: If a warning sign is present, stop using the dryer and obtain emergency or qualified professional help from a safe location. Do not continue a diagnostic cycle or open the cabinet.
Why this matters
Why: Only the first condition supports ordinary external troubleshooting; the warning signs can indicate fire, gas, water, or electrical risk.
-
Check 2
Check the room-side power path and door without contacting wet electrical parts: verify the plug is seated, the outlet appears intact, the controls are set to run, Start has been pressed as the manual requires, and the door closes fully.
Expected result: The display is dark, the outlet has no power, a fuse or breaker has opened, the door does not latch, or the panel lights and accepts a start command.
Next step: If everything is dry and safe, check the outlet with a separate low-risk appliance. Do not repeatedly reset a breaker or bypass a door switch; call qualified electrical or appliance service if power or starting remains unresolved.
Why this matters
Why: A dark panel or failed outlet points to the supply; a door or start condition can prevent operation; a responsive panel shifts attention to movement, heat, or airflow.
-
Check 3
With no safety warning, identify whether the drum turns when a suitable cycle is selected, without placing hands inside a moving drum or removing a guard.
Expected result: The drum does not move, it hums but does not turn, it turns normally, or it starts and stops unexpectedly.
Next step: Stop repeated attempts if the motor hums, the dryer overheats, smells abnormal, or stops again. Arrange qualified service rather than reaching into the cabinet or trying to free a drive component.
Why this matters
Why: No movement points toward the door circuit, motor, belt, drive, or control; normal tumbling makes a heat, load, or exhaust path more likely; repeated stopping can signal an overheating or mechanical fault.
-
Check 4
Confirm the selected cycle and temperature match the load, and verify that Air Only or another no-heat setting was not selected unintentionally.
Expected result: The control is on Air Only or a cycle unsuitable for the fabric, the load is tightly packed or heavy, or a suitable heated cycle is selected with a freely tumbling load.
Next step: Use the cycle guide and a smaller, balanced load. If a suitable heated cycle still produces no heat, stop repeated testing and have the appliance diagnosed.
Why this matters
Why: Air Only deliberately runs without heat, while an overloaded or unsuitable load can make drying appear to fail; a suitable cycle with cold air points toward the heat source.
-
Check 5
With the dryer off and cool, clean the lint screen and inspect the visible exhaust hood and vent route for lint, crushing, kinks, or an obvious obstruction.
Expected result: The screen is blocked or damaged, the outside hood has little or no airflow during a safe observation, or the vent appears clear and correctly routed.
Next step: Do not run the dryer with a loose, damaged, blocked, or missing screen. Have a qualified vent specialist inspect or clean the full route when airflow is poor or the duct is inaccessible, and stop immediately if heat or smell becomes abnormal.
Why this matters
Why: Restricted exhaust reduces airflow, lengthens drying, and can allow excessive heat; a clear visible section does not prove that the entire duct or cabinet is clean.
-
Check 6
If the drum turns, compare the heat symptom without opening the cabinet: note whether the air becomes warm on a suitable cycle, and identify whether the model is gas or electric from its rating information or manual.
Expected result: The air stays cold, the dryer heats normally but clothes remain damp, a gas model has an unverified supply or burner symptom, or an electric model has a supply or breaker symptom.
Next step: Do not open the cabinet or test live components. Have a qualified technician check gas supply and burner operation on gas models, or the electrical supply and heating circuit on electric models.
Why this matters
Why: A turning drum with cold air points to a gas-supply/burner or electric heating-circuit problem; normal heat with damp clothes shifts attention to load, sensing, or exhaust.
-
Check 7
For a cycle that ends early, check only external operating conditions: verify the dryer is level and that a very small load is not failing to contact the moisture-sensing area consistently.
Expected result: The load is very small or uneven, the dryer is not level, the automatic cycle ends with damp items, or a suitable load still ends early.
Next step: Correct only an obvious leveling or load issue using the manual. If the symptom repeats with a suitable load, arrange service instead of bypassing the sensor or control.
Why this matters
Why: KitchenAid notes that automatic cycles sense moisture or air temperature and that leveling supports correct moisture sensing; persistent early termination suggests a sensing or control fault.
Use your observations
Decision map
Find the observation that best matches what you see, then follow the next safe action.
-
PATH 01Next step
What you see
The panel is dark or the dryer has no power
Do this next
Check the dry plug and outlet from the room side. Do not repeatedly reset a breaker; recurring power loss, a damaged cord, or a burning smell needs qualified electrical or appliance service.
-
PATH 02Next step
What you see
The panel is on but the dryer will not start or the drum will not turn
Do this next
Check door closure and the documented Start control. A failed door latch, motor, drive, or control needs service; do not bypass the switch or remove a panel.
-
PATH 03Next step
What you see
The drum turns but there is no heat
Do this next
Confirm a heated cycle is selected, then have the gas supply and burner checked on a gas model or the electrical supply and heating circuit checked on an electric model.
-
PATH 04Next step
What you see
The dryer heats but clothes remain damp or the cycle takes too long
Do this next
Check load size, cycle choice, lint screen, visible exhaust, vent routing, leveling, and sensing conditions. Poor airflow or recurring damp loads require qualified service.
-
PATH 05Next step
What you see
Gas odor, burning smell, smoke, flame, sparks, unusual heat, water near electricity, or a repeated breaker trip appears
Do this next
Stop immediately and obtain appropriate emergency, gas, electrical, appliance, or vent help from a safe location. Do not continue testing or dismantle the dryer.
Helpful context
Understand the symptom
Start with the symptom, not a replacement part
A dead display suggests power or control input; a lit display with no movement suggests door, start, motor, or control conditions; a tumbling drum with cold air points to a heat source; and a running dryer that leaves clothes damp often points to cycle, load, lint, or exhaust conditions. The exact buttons and indicators vary by model, so use the model's manual for any code or setting that is not obvious.
Do not turn a safety fault into a test cycle
A gas odor, burning smell, smoke, visible spark, excessive heat, damaged cord, or repeated breaker trip is a stop-use condition. Do not keep restarting the dryer, reach behind it, remove a panel, bypass the door switch, or test live wiring. A qualified appliance technician, electrician, gas supplier, or vent specialist can handle the corresponding repair path.
When checks do not resolve it
Need a professional?
Call qualified appliance service when the dryer remains dead, will not start or tumble, has no heat, ends early, leaves clothes damp after the safe external checks, or displays a recurring fault. Use an electrician for unresolved supply or breaker problems and a vent specialist for restricted exhaust. Treat gas odor, smoke, sparking, overheating, or a repeated breaker trip as an immediate stop-use condition.
Common questions
FAQ
What should I check first when my KitchenAid dryer will not start?
From a dry, safe position, check the plug, outlet, breaker, controls, Start command, and fully closed door. If power is unstable, the breaker trips again, or there is a smell, spark, or damaged cord, stop and obtain qualified service.
Why does my KitchenAid dryer run but not heat?
Confirm that Air Only was not selected. If the drum turns but the air stays cold, a gas model needs its gas supply and burner checked by a qualified technician, while an electric model needs its supply and heating circuit checked.
Can a blocked vent make a KitchenAid dryer seem broken?
Yes. Lint or a crushed or blocked exhaust can reduce airflow, lengthen drying, and build heat. Clean the lint screen as directed and have the full vent route professionally serviced if airflow is weak or inaccessible.
Read the exact guide
Official sources
- WASHER/DRYERKitchenAid · KitchenAid dryer cycle selection, Air Only behavior, automatic moisture sensing, load, and drying-performance guidance
- Overheated Clothes Dryers Can Cause FiresU.S. Consumer Product Safety Commission · Clothes-dryer lint, airflow restriction, exhaust blockage, and fire-prevention guidance
- GAS DRYER OWNER'S MANUALKitchenAid · KitchenAid gas-dryer safety, no-start, no-heat, gas supply, vent, lint, and qualified service guidance
Community feedback
Share a repair observation
Share a plain-text repair observation. Accepted observations are published automatically; this page may take a moment to update.