
On this page
Start here
Quick answer
Start by looking for a food package, door-bin item, drawer or rail that prevents the LG freezer door from closing. Check the gasket all the way around for dirt, a folded section, a loose edge, or a tear. Clean it with warm water and mild detergent, dry it, and press a loose section back into its groove by hand. LG also documents a flashlight light-bleed check and says an unleveled unit can prevent a proper seal, but leveling and rail details vary by model. A gap, heavy frost, a ripped or twisted gasket, a door that stays misaligned, or worsening temperature or food-safety symptoms calls for service. Do not pry at ice with a sharp tool, heat or glue the gasket, force the door, or disassemble hinges or panels.
Before you begin
Safety first
- Limit owner checks to visible obstructions, correctly re-seated drawers or rails as described by the exact model manual, external gasket cleaning and gentle hand reseating, a battery-flashlight light-bleed check, and observation of frost or temperature. Do not force the door, pry ice with a sharp tool, heat or glue the gasket, drill or bend hardware, remove hinges or panels, or work on sealed-system, drain or electrical parts.
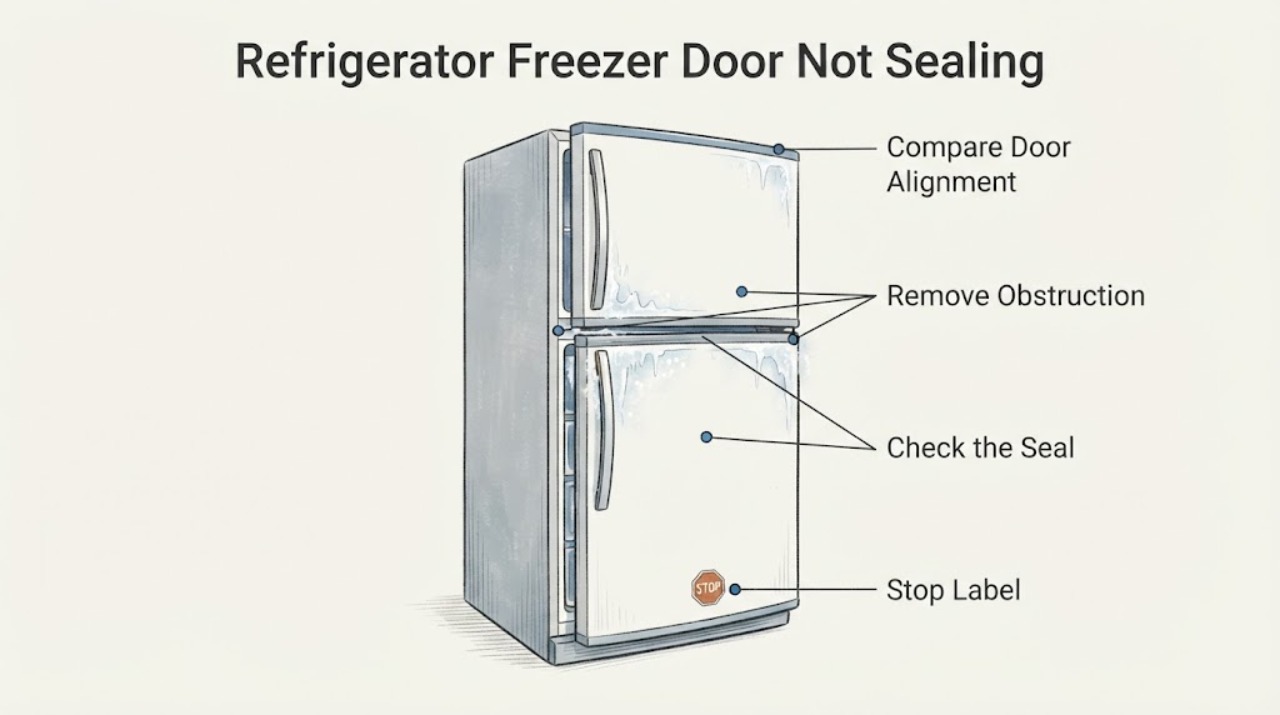
Work through in order
Diagnostic checks
Use only checks that match the exact appliance or system and its official guide.
-
Check 1
Close the freezer gently and identify the visible symptom: a gap or light bleed, a drawer that stops short, frost at the door, condensation, or a temperature/food-safety change.
Expected result: The door closes continuously, or it stops/rebounds at a particular drawer, food item or gasket section.
Next step: Use the matching obstruction, gasket and escalation branches; keep the door closed as much as practical if frozen food is warming.
Why this matters
Why: A local stopping point suggests an obstruction or rail/drawer fit issue; frost, condensation or warming indicates that air may be entering through the seal but does not identify an internal component.
-
Check 2
Remove food packages, bags or ice touching the door, and inspect behind the freezer drawer; re-seat the drawer or rail only with the force and sequence allowed by the exact model manual.
Expected result: The door now closes fully, or the drawer still stops, scrapes or sits out of alignment.
Next step: If the door still cannot close without force, stop using the drawer and arrange model-qualified service rather than bending or removing hardware.
Why this matters
Why: A corrected closure supports a simple obstruction or seating issue. Continued misalignment is not proof of a bent rail, hinge or other part.
-
Check 3
Inspect the entire gasket for food, hardened residue, a compressed fold or a loose edge. Clean it with warm water and mild detergent or a warm steamy towel, dry it, and press only a loose edge back into its groove by hand.
Expected result: The gasket is clean and continuous, or it remains loose, torn, twisted, cracked or unable to stay in its groove.
Next step: Use the closure check if the gasket is intact; request service if it is damaged or cannot remain seated. Do not glue, heat, stretch or replace it with an unverified part.
Why this matters
Why: Residue or a displaced edge can weaken adhesion. Damage or repeated separation is outside a safe cleaning fix and may let cold air escape.
-
Check 4
If the freezer has no exposed damage and the door can be closed normally, place a small battery flashlight inside, close the door, and look around the gasket from outside for light bleed.
Expected result: No light is visible, or light escapes at one or more sections of the gasket.
Next step: For light bleed, recheck obstructions and gasket seating once; if it persists, keep the freezer closed and arrange service. Do not press the door harder or disassemble it.
Why this matters
Why: LG uses light bleed as an indication that the freezer is not sealing; no light does not prove that the temperature system is healthy.
-
Check 5
Record whether moisture is only on the rubber gasket in a humid room, or whether there is recurring frost, a sheet of ice on the floor, melting food or a rising freezer temperature.
Expected result: Moisture wipes away and the door seals, or frost/ice and temperature symptoms recur after the external checks.
Next step: Dry normal condensation and monitor a closed door; for recurring frost, ice, warming or a leak, protect food as appropriate and request service without chipping ice or removing panels.
Why this matters
Why: LG describes humidity-related gasket droplets as possible normal condensation, while recurring frost or a freezer-floor ice sheet can indicate continued air entry or a drain condition requiring professional work.
-
Check 6
Give LG or a qualified refrigerator servicer the exact model, the location of the gap or damage, drawer/rail position, light-bleed result, frost or temperature symptoms, and what external cleaning changed.
Expected result: The gasket is damaged, the door is visibly out of square, light bleed persists, frost returns, cooling is affected, or a repair would require hinge, panel, drain or cabinet access.
Next step: Stop forcing or repeatedly opening the freezer and arrange model-qualified service; do not open panels, use sharp tools, heat the gasket or test sealed-system/electrical parts.
Why this matters
Why: The public LG guidance supports external checks but does not establish a universal hinge setting, gasket part number or internal frost/drain repair for an unspecified model.
Use your observations
Decision map
Find the observation that best matches what you see, then follow the next safe action.
-
PATH 01Next step
What you see
The door closes fully after an item is removed or a drawer/rail is re-seated according to the exact model manual, and no gasket damage or light bleed remains.
Do this next
Keep the freezer from being overfilled, monitor frost and temperature, and use the manual if the symptom returns.
Why this path and its safety boundary
Why it matters: The observed obstruction or seating issue explains the closure symptom better than an unconfirmed internal part failure.
-
PATH 02Next step
What you see
Food residue or a displaced gasket edge is found, and the gasket seals after cleaning, drying and gentle hand reseating.
Do this next
Leave the door closed long enough for the gasket to settle and monitor for condensation, frost or renewed gaps; request service if it separates again.
Why this path and its safety boundary
Why it matters: LG identifies foreign matter and a loose gasket edge as causes of poor adhesion and incomplete closure.
-
PATH 03Next step
What you see
A torn, twisted, cracked or persistently detached gasket remains, or the flashlight shows light bleed after the safe external checks.
Do this next
Keep the door closed as much as practical and arrange LG or qualified refrigerator service; do not glue, heat, stretch or substitute a gasket.
Why this path and its safety boundary
Why it matters: The seal is not reliably closing, and LG directs damaged gasket problems to repair rather than a universal owner replacement procedure.
-
PATH 04Next step
What you see
Condensation appears only on the gasket in a humid location, wipes away, and the door closes with no light bleed or temperature change.
Do this next
Dry the gasket, reduce door opening and keep items from obstructing closure; escalate if frost, warming or a persistent gap develops.
Why this path and its safety boundary
Why it matters: LG describes humidity-related droplets on a cold gasket as possible normal condensation rather than proof of a failed seal.
-
PATH 05Next step
What you see
A sheet of ice returns on the freezer floor, frost continues after the door seals, food is warming, a leak is present, or the next step would require removing a panel or hinge.
Do this next
Stop forcing the door or chipping ice, protect food as appropriate, and arrange model-qualified service. Do not open panels or attempt sealed-system, drain, hinge or electrical repair.
Why this path and its safety boundary
Why it matters: The issue is beyond the supported external gasket and obstruction checks; LG notes that a recurring freezer-floor ice sheet can require a trained technician and disassembly.
Helpful context
Understand the symptom
Confirm what is preventing the seal
With the freezer closed, note whether the problem is a visible gap, a door that rebounds, a drawer that stops short, condensation around the gasket, or frost near the door. Look for food packages, bags, ice, a shelf, a drawer or a guide rail that is not seated. LG says even a small opening can admit warm, moist air and create frost; it also says a packed drawer can keep the door from closing.
Remove only visible obstructions
Remove or reposition items that touch the door or sit behind a drawer, then make sure the drawer and shelves are correctly installed. If this LG model uses guide rails, re-seat the drawer only as shown in its owner manual; the LG family guidance describes checking the rails and fully closing the freezer after re-seating them. Do not force a rail, bend a basket, or infer a hinge adjustment from a different model.
Clean and reseat the gasket
Wipe all four sides of the gasket with warm water and mild detergent or a warm, steamy towel, then dry it completely. Inspect for hardened food, a compressed fold, a loose edge, crack, tear or twist. LG says a loose portion may be pressed back into its groove by hand. Stop if the gasket is damaged or will not stay seated; do not glue it, heat it, stretch it, or substitute an unverified seal.
Check the closure without stressing the door
After the visible cleanup, close the freezer gently and inspect the gasket for a continuous contact line. LG also documents placing a battery flashlight inside the freezer, closing the door, and looking from outside for light bleed; visible light indicates that the seal is not closing properly. This is an observation check, not a reason to force the door or remove its hinges.
Treat frost and condensation as results, not a diagnosis
A little moisture on a gasket can be normal in a humid location, but persistent condensation, frost at the door, a sheet of ice on the freezer floor, melting food or a rising temperature needs escalation. LG notes that a bottom sheet of ice can involve a blocked drain and may require disassembly by a trained technician. Do not chip ice with a knife or sharp tool, pour uncontrolled heat into the freezer, or remove an interior panel.
Use the exact model manual for leveling or parts
An unleveled refrigerator can keep a door from sealing, and LG publishes leveling guidance, but the correct foot, rail and hinge procedure depends on the refrigerator design. Use the model manual or LG service for any adjustment. Request service for a torn or twisted gasket, a door that remains visibly out of square, persistent light bleed, recurring frost, a water leak, or cooling and food-safety symptoms.
When checks do not resolve it
Need a professional?
Use LG support or qualified refrigerator service for a damaged or persistent seal, misaligned door, recurring frost or floor ice, leak, warming freezer, food-safety concern, or any condition requiring model-specific leveling, hinge, rail, drain or panel work.
Safety scope: Limit owner checks to visible obstructions, correctly re-seated drawers or rails as described by the exact model manual, external gasket cleaning and gentle hand reseating, a battery-flashlight light-bleed check, and observation of frost or temperature. Do not force the door, pry ice with a sharp tool, heat or glue the gasket, drill or bend hardware, remove hinges or panels, or work on sealed-system, drain or electrical parts.
Common questions
FAQ
Why is my LG freezer door not sealing?
LG says food or bags, a drawer or guide rail that is not seated, dirt on the gasket, a loose gasket edge and an unleveled refrigerator can prevent a full seal. Check those visible conditions before assuming a failed part.
Can I fix an LG freezer gasket that is dirty or partly out of its groove?
Yes, for an intact gasket: clean it with warm water and mild detergent or a warm steamy towel, dry it, and press the loose edge back into its groove by hand. A torn, twisted or repeatedly detached gasket needs service.
How can I check whether the freezer gasket has a gap?
LG documents placing a small battery flashlight inside the freezer, closing the door and looking from outside for light bleed. Light at the gasket indicates an incomplete seal; do not press the door harder or remove the door to correct it.
Is condensation on an LG freezer gasket always a failure?
No. LG says humidity can produce normal droplets on a cold gasket. Wipe them dry and check that the door, drawers and shelves are correctly installed. Persistent frost, a sheet of floor ice, warming or a gap needs service evaluation.
Can I replace or adjust the LG freezer door hinge without the model manual?
Do not guess. LG's public guidance supports checking closure, gasket, rails and leveling, but the hinge and replacement procedure depends on the exact refrigerator. Use the model manual or a qualified servicer, especially if the door is heavy or out of square.
Read the exact guide
Official sources
- Craft Ice MeltsLG USA Support · LG family guidance used only for the general freezer-door seal observation: light bleed, gasket buildup/damage and leveling; Craft Ice-specific temperature claims are not used.
- LG Refrigerator - Frost BuildupLG USA Support · Family-level LG guidance for freezer-door closure, food and rail obstructions, gasket inspection and cleaning, leveling, persistent frost and service boundaries.
- [LG Refrigerator] Water Droplets Form on Rubber Gasket (Condensation)LG USA Support · Family-level distinction between humidity condensation and a door that is not closing; supports drawer, shelf, overpacking, bag and gasket checks plus service for damage.
- [LG refrigerator door] How to remove foreign matter from the door gasket.LG USA Support · Family-level gasket cleaning and hand-reseating guidance; explicitly notes that images or content can differ by model.
Community feedback
Share a repair observation
Share a plain-text repair observation. Accepted observations are published automatically; this page may take a moment to update.