
On this page
Start here
Quick answer
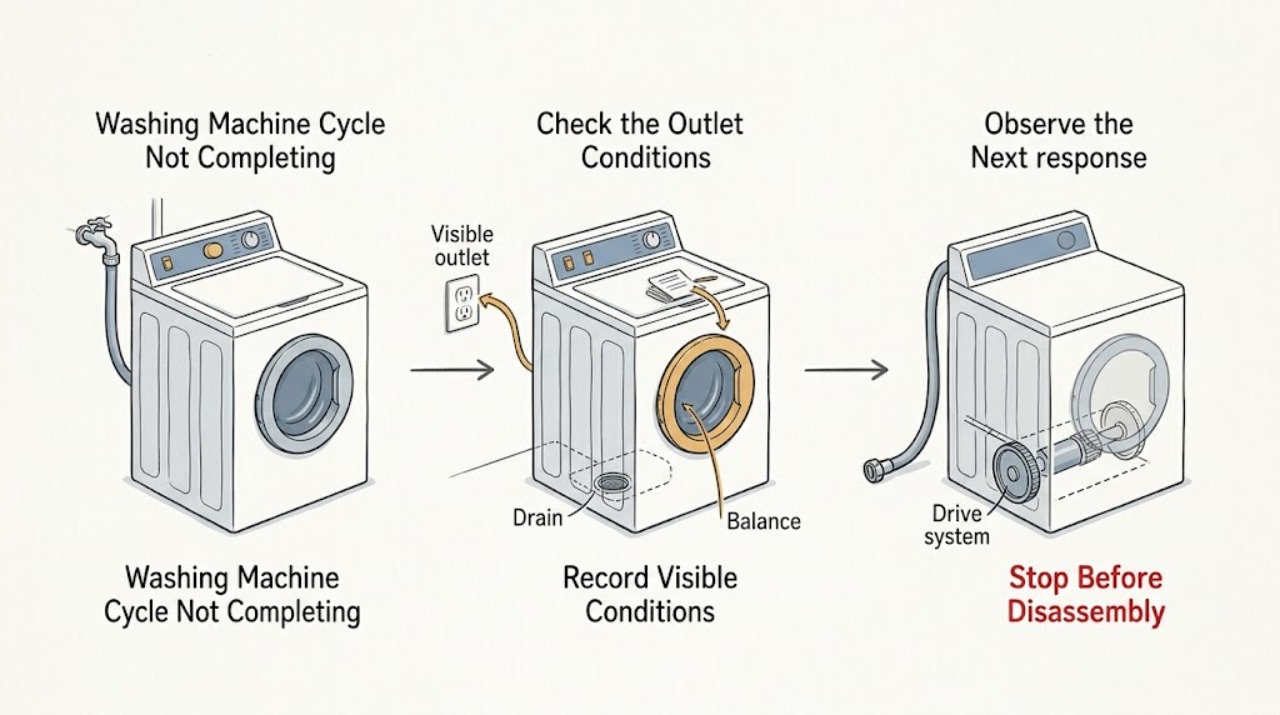
First note whether the Maytag washer stops while filling, washing, rinsing, draining, spinning, or at the end, and record any displayed code and whether the door or lid is locked. A pause can be normal during sensing, soaking, or suds removal, but a persistent stop usually points to water flow, a lock, drainage, excess suds, an unbalanced load, or a model-specific fault. Check the matching low-risk path below, perform only one documented power reset, and stop for service if the symptom returns or any electrical, water, smoke, burning, arcing, or severe-vibration hazard appears.
Work through in order
Diagnostic checks
Use only checks that match the exact appliance or system and its official guide.
-
Check 1
Stop the washer and look from a dry position for smoke, a burning or electrical smell, sparks or arcing, a recently tripped breaker, water reaching the outlet or controls, uncontrolled filling, or violent tub movement.
Expected result: There is no active hazard and the washer is stable, or one of those danger signs is present.
Next step: If any danger sign is present, stop, keep clear of wet electrical equipment, shut off the water supply only if it is safe to do so, and use qualified service. Otherwise continue with the stage and code check.
Why this matters
Why: A stable, dry appliance can receive low-risk observations. A water/electricity contact, fire sign, repeated trip, uncontrolled water flow, or severe vibration is a safety fault rather than a routine cycle issue.
-
Check 2
Write down the exact point where the cycle stopped—fill, wash or tumble, rinse, drain, spin, or end—along with the display text, remaining water, and whether a front door or top lid is locked. Identify whether the machine is front-load or top-load and record the model from its rating label.
Expected result: The stop repeats at one stage, or the machine resumes after a normal pause; a code may identify a lock, low-flow, drain, motor-speed, or suds condition.
Next step: Follow the first action below that matches the recorded stage; do not assume a code from another Maytag model has the same meaning.
Why this matters
Why: A repeatable stage narrows the decision path. Maytag notes that displayed codes are model-dependent, so the owner's manual for the recorded model takes priority over a generic code list.
-
Check 3
With the tub empty of loose items and the machine dry, confirm that the chosen cycle is valid, the control lock is off, the door or lid is fully closed, and Start is held as required by the model. Do not force the lock or bypass it.
Expected result: The washer starts and locks normally, or it shows a control-lock/start/door indication and will not begin or continue.
Next step: Clear the control lock using the model's labeled control, close the door or lid without slamming it, and retry the same cycle once. If it still will not lock or the latch is damaged, stop and request service.
Why this matters
Why: A control lock, an unlatched door or lid, a cycle-selection state, or a required press-and-hold can look like a failed cycle. A lock indication with a blocked or damaged latch points to a door/lid circuit rather than a load problem.
-
Check 4
If the washer stops during filling or shows a low-flow indication, check from outside that both hot and cold household valves are open where the model requires both, the inlet hoses are not kinked, and there is no visible leak at a connection. Do not remove a hose while it is pressurized.
Expected result: Water enters normally, flow is weak or absent, a hose is kinked, or water is leaking.
Next step: Correct only an accessible valve or hose-position issue, dry the area, and run one supervised test. If water continues leaking, flow remains poor with the valves open, or the inlet screen/valve needs disassembly, stop for service.
Why this matters
Why: Weak or absent flow can prevent the next phase; Maytag identifies closed valves, kinked hoses, and blocked inlet screens as fill causes. A leak changes this from a cycle diagnosis to a water-safety issue.
-
Check 5
If a front-load door remains locked or a top-load lid will not open after the machine has stopped, check whether the tub is hot or still contains water and wait for the machine's normal safe release. Do not pull the door, insert tools, or reach into the tub.
Expected result: The lock releases after the water drains and the cycle is canceled normally, or it stays locked with water or a lock code present.
Next step: Use the labeled Cancel or Drain and Spin control only when the area is dry and the machine is stable. If the lock remains engaged, water cannot drain, or the latch is damaged, leave it closed and arrange qualified service.
Why this matters
Why: A lock can remain engaged for safety during water, heat, or a model feature such as a hold-and-tumble period. A persistent lock with a blocked seal/latch, standing water, or a lock code needs the model-specific lock and drain path checked.
-
Check 6
If water remains when the washer stops in drain or spin, inspect the accessible drain hose and its connection from outside for a kink, clog, an overly sealed fit, or incorrect placement. Keep the floor and outlet dry; do not open a pump filter or hose while water can spill into electrical areas.
Expected result: The hose is clear and correctly positioned, or water is standing and the hose is kinked, clogged, or improperly installed.
Next step: Correct only a visible hose-position problem if it can be done without spilling water, then use one supervised Drain and Spin. If the tub will not drain, the pump/filter requires opening, or water approaches electrical parts, stop and call service.
Why this matters
Why: Restricted or incorrectly installed drainage can extend the cycle, prevent spin, leave clothes wet, and trigger a drain or suds response. Standing water also increases slip and electrical risk.
-
Check 7
If the washer stops at rinse or spin, wait until it is fully stopped, then redistribute a bulky or single heavy load evenly. Confirm the washer is stable and level from outside; do not hold the cabinet or reach into a moving basket to correct it.
Expected result: The load is tightly packed or off-center, the washer is rocking, or a balanced load still causes loud impact and repeated stopping.
Next step: Redistribute the load and select the model-appropriate cycle or spin option once. If violent movement, metal-on-metal noise, or repeated imbalance remains, stop using the washer and request service.
Why this matters
Why: Maytag explains that imbalance can cause noise, vibration, reduced spin speed, longer cycles, wet clothes, and an automatic stop while the washer attempts to self-correct. Persistent impact after a balanced load can indicate suspension, leveling, or drive trouble.
-
Check 8
If the display shows Sud or Sd, or the washer repeatedly pauses while making bubbles, check the detergent label and amount against the model manual. Use only the specified high-efficiency detergent and never add more detergent to a suds-filled tub; do not mix cleaning chemicals.
Expected result: There are excessive suds, a normal suds-removal pause, or no suds but a drain restriction remains.
Next step: Let the washer complete its documented suds-removal response, or use the model's Drain and Spin with any specified extra rinse after the tub is safe. If suds or the code return with correct detergent use, stop and request service.
Why this matters
Why: Maytag states that excess suds can pause tumbling, add rinse water, slow or prevent water extraction, and prolong the cycle. A drain restriction can produce a similar delay, so the two conditions must not be conflated.
-
Check 9
Read the exact code in the owner's manual for the recorded model. For orientation only, Maytag's front-load guide associates LOC or LC with Control Lock, Sud or Sd with excess suds, F5 E2 with a door-lock problem, F8 E1 or LO FL with low water flow, and F9 E1 with longer-than-expected draining.
Expected result: The code matches a path already checked, or it is absent, different, or persistent after the manual's low-risk action.
Next step: Follow only the manual's external checks and record the code for service. Do not test live wiring, remove panels, or replace a part based on the code alone.
Why this matters
Why: Codes are diagnostic clues, not universal repair instructions. Maytag warns that its published list may not include every model's codes; a different or recurring code needs model-specific interpretation.
-
Check 10
After the washer is dry, stable, and free of the hazards above, perform one power reset using the model guidance: unplug or disconnect power for the documented interval, reconnect it, select the cycle again, and hold Start as required. Do not repeatedly reset a breaker or retry a dangerous symptom.
Expected result: The same cycle completes once, or the washer stops again at the same stage or shows the same code.
Next step: If it completes, monitor the next load without overloading it. If it stops again, preserve the code and stage notes and arrange qualified service instead of repeating resets.
Why this matters
Why: A single reset can clear a transient control state, but recurrence is evidence of an unresolved supply, lock, drain, balance, motor, or control fault rather than a successful repair.
Use your observations
Decision map
Find the observation that best matches what you see, then follow the next safe action.
-
PATH 01Safety boundary
What you see
Stops while filling or shows low flow
Do this next
Check both required water valves, hose routing, and visible leaks; persistent low flow or a leak requires service.
Why this path and its safety boundary
Safety stop: Continue to the door/lid, wash, or drain branch that matches the recorded stage.
-
PATH 02Safety boundary
What you see
Stops during wash or appears paused without a hazard
Do this next
Allow a normal sensing, soak, or suds-removal pause to finish; if the stage remains stuck, check the exact code and detergent path.
Why this path and its safety boundary
Safety stop: Use the stage-specific branch below.
-
PATH 03Safety boundary
What you see
Door or lid will not lock, or stays locked
Do this next
Do not force it. Check safe cycle state and standing water from outside; a persistent lock or damaged latch needs service.
Why this path and its safety boundary
Safety stop: Continue with drainage or load-balance checks.
-
PATH 04Safety boundary
What you see
Stops in drain or spin with standing water
Do this next
Check only the accessible drain hose and installation while keeping water away from electrical parts; persistent no-drain needs service.
Why this path and its safety boundary
Safety stop: Check load balance, cycle selection, and spin setting.
-
PATH 05Safety boundary
What you see
Stops in rinse or spin with wet clothes, shaking, or impact
Do this next
Stop the machine, redistribute the load, and verify external stability; repeated severe movement or impact needs service.
Why this path and its safety boundary
Safety stop: Continue to the code and single-reset path.
-
PATH 06Safety boundary
What you see
Sud or Sd is displayed or visible bubbles persist
Do this next
Use the correct high-efficiency detergent and amount, allow the rinse response, and do not add detergent or cleaning chemicals.
Why this path and its safety boundary
Safety stop: Do not infer a suds fault; follow the exact model code or service path.
-
PATH 07Safety boundary
What you see
The fault returns after one safe documented reset
Do this next
Stop troubleshooting and provide the technician with the model, stage, code, water state, lock state, load, and what changed.
Why this path and its safety boundary
Safety stop: Run no more than a supervised normal cycle and monitor for recurrence.
Helpful context
Understand the symptom
A washer may pause briefly while it senses the load, soaks, redistributes clothing, drains, or reduces suds. Treat it as a fault when the same stage remains stalled, the display shows a code, water remains in the tub, the lock will not release after the cycle should be safe, or the washer repeatedly stops after a restart. Front-load and top-load controls differ, so use the instructions for your model rather than assuming a code or button sequence.
Before any check, keep hands and feet dry. Do not reach into moving clothing, force a locked door or lid, open a wet electrical area, or remove panels. If the problem is accompanied by smoke, a burning smell, visible arcing, repeated breaker trips, uncontrolled filling, water close to electrical parts, or violent movement, stop using the washer and arrange qualified help.
Safety boundary
Stop conditions
- Stop immediately for smoke, a burning or electrical smell, visible sparks or arcing, a hot or discolored outlet, or a breaker that trips again.
- Stop immediately if water reaches the outlet, controls, cord, or another electrical connection; do not touch wet plugged-in equipment.
- Stop if the washer is violently shaking, walking, striking the cabinet, or making persistent metal-on-metal noise.
- Stop if water continues entering when the washer is off, a hose or cabinet leaks repeatedly, or standing water cannot be safely drained.
- Never force a locked door or lid, bypass an interlock, remove panels, test live wiring, or open a pump or water connection with unsafe water present.
Only after diagnosis
Potential parts
- door or lid lock assembly
Consider only if the model-specific lock check fails, the latch is damaged, or a lock code returns with the door or lid unobstructed.
Confirm the exact Maytag model and the manufacturer's fit information before ordering; do not bypass the interlock. - water inlet valve
Consider only if both household supplies and hoses are adequate but the model-specific fill test indicates an inlet valve or screen fault.
Match the exact model and configuration; water connections and internal replacement are service work when leakage is possible. - drain pump
Consider only if the accessible drain path is clear but the washer still cannot drain or repeatedly stops with standing water.
Confirm model fit and have the water safely contained before any internal drain work. - suspension, drive, or control component
Consider only after a balanced, correctly installed load still causes severe vibration, motor-speed symptoms, or a recurring model-specific control fault.
Do not select a component from a code alone; model-specific diagnosis and fitment confirmation are required.
When checks do not resolve it
Need a professional?
Arrange qualified appliance service when the same stage or code returns after the documented checks and one reset, when a latch, pump, inlet valve, motor, suspension, or control may need testing, or whenever a safety stop condition occurs.
Common questions
FAQ
Why does my Maytag washer stop before the spin cycle?
An unbalanced or bulky load, standing water from a restricted drain path, excessive suds, a low-spin selection, or a power interruption can prevent a normal spin. Note whether the tub contains water, then check the safe drain and load-balance paths; severe shaking or repeated stopping needs service.
Is a long pause during a Maytag wash cycle always a failure?
No. Some cycles pause for sensing, soaking, tumbling, or suds removal. It becomes a fault when the washer remains at the same stage, repeats the stop, shows a code, leaves water, or develops a safety symptom.
What should I do if the Maytag washer door or lid stays locked?
Do not force it. Keep clear of the tub, determine from outside whether water or heat remains, and use only the model's normal cancel or drain control when it is safe. A persistent lock, standing water, or damaged latch requires qualified service.
Can I keep resetting the washer until it finishes?
Use only one safe, model-documented power reset after the washer is dry and stable. If the same stage or code returns, repeated resets can hide a lock, drain, electrical, or control fault; record the symptoms and arrange service.
Read the exact guide
Official sources
- Error Codes in Front Load Washers - Product Help | MaytagMaytag Product Help · Maytag front-load washer error-code meanings and model-specific troubleshooting limits
- CPSC Urges Flood Victims to Take Steps to Prevent CO Poisoning, Electrocution, Explosion and FiresU.S. Consumer Product Safety Commission · Electrical and water safety around wet appliances
- Stops Mid Cycle- Washer - Product Help | MaytagMaytag Product Help · Maytag top-load washer mid-cycle stops, imbalance, vibration, and self-correction behavior
- Not Starting or Not Operating - Front Load Washer - Product Help | MaytagMaytag Product Help · Maytag front-load washer water supply, door closure, Start control, display states, and power cycle guidance
- Door Will Not Lock or Unlock - Front Load Washer - Product Help | MaytagMaytag Product Help · Maytag front-load washer door lock and unlock behavior
- Not Spinning - Washer - Product Help | MaytagMaytag Product Help · Maytag washer spin, imbalance, standing water, drain hose, and leveling checks
- Owner's ManualMaytag · Maytag washer owner-manual troubleshooting for pauses, water supply, detergent suds, drainage, and spin
Community feedback
Share a repair observation
Share a plain-text repair observation. Accepted observations are published automatically; this page may take a moment to update.