
On this page
Start here
Quick answer
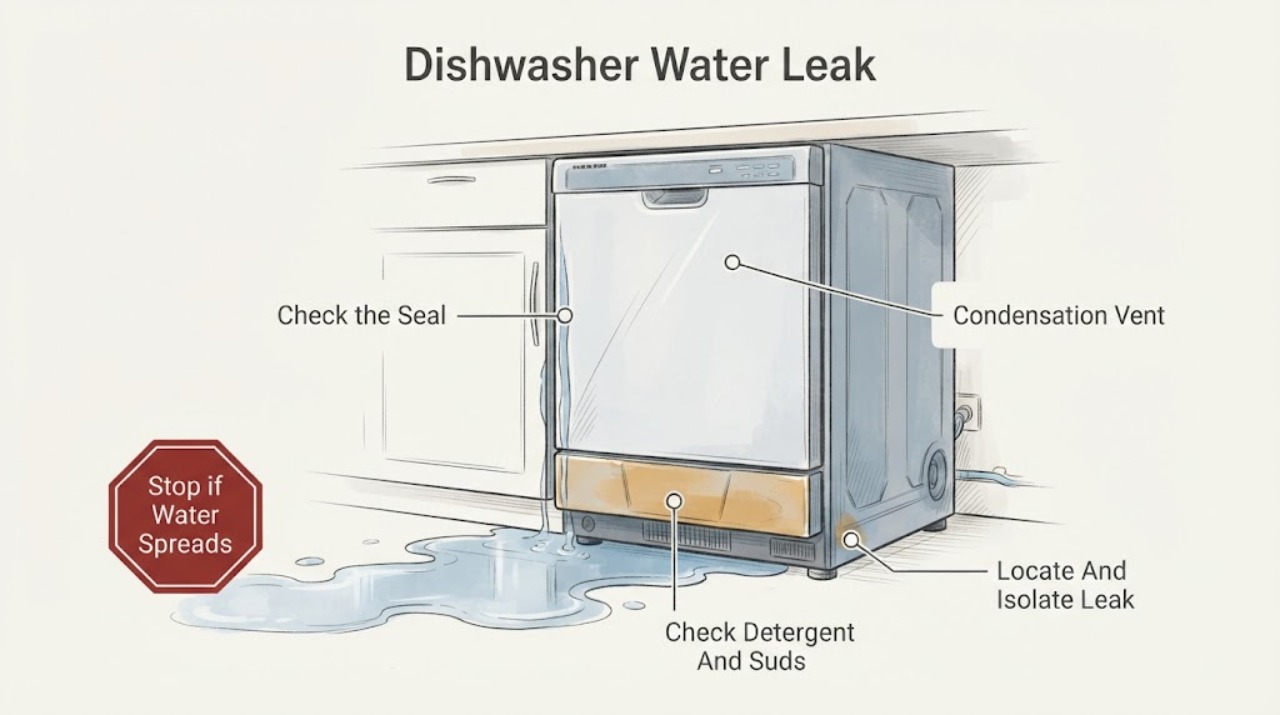
First stop the cycle and locate the water before assuming a failed part. A small amount of water around the filter area can be normal, while water escaping from the door, under the machine or near a connection needs a different check. Thermador identifies door leakage causes including the wrong detergent or excess suds, a door seal pulled out by a dish, a blocked condensation vent, and incorrect leveling. With the dishwasher stopped, inspect only visible door, rack, vent, floor and under-sink conditions that the model instructions permit; keep water away from electrical connections and close the dishwasher water valve if an active leak continues. If water comes from inside the cabinet or base, reaches electrics, returns after the external checks, or the seal/plumbing is damaged, leave the appliance off and arrange qualified Thermador service rather than opening panels or guessing a pump, hose or seal.
Work through in order
Diagnostic checks
Use only checks that match the exact appliance or system and its official guide.
-
Check 1
Stop the dishwasher, record where water is visible and when it appears, and close the dishwasher water valve if an active leak continues. Keep water away from the plug, socket and electrical controls; isolate power only if it can be done without touching a wet or damaged connection.
Expected result: Water is at the door, under the front or sink, at a visible hose, inside the cabinet/base, or only around the filter recess; it appears during filling, washing, draining or after the cycle.
Next step: Follow the matching branch below. Leave the dishwasher off and arrange service immediately for water inside the cabinet/base, water near electrics, an active uncontrolled leak or visible structural damage.
Why this matters
Why: Location and timing separate a door condition, a visible plumbing/drain condition, normal filter-area water and an internal leak that needs service.
-
Check 2
For water at the front, with the dishwasher stopped, check that dishes do not extend beyond the rack, the visible door seal is seated rather than pulled away, and the side condensation vent is not visibly blocked.
Expected result: A dish or rack item presses on the seal, the seal is displaced, the vent is blocked, or these visible conditions appear normal.
Next step: Remove or reposition only the obstructing load and use the model instructions for any seal seating check. Do not pry, glue or replace the seal without exact-model instructions; escalate if water returns.
Why this matters
Why: Thermador identifies an item catching the seal, a blocked condensation vent and improper leveling as door-leak conditions; a clear visible front path does not rule out an internal leak.
-
Check 3
Check the detergent used and whether foam is escaping from the door. Use only detergent identified for dishwashers and do not run another cycle while excessive suds remain.
Expected result: Household dish detergent or unusually heavy suds are present, or the dishwasher uses the correct detergent and there is no foam.
Next step: Stop using the wrong detergent and follow the exact manual or qualified service guidance for clearing persistent suds. If water still escapes after the suds condition is resolved, continue with the location and installation checks.
Why this matters
Why: Thermador lists incorrect detergent and persistent suds as causes of door leakage. Correct detergent use can remove that explanation but does not establish that a seal or pump is sound.
-
Check 4
If water is seen only at the bottom, identify whether it is a small amount confined around the filter or water standing across the tub or outside the appliance.
Expected result: The water is a small amount around the filter with no external puddle, or it is spread across the tub, leaking outside or returning after drainage.
Next step: For the normal-looking filter-area result, compare with the exact manual and monitor. For broader standing water or an external leak, keep the appliance off and follow the drain/installation and service branch.
Why this matters
Why: Thermador says a small amount around the filter can be normal; broader standing water or an external puddle is a separate drainage or leak symptom.
-
Check 5
With the water supply safely closed and the appliance stopped, inspect accessible under-sink and visible rear connections for a kinked or damaged inlet hose, a blocked air gap or drain path, a disposal connection problem, or an installation that does not match the model instructions.
Expected result: A visible hose is kinked/damaged, the air gap or drain connection is blocked, the drain routing is unsupported, or all accessible connections look correct.
Next step: Correct only a safe, visible condition that the exact manual supports; do not disconnect wet or pressurized fittings, open panels or guess a hose/pump replacement. Escalate if water returns or the source is not visible.
Why this matters
Why: Thermador lists water-supply blockage, drain-line blockage and drain routing as separate conditions. Clear visible installation evidence can narrow the issue but cannot rule out an internal leak or pump problem.
-
Check 6
If the exact model manual identifies a user-removable filter, clean and reinstall it according to that manual, then record whether the leak or standing water returns. Do not remove an unverified pump cover or run with the filter unlocked.
Expected result: The model-approved filter is blocked or incorrectly seated, the filter is clean and locked, or the filter design/access is uncertain.
Next step: Use only the model-approved filter path. If water still leaks, the filter cannot be identified safely, or water is inside the cabinet/base, leave the dishwasher off and arrange service.
Why this matters
Why: A dirty or poorly seated filter may contribute to drainage symptoms, but a clean filter does not diagnose a leak source; filter access is model-dependent.
Use your observations
Decision map
Find the observation that best matches what you see, then follow the next safe action.
-
PATH 01Next step
What you see
Water appears at the front or door edge during washing, and a dish catches the seal, the seal is displaced, the condensation vent is blocked or the appliance is visibly out of level.
Do this next
Stop the cycle, correct only the visible load or model-approved leveling condition, and keep the dishwasher off if the seal is damaged or water returns. Arrange qualified service for a persistent front leak.
Why this path and its safety boundary
Why it matters: Thermador identifies these visible load, seal, vent and leveling conditions as possible causes of door leakage; the result does not prove a failed seal or pump.
-
PATH 02Next step
What you see
Foam is escaping from the door or household dish detergent was used.
Do this next
Stop using the wrong detergent and follow the exact manual or qualified service guidance for clearing the suds. Do not keep running cycles while foam escapes.
Why this path and its safety boundary
Why it matters: Thermador lists incorrect detergent and persistent suds as a door-leak cause, so this is a detergent/foam condition until it is resolved; it is not evidence of a broken pump.
-
PATH 03Next step
What you see
Only a small amount of water is confined around the bottom filter and there is no external puddle or cabinet leak.
Do this next
Compare the amount with the exact owner manual and monitor the next appropriate cycle. Escalate if water spreads across the tub, reaches the floor or returns abnormally.
Why this path and its safety boundary
Why it matters: Thermador says a small amount of water around the filter can be normal, so this observation alone does not establish a leak or failed drain component.
-
PATH 04Next step
What you see
Water appears under the sink, near a visible hose or after draining, and an inlet hose, air gap, disposal connection or drain route is visibly kinked, damaged or blocked.
Do this next
Close the supply for an active leak and correct only the model-supported accessible condition. Do not disconnect wet fittings or open the cabinet; arrange service if the leak persists.
Why this path and its safety boundary
Why it matters: The visible installation or drain path may be contributing to the water condition, but Thermador's general guidance does not establish an internal pump or valve diagnosis from that observation.
-
PATH 05Next step
What you see
Water comes from inside the cabinet/base, reaches electrical parts, damages the door seal or plumbing, returns after the external checks, or cannot be located safely.
Do this next
Leave the dishwasher off, isolate water and power only when safe, protect the surrounding area, and arrange qualified Thermador service. Do not remove panels, bypass a leak-protection switch or run a cycle to reproduce the leak.
Why this path and its safety boundary
Why it matters: The remaining possibilities require model-specific inspection or professional plumbing/electrical work; the public general pages do not support a user diagnosis or part fit.
Helpful context
Understand the symptom
Find the leak location before choosing a repair path
Dry the accessible floor only if it is safe and note whether water appears at the door edge, under the front, under the sink, at the rear, or only inside the filter recess. Also note whether it appears while filling, during washing, while draining or after the cycle. Thermador's support pages treat door leakage, drain obstruction, water supply and normal filter-area water as separate situations. A puddle alone does not identify a failed pump, hose, valve or seal.
Use the door-leak checks for water at the front
With the dishwasher stopped, check that no plate, utensil or other item extends beyond the rack and catches the inner door seal. Look for a seal that has visibly pulled away and for an accessible side condensation vent blocked by an item or installation trim. Thermador also links door leakage to incorrect leveling. Use only dishwasher detergent; household dish detergent can create suds and leakage. Do not pry the seal, dismantle the door or keep running cycles while foam or water is escaping.
Do not mistake normal filter-area water for an external leak
Thermador says a small amount of water around the filter at the bottom can be normal. If water is only in that recess and there is no water outside the cabinet, record the amount and compare it with the exact model manual. If water is spread across the tub, appears under the appliance or returns as a puddle, treat it as a different drainage or leak symptom rather than relying on the normal-water explanation.
Inspect visible supply and drain conditions without opening the cabinet
If water appears under the sink or at a visible connection, first close the dishwasher water supply if an active leak continues. With the appliance stopped, look for a kinked or visibly damaged inlet hose, a drain hose or air-gap blockage, a disposal connection problem, or an installation that does not match the exact manual. Thermador says the drain hose needs a high loop between 20 and 50 inches above the floor for proper pumping, but installation details can vary; do not disconnect a pressurized or wet connection unless the model instructions and safe isolation permit it.
Clean the filter only by the model-approved method
A blocked filter can contribute to drainage problems, but it does not prove that the filter caused an external leak. If the exact manual identifies a user-removable filter, stop the appliance, remove and rinse it as directed, use a soft brush for debris, dry it and lock it back into place. Thermador warns that filter access and reinstallation are manual-dependent. Do not remove a pump cover, reach into an unseen cavity or run the dishwasher with a filter improperly installed.
When checks do not resolve it
Need a professional?
Arrange qualified Thermador service when water comes from the cabinet or base, reaches electrics, returns after the visible door, detergent, leveling, drain and filter checks, or when the seal, hose, plumbing or installation is damaged or cannot be safely identified. Thermador's parts guidance requires the model number for replacement lookup; do not order a generic seal, pump or hose from the symptom alone.
Common questions
FAQ
Is a little water at the bottom of a Thermador dishwasher always a leak?
No. Thermador says a small amount of water around the filter can be normal. Water across the tub, on the floor, under the cabinet or returning abnormally is a different symptom and should be treated as a drainage or leak condition.
Why can a Thermador dishwasher leak from the door?
Thermador lists incorrect detergent or persistent suds, a seal pulled away by dishes, a blocked side condensation vent and improper leveling as possible door-leak conditions. Check only visible, model-appropriate items and arrange service if the leak persists.
Can I order a replacement seal or pump without the dishwasher model?
Do not assume compatibility. Thermador's parts guidance uses the appliance model number to display the matching parts list, so an unknown-model leak should end at model identification and qualified service rather than a generic part purchase.
Read the exact guide
Official sources
- How to Clean Your Dishwasher | Dishwasher Cleaning Guide | ThermadorThermador · Official Thermador cleaning guidance for the documented filter path; the article retains the exact-model manual boundary for models whose filter access differs.
- Cleaning & Care | Dishwashers Support | ThermadorThermador · Official Thermador care guidance used to keep cleaning and model-manual boundaries explicit; it is not used to diagnose the leak source.
- Troubleshooting | Dishwashers Support | ThermadorThermador · Official Thermador troubleshooting overview for dishwasher supply and drain conditions, filters and model-manual boundaries; it does not authorize cabinet disassembly or generic part diagnosis.
- Appliance Features | Dishwashers Support | ThermadorThermador · Official Thermador dishwasher support for general door-leak and moisture symptoms across the product family; exact model installation and service procedures remain manual-dependent.
- Parts & Accessories | Dishwashers Support | ThermadorThermador · Official Thermador parts guidance that requires the appliance model number to identify replacement parts; it does not establish a leak component from symptoms alone.
Community feedback
Share a repair observation
Share a plain-text repair observation. Accepted observations are published automatically; this page may take a moment to update.