
On this page
Start here
Quick answer
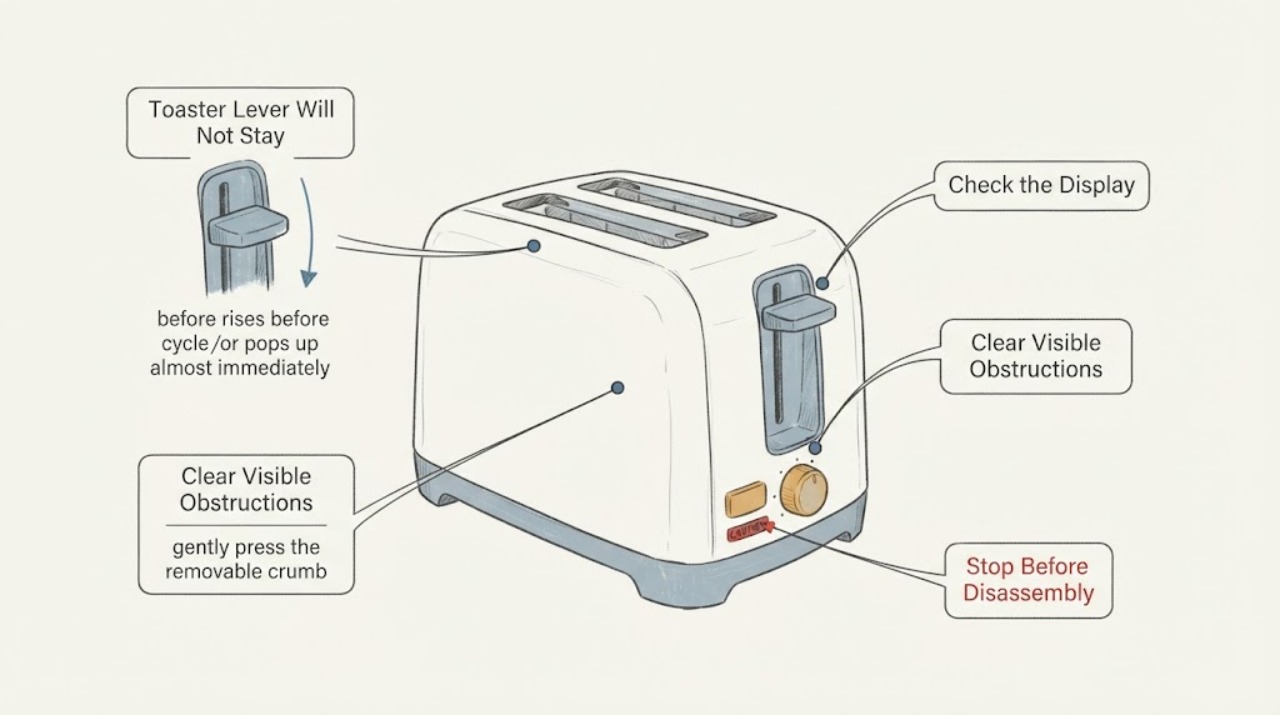
On the All-Clad TJ822D51 and TJ824D51 toaster family covered by the opened owner’s guide, push the toasting lever fully down once after selecting the browning setting. If it rises immediately or the bread pops up without toasting, do not force the lever or insert a utensil. Unplug the toaster, let it cool, remove only accessible crumbs using the manual’s cleaning procedure, and test no more than once after the crumb tray is dry and replaced. If the lever still will not stay down, the cord is damaged, or the toaster shows any other abnormal operation, stop using it and contact an authorized All-Clad service center. If your model label is not TJ822D51 or TJ824D51, use that exact model’s guide instead of assuming this procedure applies.
Work through in order
Diagnostic checks
Use only checks that match the exact appliance or system and its official guide.
-
Check 1
Read the model label and compare it with the opened All-Clad guide before troubleshooting. The guide used here is for TJ822D51 and TJ824D51; if your label is different, stop and obtain that model’s instructions. For a matching model, set the browning control and push the toasting lever fully down once, without forcing it.
Expected result: The model is TJ822D51 or TJ824D51 and the lever stays down; the model differs; or the lever rises immediately or the bread pops up without toasting.
Next step: If the model differs, use its exact guide. If a covered model’s lever rises immediately, stop forcing or repeatedly cycling it and continue only with the unplugged, cool inspection below.
Why this matters
Why: A fully depressed lever that holds and starts a cycle is the expected path in this guide. A different model may have different controls, while immediate rise on the covered models matches the guide’s troubleshooting symptom but does not identify which internal mechanism is at fault.
-
Check 2
Press Cancel if the toaster responds, then unplug it from the wall and let it cool completely. From outside, look at the lever, slots, and crumb tray for a visible obstruction, distorted lever, or bread piece; do not put a hand or tool into a slot and do not move the lever through force.
Expected result: No obstruction is visible; crumbs or a bread fragment are accessible without entering the slots; or the lever or cord looks damaged or abnormal.
Next step: Leave the toaster unplugged for damage, abnormal operation, or a cord problem and arrange authorized service. If an accessible crumb tray is the only visible issue, clean it using the next step; do not dismantle the toaster.
Why this matters
Why: A clear exterior does not prove the latch is healthy. A damaged control, cord, or working abnormality is a service condition, and a stuck food item must be handled only after the appliance is unplugged and cool.
-
Check 3
With the toaster unplugged and cool, gently press the removable crumb tray to release it, empty it, and let it dry completely if washed. Replace the tray before use. Do not turn the toaster upside down or shake it, immerse it, run water into it, insert a knife or other metal object, or touch the internal metal parts.
Expected result: The tray contains a substantial crumb buildup; the tray is clean and correctly seated; or a fragment remains inside the slots and cannot be removed without a tool or cover removal.
Next step: Replace the fully dry tray and, only if the model matches and there is no damage, perform one supervised normal test. If the lever still will not stay down, keep the toaster unplugged and contact authorized service.
Why this matters
Why: Cleaning may remove an accessible obstruction or fire risk, but the guide does not say that crumbs cause a lever-latch failure. A fragment that cannot be removed safely or a lever that remains abnormal after cleaning needs service rather than a forced release.
-
Check 4
After the toaster is cool, clean, dry, and reassembled, perform at most one supervised cycle using ordinary bread and the model’s normal control sequence. Keep the toaster upright on a stable surface away from water and flammable materials, and stop immediately for smoke, sparks, burning odor, abnormal heat, or a lever that rises before toasting.
Expected result: The lever stays down and the cycle completes normally; it rises immediately again; or a smoke, odor, spark, heat, cord, or other abnormality appears.
Next step: Stop and unplug the toaster when safe. For recurrence or any abnormality, arrange authorized All-Clad service and do not open the housing or bypass the lever mechanism.
Why this matters
Why: A single normal cycle shows only that the symptom did not recur in that test; it does not prove an internal repair. Recurrence or any abnormal operation confirms that continued use is not appropriate for an end-user adjustment.
Use your observations
Decision map
Find the observation that best matches what you see, then follow the next safe action.
-
PATH 01Next step
What you see
The label matches TJ822D51 or TJ824D51, the lever goes fully down, and one supervised cycle completes normally after the dry crumb tray is replaced.
Do this next
Use the toaster only under supervision and stop if the lever begins rising early again. Follow the exact guide for future cleaning; do not insert objects into the slots.
Why this path and its safety boundary
Why it matters: The immediate-rise symptom did not recur in that test, but the test does not establish that an internal latch or control is repaired.
-
PATH 02Next step
What you see
The lever rises immediately or the bread pops up without toasting even when the lever is pushed fully down on a covered model.
Do this next
Unplug and cool the toaster, perform only the accessible tray/crumb check, then contact an authorized All-Clad service center if the symptom remains.
Why this path and its safety boundary
Why it matters: This matches the All-Clad guide’s troubleshooting symptom. The guide does not support forcing the lever or identifying a specific replacement part from that result.
-
PATH 03Next step
What you see
The model label is not TJ822D51 or TJ824D51, or the toaster has controls or a lever design that does not match the opened guide.
Do this next
Stop using the generic procedure, locate the exact model guide through the manufacturer, and use authorized service if the lever remains abnormal.
Why this path and its safety boundary
Why it matters: The available manual evidence is not sufficient to transfer the lever procedure to that model.
-
PATH 04Next step
What you see
The cord is damaged, the toaster shows smoke, sparks, burning odor, abnormal heat, or another working abnormality, or removing a bread fragment would require a metal tool or opening the housing.
Do this next
Keep the toaster unplugged and cool, do not use water or metal tools, and arrange authorized service. Do not bypass the lever or continue testing.
Why this path and its safety boundary
Why it matters: This is a safety and authorized-service boundary, not a lever adjustment.
Helpful context
Understand the symptom
A lever that will not remain down is different from a toaster that completes a cycle and raises the toast normally. The All-Clad guide’s troubleshooting entry treats bread that pops up almost immediately as a lever-position or service issue: make sure the lever is fully down, do not force it, and use authorized service if the bread still will not stay down. That does not identify a user-replaceable latch or other internal part.
The opened guide is specifically for All-Clad TJ822D51 and TJ824D51 two- and four-slice pop-up toasters. Check the model label before applying its controls or cleaning details. All-Clad’s product page also identifies the model and links to the user manual, so a different model should be handled from its own guide.
When checks do not resolve it
Need a professional?
Arrange authorized All-Clad service if the lever will not remain down after the model-matched, unplugged crumb-tray check, if the cord is damaged, or if the toaster shows smoke, sparks, burning odor, abnormal heat, or any other working abnormality. Do not order or install a latch, switch, control, or other part from the symptom alone.
Common questions
FAQ
Why does my All-Clad toaster lever pop back up immediately?
For the TJ822D51 and TJ824D51 models covered by the opened All-Clad guide, first make sure the lever is fully down. The guide says not to force it and to consult authorized service if the bread does not stay down. A quick rise does not identify a specific internal part.
Can I fix the lever by cleaning out crumbs?
You may clean the removable crumb tray only with the toaster unplugged and completely cool, then let the tray dry fully before replacing it. The guide does not say that crumbs are the cause of a lever-latch failure, so stop and use authorized service if the lever still will not stay down. Never insert a knife or other metal object.
Does this troubleshooting apply to every All-Clad toaster?
No. The opened owner’s guide identifies models TJ822D51 and TJ824D51. Check your model label and use that model’s guide; do not transfer this lever procedure to a different All-Clad design without matching documentation.
Read the exact guide
Official sources
- All-Clad 2 & 4 Slice Pop Up Toasters — Owner’s Guide - Model No. TJ822D51 & TJ824D51All-Clad / Groupe SEB · All-Clad TJ822D51 and TJ824D51 pop-up toaster operation, safety, cleaning, troubleshooting, and service boundary.
- 2 Slice Toaster, Stainless Steel, Digital | All-CladAll-Clad · All-Clad TJ822D51 product identity, toaster features, care, and the linked user manual.
Community feedback
Share a repair observation
Share a plain-text repair observation. Accepted observations are published automatically; this page may take a moment to update.