
On this page
Start here
Quick answer
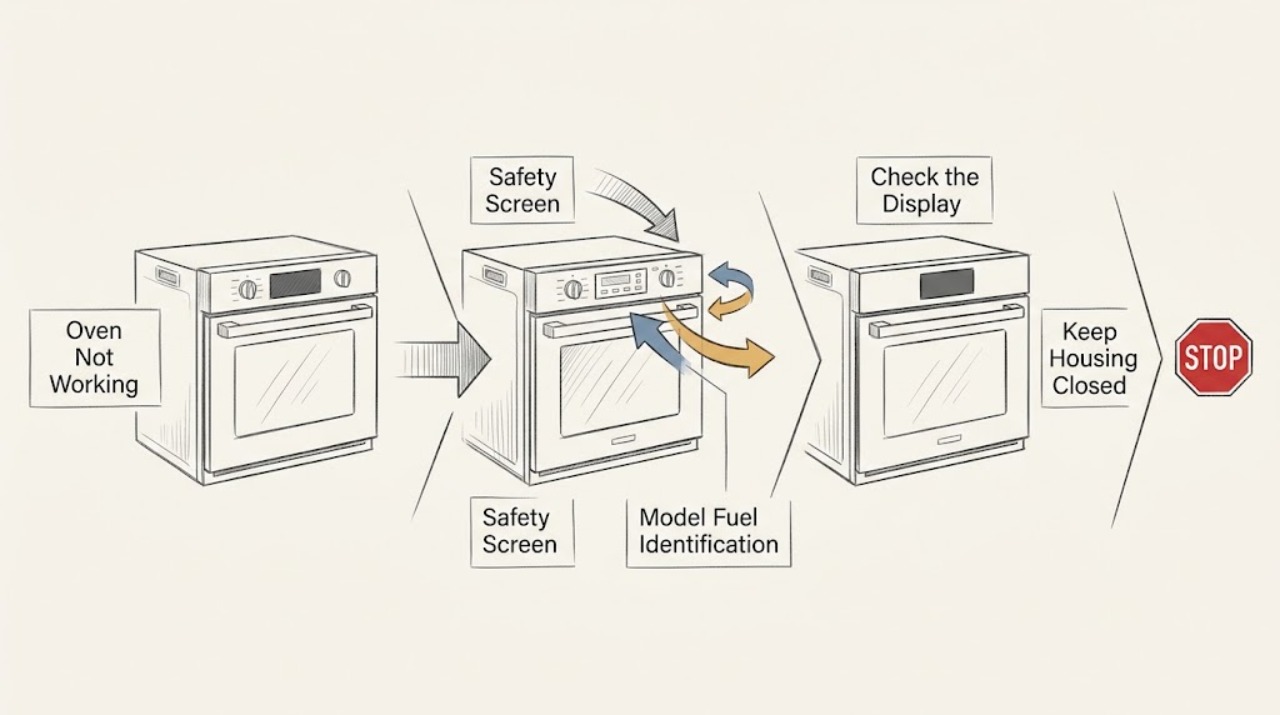
Define what ‘not working’ means on the Westinghouse oven: a completely dark display, a powered oven that will not start, no heat, or a gas oven that will not ignite. From a cool, dry, safe position, check the visible household supply, timer or clock, mode and temperature controls, child lock or demo state, door, and—only where applicable—the gas supply. Use the exact model manual for codes and reset steps. Stop immediately for gas odor, delayed ignition or a bang, abnormal flame, carbon-monoxide concern, smoke, arcing, overheating, damaged wiring, or a repeated breaker trip.
Work through in order
Diagnostic checks
Use only checks that match the exact appliance or system and its official guide.
-
Check 1
Stop the oven and look from a cool, dry, safe position at the cavity, controls, door, surrounding cabinet, visible cord or isolator, and room; do not touch a hot, wet, or damaged surface.
Expected result: Record gas odor, smoke, flame outside the intended burner area, a bang or delayed ignition, carbon-monoxide concern, arcing, burning odor, melted controls, hot receptacle, damaged glass or wiring, water, or a repeated breaker or protection trip.
Next step: For any hazard, stop using the oven, avoid switches or flames if gas is suspected, leave the area as appropriate, and arrange qualified emergency, gas, appliance, or electrical help. If no hazard is present, continue with external checks only.
Stop if: Do not reset power, ignite a burner, open a panel, or run a test after a safety symptom.
Why this matters
Why: These observations indicate gas, fire, shock, overheating, or mechanical risk rather than an ordinary setting problem.
-
Check 2
Read the complete model and serial information from the data plate when it is accessible without opening a hot or locked door, and identify whether the oven is electric, gas, or a combined configuration.
Expected result: A confirmed model and fuel type selects the correct Westinghouse manual, timer behavior, control-lock sequence, heating path, and gas-safety instructions. An unknown identity leaves those checks conditional.
Next step: Retrieve the matching Westinghouse user manual or support material and record whether the symptom is dark controls, no start, no heat, no ignition, or an error state.
Stop if: Do not guess a fuel path, code meaning, button sequence, safety-shutdown reset, or replacement part.
Why this matters
Why: Westinghouse manuals document different no-work causes across electric and gas families, so a procedure from a different model can mislead or create a hazard.
-
Check 3
If the display, clock, and indicators are dark, check from a dry position that the visible power switch or cord arrangement is on and inspect the labeled household breaker or fuse state once; do not remove covers.
Expected result: A dark console with an open breaker, blown fuse, or absent supply supports a household or installation power path. If the household supply appears normal but the oven remains dark, an appliance connection or control fault remains possible.
Next step: If the area is dry and there is no hazard, restore a household protection device once according to household instructions. If it trips again or the display stays dark, leave the oven off and arrange qualified electrical or appliance service.
Stop if: Do not repeatedly reset a breaker, touch a wet outlet, use improvised wiring, or open the oven's electrical compartment.
Why this matters
Why: Westinghouse troubleshooting identifies power not turned on, a blown household fuse, or a switched-off supply as no-work causes; it also warns that a continuing fuse fault needs service.
-
Check 4
If the display is active, compare the visible state with the exact manual: set the time of day if it is flashing or unset, cancel automatic or delayed timer mode, and check for Demo, Child Lock, or a similar control-lock indication.
Expected result: A flashing clock, AUTO timer state, Demo indication, LOCKED message, or disabled controls supports a control-state explanation. A normal clock and unlocked panel with no cycle response moves the issue to selection, door, supply, or an internal fault.
Next step: Use only the manual's visible clock, timer, or lock correction once. If the state returns, the display remains unresponsive, or a fault code appears, record it and arrange service.
Stop if: Do not enter service mode, force a lock, repeatedly change settings, or continue after heat, smoke, odor, arcing, or a protection trip.
Why this matters
Why: Westinghouse troubleshooting lists unset time, timer mode, Demo mode, and child-proof lock as separate reasons an oven may appear not to work; the exact controls vary by model.
-
Check 5
Select a normal documented oven mode and temperature, confirm the selector or control is not between positions, close the cool door normally, and use the exact Start or On command once.
Expected result: If the oven responds after a valid mode, temperature, clock, and Start sequence, the earlier problem was consistent with a control selection or timer state. If the display accepts the settings but no fan, heat, or ignition sequence begins, note that transition for service.
Next step: Record the mode, temperature, indicators, sound, and response. If the oven still does not start, do not keep cycling it; continue only with the applicable door, supply, or code check.
Stop if: Stop for a locked or hot door, gas odor, delayed ignition, smoke, burning odor, arcing, overheating, or a repeated trip.
Why this matters
Why: An oven can have power while remaining inactive because its function selector, timer, door state, or control sequence is incomplete.
-
Check 6
With the oven cool and controls safe, inspect the visible door alignment, seal, latch, and hinge area; confirm the door closes normally and check the manual for a Child Lock or safety-shutdown indication.
Expected result: A door that does not close, a lock indication, a damaged hinge or seal, or a safety-shutdown state can prevent a mode from starting. A normal door and clear lock state shift the diagnosis toward supply, controls, heating, or ignition.
Next step: Use only the matching manual's safe cancel or unlock procedure and allow a hot oven to cool. Arrange service for a persistent lock, damaged door hardware, or a safety shutdown that will not clear as documented.
Stop if: Do not pry, force, bypass, tape, or remove the door, lock, hinge, or switch.
Why this matters
Why: The door may be part of the operating or safety interlock, and Westinghouse documentation treats child-proof locks and model-specific safety shutdowns differently.
-
Check 7
Only for a confirmed gas or combined model with no gas odor, observe the documented ignition response from outside the cavity and verify only an accessible gas-supply state explicitly covered by the manual; do not test for leaks or touch the burner or igniter.
Expected result: No ignition, a sparker with no safe flame, a flame that goes out, a delayed ignition, or a large, yellow, lifting, or otherwise abnormal flame points to a gas, ignition, burner, safety, or control path that is not a user-level part diagnosis.
Next step: Stop the appliance and arrange qualified gas or appliance service for no ignition, repeated failure, delayed ignition, or abnormal combustion. Do not attempt to adjust a burner, clean an internal igniter, or replace a gas component.
Stop if: For gas odor, a bang, unburned gas, abnormal flame, smoke, or carbon-monoxide concern, stop immediately, avoid switches and ignition, leave as appropriate, and obtain qualified help.
Why this matters
Why: Westinghouse gas guidance distinguishes supply interruption, wet or dirty ignition areas, flame-safeguard behavior, and abnormal flames; these checks are model-specific and combustible gas can accumulate.
-
Check 8
Only for a confirmed electric or combined model that accepts a normal mode, observe from outside whether the expected indicator, fan, or heating response starts; do not touch an element, thermostat, sensor, relay, terminal, or wiring.
Expected result: A powered control with no heat, a single mode that fails, no fan where the manual expects one, or a protection trip when heat is selected suggests a heating, control, fan, or high-power supply path rather than a setting alone.
Next step: Record the mode, indicator behavior, fan response, and code, then arrange qualified appliance or electrical service for internal diagnosis.
Stop if: Do not expose terminals, perform live tests, remove panels, bypass a sensor or door switch, or continue after smoke, odor, arcing, overheating, or a trip.
Why this matters
Why: The observation narrows the service report but cannot identify an element, thermostat, relay, sensor, or wiring failure without model-specific testing.
-
Check 9
Write down every exact code, flashing display, timer state, mode, and stage, then use only one reset or safety-shutdown recovery procedure explicitly authorized by the matching Westinghouse manual.
Expected result: A code or shutdown that clears and does not return may have been transient; a recurring code, a blank display after reset, or a code linked to heat, ignition, supply, or protection requires service.
Next step: Keep the oven off for a recurring code or any hazard and provide the exact display and model information to qualified service. Do not erase the evidence with repeated resets.
Stop if: Do not enter hidden diagnostics, repeatedly cycle power, or operate through a safety-related code or shutdown.
Why this matters
Why: Westinghouse manuals assign different meanings and reset steps to different models, and a reset does not prove an underlying control, gas, or electrical fault is safe.
-
Check 10
Prepare the service report with the complete model and serial information, region, fuel type, display and timer state, selected mode and temperature, door or lock behavior, supply observation, heating or ignition response, exact code, reset result, and all safety symptoms.
Expected result: A complete sequence distinguishes a no-power fault, clock or Demo state, lock or door condition, gas-supply or ignition issue, electric heating fault, fan or control fault, and an unresolved internal problem.
Next step: Keep the oven out of use until qualified appliance, gas, or electrical service assesses the implicated path, especially after smoke, gas, arcing, overheating, water, or a protection trip.
Stop if: Do not perform live tests, open panels, adjust gas components, bypass interlocks, or order a part solely from the broad ‘not working’ symptom.
Why this matters
Why: The remaining possibilities can include the control, timer, switch, element, thermostat or sensor, fan, igniter, valve, wiring, or installation supply and may require guarded work.
Use your observations
Decision map
Find the observation that best matches what you see, then follow the next safe action.
-
PATH 01Safety boundary
What you see
Gas odor, delayed ignition or a bang, abnormal flame, carbon-monoxide concern, smoke, burning odor, arcing, overheating, damaged wiring, water exposure, or a repeated protection trip occurs.
Do this next
Stop operation, avoid switches or flames if gas is suspected, leave the area as appropriate, and arrange qualified emergency, gas, appliance, or electrical help.
Why this path and its safety boundary
Why it matters: The oven presents a gas, fire, shock, overheating, or other immediate safety hazard.
Safety stop: Do not reset, ignite, open panels, or re-test the oven.
-
PATH 02Safety boundary
What you see
The display, clock, and indicators are all dark.
Do this next
Check the visible household protection state once from a dry position; arrange qualified electrical or appliance service for a dead supply, repeat trip, or persistent dark console.
Why this path and its safety boundary
Why it matters: Household supply, protection, installation, or primary appliance control is implicated before a heating or ignition diagnosis.
Safety stop: Do not repeatedly reset the breaker, touch wet connections, or open wiring covers.
-
PATH 03Safety boundary
What you see
The display works but the time is flashing, the timer is automatic, Demo is active, Child Lock is shown, or controls do not respond.
Do this next
Use the matching manual's visible time, timer, Demo, or lock correction once; arrange service if the state returns or the controls remain unresponsive.
Why this path and its safety boundary
Why it matters: A model-specific control state may be preventing the oven from accepting a cooking function.
Safety stop: Do not enter hidden settings, force a lock, or repeatedly change controls.
-
PATH 04Safety boundary
What you see
The oven has power but the selector is not on a valid function, the temperature or Start command is incomplete, or the door is not closed normally.
Do this next
Select a documented mode and temperature, close the cool door normally, and use the manual's Start or On command once; escalate a persistent no-start.
Why this path and its safety boundary
Why it matters: The oven may be waiting for a complete operating sequence or an interlock condition.
Safety stop: Do not force the door, bypass the interlock, or continue after heat, smoke, gas, odor, or electrical symptoms.
-
PATH 05Safety boundary
What you see
A confirmed gas or combined Westinghouse oven has control power but no safe ignition, a flame that goes out, delayed ignition, or abnormal combustion.
Do this next
Stop and arrange qualified gas or appliance service; report the exact model, fuel type, and observed sequence.
Why this path and its safety boundary
Why it matters: The gas supply, igniter, burner, safety device, valve, or control path may be involved and is not safe to diagnose by repeated attempts.
Safety stop: For gas odor, unburned gas, a bang, smoke, abnormal flame, or carbon-monoxide concern, stop immediately and do not operate switches or ignite again.
-
PATH 06Safety boundary
What you see
A confirmed electric or combined model accepts a normal mode but does not heat, or only one mode fails.
Do this next
Leave internal diagnosis to qualified appliance or electrical service and provide the mode, indicator, fan, code, and protection behavior.
Why this path and its safety boundary
Why it matters: An element, thermostat or sensor, relay, fan, wiring, control, or high-power supply path may be involved.
Safety stop: Do not expose terminals, perform live measurements, bypass a sensor, or keep testing after smoke, odor, arcing, overheating, or a trip.
-
PATH 07Safety boundary
What you see
A code or safety-shutdown state remains or returns after the one model-authorized recovery step.
Do this next
Keep the oven off and arrange qualified service with the exact code, model, fuel configuration, and event sequence.
Why this path and its safety boundary
Why it matters: The model has detected a persistent condition or requires professional diagnosis.
Safety stop: Do not enter diagnostics or operate through a recurring safety code or shutdown.
-
PATH 08Safety boundary
What you see
After the documented clock, timer, mode, or lock correction, the oven starts normally and no hazard is present.
Do this next
Observe the next normal use and stop or arrange service if the fault returns.
Why this path and its safety boundary
Why it matters: The symptom was consistent with a control-state or selection issue, not a confirmed internal failure.
Safety stop: Do not continue operation after gas odor, abnormal flame, smoke, arcing, overheating, or a protection trip.
-
PATH 09Safety boundary
What you see
The model, region, fuel type, control generation, or applicable Westinghouse manual is unknown.
Do this next
Record the data-plate information and retrieve the exact manual before proceeding; use qualified service if the appliance is unsafe or inaccessible.
Why this path and its safety boundary
Why it matters: A procedure from another appliance family could cause an incorrect setting, ignition, lock, or electrical decision.
Safety stop: Do not guess a code meaning, gas procedure, reset interval, or part fit.
-
PATH 10Safety boundary
What you see
Power, clock, controls, door, fuel prerequisites, and one manual-authorized reset are normal, but the oven remains unusable.
Do this next
Leave the oven off and arrange qualified appliance, gas, or electrical service with the complete symptom record.
Why this path and its safety boundary
Why it matters: An internal control, timer, element, sensor, fan, igniter, valve, wiring, or installation fault remains possible.
Safety stop: Do not open panels, perform live tests, adjust gas components, bypass interlocks, or choose a part from the broad symptom alone.
Helpful context
Understand the symptom
Classify the failure before touching a control
‘Not working’ can mean no display or light, a display that will not accept a cycle, an oven that starts but stays cold, or a gas oven with no safe ignition. These paths do not share the same cause. Record the display, clock, indicator lights, selected mode, temperature, door state, stage at which it stops, and whether the cooktop or another circuit still has power. Do not use an element or igniter diagnosis to explain a completely dark console.
Westinghouse appliance documents are model and region specific
The official Westinghouse appliance manuals cover different electric, gas, and combined configurations, with different timer, lock, safety-shutdown, and control behavior. Record the data-plate model and serial information and retrieve the matching manual or support material before following a button sequence. A code, timer state, fuel path, or reset described for one family may not apply to another.
A clock or demo state can look like a hardware failure
Westinghouse troubleshooting tables list an unset time, incorrect controls, automatic timer mode, demo mode, and child-proof lock among possible no-work conditions. If the display is alive, use the documented clock, mode, lock, and start sequence once. Do not enter unlisted service settings or repeatedly cycle power to hide a persistent code.
Separate gas and electric safety boundaries
A gas model may have a supply, burner, flame-safeguard, or ignition path; an electric model may have a high-power supply, element, relay, sensor, or control path. Check only visible, model-approved conditions. A gas smell, delayed ignition, abnormal flame, smoke, or carbon-monoxide concern is not a troubleshooting invitation: stop, avoid ignition and electrical switches, leave as appropriate, and obtain qualified help.
When the right answer is service
If the safe external checks do not restore normal operation, the remaining possibilities can include a control, timer, thermostat or sensor, door switch, heating element, igniter, gas valve, wiring, fan, safety shutdown, or installation supply issue. Westinghouse support directs owners to the matching manual and service path. Give the technician the model, fuel type, exact symptom, display code, and what happened immediately before the failure.
Safety boundary
Stop conditions
- Stop immediately for gas odor, delayed ignition or a bang, abnormal flame, carbon-monoxide concern, smoke, burning odor, arcing, overheating, damaged wiring, water exposure, or a repeated breaker or protection trip.
- Do not operate switches or create a flame when gas is suspected; leave the area as appropriate and obtain qualified emergency or gas assistance.
- Do not open panels, touch terminals, perform live electrical tests, bypass a door or Child Lock, adjust gas components, or remove an igniter, element, sensor, or wiring.
- Do not force a hot or locked door, repeatedly reset household protection or oven power, or continue cycles to reproduce a hazardous symptom.
- Do not select a replacement part or reset procedure without the exact Westinghouse model, region, fuel type, and matching documentation.
Only after diagnosis
Potential parts
- timer or control assembly
Consider this only when the exact model has normal household power but a persistent clock, timer, display, mode, or control fault after documented user-level checks.
Timer and control assemblies vary by Westinghouse model and region; confirm the complete model and qualified diagnosis before selecting a component. - door latch or safety switch
This is relevant only when a normally closed door cannot satisfy the exact model's interlock or a persistent lock state is diagnosed by a qualified technician.
Door hardware and interlock designs are model-specific; never bypass or force the latch while identifying a part. - electric heating element or sensor
Consider this only for a confirmed electric or combined model that accepts a normal mode but has qualified evidence of an element, thermostat, or sensor fault.
Element and sensor ratings and connections vary by model; internal electrical diagnosis requires qualified service. - gas ignition or valve component
This is relevant only for a confirmed gas or combined model after qualified diagnosis of an ignition, burner, safety, or gas-control fault with no active gas emergency.
Gas components are model- and fuel-specific; do not test for leaks, repeat ignition, adjust combustion, or order a component from the symptom alone.
When checks do not resolve it
Need a professional?
Arrange qualified service when the console remains dark after one safe supply check, a fuse or breaker trips again, the timer, Demo, Child Lock, door, or safety shutdown persists, an exact code returns, a gas oven will not ignite safely, an electric oven will not heat, or any gas, smoke, carbon-monoxide, arcing, overheating, water, or wiring symptom occurs.
Common questions
FAQ
Why is my Westinghouse oven completely dark?
Check the visible supply switch and household breaker or fuse once from a dry, safe position. If power is absent, protection trips again, or the display remains dark with normal household supply, leave the oven off and arrange qualified electrical or appliance service.
Why does my Westinghouse oven have a display but not work?
Check the exact model's clock, timer or AUTO state, Demo mode, Child Lock, selected function, temperature, Start command, and door condition. If the controls accept a normal selection but the oven remains inactive, record the response and arrange service.
Can an unset clock stop a Westinghouse oven?
Yes. Westinghouse troubleshooting manuals list an unset or flashing time and timer state among possible reasons an oven or grill does not work. Set the clock only with the matching manual's procedure, and escalate a recurring or unresponsive timer state.
What should I do if a Westinghouse gas oven will not ignite?
Do not repeatedly attempt ignition. A gas or combined model may have a supply, ignition, burner, safety, or control fault. Stop immediately for gas odor, delayed ignition, a bang, abnormal flame, smoke, or carbon-monoxide concern and obtain qualified gas or appliance service.
When should I stop troubleshooting a Westinghouse oven?
Stop for gas odor, delayed ignition, abnormal flame, smoke, burning odor, arcing, overheating, water exposure, damaged wiring, severe mechanical behavior, or a repeated breaker or fuse trip. Do not open panels or perform live tests; arrange the appropriate qualified service.
Read the exact guide
Official sources
- Product Support for Appliances | Westinghouse NZWestinghouse Appliances · Westinghouse appliances in the supported region; retrieve the exact user manual
- TROUBLESHOOTINGWestinghouse Appliances · Westinghouse gas range family covered by the manual; confirm the exact model and region
- TROUBLESHOOTINGWestinghouse Appliances · Westinghouse electric appliance family covered by the manual; confirm the model and region
- TROUBLESHOOTINGWestinghouse Appliances · Westinghouse appliance family covered by the manual; confirm the exact model, fuel type, and region
Community feedback
Share a repair observation
Share a plain-text repair observation. Accepted observations are published automatically; this page may take a moment to update.