
On this page
Start here
Quick answer
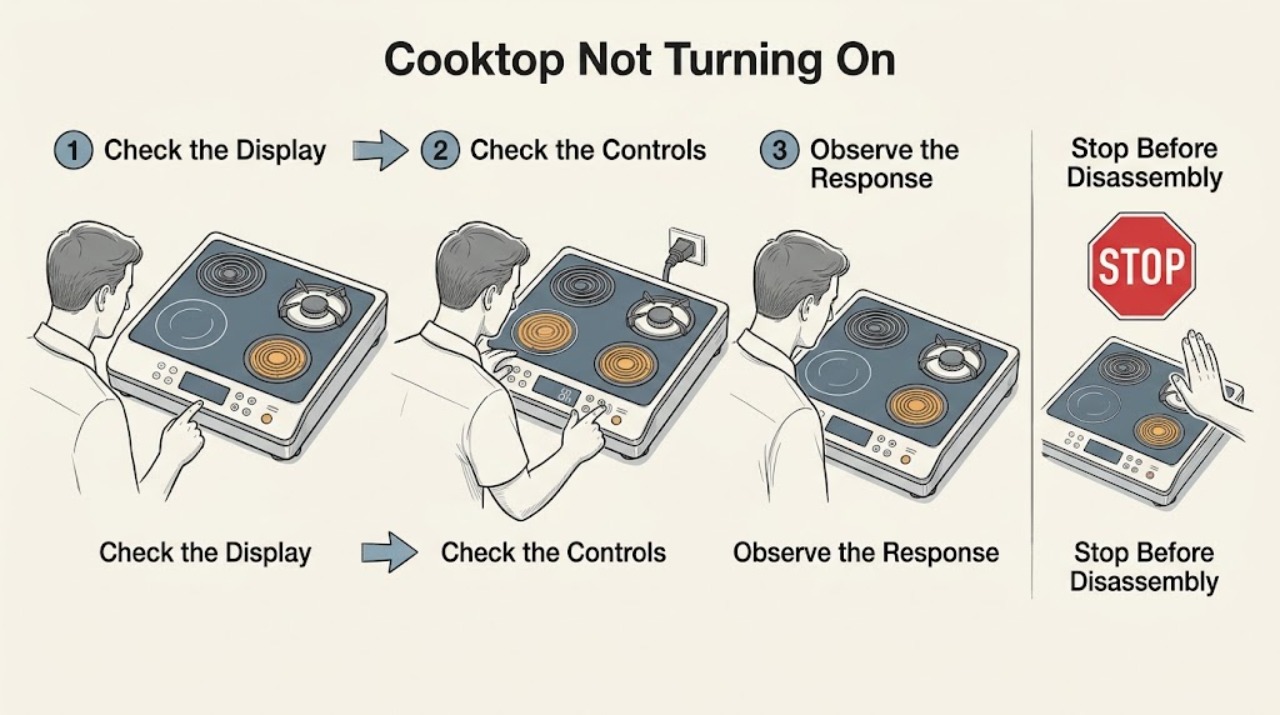
First identify whether the Whirlpool cooktop is gas, electric coil or radiant, or induction, then determine whether the whole unit is dead or only one cooking area fails. Stop immediately for gas odor, delayed ignition, flame outside the burner area, cracked glass, smoke, sparks, arcing, scorching, liquid under controls, an unusually hot control area, or a breaker that opens again. With the surface cool and dry, verify the control sequence and any control lock, inspect the accessible breaker or fuse, and make one documented power reset only when safe. For gas, check the accessible gas supply and that the control is at Ignite only during a normal lighting attempt; for electric, confirm a coil is seated and the correct element is selected; for induction, use one clean, dry, centered ferromagnetic pan of the proper size. If the display and every zone remain dead, one zone alone stays off, the glass is damaged, or a safe reset does not restore operation, leave the cooktop off and arrange qualified appliance, electrical, or gas service.
Work through in order
Diagnostic checks
Use only checks that match the exact appliance or system and its official guide.
-
Check 1
Turn all controls off and let the cooktop cool. From outside the appliance, note gas odor, delayed ignition, flame outside a burner, cracked or lifting glass, smoke, sparks, arcing, scorching, liquid under the controls, an unusually hot control area, exposed wiring, or a breaker that opened.
Expected result: The surface is cool and intact with no warning sign, or a gas, fire, electrical, liquid, or heat warning is present.
Next step: If no warning sign is present, identify the surface type and whether all zones or one zone fail. If one is present, leave the cooktop off, isolate power only when safe and permitted, and obtain qualified emergency, gas, electrical, or appliance help.
Stop if: Stop immediately for gas odor, delayed ignition, abnormal flame, smoke, fire, sparks, arcing, cracked glass, scorching, liquid under controls, abnormal heat, or a repeated breaker trip.
Why this matters
Why: A cool, intact surface permits low-risk control and supply checks. Any warning sign can involve fire, shock, gas, or burn danger and must not be recreated by repeated start attempts.
-
Check 2
With the surface cool, identify the cooktop as gas, electric coil or radiant, or induction from its burners, elements, markings, and controls. Note whether the display is blank, every area is off, or only one area will not activate; use the exact Owner's Manual for the control sequence.
Expected result: The cooktop is gas, electric coil or radiant, or induction, and the failure affects the whole unit, one zone, or only the control panel.
Next step: Follow the matching branch below: accessible power and lock for a dead display, gas supply and burner checks for gas, element seating for coil surfaces, and pan detection for induction.
Stop if: Stop if identification would require removing panels, touching wiring, lifting glass, or working around an energized or hot surface.
Why this matters
Why: Gas ignition, electric element seating, and induction pan detection have different causes. A blank display or all-zone failure points toward shared power or control; one-zone failure points toward that zone, its control, or its detection path.
-
Check 3
For a touch-control electric or induction model, inspect the display for Control Lock, Key Lock, or a fault and wipe the cool, dry control area with the method in the manual. For a gas model, check whether Cooktop Lock is active and whether the knob can move through its documented Ignite position. Do not force a knob or operate a wet panel.
Expected result: A lock is displayed, the touch panel is wet or contaminated, the knob is not in the documented start position, the control responds normally, or the control remains unresponsive.
Next step: Clear only the documented lock with the exact manual sequence, dry the panel fully, or return a gas knob to its normal off position before one safe start attempt. If the control still will not respond, stop and arrange service.
Stop if: Stop for a wet or cracked control panel, a stuck knob, a recurring fault, uncontrolled activation, smoke, sparks, or a hot control area.
Why this matters
Why: A lock can intentionally prevent zones or burners from turning on, and moisture or debris can block touch input. A normal control with one cold zone shifts concern to the element, burner, cookware, or zone circuit; an unresponsive control may need service.
-
Check 4
If there is no safety warning, inspect only the accessible plug, isolator, breaker, or fuse that supplies the cooktop, as permitted by the installation instructions. If a breaker is clearly open, restore it once when safe, then wait and verify operation; do not remove the cooktop or change wiring.
Expected result: The accessible supply was open, the display returns after one reset, the display remains blank, or the breaker or fuse opens again.
Next step: If the display returns and remains stable, continue with the matching gas, electric, or induction zone check. If the appliance stays dead or protection opens again, leave it off and arrange qualified electrical or appliance service.
Stop if: Stop for scorch marks, a hot plug or isolator, exposed wiring, moisture near the supply, a damaged cord, or repeated breaker or fuse operation.
Why this matters
Why: A supply interruption can make every zone appear dead. A stable supply with a blank display suggests the appliance input or shared controls; a repeated trip indicates an electrical fault or unsafe condition.
-
Check 5
For a gas cooktop only, with all controls off and the surface cool, confirm that the accessible main gas shutoff appears on and that the burner cap is the correct cap, seated, centered, and dry. During one normal start attempt, use the documented Ignite position and observe from a safe distance; do not adjust the gas valve or burner.
Expected result: No burner lights, one burner fails, the igniter clicks but gas does not light, the flame is uneven or unstable, or all burners light normally.
Next step: If a cool, dry cap is visibly mis-seated, correct it according to the manual and make one brief supervised attempt. If no burner lights, ignition continues, gas is present without safe ignition, or the flame is abnormal, stop and obtain trained gas service.
Stop if: Stop for gas odor, delayed ignition, a flame outside the burner area, continuous sparking, a yellow or unstable flame, smoke, or any need to adjust gas parts.
Why this matters
Why: A shared no-light symptom can involve gas supply, power for ignition, or lockout. A single burner issue can involve cap seating, ports, moisture, or that burner. An unstable flame or gas odor is a stop condition, not a cleaning challenge.
-
Check 6
For an electric coil surface, with the element cool, verify that the correct coil is fully seated and that the matching control and level are selected. For induction, place one clean, dry, centered pan made for induction on the affected zone; use the manual's pan indicator and never test with an empty pan. Do not touch a hot glass surface.
Expected result: A coil is loose, the electric element cycles without a strong glow, the induction pan is not detected, the pan is detected but the zone stays cold, or another zone works.
Next step: Correct only safe element seating or pan placement, then make one supervised low-level check. If a suitable pan is detected but the zone remains cold, or the same coil remains off after seating, keep that zone unused and arrange service.
Stop if: Stop for cracked glass, smoke, sparks, arcing, scorching, a pan that overheats without a command, liquid under controls, or a repeated breaker trip.
Why this matters
Why: A loose coil or wrong control can prevent an electric area from heating. Whirlpool says temperature-limiting coils may cycle and appear less bright, which can be normal. An induction zone may remain off when the pan material, size, or position is unsuitable; a recognized pan with no heat points toward that zone's control or power path.
-
Check 7
After the safe checks, compare the same control sequence on one other zone only when the glass, supply, and controls are intact. Record whether one zone fails while others work, every zone fails, the display is dead, or the cooktop shuts down after warming. Arrange qualified service instead of removing the glass or performing live electrical, gas, or power-module tests.
Expected result: Only one area fails, all areas fail, the unit works after one reset but fails again, or a thermal, glass, gas, or electrical warning appears.
Next step: Keep the affected zone or entire cooktop off as appropriate and provide the model, surface type, affected area, display, control-lock state, supply result, pan or burner result, and any stop-condition observation to qualified service.
Stop if: Stop all operation for gas odor, flame abnormality, cracked glass, smoke, sparks, arcing, scorching, abnormal heat, uncontrolled activation, or repeated breaker operation.
Why this matters
Why: A single-area failure is more localized; an all-area failure suggests shared power or controls. A returning fault after reset is not resolved, and a safety warning makes further operation unsafe.
Use your observations
Decision map
Find the observation that best matches what you see, then follow the next safe action.
-
PATH 01Next step
What you see
The display and every cooking area are dead.
Do this next
Arrange qualified service and follow the exact model guidance.
Why this path and its safety boundary
Why it matters: Check only the accessible prescribed supply and perform one safe reset. If the display remains blank or protection opens again, leave the cooktop off and arrange qualified electrical or appliance service.
-
PATH 02Next step
What you see
Control Lock, Key Lock, or Cooktop Lock is displayed or prevents activation.
Do this next
Arrange qualified service and follow the exact model guidance.
Why this path and its safety boundary
Why it matters: Use the exact Owner's Manual sequence to clear the lock once. If the lock returns, the panel stays unresponsive, or a gas knob is stuck, stop and request service.
-
PATH 03Next step
What you see
A gas cooktop has no light, clicking without ignition, an uneven flame, or a burner that fails while others work.
Do this next
Arrange qualified service and follow the exact model guidance.
Why this path and its safety boundary
Why it matters: Check only safe cap seating, dryness, accessible supply, and documented control position. Gas odor, delayed ignition, continuous sparking, or an abnormal flame requires immediate stop and trained gas service.
-
PATH 04Next step
What you see
An electric coil or radiant zone appears not to turn on, or does not glow as strongly as an older element.
Do this next
Arrange qualified service and follow the exact model guidance.
Why this path and its safety boundary
Why it matters: Confirm the correct control and safe element seating. Temperature-limiting coils can cycle and glow less strongly; if the selected zone remains cold while another works, arrange service.
-
PATH 05Next step
What you see
An induction zone will not activate or shows no pan detection.
Do this next
Arrange qualified service and follow the exact model guidance.
Why this path and its safety boundary
Why it matters: Use one clean, dry, centered ferromagnetic pan of the proper size. If it is detected but the zone stays cold, keep that zone off and arrange service; do not bypass detection.
-
PATH 06Next step
What you see
One zone fails while another zone works with the correct controls, pan, or burner sequence.
Do this next
Arrange qualified service and follow the exact model guidance.
Why this path and its safety boundary
Why it matters: Treat it as a localized control, element, burner, sensor, or power-path issue and arrange model-specific diagnosis. Do not replace a component based on the symptom alone.
-
PATH 07Next step
What you see
Gas odor, delayed ignition, flame outside the burner area, cracked glass, smoke, sparks, arcing, scorching, liquid under controls, abnormal heat, or a repeated breaker trip occurs.
Do this next
Arrange qualified service and follow the exact model guidance.
Why this path and its safety boundary
Why it matters: Stop using the cooktop, move away from the hazard, isolate power only when safe, and obtain qualified emergency, gas, electrical, or appliance help. Do not restart it to reproduce the event.
Helpful context
Understand the symptom
The surface type changes the first useful check
A gas cooktop needs power for ignition and a usable gas supply; an electric coil or radiant surface needs the selected element and a working supply; an induction zone needs cookware detection before it will heat. Identify the type from the controls and surface, then compare the whole-unit symptom with a one-zone symptom. Do not assume an induction pan problem is an electrical failure, or that a gas ignition symptom applies to an electric surface.
A blank display and a cold zone are different faults
If the display and every zone are dead, start with the accessible household supply and the exact model control sequence. If the display works but one zone will not activate, compare that zone with another using the correct control or pan. A control lock, wet touch area, loose coil, or unsuitable induction pan can block one operation without removing power from the entire appliance.
Reset once, then stop if the fault returns
Whirlpool describes a one-minute power reset for several electric, induction, and lock conditions. Use that only when the surface is safe, the accessible breaker is clearly identified, and no hazard is present. A breaker or fuse that opens again is a fault signal, not an invitation to keep resetting.
Gas and glass hazards need an immediate boundary
Gas odor, a burner that will not light, delayed ignition, unstable flame, continuous sparking, cracked glass, smoke, arcing, or scorching should end the test. Leave the appliance off, move away from the hazard, and use qualified gas, electrical, or appliance help. Do not open the cooktop, adjust gas components, or perform energized measurements.
Only after diagnosis
Potential parts
- gas ignition or burner assembly
Consider this category only after trained gas service confirms a burner, igniter, port, or ignition-path fault after safe cap, lock, and supply checks.
Confirm the exact Whirlpool model and fuel configuration; do not adjust or replace gas components without qualified service. - electric coil or radiant element
Consider this category only when a single electric zone remains cold after correct control selection and safe element seating, and model-specific diagnosis confirms the element path.
Confirm the exact model and element style before selecting a component; cycling or a dim glow alone does not establish failure. - induction zone or power module
Consider this category only when a suitable pan is recognized but one zone remains cold, or qualified diagnosis confirms a shared electronic fault.
Induction electronics require model-specific diagnosis; do not open the glass or perform energized tests. - control panel or control board
Consider this category only when the display or controls remain unresponsive after one safe lock and supply check and qualified diagnosis identifies the control path.
Confirm the exact model and disconnect power as instructed before any professional service.
When checks do not resolve it
Need a professional?
The display and all cooking areas remain dead after one safe accessible supply check., One zone remains off while another works with the correct control, burner, element, or induction pan., A lock, fault, unresponsive panel, or stuck knob returns after the documented control check., A gas burner will not light, clicks continuously, has an abnormal flame, or needs gas-component adjustment., Cracked glass, smoke, sparks, arcing, scorching, abnormal heat, liquid under controls, or a repeated breaker trip occurs., Diagnosis would require removing the glass, opening the cabinet, changing wiring, or testing an energized circuit.
Common questions
FAQ
Why is my Whirlpool cooktop completely dead?
Start with the accessible breaker, fuse, or prescribed supply connection, then check the control sequence and lock. A single safe reset may restore a transient control state. If the display stays blank or the protection opens again, leave the cooktop off and arrange qualified service.
Why will one Whirlpool induction zone not turn on?
Use one clean, dry, centered pan made for induction and compare it with another zone. Whirlpool says material, base size, and position affect pan detection. If a suitable pan is detected but the zone stays cold, keep that zone unused and request service.
Why does my Whirlpool gas cooktop click but not light?
A lockout, missing gas supply, wet or clogged ports, a wrong or mis-seated cap, or an incorrect Ignite position can prevent lighting. Check only the cool, accessible cap and documented controls. Stop for gas odor, delayed ignition, continuous sparking, or an abnormal flame.
Why does a Whirlpool electric element not glow red continuously?
Whirlpool says newer temperature-limiting coils can cycle and may not glow as strongly or continuously as an older element. Confirm the correct control and element seating. If the selected area remains cold while another works, arrange service.
When should I stop using a Whirlpool cooktop?
Stop for gas odor, delayed ignition, flame outside the burner area, cracked glass, smoke, sparks, arcing, scorching, liquid under controls, abnormal heat, uncontrolled activation, or a breaker that opens again. Do not open the cooktop or perform live electrical or gas work.
Read the exact guide
Official sources
- Burner Not Lighting - Gas CooktopWhirlpool Product Help · Supports cool-surface checks for clogged ports, correct cap and base pairing, centered seating, dryness, and trained service when the burner still does not light.
- Lock - Electric and Induction CooktopWhirlpool Product Help · Supports the effect of Control Lock on activation, the documented lock-release control, one-minute power reset, monitoring, and service escalation.
- Nothing Will Work - Gas CooktopWhirlpool Product Help · Supports checking the accessible power and gas supply, the main gas valve, Cooktop Lock, and the boundary for repeated breaker or fuse problems.
- Gas Burners are Clicking but Not LightingWhirlpool Product Help · Supports the distinction among lockout, no gas, moisture or clogged ports, Ignite-position behavior, and continuous sparking that needs a safe stop boundary.
- Not Powering On - Electric CooktopWhirlpool Product Help · Supports checking breaker or fuse, fully inserted coils, correct element control, normal cycling or dimmer glow of temperature-limiting coils, and one reset.
- Burner Turns Off During Cooking - InductionWhirlpool Product Help · Supports safe cooling, ventilation, control-area cleanliness, empty-pan avoidance, cookware detection, and the boundary for persistent induction faults.
- Lighting the Burners - Electronic IgnitionWhirlpool Product Help · Supports the limited observation of the documented Ignite sequence, normal clicking during ignition, and cap-care boundary without gas-component adjustment.
- Not Powering On - Electric CooktopWhirlpool Product Help · Supports control setup, lock, breaker or fuse checks, one power reset, and the model manual and service boundary for an electric cooktop that will not power on.
- Induction Compatible CookwareWhirlpool Product Help · Supports using suitable ferromagnetic cookware, checking pan base and position, and explaining why an induction zone may not activate when a pan is unsuitable or too small.
Community feedback
Share a repair observation
Share a plain-text repair observation. Accepted observations are published automatically; this page may take a moment to update.