
On this page
Start here
Quick answer
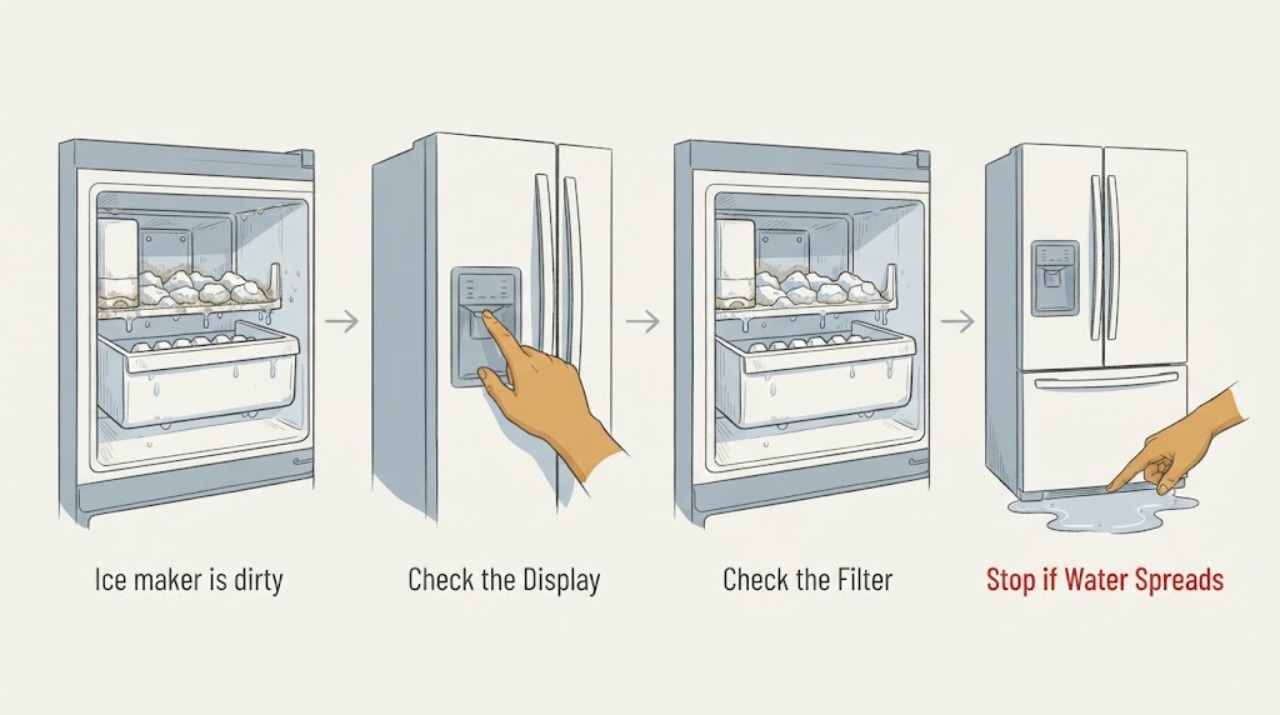
For a Whirlpool GC3JHAXTS01 refrigerator ice maker that looks dirty and is leaking, stop using the ice first: discard ice that has visible dirt, an unusual odor or taste, or contact with leak water or cleaning residue. Turn the ice maker off, remove only the accessible ice bin or chute parts that the exact manual says are removable, and clean those surfaces with water and a soft cloth or mild dish-soap solution; rinse and dry them completely. Do not pour or spray cleaner into the ice-making mechanism, fill tube, chute, filter housing, or electronics, and do not copy the cleaning-cycle instructions for a freestanding Whirlpool ice maker. After the food-contact area is clean, dry the surrounding area and locate the first wet point. Whirlpool's side-by-side refrigerator guidance points first to filter seating or damage, accessible supply connections, the rear water line, and the dispenser/chute area; a continuing leak, cracked line, or water near electrical parts is a stop-use and qualified-service issue rather than proof of a bad valve or ice-maker module.
Work through in order
Diagnostic checks
Use only checks that match the exact appliance or system and its official guide.
-
Check 1
Stop consuming the ice and turn the ice maker off using the control described by the exact GC3JHAXTS01 manual. Discard the bin's ice if it has visible dirt, an unusual odor or taste, contact with leak water, or possible cleaner residue. Do not keep sampling ice to decide whether it is safe.
Expected result: The ice is visibly contaminated or has an abnormal odor/taste, leak water has reached the bin or chute, cleaner may have entered the ice path, or the ice is only clumped without a contamination sign.
Next step: Keep the ice maker off, photograph the condition, and continue only with model-approved accessible cleaning. If the contamination source cannot be cleaned or identified, leave ice production off and arrange service.
Stop if: Do not run a harvest cycle with questionable ice, pour cleaner into the mechanism, or taste ice after a leak or chemical exposure.
Why this matters
Why: A food-contact concern changes the first decision from diagnosing a part to removing the potentially affected ice. Clumping alone can be a humidity or infrequent-use issue, but contaminated or chemically exposed ice should not be treated as usable while the source is unresolved.
-
Check 2
Remove the ice bin, scoop, or chute insert only as shown in the exact manual and only if the part is designed to come out. Wash the removable part with warm water and a soft cloth or mild dish-soap solution, rinse thoroughly, and dry completely before reinstalling it. Wipe the accessible chute and the area beneath the bin with a warm, damp cloth, then dry; do not spray or pour cleaner into the ice maker, fill tube, vents, filter housing, or controls.
Expected result: Residue or odor is limited to the removable bin/chute surfaces and clears after rinsing and drying, the bin is cracked or cannot seat, or residue/odor remains in an inaccessible ice-making path.
Next step: Reinstall only a fully dry, intact bin exactly as the manual shows. If the bin will not seat, the odor persists, or the affected surface is not removable, keep ice production off and request model-specific service.
Stop if: Do not use bleach, abrasive or harsh cleaner on refrigerator plastic or liners, do not use a sharp tool to break ice, and do not remove hoses or internal panels.
Why this matters
Why: A clean, dry, correctly seated bin makes old ice particles, clumping, and a surface spill less likely to be the continuing source. A cracked, mis-seated, or inaccessible contaminated area cannot be safely resolved by spraying deeper into the mechanism.
-
Check 3
With the ice maker still off, dry the bin, chute, freezer floor, filter area, hinge area, and visible rear tubing. Place a dry paper towel at each accessible area and observe without opening powered panels whether new water starts at the chute/bin, filter housing, refrigerator compartment or hinge area, the rear supply connection, or underneath the cabinet.
Expected result: Water starts at the chute or bin, at the filter area, at a rear or household connection, under the refrigerator, or the paper towels stay dry after the area has been cleaned.
Next step: Photograph the first wet point and use the corresponding branch below. Keep the water supply off if water returns without a controllable accessible source or can approach wiring.
Stop if: Do not pull the refrigerator farther than is safe, open the rear cover, or touch wet electrical parts.
Why this matters
Why: The first wet point is more informative than the size of the puddle. Chute or bin moisture can be meltwater from ice particles; filter or rear-line moisture points to the water path; a dry area after cleaning suggests the old spill may have been the only event but does not prove the appliance is repaired.
-
Check 4
If the first wet point is around the filter or an accessible water connection, stop the water supply before handling it. Check that the filter is the correct one for the exact model, fully seated, undamaged, and has its O-rings; inspect accessible tubing and fittings for a crack, loose insertion, or leak. Do not disconnect a pressurized line or substitute a filter by appearance alone.
Expected result: The filter is not seated, cracked, missing an O-ring, or recently changed; an accessible connection is visibly wet or the tube is cracked; or all accessible filter and line points are dry.
Next step: Correct only the model-approved filter seating or accessible connection after water is off, dry the area, and monitor once. If the filter or line is damaged, the leak recurs, or the source is inaccessible, keep water off and arrange qualified service.
Stop if: Do not force a filter, cut tubing, tighten an inaccessible fitting, or continue if water reaches electrical components.
Why this matters
Why: Whirlpool identifies filter installation or damage and loose or cracked water connections as separate refrigerator leak paths. A filter or tubing observation does not identify an ice-maker valve or module, and dry accessible points leave an internal or intermittent path unresolved.
-
Check 5
After cleaning and drying, verify only the visible conditions the exact manual supports: the bin is fully seated, the chute is clear of loose ice, the freezer door gasket is not obstructed, and the freezer is at the manual's operating setting. Do not force an ice bridge, auger, fill cup, or shutoff arm and do not run a diagnostic cycle to make the leak recur.
Expected result: The bin or chute was mis-seated or obstructed and the area stays dry after correction, or the visible arrangement is normal but water or dirty ice returns.
Next step: If the area remains dry, leave the ice maker off until a clean, normal harvest is confirmed and discard any questionable ice. If the problem returns, document its timing and arrange qualified Whirlpool service rather than naming a valve or module.
Stop if: Do not pry frozen parts, bypass a shutoff or sensor, open powered panels, or repeatedly run the ice maker while it is leaking.
Why this matters
Why: A corrected accessible obstruction can explain meltwater or poor ice delivery without proving a component failure. Recurrence with a correctly seated, clean bin and dry visible path shifts the case to an internal water, fill, sensing, or sealed connection diagnosis that requires the exact manual and service assessment.
Use your observations
Decision map
Find the observation that best matches what you see, then follow the next safe action.
-
PATH 01Next step
What you see
The ice was discarded, the removable bin and accessible chute are clean, fully dry, intact, and correctly seated, and no new water appears during observation.
Do this next
Keep the water path and food-contact surfaces clean, use only the exact manual's restart instructions, and discard any ice made before the source and cleanliness are trusted. Stop and service if odor, visible soil, or water returns.
Why this path and its safety boundary
Why it matters: The immediate problem is more consistent with contaminated or clumped stored ice, a surface spill, or an accessible bin/chute condition than a confirmed internal failure.
-
PATH 02Next step
What you see
The bin or chute is clean but water returns from the filter housing, hinge/refrigerator compartment area, rear supply connection, or a cracked visible line.
Do this next
Shut off the water before any accessible correction, keep the area dry, and arrange service for a damaged filter, cracked line, recurring leak, or any source that cannot be safely contained.
Why this path and its safety boundary
Why it matters: This pattern favors a refrigerator water-supply or filter-sealing path rather than a dirty ice bin. Whirlpool treats filter seating/damage and accessible supply connections as separate leak checks.
-
PATH 03Next step
What you see
Water appears at the chute or bin only after dispensing, ice shavings are present, the bin was not seated, or clumped ice melts into the delivery area.
Do this next
Empty and clean the delivery area with a warm, damp cloth, dry it, seat the bin as the exact manual shows, and monitor without forcing parts. Escalate if water continues with a clean, correctly seated path.
Why this path and its safety boundary
Why it matters: Meltwater or a delivery-area obstruction is more likely than a proven valve or ice-maker-module fault. Whirlpool notes that ice particles in a chute can melt and that a bin must be installed correctly.
-
PATH 04Next step
What you see
Dirty or off-tasting ice returns after the accessible bin/chute cleaning, the source is inside the ice-making path, the leak is uncontrolled, or water reaches wiring or electrical components.
Do this next
Leave the ice maker and water supply off, protect food and flooring, disconnect power only if it can be done from a dry safe position, and contact qualified Whirlpool appliance service. Provide the model, photos, first wet point, and cleaning history.
Why this path and its safety boundary
Why it matters: The problem is no longer a safe food-contact or surface-cleaning check. An inaccessible contamination source or water/electrical hazard needs model-specific professional assessment, and the visible symptom does not select an internal part.
Helpful context
Understand the symptom
Why cleaning and leaking must be separated
A dirty bin and a water leak can be related without having the same cause. Old ice, ice particles, humidity, and an incompletely seated bin can make the delivery area look wet, while a filter seal or water connection can leak independently. Clean and dry the food-contact surfaces first, then use a dry paper towel to find where new water starts. The refrigerator pages used here are deliberately separate from Whirlpool's freestanding ice-maker cleaning-cycle pages: a freestanding cleaner bottle or cycle is not a universal instruction for the GC3JHAXTS01 refrigerator ice maker.
What to record before service
Photograph the complete model label, the dirty or wet area, the ice bin's seating, the filter and its seals if accessible, and the first place that becomes wet. Record whether water appears only after dispensing, during an ice harvest, after the refrigerator door is opened, or while the appliance is idle. This evidence keeps a technician from treating an old puddle or bad-tasting ice as proof that a valve or ice-maker module needs replacement.
When checks do not resolve it
Need a professional?
Arrange qualified Whirlpool service when dirty or off-tasting ice returns after accessible cleaning, contamination or a leak originates in an inaccessible ice-making path, the bin is cracked or will not seat, a filter or supply line is damaged, water returns after an accessible correction, the leak is uncontrolled, or water reaches wiring or electrical parts. Keep the ice maker and water supply off for the latter conditions.
Have this ready
- Provide the complete GC3JHAXTS01 model and serial, country, photographs of the ice/bin/chute and first wet point, whether the ice was discarded, the cleaning method used, filter installation or replacement history, leak timing, and whether water reaches the refrigerator compartment, rear tubing, floor, or electrical area.
Common questions
FAQ
Should I keep using ice that looks dirty or tastes strange?
No. Turn the ice maker off and discard ice with visible soil, an unusual odor or taste, contact with leak water, or possible cleaner residue. Clean and fully dry the removable bin and accessible chute with the exact manual's allowed method before considering a restart; if the source is inaccessible or the symptom returns, arrange service.
Can I use the Whirlpool freestanding ice-maker cleaning cycle on this refrigerator?
Do not assume so. Whirlpool publishes a bottle-and-cleaning-cycle procedure specifically for freestanding ice makers, while the GC3JHAXTS01 task identifies a refrigerator ice maker. Use the exact GC3JHAXTS01 manual for any internal cleaning instruction; for the accessible bin and chute, use only the model-approved water/soft-cloth or mild-soap method and rinse and dry completely.
Where should I look first when the Whirlpool ice maker leaks?
Dry the area and find the first place that becomes wet. For a side-by-side refrigerator layout, Whirlpool points to the filter seating or damage, accessible supply connections and rear tubing, and the dispenser/chute area. A puddle under the refrigerator is not enough to identify the cause, so keep water off if the leak continues or approaches electrical parts.
Can I spray cleaner into the ice maker to remove the smell or dirt?
No. Do not spray or pour chemicals into the ice-making mechanism, fill tube, chute, filter housing, vents, or controls. Clean only removable food-contact pieces and accessible surfaces that the exact manual permits, using a mild method, then rinse and dry. Persistent odor or soil in an inaccessible path is a service boundary.
When is a leaking Whirlpool ice maker unsafe to keep running?
Stop ice production and shut off the water when the leak is uncontrolled, a supply line is cracked, water reaches wiring or electrical components, the source is inaccessible, or the leak returns after an accessible filter or connection check. Disconnect power only from a dry, safe position and arrange qualified service; do not open powered panels or try to prove a valve or module failure yourself.
Read the exact guide
Official sources
- Kitchen And Laundry Appliance Manuals | WhirlpoolWhirlpool · Opened official Whirlpool manuals portal; the complete GC3JHAXTS01 model remains the controlling source for removable parts and any model-specific ice-maker procedure.
- Ice Clumping in Ice Bin - RefrigeratorWhirlpool · Official refrigerator ice-bin guidance used for the water/soft-cloth cleaning and complete-drying decision; the page is not evidence for internal component diagnosis.
- Leaking from Dispenser - Side by Side RefrigeratorWhirlpool · Official dispenser-area guidance used for ice-shaving meltwater, drip-tray, loose-connection, and damaged-filter observations when the layout matches.
- Leaking at the Bottom - Side by Side RefrigeratorWhirlpool · Official bottom-leak guidance used for accessible supply, tubing, shutoff, and filter observations; no internal part conclusion is drawn.
- Leaking from Behind - Side by Side RefrigeratorWhirlpool · Official rear-leak guidance used only for safe visual inspection of accessible tubing and connections; it does not support opening the rear cabinet or live testing.
- Cleaning the Interior of the RefrigeratorWhirlpool · Official refrigerator guidance used for removable bins and accessible interior surfaces; it does not authorize spraying the ice-making mechanism or override the exact GC3JHAXTS01 manual.
- Leaking from the Ice Maker - Side by Side RefrigeratorWhirlpool · Official side-by-side refrigerator support used for the corresponding filter, connection, and water-path checks when the GC3JHAXTS01 layout matches; the exact model manual controls any different layout.
Community feedback
Share a repair observation
Share a plain-text repair observation. Accepted observations are published automatically; this page may take a moment to update.