
On this page
Start here
Quick answer
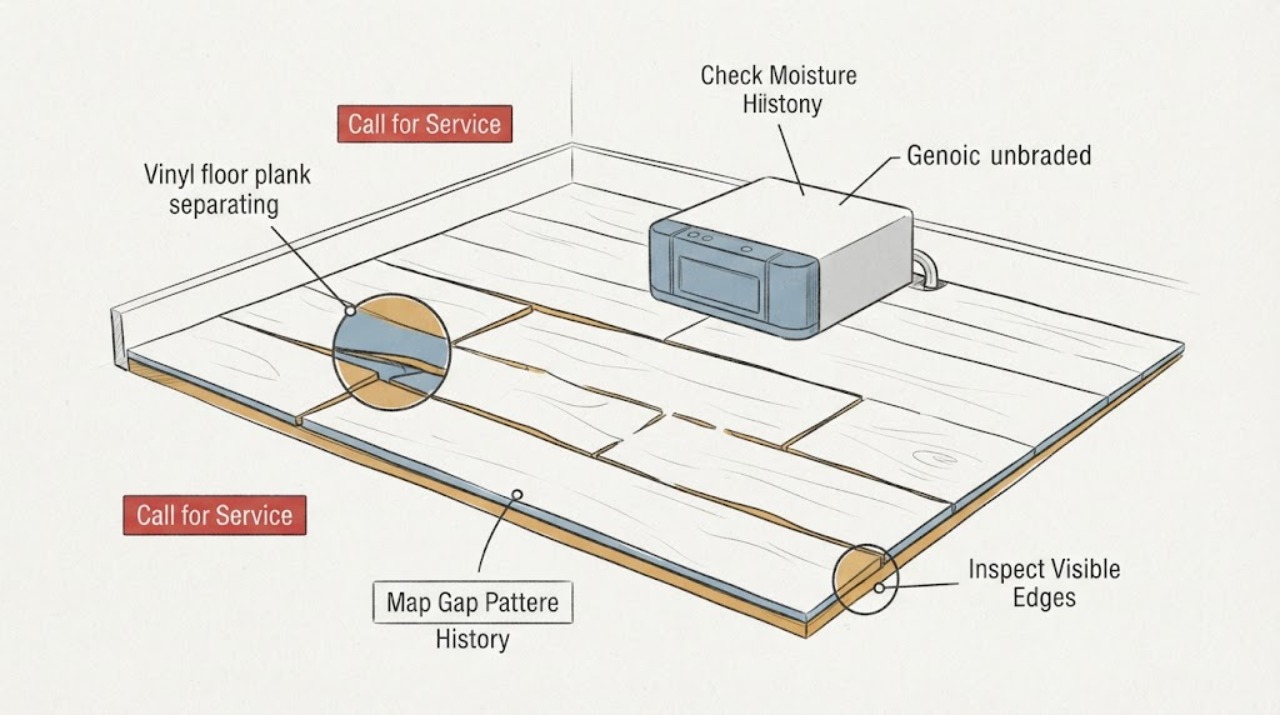
Do not pry, tap, pull, cut, heat, glue, or remove the separating vinyl planks. First photograph the gaps from above and record whether they are at end joints, long edges, a room perimeter, or a doorway; then look for moisture, temperature change, a heavy fixed object, edge pressure, or a floor area that feels uneven without lifting or probing the floor. A single stable visual joint may be a product or installation detail, while gaps that are growing, recurring with room conditions, accompanied by dampness, or spread across a row need a flooring professional to check the installation system and substrate. Keep water off the area, avoid dragging heavy items over it, and stop any inspection that would require opening the floor or disturbing trim.
Work through in order
Diagnostic checks
Use only checks that match the exact appliance or system and its official guide.
-
Check 1
From above, photograph the affected area with a nearby room landmark and note whether the separation is at a short end joint, along a long edge, across several adjacent rows, at a wall or fixed object, or at a doorway. Do not slide a card into the gap or try to close it.
Expected result: The gap is isolated to one joint, repeats in a straight row, follows a perimeter or doorway, or appears in several areas of the room.
Next step: Keep the photographs and mark the date and approximate location on a simple room sketch. Continue with moisture, environment, and loading observations without disturbing the floor.
Stop if: Stop if the floor edge is sharp, loose enough to catch a foot, lifting, wet, or unstable under ordinary walking.
Why this matters
Why: An isolated joint can point to a local edge or locking issue, while a straight row, perimeter, doorway, or multi-area pattern can indicate movement or installation conditions. The pattern narrows the professional inspection but does not prove a structural or installation cause.
-
Check 2
Look at the visible plank edges and surface from a normal standing position. Record chipped corners, crushed-looking profiles, raised edges, curling, surface cracks, staining, or a transition or baseboard that appears to press against the floor; do not remove trim or probe the joint.
Expected result: The joint edges look intact, one edge looks damaged, the floor is lifting or buckling, or a fixed trim/object appears to contact the floor tightly.
Next step: Keep foot traffic gentle and avoid moving furniture across the area. Provide the photos and the exact edge or trim observation to the flooring service.
Stop if: Stop immediately if a plank is lifting, the floor feels unsafe, or the visible condition suggests a trip or moisture hazard.
Why this matters
Why: Intact edges leave several possible causes open. A damaged edge may prevent the original joint from engaging, while lifting, buckling, or visible pressure raises the urgency for a flooring professional. A trim appearance is only an observation, not proof that the trim caused the separation.
-
Check 3
Without wetting the floor or opening anything, look for visible dampness, water marks, swelling of nearby trim, discoloration, musty odor, or a recent spill, leak, cleaning event, or flood. Compare the affected location with nearby dry areas and record when the floor was last known dry.
Expected result: There is current dampness, a stain or odor, a recent water event, moisture only at a doorway or plumbing-adjacent area, or no visible moisture history.
Next step: Keep the area dry and arrange flooring or water-damage service when moisture, odor, or a recent leak is present. Do not lift planks or attempt mold remediation to investigate.
Stop if: Stop and keep people away if the floor is wet, soft, contaminated, or near an active leak or electrical hazard.
Why this matters
Why: Waterproof plank material does not guarantee that the substrate or installation beneath it is unaffected. Moisture evidence changes the priority from cosmetic observation to source control and professional assessment; no visible moisture does not rule out concealed moisture.
-
Check 4
Record whether the gap first appeared after a noticeable seasonal or room-temperature change, prolonged sun exposure, a heating or cooling outage, or a period when the room was not climate-controlled. Note the timing and whether the gap changes visually over several days without manipulating the plank.
Expected result: The gap is stable, varies with room conditions, appeared after a long unconditioned period, or has continued to widen regardless of conditions.
Next step: Keep ordinary, consistent room conditions and document dates and photographs. Ask the flooring professional to compare the product instructions and installation environment before choosing a repair path.
Stop if: Stop monitoring and seek service if the gap widens quickly, new rows separate, or the floor begins to lift or buckle.
Why this matters
Why: A condition-linked change can be useful evidence about movement, but it is not a license to heat or cool the floor aggressively. A steadily widening gap or movement independent of conditions deserves prompt professional evaluation.
-
Check 5
From the floor, note whether a heavy appliance, island, cabinet, built-in, or recently moved item sits over or against the affected area, and record any recent furniture move, remodel, flooring installation, or repair. Do not move a heavy object to test the floor and do not drag anything across the planks.
Expected result: The separation is next to a fixed heavy object, appeared after an item was moved, follows a room transition, or has no clear load or work history.
Next step: Leave heavy items in place unless a professional gives a safe moving plan, and send the layout, photos, and timing to a flooring repair service.
Stop if: Stop if moving or reaching around an item would require force, lifting, disassembly, or disturbing the floor or trim.
Why this matters
Why: A fixed object or recent work may be relevant to how the floor can move, but the observation alone cannot establish an installation defect or a required correction. The professional needs the product type, room layout, and work history before recommending a part or repair.
Use your observations
Decision map
Find the observation that best matches what you see, then follow the next safe action.
-
PATH 01Next step
What you see
The gap is isolated, dry, stable, and has intact visible edges
Do this next
Document it and schedule a flooring professional if it persists or grows. Do not force the joint closed or apply adhesive based only on its appearance.
-
PATH 02Next step
What you see
Gaps repeat in a row, at a doorway, around a perimeter, or across multiple areas
Do this next
Request a flooring assessment that includes the product type, room boundaries, transitions, and substrate conditions. Avoid removing trim or planks to inspect it yourself.
-
PATH 03Next step
What you see
There is dampness, a recent leak, staining, odor, soft flooring, or a nearby plumbing event
Do this next
Keep people off the affected area as needed, address the water source through the appropriate professional, and arrange flooring or water-damage assessment. Do not open the floor or perform DIY mold remediation.
-
PATH 04Next step
What you see
The gap changes after room-temperature or climate-control changes
Do this next
Record the dates and conditions without adding heat, chilling the room, or attempting to force movement. Ask the flooring professional to compare the exact product guidance with the installation environment.
-
PATH 05Next step
What you see
A plank is lifting, buckling, sharp, unstable, or creating a trip hazard
Do this next
Stop walking over it, keep people and pets clear, and arrange prompt flooring service. Do not tape, nail, glue, tap, or cut the plank as a temporary repair.
Helpful context
Understand the symptom
Why a plank gap needs context
Vinyl plank systems differ: some are floating click products, some are glued, and some are loose-lay. Manufacturer guidance also varies by product. Separation can therefore reflect a joint pattern, perimeter or doorway movement, moisture below or around the floor, temperature conditions, subfloor movement, or a damaged edge. A gap alone cannot identify the cause or justify a repair product.
Safe boundary
Keep the inspection visual and from a normal standing position. Do not pry a joint, tap it closed, push a plank sideways, lift trim, cut the floor, drill, sand, add heat, inject adhesive, flood the area to test it, or remove a plank. Those actions can damage a locking edge, hide moisture evidence, or turn a limited gap into a larger repair.
Only after diagnosis
Potential parts
- vinyl-floor-repair-kit
Only consider a repair kit after a flooring professional identifies a localized, surface-level repair that matches the exact plank construction and cause; a kit cannot correct moisture, movement, or a damaged locking system by itself.
Confirm the product type, wear-layer finish, color, installation method, and manufacturer instructions before purchase; do not assume a universal kit will match or restore a separated joint. - flooring-transition
A transition is relevant only when the documented separation is at a doorway or change between floor surfaces and the professional confirms that the transition detail is appropriate for the product and movement conditions.
Match the flooring system, adjoining floor heights, doorway layout, finish, and manufacturer-approved profile; a transition should not be used to hide active moisture or a failing installation.
When checks do not resolve it
Need a professional?
Call a flooring repair or installation professional when a gap is widening, repeats across rows, changes with room conditions, follows a doorway or fixed object, or returns after prior work. Escalate promptly for moisture, odor, soft or buckled flooring, sharp edges, or a trip hazard.
Have this ready
- Provide dated photos, a simple room sketch, gap locations and patterns, visible edge condition, moisture or leak history, room-temperature or occupancy changes, heavy-object and doorway context, installation date, product brand or model if already documented, and any prior repair history.
Common questions
FAQ
Can I tap or push a separating vinyl plank back into place?
Do not tap, pry, push, or pull the joint. The plank may use a product-specific locking or adhesive system, and force can damage the edge or hide a moisture or substrate problem. Photograph it and have the exact floor assessed.
Does waterproof vinyl flooring rule out a moisture problem?
No. Some vinyl materials resist water, but moisture can still affect the substrate or installation beneath the floor. Dampness, staining, odor, soft flooring, or a recent leak should trigger source control and professional assessment rather than floor opening.
Should I fill a vinyl plank gap with glue or caulk?
Not based on a visual gap alone. Adhesive or filler may be incompatible with the floor and can conceal the reason the joint opened. A flooring professional should identify the product and cause before selecting any repair material.
Read the exact guide
Official sources
- Kent Oak LVP FlooringCOREtec · A product-family example only; the reader must use the exact product documentation for a specific floor.
- Flooring FAQsArmstrong Flooring · Armstrong product guidance; other products may have different installation requirements.
- Vinyl Flooring InstallationShaw Floors · General Shaw luxury vinyl planning guidance; exact product installation documents take precedence.
Community feedback
Share a repair observation
Share a plain-text repair observation. Accepted observations are published automatically; this page may take a moment to update.