
On this page
Start here
Quick answer
When vinyl planks are separating, first document the seam pattern and check for visible moisture, movement, swelling, or a soft area without prying up the floor. A separating seam can come from subfloor unevenness or movement, moisture affecting the substrate, an installation-specific expansion or edge issue, or a damaged click/adhesive joint. Use the product's installation guidance and have a flooring professional diagnose the subfloor and installation system before applying adhesive, forcing planks together, removing trim, or replacing boards.
Work through in order
Diagnostic checks
Use only checks that match the exact appliance or system and its official guide.
-
Check 1
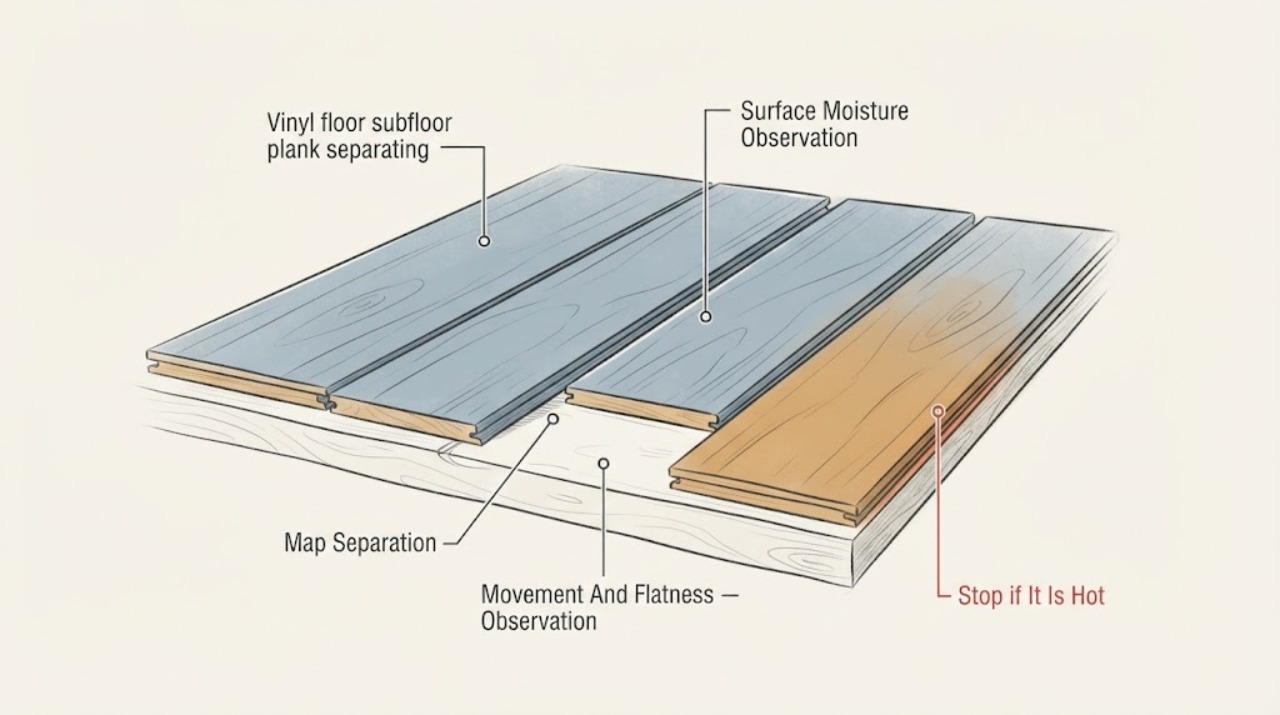
From normal standing access, photograph each separated seam with a ruler or other size reference nearby, and mark its room location on a simple sketch without moving fixed trim or lifting any plank.
Expected result: Record whether the opening is at a short end, a long side, a doorway, a perimeter edge, or a transition, and whether it is one seam or a repeating line across several rows.
Next step: Keep dated photos and the map for the installer or flooring professional. Do not force the boards together or fill the seam before the cause is identified.
Stop if: Stop the inspection if the floor is loose enough to catch a foot, exposes a sharp edge, or requires prying, cutting, or moving trim to see more.
Why this matters
Why: A single joint may be a local plank or locking-edge issue, while repeated gaps or a continuous line points toward movement, subfloor flatness, perimeter restraint, or installation conditions that need a broader diagnosis.
-
Check 2
Visually check the separated area and nearby walls, doorways, plumbing fixtures, appliances, and baseboards for staining, dampness, bubbling, raised edges, discoloration, or a musty odor; do not lift planks or probe the subfloor.
Expected result: Note whether the area looks dry and unchanged, shows an active or recent leak, or has swelling/softness or a change after cleaning, rain, plumbing use, or a spill.
Next step: If moisture is active, stop using the nearby source if that can be done safely and contact the appropriate plumbing or flooring professional. Preserve the evidence and request a moisture and subfloor assessment before any adhesive or replacement work.
Stop if: Stop and keep clear if water is near electrical equipment, the subfloor feels unsafe, or the floor is significantly swollen or collapsing.
Why this matters
Why: Vinyl's top layer may resist water while the subfloor or substrate beneath can still be affected. Moisture-related separation needs the water source and substrate assessed before cosmetic seam repair; a dry, stable area makes an installation-joint or movement cause more plausible but does not prove it.
-
Check 3
Walk normally around—not repeatedly over—the affected area and observe whether the plank edges move, click, flex, rock, tent, or make a new sound under ordinary foot traffic; compare with an unaffected nearby area.
Expected result: Classify the area as visually separated but firm, moving at the seam, hollow or flexing, raised at an edge, or broadly uneven across the room.
Next step: Take a short video and ask a flooring professional to evaluate the affected plank, adjacent rows, and subfloor. Avoid heavy furniture or rolling loads over a raised or moving section until it is assessed.
Stop if: Do not hammer, tap, roll, screw, nail, sand, or inject material into the separation to make the movement stop.
Why this matters
Why: Movement or a broad uneven pattern is consistent with an underlying support, flatness, or installation problem rather than a seam that should simply be glued shut. A firm isolated opening may still require a product-specific joint repair, but the correct repair depends on the installation type.
-
Check 4
Find the flooring carton, invoice, warranty, or installation record and note the product name, installation date, room conditions, and whether the floor was described as floating/click, glue-down, or another system; do not remove the floor to identify it.
Expected result: Check whether the product guidance calls for a dry, stable, flat subfloor, an expansion space at the perimeter, a particular underlayment, or product-specific repair materials, and note anything the original installer documented about subfloor preparation.
Next step: Give the product information and records to the flooring professional and ask for a diagnosis that distinguishes plank/joint failure from subfloor movement or moisture. Follow only the exact product guidance after the cause and installation method are confirmed.
Stop if: Stop if the only way to continue is to pry planks, remove trim, disturb a heating system, or expose possible mold or contaminated material.
Why this matters
Why: Vinyl installation methods and expansion requirements vary by product. The same visible gap can require different treatment in a floating floor versus an adhered floor, and an unverified generic fix can damage the joint or void warranty.
-
Check 5
Request a written repair scope from the flooring professional that names the installation system, suspected cause, moisture/subfloor findings, affected area, and whether a plank, transition, adhesive, or subfloor correction is actually needed.
Expected result: A useful scope separates cosmetic seam filling from correction of a wet, uneven, loose, or damaged substrate and explains what must be tested or opened, if anything.
Next step: Approve work only after the professional confirms the repair method is compatible with the exact product and warranty. Keep the written findings and before/after photos for future recurrence.
Stop if: Do not proceed with a proposal that relies on forcing separated planks together or covering a suspected moisture/subfloor problem without investigating it.
Why this matters
Why: A seam-only patch can fail again when movement or moisture remains below it. A cause-based scope also helps preserve matching material and avoid buying a repair part before compatibility is known.
Use your observations
Decision map
Find the observation that best matches what you see, then follow the next safe action.
-
PATH 01Next step
What you see
There is active moisture, a recent leak, dampness, staining, musty odor, or separation that changes after water exposure.
Do this next
Address the water source and request a flooring/subfloor moisture assessment before seam repair or replacement.
-
PATH 02Next step
What you see
Multiple rows, a broad area, or a perimeter/doorway line is separating.
Do this next
Treat it as a system or substrate diagnosis and arrange professional evaluation of flatness, stability, expansion space, and installation conditions.
-
PATH 03Next step
What you see
The affected planks flex, rock, tent, rise, or catch footwear.
Do this next
Keep traffic and rolling loads off the area as practical and request prompt flooring service; do not force or nail the planks down.
-
PATH 04Next step
What you see
The records show a floating/click system, glue-down system, or a product-specific repair instruction.
Do this next
Give that information to the professional and follow only the confirmed product method after the underlying cause is assessed.
Helpful context
Understand the symptom
What separation can indicate
A vinyl plank floor may be floating with locking edges, glued down, or another product-specific construction. The visible gap alone does not identify the cause. Manufacturer guidance consistently treats the substrate as important: it should be dry, clean, stable, and sufficiently flat, while moisture or an unstable substrate can contribute to installation failure. A single opened seam may be a local joint issue; a line of gaps, recurring movement, or separation near a wet area is stronger evidence that the subfloor or installation conditions need inspection.
Keep the first check non-invasive
Use normal room access to photograph the gap and observe how it changes. Do not lift a plank, pry a trim piece, cut the floor, drill the substrate, or spread adhesive just to see what is underneath. Those actions can hide the original evidence and can damage a locking edge, adhesive bond, underlayment, moisture barrier, or a floor-heating system.
When to arrange service
Arrange flooring service when separation is growing, repeated across multiple rows, accompanied by a soft or raised area, close to plumbing or an exterior door, or present after a spill or leak. A professional can identify whether the product is click, glue-down, or another system, evaluate the subfloor without unnecessary damage, and choose a repair compatible with the product instructions and warranty.
Only after diagnosis
Potential parts
- vinyl-floor-repair-kit
Only consider a repair kit after a flooring professional confirms that the damage is limited to a compatible surface or joint repair and that the separated plank does not require subfloor or moisture correction.
Confirm the exact vinyl product, color/finish, installation system, repair chemistry, and warranty requirements before selecting a kit; do not use it to conceal movement or moisture. - flooring-transition
Only consider a transition profile if the separation is at a doorway or floor-covering boundary and the professional confirms the existing gap, movement, and profile are installation-appropriate.
Match the exact floor height, expansion requirements, fastening method, and manufacturer's accessory guidance; a transition must not restrain a floating floor or hide a subfloor failure.
Common questions
FAQ
Why are my vinyl planks separating?
Possible causes include a local damaged joint, movement or unevenness in the subfloor, moisture affecting the substrate, perimeter or transition conditions, or an installation-specific problem. The gap pattern and product installation method matter, so document it and have the cause assessed before forcing the planks together.
Can I put glue into the separated seam?
Do not do that as a first step. Floating/click and glue-down floors use different systems, and adhesive can lock in movement, damage the joint, or hide moisture and subfloor problems. Confirm the product and cause with a flooring professional first.
Does waterproof vinyl mean the subfloor is safe from water?
No. Some vinyl products resist water, but the substrate beneath can still be affected by moisture or flooding and the installation can fail. Look for dampness, staining, odor, or changes after a leak and arrange moisture assessment when present.
Should I remove the baseboard or lift a plank to inspect the gap?
Not for the initial check. Photograph and map the separation from normal standing access, gather the product records, and let a flooring professional decide whether limited opening is necessary after considering the installation system, moisture, floor heating, and warranty.
When is a separating vinyl plank a priority?
Arrange prompt service if the area flexes, rises, catches footwear, spreads across rows, follows a leak, or has staining, odor, or an unsafe edge. Keep traffic and rolling loads off a raised or unstable section as practical while waiting.
Read the exact guide
Official sources
- Vinyl Flooring InstallationShaw Floors · Luxury vinyl preparation, subfloor requirements, expansion space, transitions, and installer guidance
- Luxury Vinyl Flooring InstallationArmstrong Flooring · Luxury vinyl installation methods, subfloor preparation, instructions, and professional installation
- Flooring FAQsArmstrong Flooring · Luxury vinyl water exposure and subfloor/substrate limitations
- Pergo Vinyl Planks & Tiles Installation InformationPergo · Vinyl click-floor subfloor stability, flatness, moisture, expansion, and accessory requirements
Community feedback
Share a repair observation
Share a plain-text repair observation. Accepted observations are published automatically; this page may take a moment to update.