
On this page
Start here
Quick answer
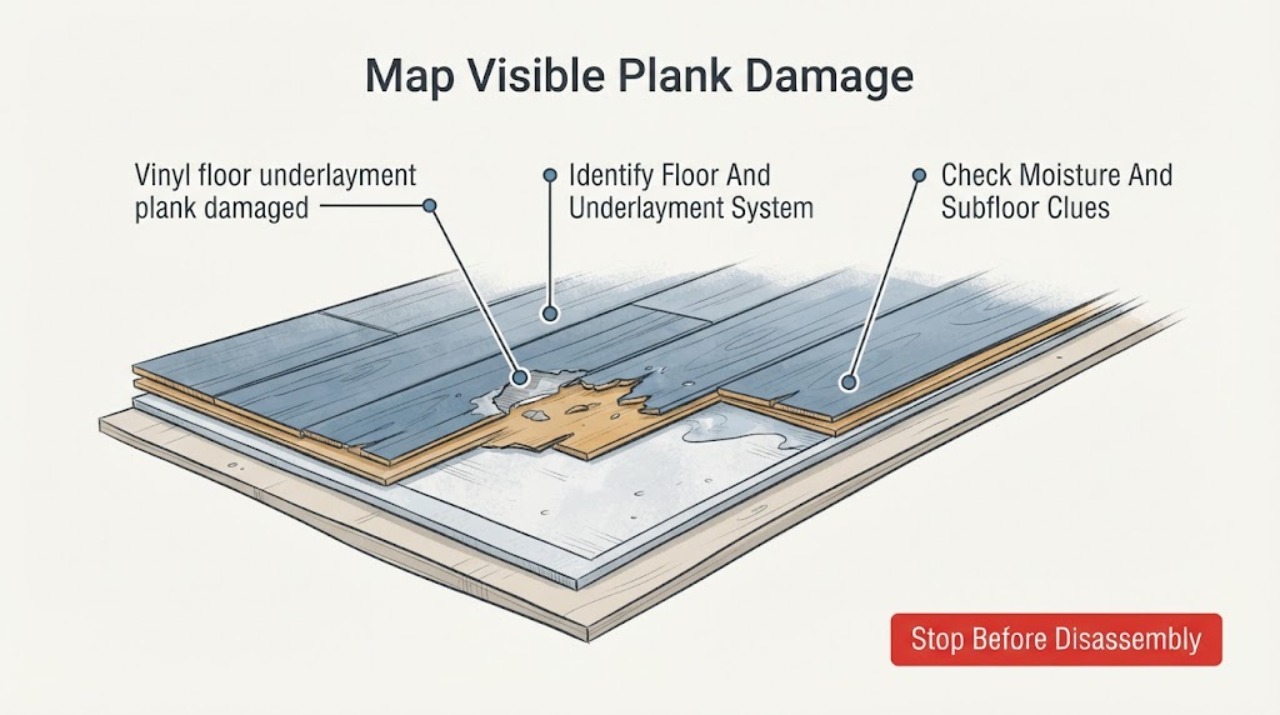
When a vinyl plank is damaged and the underlayment may also be involved, first determine whether the problem is limited to the visible plank or reflects moisture, a soft or uneven substrate, a failed locking edge, or an incompatible added underlayment. Photograph the pattern, identify the flooring and installation method from records or an unused carton, and check for dampness, movement, gaps, or damage spreading beyond one plank. Do not pry up a floating floor, cut through the plank, pull apart locking joints, or use adhesive or leveling material until the product and underlayment requirements are confirmed. A flooring professional can decide whether a compatible plank replacement, localized repair, underlayment correction, or broader floor assessment is appropriate.
Work through in order
Diagnostic checks
Use only checks that match the exact appliance or system and its official guide.
-
Check 1
Collect the carton label, warranty, installation guide, installer record, and any photograph of the floor edge or underlayment. From a visible perimeter or transition, note whether the floor appears floating, adhered, loose-lay, or fitted over an attached pad; do not lift trim, pry a plank, or separate a locking joint to investigate.
Expected result: The product name and installation method are documented, an attached pad is identified, a separate underlayment is recorded, or the layer arrangement is unknown.
Next step: Give the product information and any underlayment label to a flooring professional or the product manufacturer before selecting repair material or a replacement plank.
Stop if: Stop if identifying the layers would require removing trim, pulling up a plank, cutting the floor, or disturbing a concealed moisture barrier or adhesive.
Why this matters
Why: The same visible plank damage can require different handling depending on the flooring construction and whether an additional underlayment is approved. Shaw and other manufacturers place responsibility for product-specific substrate and underlayment suitability on the installation decision, so unknown layers make a generic repair method unreliable.
-
Check 2
Photograph the damaged plank and map its relationship to seams, locking edges, thresholds, furniture, rolling loads, heat sources, and neighboring planks. View the area in ordinary use without dragging furniture, adding a test load, or pressing on a raised edge.
Expected result: The damage is a localized scratch, gouge, dent, chipped edge, open seam, lifted corner, bowing plank, repeated pattern, or damage that extends across multiple planks.
Next step: Record the count and pattern, keep heavy or rolling loads off the area, and ask the provider to determine whether the visible plank or the supporting floor system needs attention.
Stop if: Stop using the area if a plank rocks, an edge is sharp, the surface is buckled, pieces are loose, or the damage creates a trip hazard.
Why this matters
Why: A localized cosmetic mark may be a different repair question from a failed seam, lifted edge, or repeated deformation. Damage across several planks or along a path can indicate movement, substrate irregularity, moisture, installation stress, or load exposure rather than one replaceable surface piece.
-
Check 3
From the floor surface and accessible room perimeter, look for dampness, staining, swelling, odor, soft-looking seams, mold-like growth, recurring damage near an exterior wall, plumbing fixture, door, or concrete edge. Use existing records or a non-invasive professional reading; do not wet the floor, drill for a sample, or remove a plank to test below it.
Expected result: The floor is visibly dry and firm, shows a one-time spill mark, shows recurring dampness or staining, has swollen or separating edges, or the moisture source is unknown.
Next step: Stop adding moisture or cleaning chemicals, document the location and timing, and arrange a flooring or moisture assessment before installing a patch, replacement plank, or extra underlayment.
Stop if: Stop and restrict access if water is active, the floor is slippery or soft, there is suspected mold, or assessment would require opening the floor or disturbing electrical, plumbing, or structural materials.
Why this matters
Why: A dry isolated mark is less suggestive of an active moisture cause, but it does not prove the underlayment is sound. Recurring dampness, swelling, odor, or separation can damage the plank system and substrate; Provenza and Shaw guidance both treat moisture and subfloor condition as installation-critical rather than something a surface repair can conceal.
-
Check 4
From a standing position, compare the damaged area with adjacent planks for visible height changes, repeating gaps, ridges, dips, squeaks, clicking, or movement during ordinary careful walking. Do not jump, rock the floor deliberately, use a heavy object, or force a seam to reveal movement.
Expected result: The surrounding floor is visually consistent and firm, one seam or edge moves, a broad area dips or crowns, or the symptom repeats in several rows.
Next step: Mark the locations on a room sketch, photograph the transitions, and ask a flooring professional to verify substrate flatness, moisture, expansion, and underlayment compatibility before any replacement is fitted.
Stop if: Stop if the floor flexes significantly, a plank separates, a sharp height change develops, or checking the pattern would require moving heavy furniture or dismantling the floor.
Why this matters
Why: A single damaged face can be localized, while repeated height or movement patterns can point to subfloor flatness, expansion space, underlayment compression, moisture, or installation conditions. Shaw guidance states that underlayment panels correct only minor subfloor deficiencies and that the substrate must be flat and sound; the surface pattern alone cannot identify which layer failed.
-
Check 5
Check whether an unopened spare plank, lot information, transition profile, or repair history is available. Compare the product name, thickness, finish, locking system, and installation method on records rather than placing an unverified plank or repair compound into the floor.
Expected result: A matching spare and product documentation are available, only a visually similar plank is available, the damage is at a threshold or transition, or no reliable replacement information exists.
Next step: Give all labels and records to the flooring provider and ask for fit, underlayment, and repair-method confirmation before ordering or applying a material.
Stop if: Stop if matching the part would require cutting the installed floor, forcing the locking system, applying adhesive, or removing a transition without knowing what it protects.
Why this matters
Why: A visual match is not enough to confirm locking geometry, thickness, wear layer, attached pad, finish, or compatibility with the existing underlayment. A transition issue may need a flooring assessment rather than a plank repair, while no reliable product information increases the risk of an incompatible material.
Use your observations
Decision map
Find the observation that best matches what you see, then follow the next safe action.
-
PATH 01Next step
What you see
One plank has a localized mark, the surrounding floor is dry and firm, and no seam or movement pattern is visible.
Do this next
Have a professional or the product manufacturer confirm whether a compatible repair kit or plank replacement is allowed for that flooring construction. Do not assume a generic filler or adhesive is suitable.
-
PATH 02Next step
What you see
A plank lifts, gaps, clicks, rocks, or has a damaged locking edge.
Do this next
Request a flooring assessment of the affected plank, adjoining locking system, expansion conditions, substrate, and underlayment. Keep loads off the area and do not force the seam apart.
-
PATH 03Next step
What you see
There is recurring dampness, swelling, staining, odor, soft seams, or damage near a likely water source.
Do this next
Address the moisture source and obtain a flooring/substrate assessment before replacement or patching. A surface repair cannot establish that the underlayment and subfloor are dry and sound.
-
PATH 04Next step
What you see
Several planks show dips, ridges, repeating gaps, flexing, squeaks, or a spreading damage pattern.
Do this next
Treat the condition as a floor-system question involving substrate flatness, moisture, expansion, and underlayment compatibility. Request professional evaluation rather than replacing one visible plank in isolation.
-
PATH 05Next step
What you see
Damage is concentrated at a doorway, transition, edge, or adjacent floor height change.
Do this next
Ask a flooring professional to inspect the transition, expansion space, edge restraint, and neighboring floor construction before ordering a transition or forcing the plank back into place.
-
PATH 06Next step
What you see
The product, locking system, attached pad, separate underlayment, adhesive, or repair history cannot be identified.
Do this next
Pause material selection and provide photographs, carton labels, and installation records to a flooring professional or manufacturer for compatibility guidance.
Helpful context
Understand the symptom
A damaged plank is not automatically a damaged underlayment
Vinyl floors may be glue-down, loose-lay, or floating rigid-core products, and some planks have an attached pad while others rely on a separately approved underlayment. The visible damage can come from impact, a failed locking edge, moisture, an uneven subfloor, movement, or an underlayment that is too soft or not approved for that product. Manufacturer instructions should control the repair path; a generic repair kit or extra pad can create a new compatibility or warranty problem.
Look for the cause before choosing a patch
A single surface gouge with a firm, dry floor around it is a different starting point from a plank that lifts, gaps, clicks, dips, or shows swelling at a seam. Shaw's installation guidance requires a clean, flat, dry, structurally sound substrate and says irregularities, moisture, and underlayment choices affect resilient-floor performance. Those requirements support documenting the surrounding floor rather than treating the visible mark in isolation.
Keep the inspection non-destructive
Use normal lighting, a flashlight from the side, photos, and product records. Do not turn a diagnosis into demolition, cutting, sanding, drilling, solvent use, or a full-floor reinstallation. If water is present, address the source through an appropriate professional and keep the floor dry and lightly used until the substrate and underlayment are assessed.
Only after diagnosis
Potential parts
- vinyl-floor-repair-kit
Consider only if the damage is a confirmed localized surface mark and the flooring manufacturer or professional approves a repair material for this product and finish.
Confirm product construction, finish, color, moisture history, and manufacturer instructions; a repair kit is not a substitute for correcting movement, swelling, or an unsound underlayment. - flooring-transition
Consider only when a professional confirms that the damage is limited to a doorway or floor transition and the transition profile and expansion conditions are appropriate.
Confirm the installed plank thickness, adjoining-floor height, edge restraint, finish, and installation method before ordering; do not infer fit from appearance alone.
When checks do not resolve it
Need a professional?
Call a qualified flooring professional when a vinyl plank is lifting, separating, flexing, swollen, repeatedly damaged, or affected by dampness; when more than one plank is involved; when the underlayment or substrate is unknown; or when a doorway or transition is damaged. Request prompt assessment for active water, suspected mold, slippery flooring, or a trip hazard.
Have this ready
- Provide the flooring product and lot information, installation method, attached-pad or underlayment details, wide and close photos, damage pattern, moisture or spill history, room and transition locations, movement observations, and any spare plank or prior repair records.
Common questions
FAQ
Can I put a repair kit over a damaged vinyl plank?
Only after confirming that the issue is a localized surface mark and that the flooring manufacturer allows that type of repair. A kit will not correct moisture, swelling, movement, a failed locking edge, an uneven substrate, or an incompatible underlayment.
How do I know whether the underlayment is causing the plank damage?
Look for a repeating pattern of flexing, dips, ridges, gaps, clicking, moisture, or damage across several planks, and check product records for an attached pad or separate layer. These clues narrow the question but do not identify the failed layer; a flooring professional should verify the substrate and underlayment.
Can I add another underlayment under luxury vinyl plank?
Do not add one by default. Some vinyl products have an attached pad or restrict additional underlayment, and manufacturers require product-specific compatibility and substrate conditions. Confirm the exact installation guide before any layer is added.
When should damaged vinyl flooring be professionally assessed?
Arrange an assessment when planks lift, separate, flex, swell, or repeatedly fail; when moisture, odor, or a soft substrate is present; when several planks are involved; or when the product or underlayment is unknown. Restrict access to sharp, slippery, loose, or buckled areas.
Read the exact guide
Official sources
- VersaLock Vinyl Plank Installation InstructionsShaw Industries Group, Inc. · This product-family guidance is used only for general decision boundaries; the reader must confirm the exact product instructions and a professional should adapt any replacement method to the installed floor.
- MaxCore Waterproof Luxury Vinyl Plank GuidelinesProvenza Floors, Inc. · Used as a product example showing that some LVP has an attached pad and that moisture and subfloor condition must be corrected before installation; it is not a claim about every vinyl-floor product.
- Installation Guidelines For LOOSE LAY Vinyl PlankShaw Industries Group, Inc. · Manufacturer guidance is used to explain why underlayment, moisture, flatness, and substrate compatibility must be verified for the specific product; it is not a universal repair instruction for every vinyl floor.
Community feedback
Share a repair observation
Share a plain-text repair observation. Accepted observations are published automatically; this page may take a moment to update.