
On this page
Start here
Quick answer
A leaking garbage disposal should be traced to its first wet point before any repair: the common paths are the sink-side mounting assembly, dishwasher inlet, discharge gasket or elbow, adjacent plumbing, or a leak through the disposal body or motor joint. Turn the disposal off and isolate its power before reaching or inspecting near it, keep hands out of the hopper, and use only external visual checks; a confirmed body, bottom, or motor-joint leak, damaged cord, water near an outlet, unstable unit, or leak that persists needs a qualified plumber or appliance service professional.
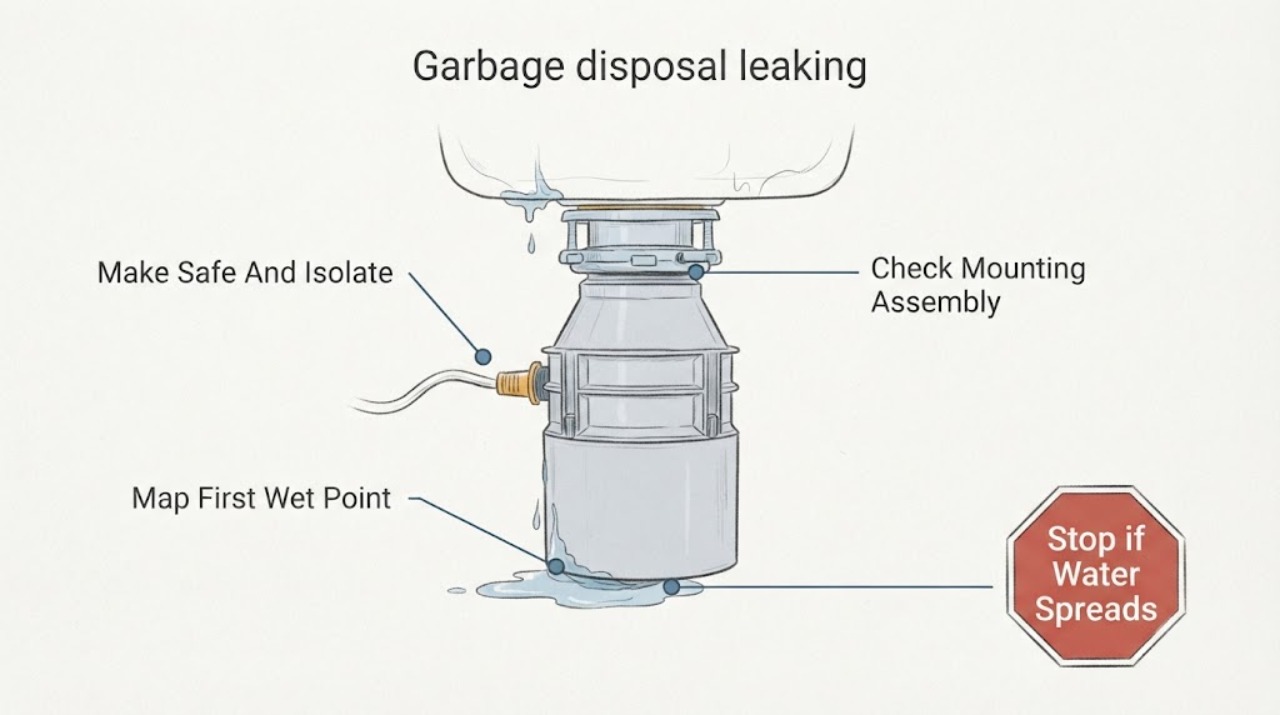
Work through in order
Diagnostic checks
Use only checks that match the exact appliance or system and its official guide.
-
Check 1
Turn the wall switch off and isolate the disposal's power at the unplugged cord or breaker only if it is dry, accessible, and safe to reach. Keep the switch off during inspection, keep hands out of the hopper, and do not touch a wet cord, receptacle, or exposed wiring.
Expected result: Power can be isolated without entering a wet area, or the cord, receptacle, wiring, switch, or cabinet area is wet or damaged.
Next step: Continue only with dry, external observation when isolation is safe. Leave the area and arrange qualified electrical or plumbing service when water is near electrical parts or power cannot be safely isolated.
Stop if: Stop for sparks, smoke, burning odor, a shock, a damaged cord, exposed wiring, water at the receptacle, or a breaker that trips again.
Why this matters
Why: A dry, de-energized unit permits external leak tracing; wet or damaged electrical parts turn this into an electrical safety issue rather than a plumbing adjustment.
-
Check 2
Dry the cabinet floor, disposal exterior, and visible joints. Place dry paper beneath the unit, then use a stopper to hold a small amount of sink water and observe from the side while it sits and drains; do not run the disposal for this test.
Expected result: The first wet spot is at the mounting assembly, dishwasher inlet, discharge elbow or trap, disposal body or motor joint, or somewhere adjacent to the sink.
Next step: Record the exact joint and whether it leaks while the sink sits, drains, or both. Follow the matching mounting, inlet, discharge, adjacent-plumbing, or professional-service branch.
Stop if: Stop if the unit shifts, its support looks damaged, water reaches electrical parts, or finding the wet point requires removing a panel or disconnecting plumbing.
Why this matters
Why: The first wet point identifies the branch to inspect; water dripping from the bottom may have traveled down from a higher connection, while a body or motor-joint wet point after upper checks suggests an internal leak.
-
Check 3
If water starts at the sink-side top interface, inspect the visible flange, mounting ring, and accessible fasteners from outside the unit. Look for a gap, movement, fresh installation, or water emerging directly under the sink flange; do not support, lower, or remove the disposal.
Expected result: The mounting area is visibly loose or gapped, the disposal moves, the leak follows the flange, or the mounting area is dry while water appears below.
Next step: If the assembly is loose, the disposal is moving, or the flange seal is suspected, leave the unit off and have a plumber or qualified installer correct the mounting. Do not dismount a supported disposal yourself.
Stop if: Stop for a sagging or unsupported unit, a cracked sink or flange, corroded fasteners, or any need to loosen the mounting ring or remove the disposal.
Why this matters
Why: A top leak is consistent with a mounting installation, flange, or gasket problem; a dry top shifts attention to the dishwasher inlet, discharge, adjacent plumbing, or body.
-
Check 4
If a dishwasher drain hose is attached, inspect the inlet from outside the disposal. Look at the hose end, clamp, hose adapter if present, inlet area, and the elbow or trap joint without pulling the hose or reaching inside the disposal.
Expected result: Water appears at the hose or clamp, the adapter is loose or cracked, the inlet connection is wet, or the inlet is dry while the discharge or another joint is wet.
Next step: Keep the disposal off and arrange plumbing service for a loose, cracked, inaccessible, or recurring dishwasher connection. If the connection is dry, continue to the discharge and adjacent-plumbing checks rather than replacing the disposal.
Stop if: Stop if the hose is split, the connection is under strain, the inlet or disposal is cracked, water is near electrical parts, or diagnosis requires removing the hose or a plug.
Why this matters
Why: A wet hose, clamp, adapter, or inlet supports a dishwasher-connection leak; a dry inlet rules out that location for the observed test but does not rule out a leak that occurs only when the dishwasher drains.
-
Check 5
If the first wet point is at the disposal outlet, inspect the discharge nut or bolts, gasket, discharge elbow, and elbow-to-trap joint from outside. Look for a loose connection, gasket debris, a cracked or torn gasket, a cracked elbow, or wetness that begins at the trap joint.
Expected result: The discharge fastener is loose, the gasket is dirty or damaged, the elbow is cracked, the elbow-to-trap joint is wet, or the entire discharge area is dry.
Next step: Do not operate the disposal while the discharge is leaking. Have a plumber replace a cracked or damaged part or correct a joint when access, support, or model-specific sealing is uncertain; keep any inspection external.
Stop if: Stop for a hanging disposal, a cracked drain pipe, corroded or seized fasteners, active spraying, or any need to remove the elbow or lower supported plumbing.
Why this matters
Why: These observations distinguish an outlet gasket or elbow problem from a trap or adjacent-pipe problem; a dry discharge moves the diagnosis back to the mounting, inlet, another plumbing source, or disposal body.
-
Check 6
After the upper, inlet, and discharge interfaces are dry or accounted for, inspect the disposal body and motor-joint area, then trace nearby faucet, filter, sprayer, dishwasher hose, sink seam, and countertop joints. Do not remove the disposal or energize it to force a leak.
Expected result: Water comes through the container wall, bottom, or motor joint; or the disposal is dry and an adjacent plumbing or sink source is wet.
Next step: Leave the disposal off and call a qualified plumber or appliance service professional for a body or motor-joint leak, an unstable unit, or a leak that returns. For an adjacent source, have the responsible plumbing connection or sink seam repaired.
Stop if: Stop immediately for water near electrical parts, a cracked disposal body, a loose support, a damaged cord, burning odor, or any internal access or live test.
Why this matters
Why: A confirmed body, bottom, or motor-joint leak needs professional assistance; a dry disposal with a wet adjacent source is a plumbing or sink-seam issue rather than proof the disposal has failed.
Use your observations
Decision map
Find the observation that best matches what you see, then follow the next safe action.
-
PATH 01Next step
What you see
The first wet point is directly below the sink flange or mounting assembly.
Do this next
Keep power isolated and have a plumber or qualified installer assess the flange, mounting ring, gasket, and support. Do not lower or remove the disposal as a homeowner leak test.
-
PATH 02Next step
What you see
Water starts at the attached dishwasher hose, clamp, adapter, or disposal inlet.
Do this next
Keep the disposal off, document the wet connection, and arrange plumbing service for a damaged hose, clamp, adapter, or inlet. Do not pull the hose or reach into the inlet.
-
PATH 03Next step
What you see
The discharge nut, gasket, elbow, or elbow-to-trap joint is the first wet point.
Do this next
Do not run the disposal. Have the damaged gasket, elbow, or joint repaired with the correct model-specific parts and support, especially if the connection is cracked, seized, or under load.
-
PATH 04Next step
What you see
The upper connections are dry but water comes through the disposal body, bottom, or motor joint.
Do this next
Leave power off and arrange qualified appliance or plumbing service. Do not open the body, remove the disposal, or assume a replacement part will seal an internal leak without model-specific diagnosis.
-
PATH 05Next step
What you see
The disposal is dry but paper shows water at a faucet, filter, sprayer, dishwasher hose, sink seam, countertop joint, or nearby pipe.
Do this next
Treat the wet component as the source and have the corresponding plumbing or sink-seam connection repaired; do not replace the disposal based on water found in the cabinet.
-
PATH 06Next step
What you see
Water reaches electrical parts, the cord is damaged, the unit is loose, sparks or odor occur, or a breaker trips.
Do this next
Keep clear, leave the disposal off if that can be done safely, and obtain qualified electrical or plumbing assessment. Do not reset the breaker, run the disposal, or touch wet electrical equipment.
Helpful context
Understand the symptom
Find where the water starts, not where it ends up
Empty the cabinet and dry the disposal and nearby pipes. A sheet of newspaper or dry paper under the sink makes the first drip easier to see. With the disposal switched off and no hands near the hopper, put a stopper in the sink, add a small amount of water, and observe the underside while it sits and then drains. A drip at the top points toward the mounting assembly; a drip at the dishwasher connection or discharge points toward those joints. If the disposal body or motor joint itself is wet, do not assume water running down from above is the cause until the upper interfaces have been checked.
Use the leak location to choose the next check
At the sink-side mounting assembly, look for a gap, movement, or water emerging directly below the flange. At a dishwasher inlet, inspect only the hose connection, clamp, adapter, and surrounding inlet. At the discharge, inspect the discharge nut or bolts, gasket, elbow, and elbow-to-trap joint for wetness, debris, cracks, or a loose connection. Adjacent faucet, filter, sprayer, dishwasher hose, sink seam, or countertop joints can mimic a disposal leak, so follow the wet trail rather than replacing a disposal based on a damp bottom.
The body and electrical area are a stop boundary
Do not put a hand into the hopper or reach under the disposal while it can be energized. If water is coming through the container wall, from the bottom, or at the motor joint after the upper connections have been ruled out, the leak may involve an internal seal or the disposal body and is not a safe external adjustment. Keep the unit off if water is near the receptacle, cord, or switch, if the cord is cut or wet, or if the unit is loose; arrange qualified service rather than removing the disposal or testing it live.
Only after diagnosis
Potential parts
- disposal discharge gasket or elbow
Consider this category only when the first wet point is confirmed at the discharge and the gasket or elbow is visibly damaged or a professional identifies it as the cause.
Confirm the disposal model, discharge design, gasket shape, elbow dimensions, and required sealing method before ordering; a similar-looking drain part may not fit. - dishwasher drain hose clamp or adapter
Consider this category only when a connected dishwasher inlet is the confirmed wet point and the hose, clamp, or adapter is damaged or incompatible.
Confirm hose diameter, clamp range, adapter style, inlet arrangement, and installation instructions; not every disposal has a dishwasher hose connection. - disposal mounting gasket or flange assembly
Consider this category only when water is confirmed to start at the sink-side mounting interface and the exact disposal and sink configuration are identified.
Confirm the disposal mounting system, sink opening, flange dimensions, support hardware, and manufacturer instructions; mounting work may require supporting the disposal and should be left to a professional when unstable.
When checks do not resolve it
Need a professional?
The leak is confirmed at the disposal body, bottom, or motor joint., The disposal is loose, sagging, cracked, or the leak returns after external connections are dry., A dishwasher inlet, discharge, trap, mounting, or sink connection is cracked, seized, inaccessible, or under load., Water is near the receptacle, switch, cord, or exposed wiring, or the breaker trips., Diagnosis would require removing the disposal, opening the body, reaching into the hopper, or testing energized equipment.
Common questions
FAQ
Why is water dripping from the bottom of my garbage disposal?
Water may have traveled down from the mounting assembly, dishwasher inlet, discharge, or adjacent plumbing. Dry the cabinet and trace the first wet point. If the upper interfaces are dry and water comes through the bottom or motor joint, stop using the disposal and arrange professional service.
Can I run the disposal to see where it leaks?
Do not run it when water is near electrical parts, the unit is unstable, the cord is damaged, or you have not safely isolated the area. Start with the disposal off and use dry paper plus a small sink-drain observation; a professional can perform any energized test that is actually necessary.
What if the leak is at the dishwasher connection?
Inspect the attached hose, clamp, adapter if used, and inlet from outside the disposal. A wet or cracked connection needs plumbing repair; do not pull the hose or reach into the inlet, and remember this branch applies only when a dishwasher drain hose is connected there.
Is a leaking discharge gasket something I can diagnose?
You can identify a wet discharge area and look externally for a loose fastener, debris, torn gasket, or cracked elbow. Do not operate the disposal while it leaks, and have a plumber handle replacement when the connection is cracked, seized, unsupported, or model-specific.
When does a garbage disposal leak require a professional?
Call when water comes through the body, bottom, or motor joint; the disposal is loose; a connection is cracked or inaccessible; water reaches electrical parts; or repair would require removal, internal access, or live testing. Keep power off and provide the observed leak location to the technician.
Read the exact guide
Official sources
- Garbage Disposal LeakingInSinkErator · InSinkErator garbage disposal leak-location troubleshooting
- Garbage Disposal Leaking at the DischargeInSinkErator · InSinkErator disposal discharge troubleshooting
- Garbage Disposal Leaking at the Dishwasher InletInSinkErator · InSinkErator disposal dishwasher-inlet troubleshooting
- NAVEDTRA 14265AU.S. Navy / Department of Defense · U.S. Navy technical training guidance for garbage-disposal leak locations and electrical safety
Community feedback
Share a repair observation
Share a plain-text repair observation. Accepted observations are published automatically; this page may take a moment to update.