
On this page
Start here
Quick answer
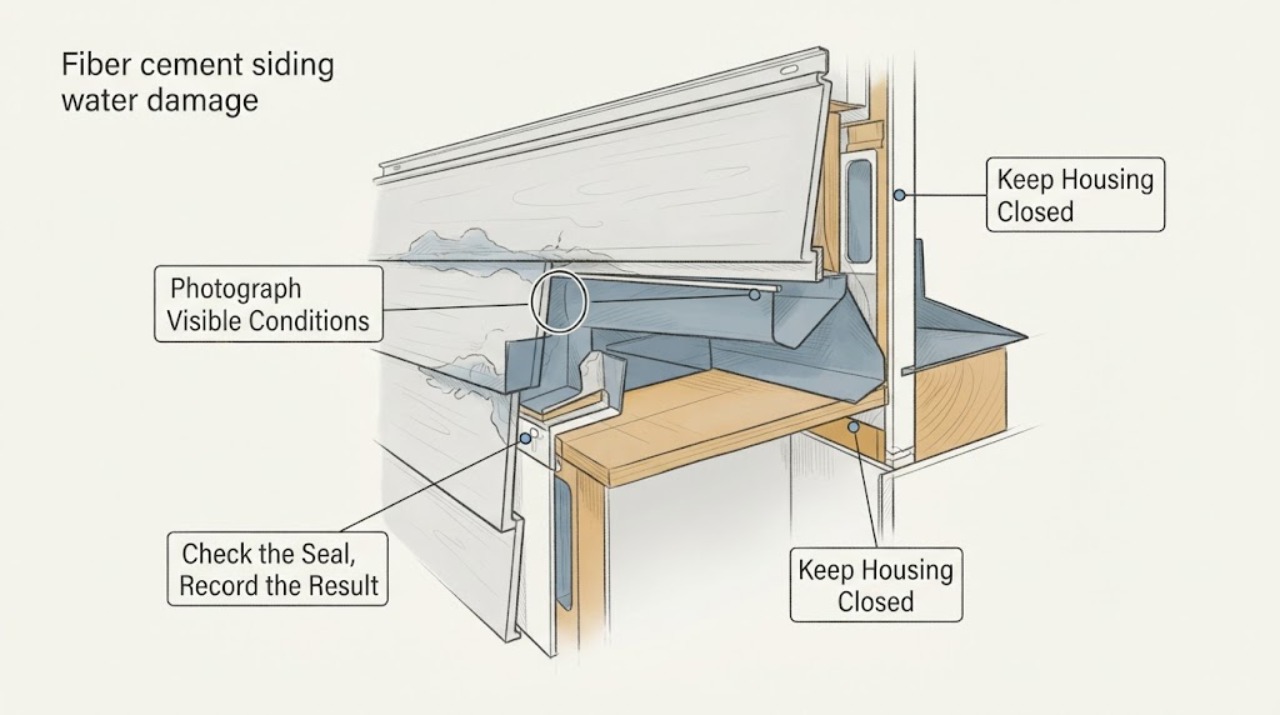
Do not cut, remove, or climb to investigate fiber-cement siding water damage. From the ground and from inside the affected room, photograph finish changes, open or failed joints, staining, dampness, and the path from the exterior wall to the interior. Water-resistant siding can still have a failed joint, flashing, trim, or weather-barrier detail behind it, and a surface stain does not show how far water traveled. Keep the area dry and call a siding or building-envelope professional promptly if panels are loose or cracked, joints are open, interior finishes are wet, or moisture keeps returning.
Work through in order
Diagnostic checks
Use only checks that match the exact appliance or system and its official guide.
-
Check 1
From ground level, inspect the visible siding face and lower edges around the affected wall, window, door, corner, and utility penetrations. Photograph cracks, chips, bulges, loose-looking boards, darkening, streaks, edge swelling, or a finish that is lifting or peeling; do not touch or push the panels.
Expected result: A localized finish change without visible board movement is different from a cracked, bowed, separated, or loose-looking panel. Streaks below a joint or opening can identify a water path but do not prove that the entry point is at that exact location.
Next step: Compare the exterior location with the interior wall and ceiling near the same opening, then look at visible joints and trim transitions.
Stop if: Stop if panels appear unstable, fragments are falling, the wall is bulging, or further viewing would require a ladder, climbing, or contact with a damaged surface.
Why this matters
Why: Visible panel or finish damage raises the need for a siding inspection; a clean exterior does not rule out water behind the cladding. Keep the photo wide enough to show the wall context.
-
Check 2
Inspect accessible horizontal and vertical joints, corner trim, window and door edges, and the visible lower termination for open gaps, failed-looking caulk, missing trim, exposed fastener areas, or a place where water could collect. Use photos rather than a blade, probe, or sealant tool.
Expected result: An open or visibly failed joint near a streak or interior stain is a credible water-entry lead; a joint that looks intact does not confirm that flashing or a concealed weather barrier is intact. Do not assume any exterior caulk is appropriate for the product or joint.
Next step: Record the joint type, its position relative to windows or corners, and whether the defect appeared before or after rain. Do not patch or repaint before the cause is assessed.
Stop if: Stop if the joint is at height, near electrical service, behind a fragile panel, or only reachable by removing trim or using a ladder.
Why this matters
Why: Joint and transition evidence helps a professional plan a non-destructive inspection. Sealing over a wet or damaged assembly can trap the problem and hide the path.
-
Check 3
From inside the affected room, look for dampness, staining, bubbling paint, peeling wallpaper, musty odor, soft trim, or a ceiling or wall mark that aligns with the exterior siding symptom. Photograph the area and note whether it changes after rain; do not open the wall or press hard on the finish.
Expected result: A new or expanding interior mark after rain supports active or recent water intrusion, while an old dry stain may be a past event. A musty odor or soft finish increases the need for prompt moisture and building assessment, but the visible room side cannot show hidden sheathing condition.
Next step: Map the interior mark against the exterior photo and gather the date of the last storm or wash. Keep furniture and belongings away from active dampness.
Stop if: Stop for active dripping, pooling, sagging ceiling material, visible mold, electrical involvement, or any need to cut or probe the wall.
Why this matters
Why: Interior evidence changes urgency and may require a building-envelope, water-damage, or interior repair professional in addition to a siding contractor. Do not assume the outer board can be replaced without checking the wall assembly.
-
Check 4
Review the timeline and conditions from a safe location: note whether the damage follows wind-driven rain, a roof or gutter issue, window washing, a recent siding job, or a repair to an opening. Compare current photos with older photos if available.
Expected result: A repeatable rain-related mark near one transition points toward a water-management detail; damage that follows a gutter overflow or roof issue may originate above the siding. A one-time stain without current moisture still warrants documentation before cosmetic repair.
Next step: Provide the timeline, interior and exterior photos, wall orientation, and any recent work to a siding or building-envelope professional.
Stop if: Stop if confirming the source would require roof access, ladder work, removing boards, cutting, drilling, sanding, or concealed-wall probing.
Why this matters
Why: Timing helps the professional distinguish a siding-joint problem from roof, window, plumbing, or condensation sources, but it cannot confirm the concealed path. Keep all likely sources in the service report.
Use your observations
Decision map
Find the observation that best matches what you see, then follow the next safe action.
-
PATH 01Next step
What you see
Ground-level photos show a cracked, loose-looking, bulged, or visibly damaged panel, or an open joint near a water trail.
Do this next
Keep the wall undisturbed and call a siding or building-envelope professional for a moisture and attachment assessment. Do not caulk, paint, remove, or replace the panel as a first diagnostic step.
-
PATH 02Next step
What you see
Interior staining, dampness, musty odor, or finish bubbling aligns with the exterior wall or returns after rain.
Do this next
Treat the issue as active or recent water intrusion and arrange prompt professional assessment. Protect belongings and stop any activity that would seal or conceal wet material.
-
PATH 03Next step
What you see
The likely entry point is above reach, behind siding, inside a wall, or near electrical or roof components.
Do this next
Stop the homeowner investigation and call the appropriate siding, roofing, building-envelope, or water-damage professional. Do not use a ladder, open the wall, or create fiber-cement dust.
Helpful context
Understand the symptom
Why the surface is not the whole diagnosis
Fiber-cement boards resist weather, but water can enter at a failed joint, trim edge, opening, flashing transition, or installation detail. A dark mark or peeling interior finish may be downstream from the entry point. The useful first report is a map of visible symptoms and timing, not a guess that the siding board itself is the only damaged material.
Stay at safe observation level
Use a phone camera and flashlight from the ground, a normal doorway, or an interior floor. Do not climb, remove siding or trim, drill, cut, sand, probe a concealed wall, or pressure-wash the surface. A professional can determine whether siding, flashing, sheathing, insulation, or interior finishes need repair and can manage fiber-cement dust safely if removal is necessary.
Only after diagnosis
Potential parts
- moisture-meter
Consider this category only as a professional-selected aid for comparing accessible wall areas after visible moisture evidence is documented; a reading cannot locate the entry point or certify a dry wall assembly.
Follow the instrument instructions and treat readings as comparative clues. Do not press probes into siding, cut the wall, or use a reading to justify concealed-wall work. - exterior-caulk
Consider this category only after a siding professional identifies a fixed, accessible joint that is appropriate to reseal and confirms the surrounding material is dry and sound.
Match the sealant to the siding finish, joint design, movement, and manufacturer guidance. Do not seal over wet damage, drainage paths, weep openings, or a concealed leak.
When checks do not resolve it
Need a professional?
Call a siding or building-envelope professional when panels are cracked, loose, bowed, or stained; joints or trim appear open; interior finishes are wet or repeatedly stain after rain; or the entry path may be behind the cladding. Add a roofing, window, plumbing, or water-damage professional when the timeline points to those sources.
Have this ready
- Provide ground-level exterior photos, interior photos, the wall orientation and nearby window, door, gutter, or roof details, the date of rain or other triggering event, and any recent siding or flashing work. State that no panels were removed and no cutting, drilling, sanding, ladder work, or concealed-wall probing was performed.
Common questions
FAQ
Does a dark stain prove the fiber-cement siding is ruined?
No. A stain can be surface finish, a past event, or evidence of water that traveled from another transition. Photograph it, compare it with interior symptoms and weather timing, and have a professional assess the siding and wall assembly before replacement.
Can I caulk the siding joint myself to stop the leak?
Do not seal a wet or uncertain joint as a first step. A professional should identify whether the joint is intended to be sealed, whether drainage must remain open, and whether the underlying material is dry and sound before selecting a compatible sealant.
Should I remove a siding panel to check for rot?
No. Removal, cutting, drilling, and probing can create dust, damage the weather barrier, and expose hidden hazards. Use ground-level and interior photos and arrange a siding or building-envelope inspection.
Read the exact guide
Official sources
- Prepare your home for winter: essential exterior maintenance tipsJames Hardie · The manufacturer advises checking for cracks, gaps, and loose panels and explains that damaged areas can allow moisture behind siding; it does not replace a professional assessment of concealed damage.
- Hardie Moisture Management ProductsJames Hardie · The manufacturer emphasizes moisture management as part of a siding project, supporting the distinction between the visible cladding and the wall's water-management layers.
- Frequently Asked QuestionsJames Hardie · The manufacturer describes fiber-cement siding as water resistant, recommends inspecting failed caulk, and distinguishes small surface repairs from broader installation and product questions; these points do not establish the condition of an unknown wall assembly.
Community feedback
Share a repair observation
Share a plain-text repair observation. Accepted observations are published automatically; this page may take a moment to update.