
On this page
Start here
Quick answer
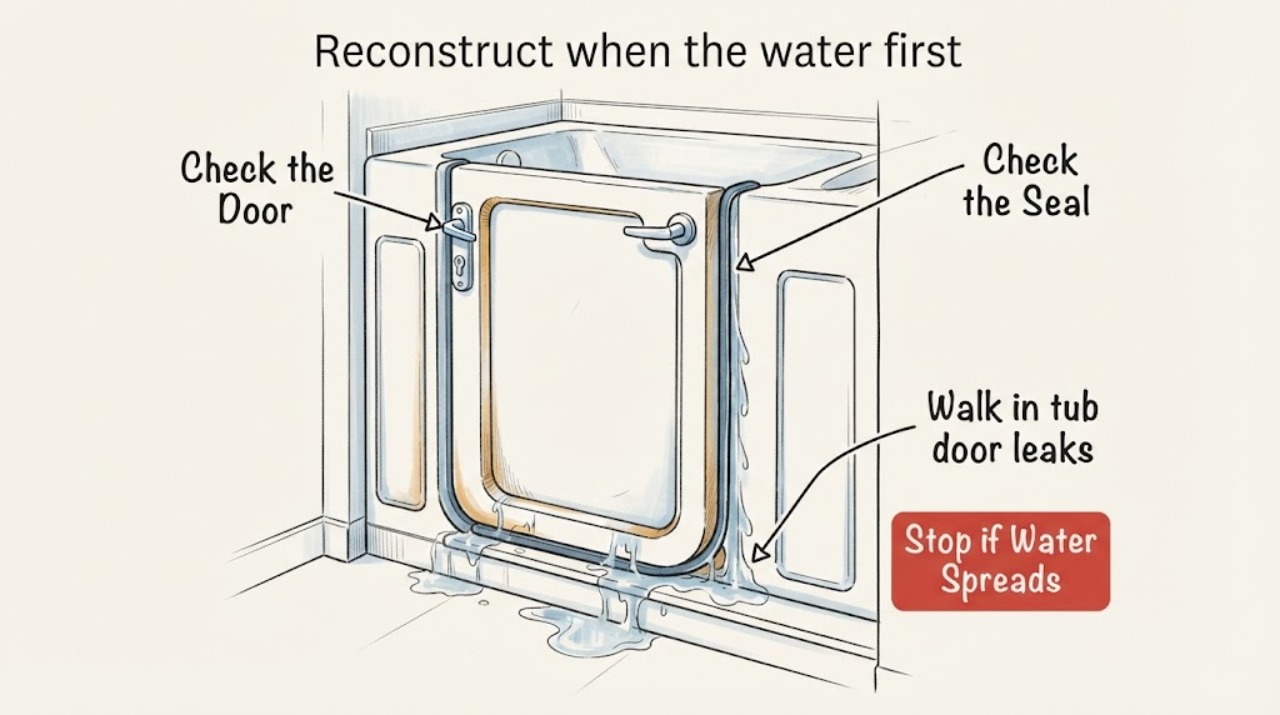
Stop using the walk-in tub until the floor is dry and the source of the water is understood. A leaking door can wet the bathroom floor and create a slip hazard, and continuing to fill the bath can increase damage below or around the tub. With the tub empty, make only safe visual checks of the accessible seal and latch area, document where the water first appeared, and record whether the event happened during filling, bathing, draining, or showering. Do not open the door against standing water, remove the seal, adjust or disassemble the latch, apply caulk to the moving seal, or test the leak by filling the tub. A walk-in-tub service professional or the manufacturer-authorized service route should identify the model-specific seal, alignment, installation, or plumbing issue.
Work through in order
Diagnostic checks
Use only checks that match the exact appliance or system and its official guide.
-
Check 1
Stop using the tub, dry the bathroom floor, and place absorbent towels outside the door without standing in water or attempting another fill test.
Expected result: The floor may remain wet after drying, show a path from the door, or show water elsewhere near the drain, shower, supply, or wall.
Next step: Keep the tub out of service, photograph the dry and wet areas from a safe position, and arrange professional service.
Stop if: Do not enter a wet area to test the door; get assistance if a person with limited mobility could fall.
Why this matters
Why: A continuing wet area or a spreading path increases slip and property-damage risk and cannot be safely diagnosed by repeated bathing.
-
Check 2
With the tub empty and the door open, visually inspect the accessible seal, doorjamb, threshold, and latch area from a stable standing position; do not remove, pry, lubricate, adjust, or disassemble any part.
Expected result: Look for visible dirt, a displaced or torn seal, an uneven contact line, a latch that does not appear to reach its normal closed position, or damage at the stationary frame.
Next step: Photograph the accessible area and give the manufacturer, model, and these observations to a qualified walk-in-tub technician; follow only the exact owner instructions for that model.
Stop if: Stop immediately if the seal is loose, the frame is damaged, the door will not latch normally, or inspection would require tools or body weight on the tub.
Why this matters
Why: A visible seal or latch concern supports a door-service branch, but a clean-looking seal does not rule out alignment, compression, installation, or a leak from another path.
-
Check 3
Reconstruct when the water first appeared and mark the likely path on a photo or sketch: during filling, while bathing or using the hand shower, while draining, or after the tub was left unused.
Expected result: Water beginning at the door perimeter differs from water appearing at the drain, shower hose, supply connection, overflow, wall, or floor under the tub.
Next step: Do not reproduce the leak. Give the timing, location, door position, and photos to the service professional so the professional can choose a controlled test.
Stop if: Treat any leak that occurs while the tub is unused, reaches another room or ceiling, or is accompanied by soft flooring as an urgent professional assessment.
Why this matters
Why: Timing and location help separate a door-seal or latch concern from shower spray, drain, supply, overflow, installation, or concealed leakage; these paths require different service scopes.
-
Check 4
Collect the tub brand, model or serial label, installation or purchase information, door direction, and any prior repair records without removing panels or accessing hidden plumbing.
Expected result: A model and warranty record may identify the correct seal and service route, while missing identification means compatibility and warranty coverage remain uncertain.
Next step: Request an authorized or otherwise qualified walk-in-tub assessment and ask the provider to state whether the scope is seal replacement, latch/alignment service, installation correction, plumbing repair, or a combination.
Stop if: Do not order a replacement seal or start a repair from a generic photo alone; wait for model compatibility and a safe work plan.
Why this matters
Why: Walk-in tubs use model-specific door and latch systems; a generic seal, caulk, or adjustment can fail to restore a safe watertight closure and may affect coverage.
Use your observations
Decision map
Find the observation that best matches what you see, then follow the next safe action.
-
PATH 01Next step
What you see
Water appeared at the door perimeter and the accessible seal or latch looks damaged or abnormal.
Do this next
Keep the tub out of service and request model-specific door or seal service.
-
PATH 02Next step
What you see
The door area looks normal, but water began at the shower, drain, supply, overflow, wall, or below the tub.
Do this next
Request a plumbing or installation leak assessment rather than ordering a door seal.
-
PATH 03Next step
What you see
The incident cannot be localized or the tub has no usable identification record.
Do this next
Provide photos and the incident timeline to a qualified walk-in-tub service provider for a controlled diagnostic visit.
Helpful context
Understand the symptom
Why the first step is containment
A walk-in tub is designed to hold water behind a closing door, so a leak is not a cosmetic nuisance. Water on the bathroom floor can cause a slip, particularly for someone who uses the tub for accessible bathing. The first decision is whether the tub can remain safely out of service while a professional identifies the leak. Do not try to prove the diagnosis by filling the bath again.
Do not use caulk as a door-seal shortcut
A walk-in tub door is a moving, model-specific sealing system. Caulk on the moving contact surface can interfere with movement, hide the actual fault, or fail when the door is operated. Do not apply caulk, adhesive, lubricant, or a generic replacement gasket to the door seal unless the exact manufacturer instructions and a qualified professional identify an approved use on a stationary joint. The same caution applies to latch adjustments and door disassembly.
When to stop and call for service
Call a walk-in-tub service professional before using the bath again if the door leaks, will not latch normally, or has visible seal, frame, or alignment damage. Request urgent assessment for water that continues while the tub is unused, reaches a ceiling or another room, or has softened flooring. If anyone slips or is injured, address the injury first and do not ask them to test the tub.
Only after diagnosis
Potential parts
- tub-door-seal
Only after a qualified provider or the exact manufacturer documentation confirms that the seal is damaged and identifies the compatible replacement.
- bathroom-leak-alarm
An optional alert for monitoring a dry, accessible floor while service is pending; it does not repair or make a leaking tub safe to use.
- silicone-caulk
Do not apply caulk to the moving door-seal contact surface. Consider this class only if the exact manufacturer instructions and a qualified professional identify a separate stationary joint that needs it.
When checks do not resolve it
Need a professional?
Call a qualified walk-in-tub service professional before using the tub again whenever the door leaks or will not latch normally. Use an urgent service route for persistent water, water reaching a ceiling or another room, soft flooring, or a serious slip risk.
Common questions
FAQ
Can I keep using a walk-in tub if the door leaks only a little?
No. Keep it out of service until the cause is identified. Even a small leak can wet the floor, increase slip risk, and allow damage to spread around or below the tub.
Should I open the walk-in tub door to drain it if water is still inside?
Follow the exact owner manual for the model, but do not force or open a door against standing water. One manufacturer manual instructs users to drain completely before opening; a service professional should handle an abnormal latch, drain, or full-tub condition.
Can I put caulk on the walk-in tub door seal?
Do not apply caulk to the moving door-seal contact surface. It can hide the fault or interfere with operation. Only a qualified professional using exact manufacturer instructions should assess sealant on a separate stationary joint.
How can I tell whether the leak is really from the door?
Do not refill the tub to test it. Record where water first appeared and whether it followed filling, bathing, showering, draining, or no use. Water at a drain, supply, overflow, wall, or below the tub needs a different diagnostic path from a door-perimeter leak.
What should I give the walk-in tub repair professional?
Provide the brand and model or serial information, door direction, photos of the accessible seal and surrounding floor, the timing and starting location of the water, whether the latch worked normally, installation or purchase information, and prior service records.
Read the exact guide
Official sources
- Extra-Wide Walk-In Tub DoorKohler Co. · Manufacturer-specific product information used only to explain why a door seal and handle are model-specific; it does not establish a diagnosis for another tub.
- Falls and Fractures in Older Adults: Causes and PreventionNational Institute on Aging · General U.S. health and home-safety guidance; it is not a walk-in-tub repair procedure.
- Limited Warranty Walk-In BathAS America Inc. (American Standard) · American Standard warranty terms only; coverage, eligibility, and service routes vary by brand, model, purchaser, and jurisdiction.
- Walk-In Bath Owner's ManualKohler Co. · Specific Kohler walk-in bath manual; other brands and models can use different door and seal procedures.
Community feedback
Share a repair observation
Share a plain-text repair observation. Accepted observations are published automatically; this page may take a moment to update.