
On this page
Start here
Quick answer
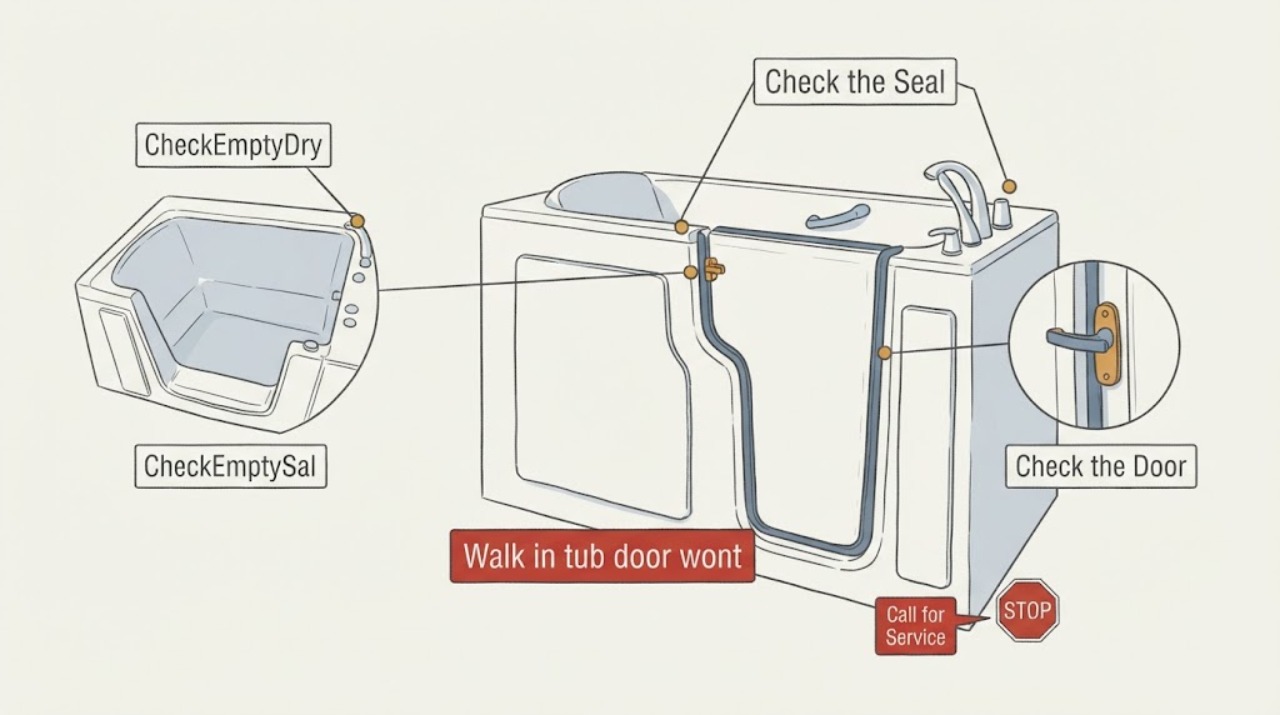
Do not fill or use a walk-in tub when its door will not latch smoothly and securely. With the tub empty and dry, look from a normal standing position for an uneven gap, rubbing, a door that sits high or low at one side, debris on the gasket or jamb, or a latch that does not line up with its receiver. Those observations separate a cleaning or seal-shape issue from a shifted door, frame, leveling, or latch problem, but they do not identify a safe adjustment. Manufacturer guidance links level support and frame condition to door alignment, and some manuals specifically say not to tamper with the hinge or door fittings. Photograph the closed-but-unlatched position, record the model and serial information, and arrange qualified walk-in-tub service rather than forcing the handle or adjusting unknown hardware.
Work through in order
Diagnostic checks
Use only checks that match the exact appliance or system and its official guide.
-
Check 1
Make sure the walk-in tub is completely drained and dry before inspecting the door. Leave the door open while it is out of service; do not fill the tub or sit against the door to test the latch.
Expected result: The tub is empty and dry, or water remains because the door or drain condition has not allowed a normal emptying process.
Next step: If empty and dry, continue with visual checks. If water remains or the door cannot be made safe without force, keep people clear and arrange qualified service before further testing.
Stop if: Stop immediately for an uncontrolled leak, electrical equipment exposed to water, smoke, sparking, or any need to enter an unsafe position.
Why this matters
Why: A dry, empty tub allows the door position and latch path to be observed without adding water pressure or exposing a bather to a door that cannot secure. Remaining water raises the urgency for provider or plumbing help and is not a reason to force the door.
-
Check 2
With the door open, inspect the visible gasket and the door jamb for hair, soap film, construction dust, a folded edge, a flattened section, tear, or material stuck to the frame. Wipe only accessible surfaces with the mild cleaning method allowed by the exact manual; do not pry or stretch the gasket.
Expected result: The gasket and jamb are visibly clean and even, or a localized obstruction or deformation is present where the door should meet the frame.
Next step: If the manual permits a simple wipe or leaving the door open to let the seal relax, do that once and recheck the empty door gently. If the gap, rubbing, or latch failure remains, stop and report the exact location rather than adjusting the hinge.
Stop if: Do not use oils, solvents, abrasive tools, adhesive, or an improvised shim on the door seal.
Why this matters
Why: Debris or a gasket that has not relaxed can keep the door from reaching its normal closed position, but a clear gasket with a door that still stops short points more toward alignment or latch hardware. Cleaning cannot correct a twisted frame or an offset receiver.
-
Check 3
Close the empty door only until it first contacts the frame, without turning the handle past normal resistance. From above and from the latch side, compare the gap at the top and bottom and note any rubbing, corner contact, or edge that sits higher or lower.
Expected result: The gap is even and the door meets the frame squarely, or one side rubs, the corners contact unevenly, or the latch receiver is visibly off-center from the latch path.
Next step: Photograph the pattern and leave the door unlatched and unused. Give the service provider the high or rubbing edge; do not try to pull the door into alignment with the handle.
Stop if: Stop if the door shifts suddenly, the glass or frame is cracked, the hinge is loose, or closing requires force.
Why this matters
Why: An even contact pattern with a handle that still will not secure makes a latch, receiver, or internal mechanism issue more likely. A wedge-shaped gap, rubbing edge, or visibly offset latch path makes door, frame, hinge, or tub-support alignment more likely.
-
Check 4
From floor level only if it is safely visible, look for a support leg that is not contacting the floor, a tub that rocks, a new gap under the frame, or signs that the surrounding floor has moved. Do not lift, rock, crawl under, or turn a leveling leg.
Expected result: All visible supports appear seated and the tub is stable, or a support gap, rocking frame, floor damage, or recent settling is visible.
Next step: If the tub is stable, keep the geometry findings for the latch inspection. If support or floor movement is suspected, stop using the tub and contact the installer, manufacturer, or qualified bath professional to level and assess it according to the exact model procedure.
Stop if: Do not adjust legs, remove panels, enter a crawl space, or work beneath a loaded or unstable tub.
Why this matters
Why: The manufacturer identifies level support as part of correct door alignment and warns that inadequate support can warp the frame or shell. A support or floor pattern makes a structural or installation assessment more important than a latch-part swap.
-
Check 5
With the door open and the tub empty, operate the handle or latch only through its normal range once. Observe the visible latch pins or receiver area without removing trim, covers, or mechanism parts.
Expected result: The handle moves smoothly but the latch path is visibly offset, or the handle binds, spins freely, stops early, or fails to move the visible latch parts.
Next step: Record the handle feel and which latch side is offset, then stop operating it. Ask a qualified provider to inspect the latch, receiver, hinges, and frame together.
Stop if: Never force the handle, hold the latch partly engaged, bypass the lock, or test the door while water is in the tub.
Why this matters
Why: Smooth handle motion with an offset path supports an alignment or receiver assessment. Binding, free spinning, incomplete travel, or a loose handle points toward a mechanism or mounting fault that requires model-specific service; neither result proves that a generic latch will fit.
-
Check 6
Collect the model and serial number, door swing direction, installation or service date, photographs of the gap and latch, and the first date the door stopped latching. Note whether the issue followed moving the tub, a renovation, a leak, or visible floor change.
Expected result: The problem began immediately after installation or movement, gradually worsened, or appeared without a known change; the service record may identify the installer and model-specific procedure.
Next step: Keep the tub out of service and send the complete handoff to the manufacturer, installer, warranty provider, or qualified walk-in-tub technician. Ask them to state which adjustments are permitted for this model before any hardware is touched.
Stop if: Do not dismantle the door or conceal the symptom with a replacement handle, adhesive, shim, or sealant before the cause is identified.
Why this matters
Why: A post-installation or post-movement onset increases the value of an installation and leveling review. A gradual or unexplained change supports a service inspection of the latch, hinge, frame, and seal rather than a one-part assumption.
Use your observations
Decision map
Find the observation that best matches what you see, then follow the next safe action.
-
PATH 01Safety boundary
What you see
The door meets the frame evenly without rubbing, but the handle binds, spins, stops early, or does not move the latch into its receiver.
Do this next
Keep the tub empty and arrange qualified service for the handle, latch, receiver, and mounting points together.
Why this path and its safety boundary
Why it matters: A latch or receiver mechanism is more likely than a broad tub-leveling problem, but the internal failure and exact replacement remain model-specific.
Safety stop: Do not force the handle, bypass the latch, or order a universal replacement.
-
PATH 02Safety boundary
What you see
One edge rubs or sits high, the gap is wedge-shaped, the corners meet unevenly, or the latch path is visibly off-center.
Do this next
Photograph the high or rubbing edge and request a model-specific alignment inspection. Leave the door unused until it closes and latches smoothly under professional guidance.
Why this path and its safety boundary
Why it matters: Door, hinge, frame, or tub-support misalignment is more likely than a simple seal-cleaning issue; the door may not compress the seal evenly.
Safety stop: Do not loosen hinge bolts, move the receiver, or pull the door into position with the handle.
-
PATH 03Safety boundary
What you see
A support leg is visibly clear of the floor, the tub rocks, the surrounding floor has moved, or the issue followed installation, movement, or renovation.
Do this next
Stop using the tub and ask the installer, manufacturer, or qualified bath professional to assess level, support, subfloor, frame, and door alignment as one job.
Why this path and its safety boundary
Why it matters: Uneven support can change the frame or shell geometry and make the door appear to have a latch fault.
Safety stop: Do not crawl beneath, lift, load, or re-level the tub yourself.
-
PATH 04Safety boundary
What you see
The door geometry is otherwise even, but debris, a folded gasket edge, shipping deformation, or a small obstruction prevents normal contact.
Do this next
Use only the exact manual's gentle cleaning or seal-relaxation guidance, then recheck the empty door once. Escalate if the latch remains unreliable or the gasket is torn or permanently deformed.
Why this path and its safety boundary
Why it matters: A limited seal or contact condition may be contributing, but a latch that still will not secure after one permitted cleaning or relaxation check remains a service issue.
Safety stop: Do not stretch, glue, lubricate, cut, or shim the gasket.
-
PATH 05Safety boundary
What you see
There is active water, cracked glass or acrylic, a loose hinge, exposed wiring, smoke, sparking, electrical equipment exposed to water, or an unstable tub.
Do this next
Keep people away, avoid touching wet electrical equipment, and contact emergency or qualified help appropriate to the hazard before any tub troubleshooting.
Why this path and its safety boundary
Why it matters: The situation exceeds a user inspection and can involve an immediate fall, water, electrical, or structural hazard.
Safety stop: Stop all use and do not attempt a latch test.
Helpful context
Understand the symptom
Why a latch problem is an alignment problem until proven otherwise
A walk-in tub door is a load-bearing part of the water-retention system: the latch draws the door into the frame and the seal has to contact evenly. If the door is high on one side, rubs the frame, or leaves a wedge-shaped gap, the latch may be perfectly functional but unable to meet its receiver. An unlevel floor, uneven support, a shifted frame, a hinge change, shipping deformation, debris, or a worn mechanism can look similar from the handle. A door that will not latch is therefore a keep-out-of-service condition, not an invitation to force the handle.
Start empty, dry, and visible
Drain the tub completely if it was already in use, then leave the door open and let the area dry. Do not fill the tub to test a door that will not latch. Use a flashlight only from a safe position and photograph the door, receiver, gasket, and gaps without removing covers or hardware. If water is already escaping, protect the floor and keep the tub out of service until the source and door operation are assessed.
What not to adjust
Walk-in tubs use model-specific hinge, receiver, multi-point latch, and leveling arrangements. A generic quarter-turn, shim, lubricant, or replacement latch can change the door compression or leave a false sense of security. Do not loosen hinge bolts, move the receiver, alter leveling legs, drill the frame, remove access panels, or bypass a latch unless the exact manufacturer manual and a qualified technician authorize that procedure for the identified model.
The correct service handoff
Give the service provider the model and serial information, door swing direction, whether the problem began after installation or movement, which edge is high or rubbing, whether the handle moves normally, and photographs of the unlatched position. Ask for the inspection to cover tub leveling and support, frame or hinge alignment, latch-to-receiver alignment, gasket condition, and any water damage. This keeps a possible alignment fault from being treated as a simple seal replacement.
Safety boundary
Stop conditions
- Do not fill or use the tub until the door closes and latches smoothly and securely.
- Do not force the handle, use it for body support, bypass the latch, or test with water in the tub.
- Do not adjust hinges, receivers, leveling legs, or other model-specific hardware without qualified guidance.
- Stop for uncontrolled water, cracked material, an unstable tub, exposed wiring, smoke, sparking, or electrical equipment exposed to water.
Only after diagnosis
Potential parts
- manufacturer-specific latch or receiver hardware
Consider only after a qualified inspection confirms that the latch or receiver is faulty rather than the door, frame, hinge, seal, or tub support being misaligned.
Confirm the exact manufacturer, model, door swing, latch design, mounting pattern, and service instructions before ordering; do not assume a universal latch fits. - manufacturer-specific door gasket
Consider only if inspection finds a torn, permanently deformed, or model-specific gasket problem after alignment and latch operation are assessed.
Confirm exact model and gasket profile with the manufacturer or qualified installer; a gasket replacement will not correct a twisted frame or offset latch.
When checks do not resolve it
Need a professional?
Arrange service when the door does not latch smoothly, the gap or rubbing persists, the handle feels abnormal, the tub is not stable, or any gasket, frame, hinge, or latch damage is visible. Do not use the tub until the door closes and secures reliably.
Have this ready
- Exact model and serial information visible without dismantling
- Door swing direction and the side or corner that rubs or sits high
- Photos of the door gap, gasket, jamb, receiver, and visible support condition
- Whether the handle binds, spins, stops early, or moves smoothly
- Installation or service date and any movement, renovation, leak, or floor change
- Any active water, cracked material, loose hinge, electrical exposure, or other hazard
Common questions
FAQ
Can I keep using a walk-in tub if the door sometimes will not latch?
No. Treat an unreliable latch as an out-of-service condition. Do not fill the tub or rely on a one-time click; keep it empty and arrange qualified service.
Does a wedge-shaped door gap mean the latch is bad?
Not necessarily. A wedge-shaped gap, rubbing edge, or offset receiver can point to door, hinge, frame, leveling, or support misalignment. Have those areas assessed together before selecting a latch.
Should I adjust the walk-in tub hinge or leveling legs?
Do not adjust them based on a generic instruction. Walk-in tub frames and latch systems vary, and manufacturer guidance for some models says not to tamper with the hinge or door fittings. Ask the manufacturer, installer, or qualified technician for the exact procedure.
Could dirt on the gasket stop the door from latching?
It can prevent normal contact, especially if the gasket is folded or deformed. With the tub empty, use only the gentle cleaning or seal-relaxation method in the exact manual. If the latch still will not secure, stop and arrange service.
What should I photograph for the technician?
Photograph the door from above and from the latch side, the gap at the top and bottom, the gasket and jamb, the receiver, and any visible support or floor change. Include the model and serial label if it can be read without removing anything.
What if the tub rocks or a support leg is not touching the floor?
Stop using the tub and have the installer or a qualified bath professional assess level, support, subfloor, frame, and door alignment. Do not crawl under the tub or turn a leveling leg while it is installed.
When is the latch problem an emergency?
Seek urgent help for uncontrolled water, cracked glass or acrylic, a loose or shifting hinge, an unstable tub, smoke, sparking, exposed wiring, or electrical equipment exposed to water. Keep people away and do not perform a latch test.
Read the exact guide
Official sources
- Self Install Walk In Bathtub | Ella's BubblesElla's Bubbles · Manufacturer installation guidance used for the relationship between level support, frame or shell alignment, door closure, and seal; model configuration and installer procedure vary.
- Ella Gel Coat Walk In Tub ManualElla's Bubbles · Manufacturer manual used for empty-and-dry door handling, door-handle limits, latch position, seal care, and the instruction not to tamper with door fittings; exact model instructions govern.
- Warranty Activation | Ella's BubblesElla's Bubbles · Manufacturer checklist used for the importance of level support, a clean door seal, water-tight door testing, service access, and recording model and serial details.
Community feedback
Share a repair observation
Share a plain-text repair observation. Accepted observations are published automatically; this page may take a moment to update.