
On this page
Start here
Quick answer
Start with the visible dispenser rather than assuming a pump or control failure. Amana says to fill the rinse-aid dispenser to Full, wipe up any spill, close the lid gently, and use the dispenser adjustment to change the amount released; its family guidance identifies a factory setting of 2 or 3 and says a higher setting can help with drying or spots. Run the exact model's normal instructions and check whether the level changes after a cycle. If a full dispenser stays full, leaks, will not close, or the setting controls do not match the instructions, stop guessing at internal parts and arrange Amana or qualified dishwasher service.
Before you begin
Safety first
- Do not remove the dishwasher door or control panel, probe dispenser wiring, bypass a latch, or order an internal dispenser part from the symptom alone. Stop and arrange qualified service for a leak, failed latch, persistent unchanged level, or a recurring problem after the exact model guidance.
Work through in order
Diagnostic checks
Use only checks that match the exact appliance or system and its official guide.
-
Check 1
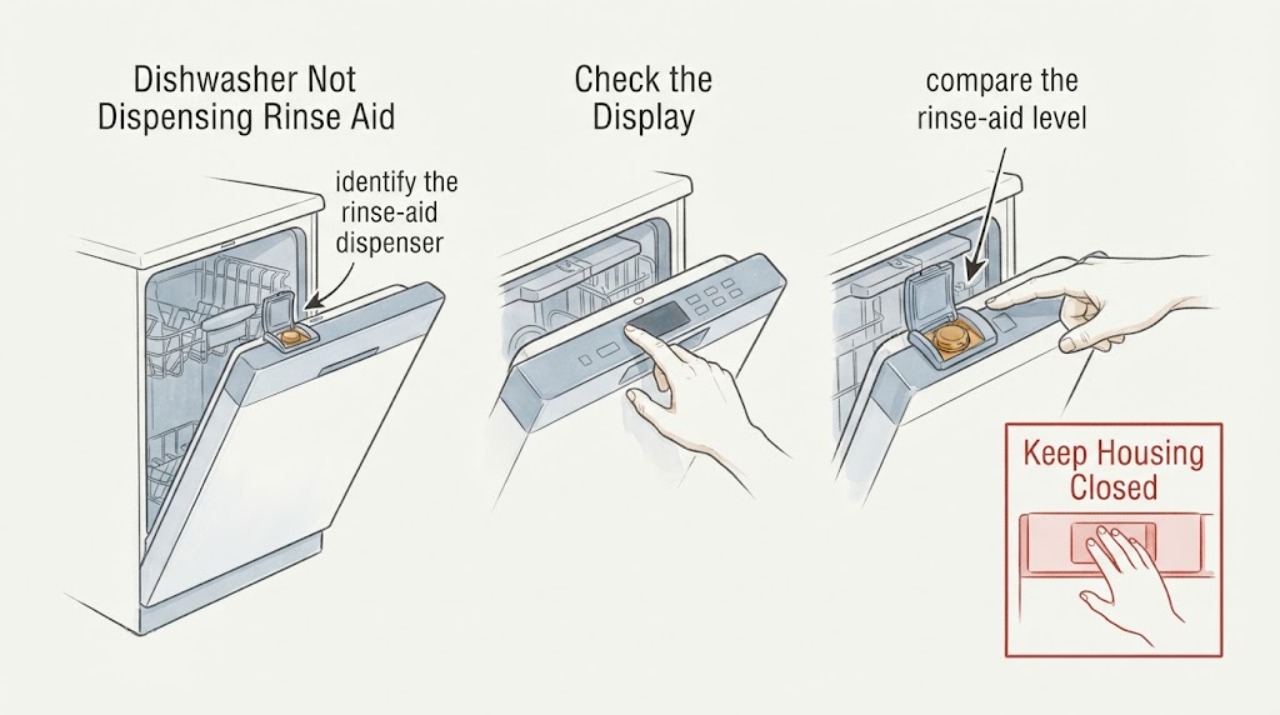
With the dishwasher door fully open, identify the rinse-aid dispenser and fill it with the liquid rinse aid specified by the Amana guidance to the Full mark; wipe away any spill and close the lid gently.
Expected result: The indicator is at Add or empty, the reservoir reaches Full and the lid closes, or the lid will not close, the reservoir leaks, or the dispenser is already full.
Next step: If it filled and closed normally, continue to the setting check and then observe the level after a cycle. If it will not close or leaks, stop adding rinse aid and use the exact manual or service path; do not run with a visibly leaking dispenser.
Why this matters
Why: A low indicator or empty reservoir is a supply condition. A properly filled reservoir that will not close or leaks is a dispenser or fit condition that cannot be diagnosed safely by adding more liquid.
-
Check 2
Check the dispenser arrow adjustment and, only if the model has that control, move it one step toward a higher release setting when the documented symptom is wet dishes, rings, or calcium spots.
Expected result: The adjustment is present and the dishes are wet or spotted, the dispenser has no matching adjustment, or the control/menu sequence does not match the instructions you found.
Next step: Make one documented adjustment and observe the next normal cycle. If the control does not match, stop using a generic button sequence and retrieve the exact owner manual by model before changing settings.
Why this matters
Why: Amana says the release amount is adjustable and that a higher setting can help with drying or spots. A missing or different control means the model-specific instructions govern; it is not evidence that the dispenser is broken.
-
Check 3
After the next normal cycle, compare the rinse-aid level with the pre-cycle level and separately note whether dishes are wet or spotted; do not open the dispenser mechanism or test wiring.
Expected result: The level has fallen, the level is unchanged, or the level cannot be judged because of a spill, unreadable indicator, or leaking lid.
Next step: For a falling level, use the documented adjustment and loading guidance for the drying/spot symptom. For an unchanged level or leak, record the model and arrange qualified service rather than ordering an internal part from the symptom alone.
Why this matters
Why: A falling level is consistent with some dispensing; an unchanged level after a correct fill and closed lid supports a dispenser-release problem but does not identify a valve, latch, or control-board failure. An unreadable or leaking dispenser needs a closer model-specific inspection.
-
Check 4
Check only visible installation conditions: the dishwasher sits level and square, the door closes normally, and there is no visible leak around the door or dispenser.
Expected result: The appliance is visibly out of level, the door does not close normally, a leak is visible, or the installation and door appear normal.
Next step: Correct only an accessible leveling or door-position issue according to the exact model manual. If a leak remains, the dispenser stays full, or the visible installation is normal but dispensing still fails, stop use as appropriate and arrange service.
Why this matters
Why: Amana says leveling supports normal operation and helps prevent leaks. These observations can explain a door or spill issue but cannot prove that a rinse-aid release mechanism is functioning.
-
Check 5
Prepare the complete model number, the dispenser style, fill level before and after a cycle, setting used, dish-drying result, and any lid or leak observation for Amana or qualified dishwasher service.
Expected result: The dispenser remains full, leaks, will not latch, the model-specific setting does not resolve the issue, or the exact owner manual points to service.
Next step: Use Amana support or qualified appliance service. Do not remove the door/control panel, probe live wiring, bypass a latch, or substitute a dispenser assembly based only on the symptom.
Why this matters
Why: The remaining fault may be inside the dispenser or controls, and the no-model task does not support naming a compatible part or an internal repair procedure.
Use your observations
Decision map
Find the observation that best matches what you see, then follow the next safe action.
-
PATH 01Next step
What you see
The reservoir was below Add or empty, it now fills to Full, the lid closes, and the level falls after a normal cycle.
Do this next
Keep the dispenser filled to the model mark and use the documented amount setting. If drying or spotting remains, make only one adjustment at a time and recheck the next cycle.
Why this path and its safety boundary
Why it matters: The dispenser is receiving and releasing rinse aid; the original symptom may have been an empty reservoir or an incorrect fill/closure rather than a confirmed internal failure.
-
PATH 02Next step
What you see
The dispenser is correctly filled and closed, but its level is unchanged after a normal cycle.
Do this next
Stop experimenting with internal parts, record the exact model and cycle, and arrange Amana or qualified dishwasher service using the official support path.
Why this path and its safety boundary
Why it matters: The release result is not demonstrated. This supports a service question but does not prove a failed valve, lid, control, or board.
-
PATH 03Next step
What you see
The level falls, but dishes remain wet or show rings or calcium spots.
Do this next
Use the exact model manual and Amana adjustment guidance; increase the documented setting one step only if the model supports it, then observe another normal cycle.
Why this path and its safety boundary
Why it matters: Rinse aid is being consumed, so the remaining symptom is an amount, water-condition, loading, or drying-result question rather than proof that nothing dispenses.
-
PATH 04Next step
What you see
The lid will not close, the dispenser leaks, the door does not close normally, or the dishwasher is visibly out of level.
Do this next
Keep the check external and follow the exact model instructions for accessible leveling or closure. If the leak or latch problem remains, arrange service and do not open the door assembly.
Why this path and its safety boundary
Why it matters: The visible closure or installation condition needs correction or service before a dispensing conclusion is made.
Helpful context
Understand the symptom
Rinse aid is released during the final rinse to improve drying and reduce spotting or filming. A dispenser that appears full can mean it has not released the expected amount, but it does not identify a failed valve, lid, control, or board. Use the visible dispenser and the exact model instructions to separate a filling or setting issue from a service issue.
Fill the dispenser without flooding the door
Open the dishwasher fully and identify the hinged or sliding-lid dispenser used by the model. Amana describes opening the lid by pressing its center and pulling the edge, filling to the Full mark, wiping away any spill, and closing the lid gently. The quick-start guide also says to check the indicator and refill when it reaches Add. Do not pour rinse aid into the detergent cup or leave liquid on the door where it can be mistaken for normal dispensing.
Adjust the release amount only within the documented range
Amana says the release amount is adjustable and identifies 2 or 3 as a factory setting on the family guidance. If dishes remain wet or show rings or calcium spots while the level is clearly decreasing, move the arrow adjuster one step at a time toward a higher setting and observe the next result. Do not assume that a menu sequence from another Amana model applies: Amana notes that control buttons and setting procedures vary, so use the matching owner manual for electronic settings.
Use the level and the dishes as separate observations
After the next normal cycle, check both the dispenser level and the dry result. A lower level with wet or spotted dishes points first to an amount or water-condition adjustment question; an unchanged level after correctly filling and closing the dispenser points to a release or service question, but does not prove which internal part failed. Record the exact model and what changed before contacting service.
Keep the remaining checks external
Amana also says the dishwasher should be level and square; leveling supports normal operation and helps prevent leaks. Check only that the appliance sits securely and the door closes normally. Do not remove the door panel, probe the dispenser wiring, or order a dispenser assembly from the symptom alone.
When checks do not resolve it
Need a professional?
Arrange Amana or qualified dishwasher service when a correctly filled dispenser remains full after a normal cycle, leaks, will not latch, the door or installation cannot be corrected from the outside, or the exact model instructions do not resolve the problem. Do not infer a valve, control board, or replacement part from the symptom alone.
Safety scope: Do not remove the dishwasher door or control panel, probe dispenser wiring, bypass a latch, or order an internal dispenser part from the symptom alone. Stop and arrange qualified service for a leak, failed latch, persistent unchanged level, or a recurring problem after the exact model guidance.
Have this ready
- Complete model number, region, dispenser style, fill level before and after a cycle, adjustment setting, cycle used, drying/spot result, and any lid, door, level, or leak observation.
Common questions
FAQ
How much rinse aid should an Amana dishwasher hold?
Amana family guidance describes a full dispenser as about 5 ounces (150–175 mL) and says to fill to the Full mark rather than overfilling. The exact dispenser shape and indicator should be checked against the model manual.
What setting should I use if the rinse aid is not dispensing?
First verify the reservoir is filled and the lid closes. Amana identifies 2 or 3 as a factory setting in its family guidance and says a higher amount may help drying or spotting; the exact menu or control sequence varies by model, so use the matching owner manual.
How can I tell whether rinse aid is actually being dispensed?
Record the level before a normal cycle and compare it afterward, while also noting the drying result. A lower level is consistent with dispensing; an unchanged level after a correct fill and closed lid is a reason to use the model-specific service path, not proof of a particular failed part.
Can I take the dishwasher door apart to repair the dispenser?
Do not use a generic door-panel or wiring procedure. The official Amana guidance supports filling, adjustment, leveling, and contacting service; without the exact model manual, an internal repair or part fit cannot be scoped safely.
Read the exact guide
Official sources
- How to Fill and Adjust Rinse Aid Dispenser - DishwasherAmana · Opened Amana family guidance for hinged or sliding-lid dispensers; exact dispenser shape and controls remain model-specific.
- Not Dispensing Rinse Aid - DishwasherAmana · Amana family-level support for a dishwasher that is not dispensing rinse aid; the task supplies no model, so model-specific menu and part claims are excluded.
- Dishwasher Quick Start Guide W11538000 Rev CAmana · Opened official Amana multi-model quick-start PDF; it supports family-level fill/indicator/adjustment guidance, while exact cycles and controls remain model-specific.
- Adjusting Rinse Aid Level - DishwasherAmana · Used only to establish that some Amana models use a setting menu and that the documented control sequence is model-dependent; no generic button sequence is given here because the task has no model.
Community feedback
Share a repair observation
Share a plain-text repair observation. Accepted observations are published automatically; this page may take a moment to update.