
On this page
Start here
Quick answer
If a Bauknecht washing-machine door will not close, switch the machine off and check that no clothing, foreign object, detergent residue, or folded door seal is trapped between the door and the opening. Inspect the rubber seal and door frame for a tear, distortion, or loose section, then check that the washer stands squarely on all four feet. Never force the door or bypass the lock. If the door still will not close or the machine will not start after these external checks, leave it out of service and arrange qualified appliance service for the hinge, latch, door lock, or damaged cabinet.
Before you begin
Safety first
- Do not bypass the door interlock, operate with a door that needs force, or open panels and wiring. Disconnect power only for safe external cleaning or when directed by the model instructions; stop immediately for smoke, sparking, exposed conductors, or uncontrolled leakage.
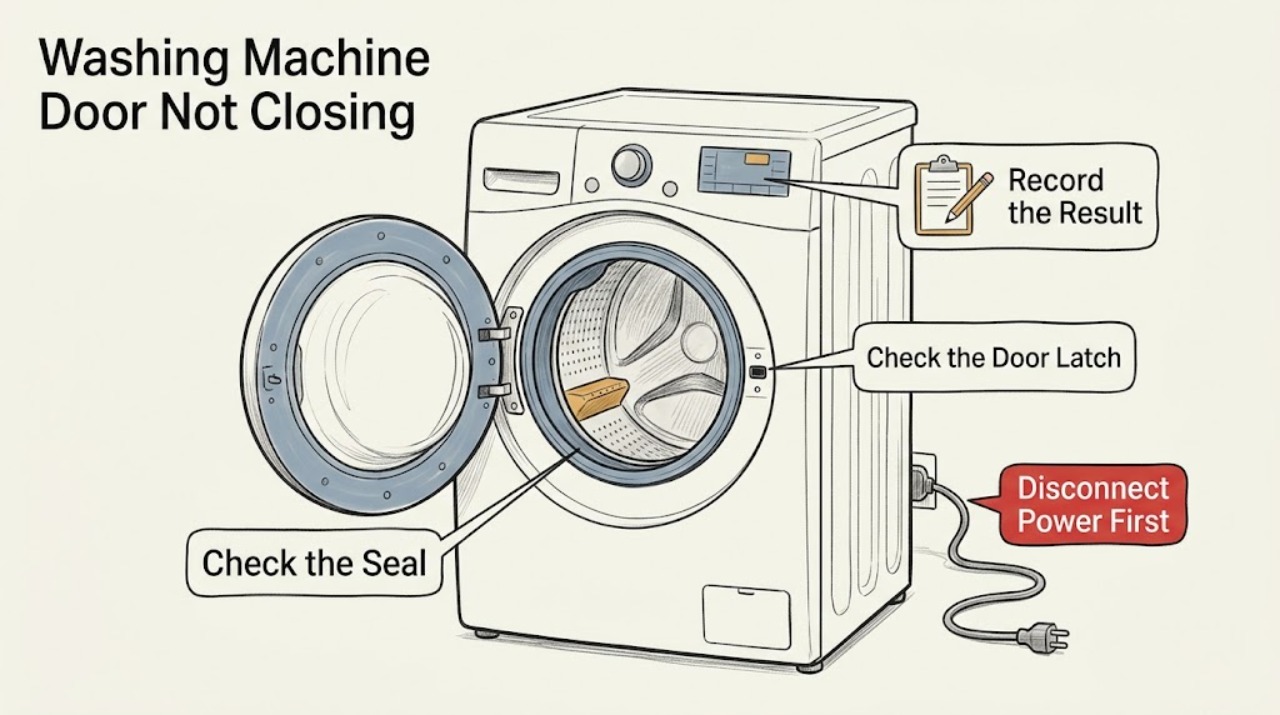
Work through in order
Diagnostic checks
Use only checks that match the exact appliance or system and its official guide.
-
Check 1
Switch the washer off, open the door fully, and inspect the entire opening for a garment edge, drawstring, foreign object, detergent buildup, or a folded section of the rubber cuff. Remove only loose material that is clearly accessible; do not use a tool to pry the door or latch.
Expected result: The door path is clear and the seal lies evenly, or something is trapped or the seal is folded into the latch path.
Next step: If the obstruction is removed and the seal returns to its normal position without damage, close the door gently and continue to the start-response check. If material is wedged behind the seal or cannot be removed without force, stop and arrange service.
Stop if: Stop if the door is jammed, glass is cracked, the seal is torn, or removal would require prying the latch or reaching into an inaccessible mechanism.
Why this matters
Why: A trapped load or folded cuff can keep the door from reaching the latch and can damage the seal if the door is forced.
-
Check 2
With the appliance off and unplugged before cleaning, wipe accessible rubber and frame surfaces with a soft cloth lightly dampened with lukewarm soapy water; then inspect the cuff, glass, hinge side, latch side, and strike area for a split, bulge, detached edge, or distortion.
Expected result: The seal is intact and even, or it has a visible tear, deformation, detached section, or a gap that remains when the door is held in its natural position.
Next step: If cleaning restores an even seal, make one gentle closure test. If the cuff or frame is damaged, do not run a wash; document the affected area and arrange model-specific service.
Stop if: Stop for a torn cuff, sharp exposed edge, cracked glass, water already leaking from the door area, or any need to remove the seal retainer or door panel.
Why this matters
Why: An intact seal can be checked further for alignment; a torn or distorted cuff cannot reliably protect the opening and may keep the door from closing or sealing.
-
Check 3
Close the empty door gently while watching the gap around the circumference; compare the hinge side and latch side without lifting, pushing sideways, or loosening any fastener.
Expected result: The door sits evenly and reaches the latch, or one corner sits low, the door rubs the frame, or the latch and strike do not meet.
Next step: If the door is uneven or the latch misses, leave the washer unused and provide the technician a photo or description of which side is misaligned. Do not adjust hinge screws unless the exact model instructions explicitly authorize it.
Stop if: Stop if the door, hinge, strike, or cabinet is bent, loose, cracked, or under tension, or if correcting it would require removing panels.
Why this matters
Why: An even door that still will not lock points toward the latch or lock; a low or rubbing door points toward hinge wear, a shifted door, or cabinet distortion.
-
Check 4
Check from the front that all four adjustable feet are firmly on the floor and that the washer is not rocking or pressed tightly against surrounding furniture; do not tip or move a loaded machine to make this check.
Expected result: All four feet are stable and the cabinet is aligned, or the washer rocks, a foot is lifted, or the cabinet has shifted against a wall or cabinet.
Next step: If the washer is empty and the model instructions describe safe foot adjustment, follow those instructions and recheck the door without force. If it is loaded, trapped in cabinetry, or still misaligned, arrange help rather than pulling it out alone.
Stop if: Stop if the appliance must be tilted, lifted, disconnected from plumbing, or moved by one person, or if leveling does not correct the door gap.
Why this matters
Why: A machine that is not square can transfer force into the door and seal, so correcting the installation condition may restore alignment; it does not prove that a damaged door part is sound.
-
Check 5
After the opening is clear and the door closes naturally, reconnect power if it was disconnected, select a normal wash program, and press Start/Pause once while observing the door and display; do not bypass or manually defeat the lock.
Expected result: The door accepts the latch and the cycle begins, or the door appears closed but the display continues to report an open door or the cycle does not start.
Next step: If the cycle starts, monitor the first short period for rubbing, leaks, or renewed opening. If it does not start, switch the machine off and arrange service with the observed display state.
Stop if: Stop immediately for water leaking at the door, an electrical smell, sparking, a cracked door, or any attempt to defeat the interlock.
Why this matters
Why: A successful start confirms that the closure path and interlock are responding; a persistent open-door indication points toward the latch, door lock, wiring, or alignment rather than a simple obstruction.
-
Check 6
Arrange qualified appliance service when the door still will not close after the external checks, when it closes but will not lock, or when the seal, hinge, latch, strike, lock, or cabinet is damaged; provide the model identifier, the side of the gap, any display message, and whether the machine has been moved or overloaded.
Expected result: No safe external correction restores normal closure, or the fault is intermittent, recurring, or accompanied by a damaged part or leak.
Next step: Keep the washer unplugged or switched off and the water supply closed if a leak is present until a technician assesses it; do not run a cycle with a door that needs force to stay shut.
Stop if: Stop all DIY work at the professional boundary: do not remove the door lock, hinge, seal retaining ring, cabinet panels, or wiring, and do not bypass the door interlock.
Why this matters
Why: The remaining possibilities include door hardware, the interlock, wiring, or cabinet alignment, and the symptom alone cannot identify a compatible replacement or safe adjustment.
Use your observations
Decision map
Find the observation that best matches what you see, then follow the next safe action.
-
PATH 01Next step
What you see
A garment, foreign object, residue, or folded seal is in the door path.
Do this next
Arrange qualified service and follow the exact model guidance.
Why this path and its safety boundary
Why it matters: Remove only the clearly accessible obstruction, restore the seal gently, and make one closure test. If removal needs force or the seal is damaged, stop and arrange service.
-
PATH 02Next step
What you see
The cuff is torn, distorted, detached, or cannot sit evenly in the opening.
Do this next
Arrange qualified service and follow the exact model guidance.
Why this path and its safety boundary
Why it matters: Do not run the washer or attempt a patch. A damaged seal can prevent closure and allow leakage; arrange model-specific inspection of the seal and adjacent door parts.
-
PATH 03Next step
What you see
The door sags, rubs, has an uneven gap, or the latch misses the strike.
Do this next
Arrange qualified service and follow the exact model guidance.
Why this path and its safety boundary
Why it matters: Leave the machine unused and have the hinge, door carrier, strike, and cabinet alignment checked. Do not force the door or loosen hardware without the model procedure.
-
PATH 04Next step
What you see
The washer rocks, a foot is lifted, or the appliance is pushed against surrounding cabinets or a wall.
Do this next
Arrange qualified service and follow the exact model guidance.
Why this path and its safety boundary
Why it matters: Correct only an accessible leveling condition using the model instructions and with the washer safely empty; if the door remains misaligned, escalate to service.
-
PATH 05Next step
What you see
The door closes naturally but the machine reports it open or will not start.
Do this next
Arrange qualified service and follow the exact model guidance.
Why this path and its safety boundary
Why it matters: Treat the latch, door lock, strike, wiring, or alignment as a fault. Do not bypass the interlock; keep the washer out of service and arrange qualified diagnosis.
-
PATH 06Next step
What you see
There is a leak at the door, cracked glass, exposed wiring, electrical odor, smoke, or sparking.
Do this next
Arrange qualified service and follow the exact model guidance.
Why this path and its safety boundary
Why it matters: Stop immediately, disconnect power only if it is safe to do so, close the water supply when a leak is present, keep clear of the hazard, and obtain qualified help.
Helpful context
Understand the symptom
Start with the closure path
A door that stops short of the frame usually has a physical obstruction or a part that has moved out of position. With the machine switched off, remove any garment caught in the opening and look around the full rubber cuff, glass edge, latch opening, and cabinet lip. Do not lean your weight on the door or keep pushing after it meets resistance. A door that closes only when forced is not a safe test of the lock.
Treat a damaged seal or shifted door as a fault
The door seal must sit evenly in its channel without a cut, bulge, detached section, or foreign object behind it. Bauknecht notes that items can become caught during loading and damage the cuff. If the gap remains after the load and seal are clear, a hinge, strike, latch, lock, or cabinet alignment problem is possible; these parts need model-specific diagnosis rather than an improvised adjustment.
Use the start response as confirmation
Once the door closes naturally, select the normal cycle and press Start/Pause once. A correctly closed door should allow the machine to begin its normal locking sequence. If the door looks closed but the cycle still refuses to start, do not repeatedly slam it or bypass the interlock; record the display behavior and arrange service if the problem persists.
Safety boundary
Stop conditions
- Do not force, slam, tape, wedge, or tie the door shut.
- Stop if the rubber cuff, door glass, hinge, latch, strike, or cabinet is visibly damaged.
- Do not remove panels, door-lock wiring, hinge hardware, or the seal retaining ring as an ordinary-user check.
- Stop immediately for leaking water, smoke, sparking, an electrical smell, or exposed conductors.
- Do not bypass the door interlock or run a cycle when the door needs force to remain closed.
Only after diagnosis
Potential parts
- washing-machine door seal
Only consider a seal after inspection confirms a tear, detached edge, or permanent distortion that prevents an even closure.
Confirm the complete appliance model and the manufacturer's fit information before ordering; door seals are not universal. - door hinge or hinge hardware
Only consider hinge hardware if the door sags, rubs, or misses the strike while the seal and frame are otherwise intact.
Use the exact model identifier and qualified diagnosis to confirm the correct hinge configuration. - door latch or interlock assembly
Only consider the latch or interlock after the door closes naturally but the machine still reports an open door or refuses to start.
Electrical door-lock assemblies require exact model matching and should be fitted and tested by a qualified technician. - door strike or closure hardware
Only consider the strike or related closure hardware if the door is aligned but the latch cannot engage or the strike is visibly damaged.
Confirm the model-specific door design and have the hardware checked for alignment before replacement.
When checks do not resolve it
Need a professional?
Call a qualified appliance technician when the door remains physically misaligned after the clear-load, seal, and stability checks; when it closes but will not lock or the washer reports an open door; or when any door hardware, seal, cabinet, wiring, or water containment is damaged. Keep the appliance out of service until the fault is assessed.
Safety scope: Do not bypass the door interlock, operate with a door that needs force, or open panels and wiring. Disconnect power only for safe external cleaning or when directed by the model instructions; stop immediately for smoke, sparking, exposed conductors, or uncontrolled leakage.
Common questions
FAQ
Why will my Bauknecht washing-machine door not close?
The usual external causes are clothing or an object caught in the opening, a folded or damaged rubber cuff, a door that has sagged or shifted, or an unstable washer. Clear and inspect these areas without force; a door that still will not close needs service.
Can I keep pressing the door until it clicks?
No. Repeated force can damage the cuff, latch, hinge, or glass. The door should reach the latch naturally after the opening and seal are clear.
The door looks closed but the cycle will not start. What should I do?
Make one normal Start/Pause attempt after confirming that the door sits evenly. If the washer still reports an open door or will not lock, keep it out of service; the latch, interlock, wiring, or alignment may need professional diagnosis.
Could an unlevel Bauknecht washer affect the door?
It can contribute to cabinet movement or an uneven closure. Check that all four feet are firmly on the floor and the washer is aligned, but do not tip or move a loaded appliance.
Should I replace the door seal myself?
Only treat a seal as a replacement candidate after confirming a tear or permanent distortion and matching the exact model. Removing retainers or panels can expose sharp edges and affect water containment, so qualified service is the safer boundary.
Read the exact guide
Official sources
- Die Waschmaschine schaltet sich ein, beginnt aber nicht zu waschen. Was kann ich tun?Bauknecht · Bauknecht's washer FAQ says the washer will not start when the porthole door is not properly closed.
- Warum vibriert und bewegt sich die Waschmaschine beim Waschen?Bauknecht · Bauknecht advises checking that all four feet stand firmly on the floor and that the machine is correctly aligned.
- Die Türmanschette ist eingerissen. Was kann ich tun?Bauknecht · Bauknecht explains that laundry can be caught in the door during loading and tear the cuff during spinning.
- Finden Sie schnelle Lösungen und einfache zur Fehlerbehebung - BauknechtBauknecht · Bauknecht presents its troubleshooting guidance for minor appliance problems and directs users to repair booking or customer support when the self-help guidance is insufficient.
- Quick GuideBauknecht / Whirlpool group documentation · The opened manufacturer-hosted guide lists an improperly closed door as a cause of a cycle not starting, instructs users to unplug before cleaning or maintenance, and directs users to technical assistance when a problem persists.
Community feedback
Share a repair observation
Share a plain-text repair observation. Accepted observations are published automatically; this page may take a moment to update.