
On this page
Start here
Quick answer
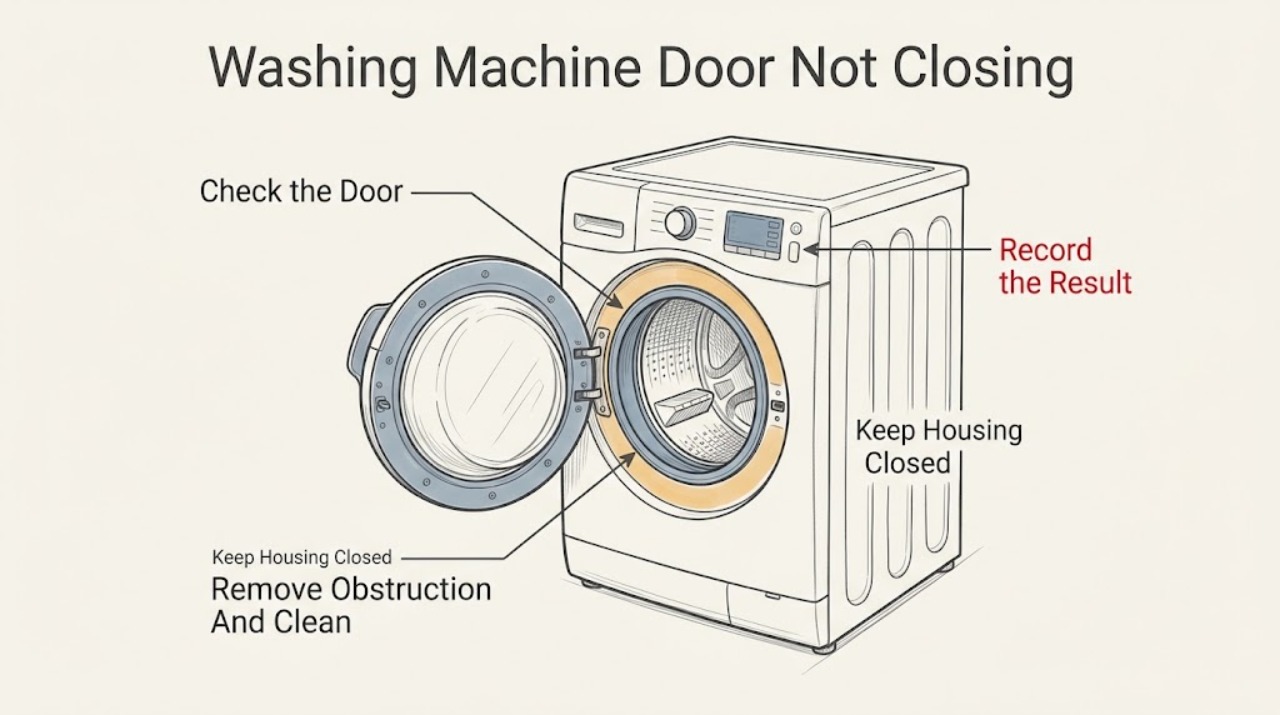
Do not force a Maytag washer door or bypass its lock. With the cycle stopped and the area safe, remove any garment, packing material, or debris caught between the door and gasket or at the latch, then wipe visible soap or soil from the contact area with a soft cloth. Check whether the door or lid is visibly sagging, the gasket is torn or folded, the strike or latch is loose, or the washer has shifted out of level. A control-lock message, water left in the drum, a hot door or glass, leaking water, cracked glass, damaged hinge, exposed wiring, or a door that remains out of alignment calls for the model manual and qualified service. The lock is a safety device; a door that still will not close or latch after safe obstruction and cleaning checks should remain out of use.
Before you begin
Safety first
- This article covers safe external observation and only the model manual's normal cancel or control procedure. Do not force or pry the door, reach into hot or moving water, bypass the lock, open panels, move a wet washer, or perform live electrical work.
Work through in order
Diagnostic checks
Use only checks that match the exact appliance or system and its official guide.
-
Check 1
Stop the washer and wait until the drum or basket has stopped. From the outside, note whether the issue is a front-load door that will not meet the frame, a top-load lid that will not close, a door that closes but will not latch, or a door that is locked during a cycle; record any display message without trying to defeat the lock.
Expected result: The door is physically blocked, it aligns but does not latch, the lid is blocked, or the door is locked with water, heat, movement, or a control message present.
Next step: Follow the matching branch below and the exact Maytag manual. Do not pull, pry, or repeatedly start the washer to see whether the lock changes.
Stop if: Stop if the glass or lid is hot, the basket is moving, water is present, the washer is leaking, or the lock area is cracked, loose, wet, or electrically damaged.
Why this matters
Why: A physical obstruction calls for a safe visual check, while a door that aligns but will not latch can involve the lock or strike. A door locked during movement, heat, or water may be acting as a safety function rather than failing.
-
Check 2
With the cycle cancelled and the door area cool and dry, inspect the gasket, door rim, strike, latch opening, and lid contact area for a garment, packing or shipping material, lint, coins, detergent residue, or other visible debris. Remove only a loose item that is plainly accessible, then wipe the contact area with a warm damp or soft cloth as the Maytag guidance permits.
Expected result: A garment or debris was trapped, soap or soil was built up at the contact, the gasket is folded or torn, or the contact area is clear.
Next step: If the loose obstruction is removed and the gasket is intact, close the door normally and follow the manual for a single start attempt. If the door still will not meet or latch, keep the washer off and continue with alignment and lock-state checks.
Stop if: Do not cut a trapped garment, pull a gasket out of its groove, pry the latch, or reach into standing water or a hot drum.
Why this matters
Why: Maytag identifies clothing, packing material, debris, and soap buildup as causes of an incomplete latch. A folded or damaged gasket can prevent sealing and may also allow a leak; a clear area shifts attention to alignment or the lock mechanism.
-
Check 3
With power isolated only when it is safe and the washer is dry, inspect the visible door or lid alignment, hinge side, handle, strike, latch opening, gasket lip, and surrounding frame without removing a panel. Compare the gap around the door and whether it sags, rubs, springs back, or requires lifting to meet the latch.
Expected result: The hinge or handle is loose or bent, the strike is damaged, the gasket is torn or displaced, the door rubs the frame, the lid is warped, or the door aligns normally.
Next step: Photograph the visible condition and provide it to Maytag or qualified washer service. Keep the machine out of use if any hardware or sealing surface is damaged; do not tighten or replace hidden hardware unless the model manual explicitly authorizes that safe repair.
Stop if: Stop for cracked glass or lid material, a sharp edge, exposed wiring, a loose hinge, water at the latch, or a door that could fall.
Why this matters
Why: A changed gap or a door that latches only when lifted suggests alignment, hinge, frame, or gasket trouble rather than a control setting. Normal visible alignment with no latch engagement points toward the lock or its wiring, which is not an owner bypass task.
-
Check 4
Read the exact model's display and control-lock instructions. Determine whether Control Lock, a delayed or active cycle, Fresh Hold or another model-specific option, an error code, or residual water is keeping the door unavailable; do not guess a code from a different Maytag model.
Expected result: A control-lock indicator is present, the cycle is still active, water remains, a model-specific door code is displayed, or no cycle-state condition is shown.
Next step: Use only the model manual's documented cancel, unlock, or control-lock procedure. If water remains or the message returns, keep the door closed and request service rather than forcing it open or bypassing the lock.
Stop if: Do not force the door, insert tools into the lock, bypass an interlock, run a cycle with an unlatched door, or disconnect a wet electrical connection.
Why this matters
Why: Maytag notes that control lock can disable controls and that an active cycle, high water level, temperature, tumbling, or spinning can keep a door locked. A door code or persistent lock after the documented state is cleared can indicate a lock, drain, or control fault.
-
Check 5
Look for a washer that rocks, has shifted after moving, or has a frame and door gap that changes when the cabinet is touched. Check only the visible floor and installation condition; use the model installation instructions for any leveling adjustment and do not drag a washer with water in it or a damaged door.
Expected result: The cabinet rocks or is visibly out of alignment, the floor or installation is uneven, the door gap is even, or alignment appears normal.
Next step: Have the installation corrected using the exact Maytag instructions or arrange qualified service. Do not use the door as a lever, wedge the cabinet, or keep the washer operating while it rocks.
Stop if: Stop for severe rocking, a tipped cabinet, a damaged floor, a leaking hose, a water-filled drum, or any need to move the machine across wet flooring.
Why this matters
Why: A shifted or unlevel cabinet can change the relationship between the door, gasket, strike, and lock. If the machine is stable and the door still fails to latch, the latch, hinge, strike, or control circuit needs model-specific assessment.
-
Check 6
After safe obstruction, contact, cycle-state, and visible alignment checks, record the exact model, front-load or top-load design, door position, display message, water or heat state, visible damage, and whether the door ever latches. Keep the washer out of use while arranging qualified service.
Expected result: The door closes and latches normally after a clearly removed obstruction, or it remains misaligned, cannot latch, leaks, shows a lock error, or requires force.
Next step: Use the record to request Maytag or qualified appliance service. The technician should verify the exact model and inspect the door hardware, lock, wiring, drainage state, and alignment before selecting a component.
Stop if: Do not open the cabinet, bridge the lock, run the washer with the door unsecured, or replace a latch as a trial.
Why this matters
Why: A corrected obstruction may explain a one-time closure issue. Persistent failure or force-dependent latching can involve the gasket, hinge, strike, latch, drain-related lock state, or control circuit and cannot be safely resolved by bypassing the interlock.
Use your observations
Decision map
Find the observation that best matches what you see, then follow the next safe action.
-
PATH 01Safety boundary
What you see
The door is locked while the washer contains water, is hot, is tumbling or spinning, or has not completed its stop sequence.
Do this next
Cancel or pause only as the exact model manual directs and wait for movement, heat, and water conditions to clear. If water remains or the door stays locked, request service.
Why this path and its safety boundary
Why it matters: The lock may be preventing access for flood, burn, or movement safety.
Safety stop: Do not pull the door, drain water by opening the door, or insert a tool into the lock.
-
PATH 02Safety boundary
What you see
A garment, shipping material, lint, coin, detergent residue, or other loose debris is visibly between the door, gasket, lid, or latch.
Do this next
Remove only the plainly accessible loose item after the cycle is stopped and the area is safe, then wipe the contact area with a soft cloth and follow the manual for one normal closure attempt.
Why this path and its safety boundary
Why it matters: The obstruction can prevent complete closure and can damage the seal if the door is forced.
Safety stop: Do not cut, yank, pry, or pull a trapped item from a hot, wet, or moving washer.
-
PATH 03Safety boundary
What you see
The gasket is torn or displaced, the hinge or strike is bent or loose, the handle is damaged, the lid is warped, or the door sags or rubs the frame.
Do this next
Keep the washer out of use and arrange qualified Maytag or appliance service. Provide photos and the exact model; do not force alignment or substitute hardware.
Why this path and its safety boundary
Why it matters: The door cannot reliably seal or engage the safety lock, and continued operation may cause a leak or further damage.
Safety stop: Stop for cracked glass, sharp edges, a falling door, exposed wiring, or water near the hinge or lock.
-
PATH 04Safety boundary
What you see
Control Lock, a delayed or active cycle, a Fresh Hold-like option, or a model-specific door or control message is shown.
Do this next
Use the model manual to clear the state once. If the message persists, water remains, or the lock does not respond, leave the machine off and request service.
Why this path and its safety boundary
Why it matters: The washer may be intentionally preventing operation or closure, or it may need the exact model's documented reset or cancel sequence.
Safety stop: Do not guess another model's code, repeatedly cycle power, or bypass the lock to start the washer.
-
PATH 05Safety boundary
What you see
The washer rocks, has shifted, the floor is uneven, or the door gap changes with cabinet position.
Do this next
Stop using the washer and correct installation only according to the exact Maytag instructions, or have a qualified installer or technician do it. Recheck the door without force after the cabinet is stable.
Why this path and its safety boundary
Why it matters: Alignment between the cabinet, gasket, strike, and lock may be preventing closure.
Safety stop: Do not drag a water-filled or damaged washer, wedge the cabinet, or operate it while it rocks.
-
PATH 06Safety boundary
What you see
The door area is clear and aligned, but the door will not latch, latches only when forced or lifted, or the lock error returns.
Do this next
Keep the washer out of use and request qualified Maytag appliance service. Do not treat a replacement latch or power reset as a safe test.
Why this path and its safety boundary
Why it matters: A latch, strike, hinge, gasket, drain-related lock state, wiring, or control fault remains possible and needs model-specific service testing.
Safety stop: Do not open panels, bridge an interlock, operate with an unsecured door, or perform live electrical tests.
Helpful context
Understand the symptom
First decide whether this is a door, lid, or cycle-state problem
Maytag uses different front-load door and top-load lid designs. A front-load door may look shut without engaging the lock, while a top-load lid can be blocked by clothing, packing material, or soil at the contact area. A door that is locked during a running, hot, spinning, or water-filled cycle is a different condition from a door that cannot physically meet the frame. Use the exact model manual for the controls and lock layout.
Inspect only from the outside
Stop the cycle and wait for movement to end. If water is present, the glass is hot, or the machine is leaking, do not pull the door open or reach into the drum. Once the door area is safe, check for a trapped garment, folded gasket, debris, soap residue, bent strike, or visible hinge sag. Wipe accessible contact surfaces with a soft cloth; do not pry, hammer, tape, or force the lock.
A latch problem can be mechanical or electronic
The door must close completely before a Maytag washer can operate. A control-lock setting, an active cycle, residual water, or a model-specific error can make a good door appear unavailable. If the door physically aligns but the lock never engages, or it closes only when pushed hard or lifted, leave the washer out of use and have the latch, strike, hinge, gasket, and control circuit assessed.
Safety boundary
Stop conditions
- Stop for water leaking or pooling near the door, latch, controls, plug, or wiring; do not reach into standing water.
- Stop for a hot door or glass, active movement, a cracked lid or door, sharp edges, a falling hinge, or a door that needs force to close.
- Stop for smoke, burning smell, sparks, a hot or damaged cord or outlet, exposed wiring, or a repeated breaker trip.
- Do not force the door, insert tools into the latch, bypass an interlock, operate with an unsecured door, or repeatedly cycle power to clear a lock condition.
- Keep the Maytag washer out of use when the door remains out of alignment or will not latch after safe external checks; arrange qualified service.
Only after diagnosis
Potential parts
- washer door gasket or seal
Consider this category only when the exact model's gasket is torn, displaced, hardened, or preventing the door from meeting the frame after qualified inspection.
Confirm the exact Maytag model and seal design; do not pull the gasket from its groove or use a part to compensate for an unlevel cabinet. - washer door latch, strike, or lock assembly
Consider this category only when the door aligns and the obstruction is gone but qualified diagnosis finds the latch, strike, or lock circuit does not engage.
Confirm the exact model and lock design; never bridge, disable, or test an interlock as a workaround. - washer door hinge or lid hinge hardware
Consider this category only when visible sag, rubbing, looseness, or qualified inspection confirms a hinge or related alignment fault.
Confirm exact model and hardware configuration; cracked glass, a falling door, or structural damage requires service rather than a trial replacement.
When checks do not resolve it
Need a professional?
Request qualified Maytag or appliance service when the door or lid remains out of alignment, will not latch after an accessible obstruction and contact-area cleaning are complete, requires force, leaks, displays a returning lock error, or has damaged glass, a hinge, handle, strike, gasket, cord, or outlet. Use urgent local help for smoke, fire, electric shock, or water near energized connections.
Safety scope: This article covers safe external observation and only the model manual's normal cancel or control procedure. Do not force or pry the door, reach into hot or moving water, bypass the lock, open panels, move a wet washer, or perform live electrical work.
Common questions
FAQ
Why will my Maytag washer door not close?
Look for a garment, packing material, debris, folded gasket, or soap buildup at the door or latch area. Then check for visible hinge, strike, handle, glass, lid, or alignment damage. If the door is clear but still will not latch, keep the washer out of use and arrange model-specific service.
Can I force a Maytag washer door shut?
No. Forcing the door can damage the gasket, strike, hinge, glass, or safety lock. Remove only a plainly accessible loose obstruction after the cycle has stopped and the area is safe; a door that needs force requires qualified inspection.
Why is my Maytag washer door locked with water inside?
Maytag explains that water level, heat, tumbling, spinning, or an incomplete drain can keep a door locked as a safety measure. Use only the exact model's documented cancel or drain procedure. Do not pull the door open or reach into water.
What if the Maytag door closes but will not latch?
Clean visible soap or soil from the contact area with a soft cloth and check whether the door aligns normally. If it latches only when lifted or pushed hard, or a lock message returns, the hinge, strike, latch, gasket, wiring, or control needs qualified service.
Can an unlevel washer keep the door from closing?
A shifted or unstable cabinet can change the relationship between the door, gasket, strike, and lock. If the washer rocks or the door gap changes, stop using it and follow the exact Maytag installation instructions or arrange qualified installation service.
When should I stop using my Maytag washer?
Stop for a leak, standing water near electricity, hot glass or water, cracked glass or lid material, a falling hinge, smoke, burning smell, sparks, exposed wiring, a repeated breaker trip, or a door that needs force. Keep the washer off when it will not latch after safe external checks.
Read the exact guide
Official sources
- Not Starting or Not Operating - Front Load Washer - Product HelpMaytag Product Help · Official Maytag support guidance for front-load washers; display messages and button sequences vary by model.
- Lid Not Latching - Washer - Product HelpMaytag Product Help · Official Maytag support guidance for top-load washers; use only if the assigned appliance has a lid rather than a front door.
- Service manualMaytag · Official Maytag service documentation intended for qualified technicians; cited here to define the professional boundary, not as an owner repair procedure.
- Door Will Not Lock or Unlock - Front Load Washer - Product HelpMaytag Product Help · Official Maytag support guidance for front-load washers; options such as Fresh Hold vary by model.
- Owner's ManualMaytag · Official Maytag owner manual for a specific washer family; use as an example and locate the exact manual by model before applying code or control details.
- Latching a Front Load Washer DoorMaytag Product Help · Official Maytag support guidance for front-load washers; exact controls and hardware vary by model.
- Washing Machine Not Spinning: Possible Causes And FixesMaytag · Official Maytag consumer guidance for washers; model-specific installation instructions control any leveling work.
Community feedback
Share a repair observation
Share a plain-text repair observation. Accepted observations are published automatically; this page may take a moment to update.