
On this page
Start here
Quick answer
If a Belling oven is not turning on, first check whether the cooker has power and whether its display is lit, then confirm that the clock is set correctly, the timer is in manual mode rather than Auto, and both an oven function and a temperature are selected. Check only an accessible plug, socket, fuse, or circuit breaker; do not open the cooker. For a gas model, never try to light it if you smell gas. If the display stays dead, the breaker trips again, the controls remain unresponsive, or the oven still will not operate after the external checks, switch it off and arrange qualified appliance service.
Before you begin
Safety first
- Do not open panels, test live circuits, work on gas components, manually ignite the oven, bypass a safety control, or repeatedly reset a tripping supply. If gas is smelled, do not operate electrical switches; leave the area and follow local gas-emergency guidance.
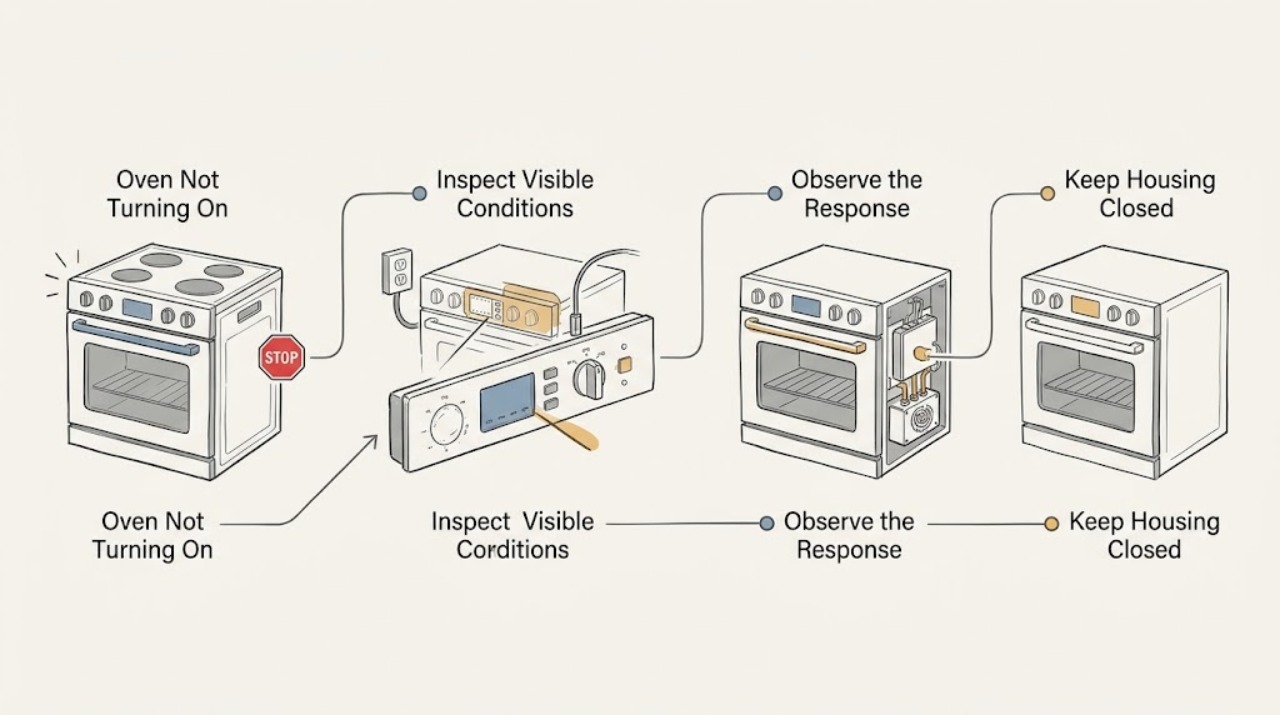
Work through in order
Diagnostic checks
Use only checks that match the exact appliance or system and its official guide.
-
Check 1
Look at the oven or cooker display and check the accessible wall switch, plug connection where applicable, and nearby kitchen power without moving a hard-wired appliance or removing any cover. Test the socket only with a known-safe appliance if the outlet is designed for that use.
Expected result: The display is dark and the outlet or appliance supply appears dead, or the display is lit and other kitchen power is normal.
Next step: If an accessible breaker or fuse is open, follow the home's normal reset or replacement procedure once. If it opens again, leave the oven off and arrange qualified electrical or appliance service. If power is present, continue to the timer check.
Stop if: Stop for a hot or scorched outlet, damaged cord or plug, exposed wiring, repeated trips, sparking, or any need to remove a cover.
Why this matters
Why: No display or no outlet power points first to the household supply, switch, fuse, or connection; a lit display means the oven may instead be blocked by the timer, controls, or an internal fault.
-
Check 2
Read the clock/programmer display and use the exact Belling model guide to check whether the time of day is set, the timer is in manual mode, and no Auto or delayed-cooking state is active. Do not guess at a key combination if the display symbols are unfamiliar.
Expected result: The clock is unset or shows an Auto/automatic state, bars or symbols indicate a programmed cycle, or the timer shows a normal manual-ready state.
Next step: Set the time and return the programmer to manual mode only as described for the model, then make one normal start attempt. If the controls will not accept the change, arrange service rather than opening the timer panel.
Stop if: Stop if the programmer is cracked, wet, intermittently activating, or would require removing the control panel to investigate.
Why this matters
Why: On some Belling models, an unset clock or Auto mode can prevent the oven from starting even though the cooker has power; a normal manual state shifts attention to the selected oven controls.
-
Check 3
With the oven empty and cool, set a standard oven function and a temperature on the front controls, then press or turn the start control exactly as the model guide describes. Check whether a key lock or child-lock indicator is active and use only the model's documented release procedure.
Expected result: The display or indicator responds and the oven begins its normal sequence, or the controls remain inactive and no heating or ignition indication appears.
Next step: If the oven responds, supervise the start and stop for any smoke, gas odor, abnormal noise, or uncontrolled heating. If it remains inactive after a documented normal setup, switch it off and arrange service.
Stop if: Stop for a stuck or hot control, a cracked panel, sparking, smoke, or any need to bypass a lock or access wiring.
Why this matters
Why: Belling identifies both an oven function and a temperature as required settings on supported models; a lock or missing setting can mimic a dead oven, while unresponsive controls point toward a control or supply fault.
-
Check 4
Identify whether the Belling appliance is gas, electric, or dual-fuel from its model documentation. For a gas oven only when there is no gas smell, observe whether the normal ignition sequence begins; for an electric oven, observe only the external indicator or display. Do not manually ignite gas or inspect burners, elements, terminals, or ignition wiring.
Expected result: A gas model has no ignition response, an electric model has no heating indication, or there is gas odor, sparking, smoke, or another hazard.
Next step: If there is no hazard but the correct cycle remains inactive, switch the appliance off and arrange qualified service. If gas is smelled, do not operate electrical switches or try to light the oven; leave the area and follow local emergency gas guidance.
Stop if: Stop immediately for gas odor, hissing, smoke, sparking, exposed conductors, a burning smell, or an element or burner that does not behave normally.
Why this matters
Why: The same 'not turning on' symptom can come from an uncommanded control state or an internal gas/electrical component, but the symptom alone cannot identify a safe repair. Gas odor changes this from troubleshooting to an immediate safety event.
-
Check 5
If the display is responsive and the manual settings are correct, switch the oven off using its normal control and make one later supervised start attempt; do not repeatedly reset a breaker or rapidly cycle a failed ignition. Record any display message, sound, indicator behavior, and whether another oven or hob function works.
Expected result: The oven starts normally once, or the same failure returns or is accompanied by a breaker trip, error indication, or abnormal sound.
Next step: If the failure recurs, leave the oven switched off and arrange qualified appliance service with the recorded observations. Do not use another function as a workaround if it creates heat or gas without reliable control.
Stop if: Stop for repeated breaker trips, an error that returns, uncontrolled heating, smoke, gas odor, or an electrical smell.
Why this matters
Why: A one-time control-state issue may be resolved by the documented setup, but recurrence points toward a fault in supply, timer, selector, heating, ignition, or safety control that cannot be assigned from the symptom alone.
-
Check 6
Arrange qualified appliance service when the oven remains dead with a safe supply, will not leave Auto or lock mode, does not respond to a documented function and temperature selection, or has a recurring trip, error, ignition failure, or damaged control. Provide the model and serial information and the observations from each safe check.
Expected result: No external correction restores operation, or the appliance shows a hazard, recurring failure, or suspected internal component fault.
Next step: Keep the oven switched off until an authorised or otherwise qualified technician assesses it. If a gas smell, fire, or electrical hazard is present, leave the area and use the applicable local emergency or utility guidance first.
Stop if: The professional boundary begins before removing panels, testing live circuits, adjusting gas components, replacing a thermal cutout, or bypassing a safety control.
Why this matters
Why: The remaining fault may involve the programmer, selector, thermal protection, heating circuit, ignition system, wiring, or control board, and opening the appliance can expose live electricity, hot surfaces, or gas components.
Use your observations
Decision map
Find the observation that best matches what you see, then follow the next safe action.
-
PATH 01Next step
What you see
The display is dark and the outlet, switch, fuse, or breaker has no accessible power.
Do this next
Arrange qualified service and follow the exact model guidance.
Why this path and its safety boundary
Why it matters: Address only the normal household reset or fuse check once. If power does not return or protection opens again, keep the oven off and use qualified electrical or appliance service.
-
PATH 02Next step
What you see
The clock is unset, the timer is in Auto mode, or a programmed state is active.
Do this next
Arrange qualified service and follow the exact model guidance.
Why this path and its safety boundary
Why it matters: Set the time and return to manual mode using the exact model guide, then make one supervised start attempt. Escalate if the programmer will not respond.
-
PATH 03Next step
What you see
The oven has power but no normal function and temperature have been selected, or a key lock is active.
Do this next
Arrange qualified service and follow the exact model guidance.
Why this path and its safety boundary
Why it matters: Correct the front-control state only with the documented model procedure. If controls remain unresponsive, do not open the console; arrange service.
-
PATH 04Next step
What you see
A gas oven has gas odor, hissing, failed ignition with suspected unburned gas, or any uncertainty about the gas supply.
Do this next
Arrange qualified service and follow the exact model guidance.
Why this path and its safety boundary
Why it matters: Do not try to light the appliance or operate an electrical switch. Leave the area and follow local gas-emergency guidance; qualified service is required before use.
-
PATH 05Next step
What you see
Power and documented controls are normal, but the oven still gives no ignition or heating response.
Do this next
Arrange qualified service and follow the exact model guidance.
Why this path and its safety boundary
Why it matters: Keep the appliance off and arrange qualified diagnosis of the selector, programmer, safety control, heating circuit, ignition system, and wiring; do not infer a single replacement part from the symptom.
-
PATH 06Next step
What you see
The oven starts only intermittently, trips the breaker again, shows a recurring error, or has smoke, scorching, a damaged control, or exposed wiring.
Do this next
Arrange qualified service and follow the exact model guidance.
Why this path and its safety boundary
Why it matters: Stop using the oven and arrange service. For smoke, sparking, or fire, disconnect power only if safe and follow local emergency guidance; never use water on an electrical or cooking-oil fire.
Helpful context
Understand the symptom
Separate a dead cooker from an oven that is not commanded to heat
A completely dark display and an oven that has power but does not begin heating are different symptoms. Start with the accessible supply and display, then check the clock, manual/Auto state, selected function, and temperature. Belling notes that these settings can prevent operation on some models, so use the exact model guide for any button sequence instead of guessing.
Keep electrical and gas work outside the ordinary-user checks
Only inspect controls that are designed to be used from the front and an accessible household fuse or breaker. Do not remove covers, test live wiring, or work on an ignition circuit. If the oven is gas and there is any gas smell, stop without operating electrical switches and follow local gas-emergency guidance. Belling's guide reserves servicing for authorised personnel.
Use one supervised start test
After the safe external checks, select a normal oven mode and temperature and start it once. Observe whether the display responds, the indicator changes, or the oven begins its normal ignition or heating sequence. If nothing changes, or the breaker opens again, stop testing rather than repeatedly resetting or cycling the controls.
Safety boundary
Stop conditions
- Do not remove the oven's outer panels, terminal covers, control console, or wiring as an ordinary-user check.
- Do not repeatedly reset a breaker, replace a fuse with an unapproved type, bypass a thermal or door safety, or manually ignite gas.
- If gas is smelled, do not try to light any appliance or operate an electrical switch; leave the area and follow local gas-emergency guidance.
- Stop for smoke, sparking, scorching, a hot outlet, exposed conductors, uncontrolled heating, or a damaged power cord or plug.
- Do not continue cooking if the oven cannot be reliably started and stopped from its normal controls.
Only after diagnosis
Potential parts
- oven timer or programmer
Only consider the programmer after power is confirmed and the clock or manual-mode controls remain unresponsive or prevent a documented start.
Confirm the complete appliance model and the manufacturer's fit information; programmer assemblies are model-specific. - oven selector or control switch
Only consider a selector or control switch after the oven has safe power and correct timer settings but cannot select or maintain a cooking function.
Have a qualified technician verify the control configuration and exact model before any replacement. - oven heating or ignition component
Only consider a heating or ignition component after the controls command a normal cycle but the matching electric heating or gas ignition response is absent and the supply is safe.
Do not order from the symptom alone; gas and electrical components require exact model matching and qualified testing. - oven safety or thermal control
Only consider a safety or thermal control after a technician confirms repeated no-start behavior or a protective trip with normal external controls.
Safety controls must be diagnosed and fitted by a qualified technician using the model documentation.
When checks do not resolve it
Need a professional?
Arrange qualified appliance service when the oven remains inactive after the accessible power, clock, timer, and function checks; when the display is dead despite a confirmed supply; when the breaker trips again; or when the selector, programmer, heating circuit, ignition system, wiring, or safety control may be faulty. Gas odor, smoke, sparking, and exposed conductors require an immediate stop and appropriate local emergency help.
Safety scope: Do not open panels, test live circuits, work on gas components, manually ignite the oven, bypass a safety control, or repeatedly reset a tripping supply. If gas is smelled, do not operate electrical switches; leave the area and follow local gas-emergency guidance.
Common questions
FAQ
Why is my Belling oven completely dead?
Start with the accessible power supply, wall switch or socket, and household fuse or breaker. If the display remains dark with a safe confirmed supply, do not open the cooker; the fault needs qualified diagnosis.
Can a Belling oven fail to start because of the clock?
Yes. On some Belling models the time must be set and the programmer must be in manual mode rather than Auto. Use the exact model guide to change the setting.
The display is on, but the oven still will not turn on. What should I check?
Confirm that both an oven function and a temperature are selected, and check for a key lock or programmed cooking state. If the controls respond normally but no heating or ignition sequence begins, arrange service.
What should I do if my gas Belling oven smells of gas?
Do not try to light the oven or operate an electrical switch. Leave the area and follow local gas-emergency guidance. Do not return to testing until the gas concern has been handled and the appliance is cleared.
Should I replace a fuse or oven part when it will not turn on?
Only perform the ordinary household fuse or breaker check permitted by the installation, and do not repeatedly reset a tripping supply. Oven timers, selectors, heating or ignition components, and safety controls require model-specific diagnosis and qualified fitting.
Read the exact guide
Official sources
- Self-help & MaintenanceBelling · Belling's support page describes its self-help guidance for common appliance questions and directs users to customer support when the available guidance does not resolve the problem.
- Ovens - TroubleshootBelling · Belling's official oven troubleshooting page says that an oven that does not switch on should be checked for supplied power and that other kitchen appliances can be checked as an indication of power.
- FAQsBelling · Belling's official FAQ says an oven that is not coming on may need a power, fuse, clock, and manual-mode check, and says an electric oven may not heat if the timer is in Auto mode.
- USER GUIDEBelling · The opened Belling gas-oven guide warns not to try to light an appliance or operate an electrical switch when gas is smelled, reserves servicing for authorised personnel, and describes the normal push-and-turn ignition sequence.
- USER GUIDEBelling · The opened Belling user guide explains that the main oven needs power, a set time, manual timer state, and both a cooking function and temperature; it also contains the appliance's gas and electrical safety boundaries.
Community feedback
Share a repair observation
Share a plain-text repair observation. Accepted observations are published automatically; this page may take a moment to update.