
On this page
Start here
Quick answer
An Admiral oven that will not turn on may have no incoming power, a control lock or other mode that prevents a start, an incorrectly selected function, a door-latch condition, or an internal control, heating, or ignition fault. First determine whether the display, clock, interior light, or other range functions have power. Then check the exact Admiral owner instructions for the cooking function, temperature, Start control, lock, delay, demo, Sabbath, or timer settings; do not assume another model uses the same buttons. If the display is blank, a breaker trips again, you smell gas or burning, see smoke, the door or latch is damaged, or any check requires exposing terminals, wiring, an igniter, element, or control board, stop using the oven and arrange qualified appliance service. A single documented power reset may be appropriate for the model, but it is not a repair and should not be repeated when the fault returns.
Before you begin
Safety first
- This article covers ordinary-access observation, documented control checks, and a safe external power check only. Electrical, gas, heating, ignition, latch, control, and internal appliance repairs require qualified service.
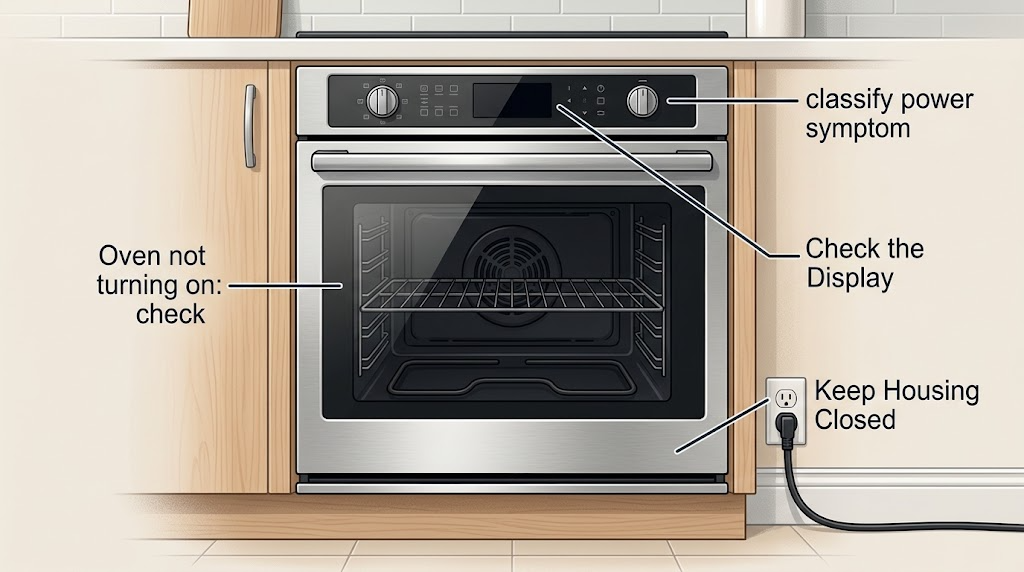
Work through in order
Diagnostic checks
Use only checks that match the exact appliance or system and its official guide.
-
Check 1
Without removing panels or touching wiring, observe the Admiral oven display or clock, interior light, control response, and any other range or cooktop function that you normally use.
Expected result: Record whether the display is completely blank, the display works but controls do not respond, the controls respond but Bake or Broil does not begin, or another range function also has no power.
Next step: Follow the matching branch and keep the oven off if there is smoke, odor, heat damage, a gas concern, or repeated electrical interruption.
Stop if: Do not open the console or cabinet to determine why the display is dead, and stop immediately for gas odor, smoke, a burning smell, or water near electrical parts.
Why this matters
Why: A blank display or several dead functions supports an incoming-power, fuse, breaker, or control-supply branch. A lit display with unresponsive keys supports a lock or control branch, while a selected cycle that does not heat points toward settings, latch, heating, ignition, or control diagnosis.
-
Check 2
With the display on, use the exact Admiral owner instructions to select the intended Bake or Broil function, set a temperature where required, press Start if specified, and check for a visible Control Lock, Demo, Sabbath, Delay Start, or timer state.
Expected result: Note whether the oven accepts the setting, shows a lock or showroom-style mode, waits for a delayed start, shows an error, or returns to an idle screen without beginning.
Next step: Change only the documented mode or setting for the exact model and make one normal start attempt; if the oven still will not start, stop changing settings and arrange service.
Stop if: Do not guess a key combination, enter a service mode, bypass a lock or door switch, or continue if the display shows an unexplained fault or heat-related warning.
Why this matters
Why: A locked, demo, delayed, or incomplete control state can prevent a normal start without proving a failed part. If the documented settings are correct but the controls remain unresponsive or an error returns, the control or power system needs service diagnosis.
-
Check 3
From a safe position, check whether the oven or range plug is visibly seated as designed and whether the household breaker or fuse for the appliance is visibly tripped or blown; leave all electrical measurements and cover removal to a qualified technician.
Expected result: Record a normal-looking power connection, a single tripped breaker or blown fuse, a breaker that trips again, a loose or heat-damaged connection, or a wall-oven connection that is not safely accessible.
Next step: If the model instructions permit one ordinary reset, restore power once and observe the display and operation. If the breaker trips again, remains dead, or the connection is damaged or inaccessible, leave the oven off and call qualified service.
Stop if: Do not repeatedly reset a breaker, replace a fuse with an improvised substitute, pull out a built-in oven, open a junction box, or inspect live terminals.
Why this matters
Why: One external power interruption can explain a dead control, but a repeat trip, heat damage, loose connection, or inaccessible connection indicates an electrical or appliance fault rather than a setting problem. A breaker position alone does not prove that the oven receives the correct supply.
-
Check 4
With the oven cool, inspect the door's ordinary closing and the visible self-clean latch position without forcing it or removing trim; do not start a self-clean cycle as a test.
Expected result: Record a door that closes normally and shows no lock indicator, a latch that remains engaged, a door that will not close or align, or a lock indicator that remains after the documented unlock procedure.
Next step: Follow only the exact model's documented cancel or unlock procedure; if the latch remains stuck, the door is damaged, or the oven still will not start, arrange service.
Stop if: Do not pry the latch, defeat a door switch, run self-clean to free it, or place hands near a hot or moving latch mechanism.
Why this matters
Why: A locked self-clean latch or door that cannot close can prevent a cycle on some designs. A normal door does not rule out a hidden interlock or control fault, and a forced latch or damaged hinge is a service issue.
-
Check 5
After the documented control and external-power checks, make one normal start attempt while observing from outside the closed oven for a display change, relay click, heating response, ignition attempt, error indication, or unusual odor.
Expected result: Record no response, a response with no heat, repeated clicking or ignition attempts, a visible damaged element, gas odor, smoke, burning smell, or an error that returns.
Next step: Turn the oven off and arrange qualified appliance service for any no-heat, ignition, error, or abnormal symptom; provide the model, power-state result, selected function, and observed response.
Stop if: Do not open the door to inspect an ignition system while it is attempting to light, test voltage or continuity, touch an element, relight gas, or operate through smoke, gas odor, or burning odor.
Why this matters
Why: Controls that respond but produce no heat can involve a heating element, igniter, safety valve, relay, sensor, or control; a visual symptom does not identify which part. Gas odor, smoke, burning smell, repeated clicking, or an element or wire fault raises the safety boundary immediately.
-
Check 6
If a documented control change or single permitted power reset restored the display, make one controlled start attempt using the normal Admiral procedure and then stop testing.
Expected result: Record whether the oven starts normally, the display fails again, the lock or error returns, the breaker trips, or heating or ignition remains absent.
Next step: Use the oven only if it completes a normal cycle without abnormal signs; otherwise leave it off and request qualified service rather than repeating the reset.
Stop if: Do not keep cycling a failed oven, bypass safety controls, or continue operation after smoke, gas odor, burning smell, abnormal heat, or a breaker trip.
Why this matters
Why: A normal start after a transient setting or power state supports that limited explanation but does not prove the appliance is repaired. A returning fault, repeat trip, or missing heat means an underlying control, power, latch, heating, or ignition problem remains.
Use your observations
Decision map
Find the observation that best matches what you see, then follow the next safe action.
-
PATH 01Safety boundary
What you see
The Admiral display, clock, and other expected functions are blank or dead.
Do this next
Check only the visible plug or household breaker or fuse condition; follow the model manual for one permitted reset, then request service if power does not return or the interruption repeats.
Why this path and its safety boundary
Why it matters: An external power interruption, fuse or breaker, supply connection, or control-power fault is more likely than a bake-only component.
Safety stop: Do not remove a wall oven, open a junction box, test live voltage, or repeatedly reset a breaker.
-
PATH 02Safety boundary
What you see
The display is on but keys do not respond, or a lock, demo, Sabbath, or delayed-start indication is present.
Do this next
Use the exact Admiral manual to cancel or unlock the mode and make one normal start attempt; call service if the control remains locked, unresponsive, or shows a returning error.
Why this path and its safety boundary
Why it matters: A documented control state can block operation without a failed component, but control behavior differs by model.
Safety stop: Do not guess key combinations, enter service mode, or bypass a lock or interlock.
-
PATH 03Safety boundary
What you see
The controls accept a function and temperature, but the oven does not heat or ignite.
Do this next
Turn the oven off and arrange qualified appliance diagnosis, noting whether the unit is electric or gas and what the display and ignition response did.
Why this path and its safety boundary
Why it matters: A heating element, igniter, safety valve, relay, sensor, control, or supply fault remains possible; the symptom alone does not identify a part.
Safety stop: Do not test voltage or continuity, touch an element, relight gas, open the rear panel, or continue if there is smoke, gas odor, or a burning smell.
-
PATH 04Safety boundary
What you see
The breaker trips again, the fuse blows again, or power returns briefly and then disappears.
Do this next
Leave the oven off and request qualified appliance or electrical service; report when the trip occurs and which other functions are affected.
Why this path and its safety boundary
Why it matters: A repeated electrical interruption needs fault isolation and may involve the appliance, circuit, wiring, or control; it is not a normal reset condition.
Safety stop: Do not keep resetting protection, substitute a different fuse, open terminals, or operate the oven from an extension cord or improvised connection.
-
PATH 05Safety boundary
What you see
The door does not close or the self-clean latch or lock indicator remains engaged after the documented unlock procedure.
Do this next
Leave the oven off and arrange service for latch, hinge, interlock, or control inspection.
Why this path and its safety boundary
Why it matters: A latch, hinge, interlock, or control issue may prevent a safe cycle; forcing it can damage the door or defeat a safety feature.
Safety stop: Do not pry, bend, bypass, or manually defeat the latch or door switch.
-
PATH 06Safety boundary
What you see
Gas odor, smoke, burning smell, a visibly damaged wire or element, or abnormal heat occurs during the start attempt.
Do this next
Turn controls off, avoid flames and electrical switching if gas is suspected, leave the area as appropriate, and contact the relevant qualified emergency or appliance service according to local safety guidance.
Why this path and its safety boundary
Why it matters: This is an immediate safety branch, not a parts-identification or repeated-test branch.
Safety stop: Do not restart the oven, inspect an igniter while it is operating, touch damaged wiring, or investigate a gas leak yourself.
Helpful context
Understand the symptom
First identify what ‘not turning on’ means
A dead display and an oven whose display works but will not begin Bake are different faults. Check whether the clock or display, interior light, cooktop or range functions, and control buttons respond, without removing panels. If the display works, verify that a cooking function and temperature were actually selected and that Start was pressed if the model requires it. If nothing works, prioritize the external power path and stop if a breaker or fuse condition repeats.
Use the Admiral model instructions for modes and locks
Control Lock, Demo Mode, Sabbath Mode, Delay Start, a self-clean latch, and timer behavior vary by model. Admiral's public product page lists multiple oven and cooker configurations but does not establish a universal control sequence. Use the model and serial information to find the applicable manual, then change only a setting explicitly documented for that model. Do not guess at a hidden service mode or hold random keys.
Keep electrical, gas, and heating repairs behind the service boundary
A blank display after an external power check, repeated breaker operation, a gas odor, smoke, a burnt wire, a cracked element, or a failed igniter or control needs qualified diagnosis. Internal oven parts can remain hot or electrically energized and gas ignition systems add a separate hazard. Do not measure live voltage, open the terminal block, remove the rear panel, bypass a door or safety switch, or replace an element, igniter, valve, fuse, or board based only on the symptom.
Safety boundary
Stop conditions
- Stop for gas odor, smoke, burning smell, a hot or damaged cord or wire, repeated breaker operation, water near electrical parts, or abnormal heat; leave the oven off and use appropriate qualified service or emergency guidance.
- Do not open the console, rear panel, terminal block, junction box, control board, or burner or ignition area; do not test live voltage or continuity as an ordinary user check.
- Do not bypass a Control Lock, door latch, interlock, fuse, safety valve, or other protective device, and do not guess at a service-mode key sequence.
- Do not touch a heating element, igniter, burner, or wiring while hot or energized, relight gas, or start self-clean to solve a stuck latch.
- If the display remains dead, a setting reset fails, no heat persists with responsive controls, or the fault returns after one permitted reset, stop troubleshooting and arrange qualified appliance service.
Only after diagnosis
Potential parts
- oven control or user-interface assembly
Consider this category only when the exact model's controls remain dead or unresponsive after power and documented mode checks and qualified diagnosis identifies the control assembly.
Confirm the exact Admiral model, revision, connector arrangement, and manufacturer fit information; do not order from a no-start symptom alone. - electric bake or broil element
Consider this only for an electric model when qualified inspection confirms a damaged or electrically failed element after the control and supply are verified.
Match the exact model, element position, mounting, and electrical specification; a visible crack is a reason for service, not a user-level live test. - gas oven igniter or safety valve
Consider this only for a gas model when a qualified technician confirms an ignition or valve fault after checking the documented controls and safe gas supply conditions.
Confirm the exact model and gas-system requirements with the manufacturer or technician; do not relight, bypass, or substitute a gas component. - oven door latch or interlock component
Consider this only when the door or self-clean latch remains stuck or fails to register correctly and professional diagnosis identifies the latch or interlock.
Confirm the exact model and latch design; do not force or defeat a door safety mechanism.
When checks do not resolve it
Need a professional?
Arrange qualified appliance service when the Admiral oven remains dead after a safe external power check, the breaker or fuse trips again, controls remain locked or unresponsive, the door latch will not release or close, the oven accepts a cycle but does not heat or ignite, an error returns, or diagnosis would require cabinet, terminal, wiring, element, igniter, valve, sensor, or control-board access. Gas odor, smoke, burning smell, damaged wiring, water near electrical parts, or abnormal heat is an immediate stop condition.
Safety scope: This article covers ordinary-access observation, documented control checks, and a safe external power check only. Electrical, gas, heating, ignition, latch, control, and internal appliance repairs require qualified service.
Common questions
FAQ
What should I check first when an Admiral oven will not turn on?
Determine whether the display, clock, interior light, or other range functions have power. If the display works, check the exact model's function, temperature, Start, lock, delay, demo, Sabbath, and timer states. If the display is dead or power protection trips again, stop and arrange service.
Can a control lock or demo mode stop the oven from starting?
Some oven models can block operation through Control Lock or Demo Mode, and Delayed Start can make a selected cycle wait. Use only the exact Admiral manual for the model's procedure; do not guess key combinations or enter service mode.
Should I reset the breaker if the Admiral oven is dead?
Check the visible household breaker or fuse condition and follow the exact model instructions for one permitted reset. If the breaker trips again, the display remains dead, or power returns only briefly, leave the oven off and request qualified appliance or electrical service.
What if the display works but the oven does not heat?
Confirm the documented cooking function, temperature, Start control, lock, delay, and mode settings once. If the controls respond but there is no heat or ignition, a heating element, igniter, safety valve, sensor, relay, control, or supply fault may remain; do not test or replace those parts based on the symptom alone.
When is an Admiral oven no-start condition unsafe to troubleshoot?
Stop for gas odor, smoke, burning smell, damaged wiring or element, repeated breaker operation, abnormal heat, water near electrical parts, or any need to open the cabinet, terminal block, control, ignition, or heating circuit. Leave the appliance off and arrange appropriate qualified service or emergency guidance.
Read the exact guide
Official sources
- Nothing Is Working - No Power - Wall OvenWhirlpool Product Help · Whirlpool wall-oven guidance used for general safety and decision structure; exact electrical requirements and controls vary by Admiral model.
- Range & Wall Oven - Oven Will Not Come OnGE Appliances · GE Appliances support guidance used for cross-brand symptom branching; Admiral model instructions control any Admiral-specific button sequence or component arrangement.
- Oven Not Heating - Powering On - Electric RangeWhirlpool Product Help · Whirlpool electric-range guidance used for general control-state branching; it does not establish that every Admiral oven has these features.
- Admiral Microwaves, Electric Ovens, Kettles, Toasters and SandwichmakerAdmiral Appliances · Admiral Appliances official kitchen-appliance catalog; it identifies product categories and examples but does not provide a universal no-start procedure for every Admiral model.
Community feedback
Share a repair observation
Share a plain-text repair observation. Accepted observations are published automatically; this page may take a moment to update.