
On this page
Start here
Quick answer
A Blomberg washer dryer that is not working may have no incoming power, a door or control lock that prevents starting, an interrupted water supply, or a drain condition that stops the programme. First determine whether the display is completely dark or whether the machine powers up but will not start. Check the outlet and breaker without opening the appliance, make sure the door is fully latched and a valid programme has been selected, then look for a closed tap, kinked hose, standing water, or a displayed code. Unplug before inspecting a cord or pump area, do not force the door, and stop after the external checks if a breaker trips again, the cord is damaged, water is leaking, burning smell or smoke is present, or the machine still will not run.
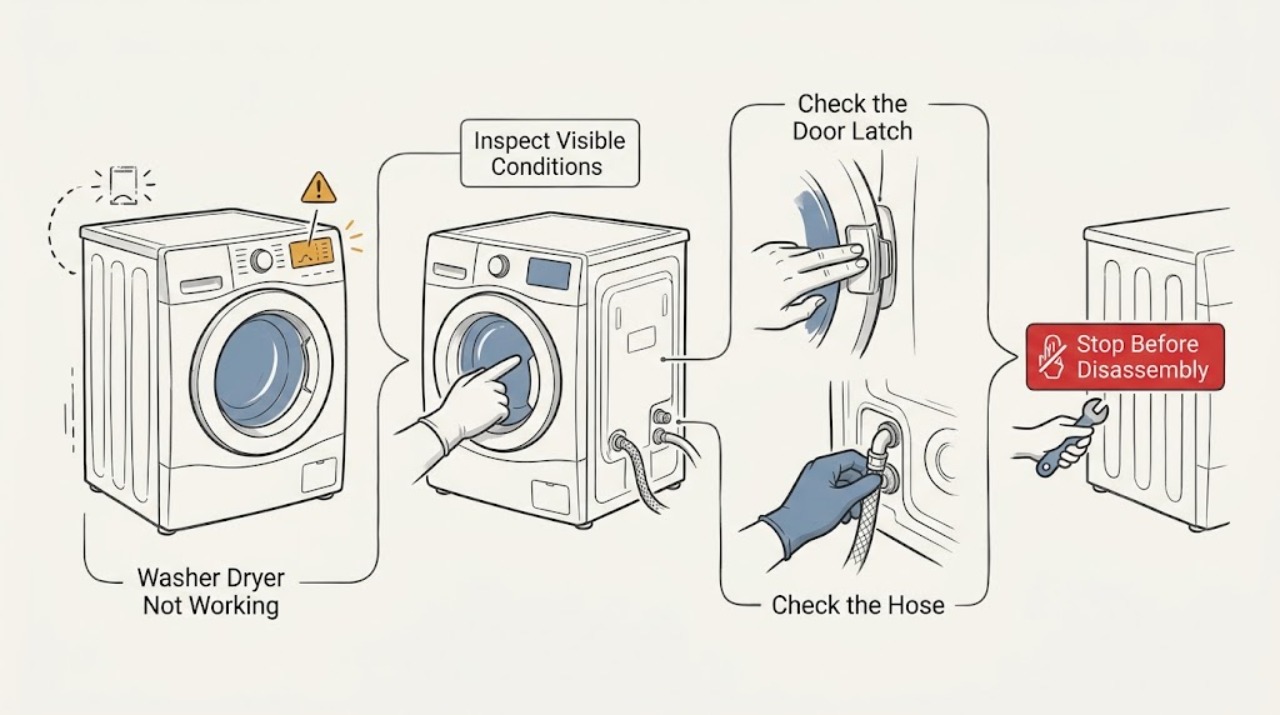
Work through in order
Diagnostic checks
Use only checks that match the exact appliance or system and its official guide.
-
Check 1
With the washer dryer switched off, check whether its plug is seated, test the same socket with a small known-working appliance, and look at the home's breaker or fuse only from the normal user access point.
Expected result: The socket works and the washer dryer's display returns, or the socket is dead, the breaker trips again, or the display stays completely dark.
Next step: If the outlet is dead, address the household electrical supply. If a breaker trips again, stop resetting it and arrange qualified electrical or appliance service. If the cord is damaged, leave the machine disconnected. If power is present, continue to the door and control check.
Why this matters
Why: A dead outlet points to the household supply. A repeat trip or a dark panel after a working outlet is confirmed points beyond a simple programme selection issue.
-
Check 2
Close the loading door firmly, remove any visible item from the seal or latch area without forcing it, select a valid programme, and press the model's Start or Pause control once. Check the display for a child-lock, delayed-start, pause, or error indication.
Expected result: The door-lock indicator appears and the programme starts, or the door will not latch, the control does not respond, or a lock or code remains displayed.
Next step: Use the exact model manual to interpret or disable a lock and to identify a displayed code. Do not force the door or bypass its lock. If the latch is damaged or the code remains after the manual's user steps, stop and request service.
Why this matters
Why: Starting after the door and control check indicates an interlock or setting was preventing operation. A latch that will not engage or a persistent lock/code can indicate a door or control fault; a child lock can also prevent changes without being a mechanical failure.
-
Check 3
If the programme begins but does not fill, verify that the household water supply is available, both visible inlet taps are open as intended for the installation, and the inlet hose is not kinked, crushed, or pulled tight.
Expected result: Water is unavailable, a tap is closed, the hose is bent, or the machine fills after the external supply condition is corrected; alternatively, the supply looks normal but no water enters.
Next step: Correct only the visible tap or hose condition and retry once. Do not remove the inlet hose or clean an inlet screen unless the model manual gives the exact procedure and the appliance is isolated from power and water. Escalate if the supply is normal but the machine still will not fill.
Why this matters
Why: A closed or restricted supply can prevent the programme from starting or can make it wait. Normal supply with no fill leaves an inlet screen, valve, sensor, or control fault possible, but the model-specific manual is needed before any further work.
-
Check 4
If water remains in the drum or the programme stops before spin or drying, switch off and unplug the appliance, allow hot water to cool, and inspect only the visible drain hose and the user-accessible pump-filter area described by the manual; use a container and cloth if the manual calls for draining.
Expected result: The hose is kinked, the filter area contains debris, the filter is not seated, or water drains after the user-accessible cleaning procedure; alternatively, there is a leak, unusual pump noise, or no drainage.
Next step: Correct a visible hose position or clean and reseat the filter only exactly as the model manual directs, then run one short drain or rinse test. Do not reach into a moving pump, work with the appliance powered, or remove cabinet panels. Stop for a leak or persistent non-drain and arrange service.
Why this matters
Why: A restricted drain path can stop a programme and prevent spin or drying. A leak, unusual noise, or continued failure after the safe filter and hose check points to a pump, hose, or control fault rather than a setting.
-
Check 5
After recording any displayed code and completing the relevant external check, turn the appliance off, unplug it for a few minutes, restore power, and try one simple programme with the door closed and no unusual load.
Expected result: The machine completes the test, stops again at the same stage, or returns the same code, noise, odor, or leak.
Next step: If it fails again, stop using it and provide the model identification, displayed code, programme stage, water state, and any sound or odor to Blomberg or a qualified appliance technician. Do not open the cabinet or replace a part based only on this symptom.
Why this matters
Why: A successful single reset supports a temporary control or supply interruption, but it does not establish that an internal fault is repaired. Repeated identical behavior is useful evidence for service and should not be chased with repeated resets.
Use your observations
Decision map
Find the observation that best matches what you see, then follow the next safe action.
-
PATH 01Safety boundary
What you see
The display is completely dark.
Do this next
Use action-power-state. If the socket works but the machine remains dark, or a breaker trips again, leave it disconnected and arrange qualified service.
Why this path and its safety boundary
Safety stop: Continue with the door and control check.
-
PATH 02Safety boundary
What you see
The panel lights, but Start does not begin a programme.
Do this next
Check the door latch, selected programme, child lock, delayed start, and any display code using the exact model manual. Do not force or bypass the door lock.
Why this path and its safety boundary
Safety stop: Continue with the water-entry or drain-state branch based on where the programme stops.
-
PATH 03Safety boundary
What you see
The programme waits at fill or a no-water indication appears.
Do this next
Check the household supply, visible inlet taps, and hose position. If those are normal and the machine still does not fill, stop at the external check boundary and request service.
Why this path and its safety boundary
Safety stop: If water is left in the drum, use the drain-state branch; otherwise record the programme stage and code before service.
-
PATH 04Safety boundary
What you see
Water remains in the drum or the machine will not reach spin or drying.
Do this next
Unplug first, let hot water cool, then follow the model manual for the visible hose and pump-filter check. A leak, unusual noise, or continuing blockage requires service.
Why this path and its safety boundary
Safety stop: Continue to one controlled reset and simple programme test; do not repeat resets if the symptom returns.
-
PATH 05Safety boundary
What you see
The same stop, code, noise, odor, or leak returns after one safe retry.
Do this next
Stop using the appliance, preserve the displayed code and symptom details, and arrange qualified appliance service.
Why this path and its safety boundary
Safety stop: A completed test programme supports a temporary interruption; monitor the next normal load and stop if the fault returns.
Helpful context
Understand the symptom
Start by separating no power from no start
If the display and indicators are dark, begin with the socket, plug, breaker, and visible cord. If the panel lights but the drum does not begin, the door latch, selected programme, child lock, delayed start, water supply, or an uncompleted drain is a better lead. This split prevents repeated resets from masking a supply or safety interlock problem.
Use the symptom at the point where the programme stops
A washer dryer can appear to be not working because it waits for enough water, cannot drain, or pauses for an unbalanced load. Note whether it stops before filling, leaves water in the drum, unlocks only after draining, or stops shortly after starting. The symptom changes the next check; it does not prove that a particular internal part has failed.
Keep the boundary external and model-aware
Blomberg controls and child-lock combinations vary by model. Use the model's own manual for any button sequence or code meaning. The checks below are limited to visible controls, the socket, hoses, and the user-accessible filter area described by the manual; do not remove covers or test live electrical parts.
Safety boundary
Stop conditions
- Stop and leave the washer dryer disconnected if the power cord is damaged, a breaker trips again, smoke or a burning odor is present, or the outer enclosure is hot in an unusual way.
- Do not force the loading door or bypass its lock; stop if it will not latch or remains locked with water in the drum.
- Stop for an active water leak, unusual pump or motor noise, or water that cannot be drained by the exact user procedure in the model manual.
- Do not remove cabinet panels, test live wiring, or replace an internal part on the basis of a general not-working symptom.
- After one safe retry, stop if the same code, stop point, odor, noise, or leak returns and arrange qualified appliance service.
When checks do not resolve it
Need a professional?
Arrange qualified appliance or electrical service when the socket is good but the washer dryer remains dark, a breaker trips again, the cord or latch is damaged, a code persists, water leaks, the pump or motor makes an unusual noise, or the machine still will not complete a programme after the model-specific external checks.
Common questions
FAQ
Why is my Blomberg washer dryer completely dead?
Check the plug and socket, then the household breaker or fuse from the normal user access point. If a known-working socket is available but the display remains dark, leave the appliance disconnected and arrange qualified service rather than opening it.
Why does the panel light up but the washer dryer not start?
A fully latched door, valid programme, Start control, child-lock state, delayed start, and any displayed code are the first checks. Use the exact model manual for button sequences and do not force or bypass the door lock.
Can low water supply make the machine seem not working?
Yes. A closed tap, restricted or kinked inlet hose, or low supply can leave the machine waiting for enough water. Correct only visible tap or hose conditions; if supply is normal but filling does not resume, request service.
What if water is still in the drum?
Treat it as a drain-state issue: unplug first, let hot water cool, and follow the model manual for the drain hose or pump-filter procedure. A leak, unusual pump noise, or continued no-drain condition needs service.
Should I keep resetting the washer dryer?
Try one brief unplug reset only after recording a code and completing the relevant external check. If the same stop point, code, odor, noise, or leak returns, stop using the appliance and arrange qualified appliance service.
Read the exact guide
Official sources
- Water from my Blomberg washer dryer is not emptying, what should I do?Blomberg · Blomberg washer-dryer drainage support
- TroubleshootingBlomberg · Blomberg washing-machine and washer-dryer troubleshooting guidance
- User's ManualBlomberg · Blomberg washer-dryer user manual
- My Blomberg washer dryer is not powering on, what should I do?Blomberg · Blomberg washer-dryer support
Community feedback
Share a repair observation
Share a plain-text repair observation. Accepted observations are published automatically; this page may take a moment to update.