
On this page
Start here
Quick answer
Do not bend, force, or replace a Bosch ice-maker arm by appearance alone. Bosch manuals use different terms and layouts: one manual calls it a moving metal fill-level hook, while another calls it a fill-level sensor. Both describe food or ice blocking that part as a possible reason for low or interrupted production, but neither supports diagnosing a physically broken arm or choosing a universal replacement without the appliance model. Record the E-Nr and inspect only with the ice maker switched off and the appliance's manual-approved access available. Remove loose food or ice from the storage container only if the exact manual permits it; do not reach into a powered ice maker, open the ice-maker assembly, or force the arm. A detached, bent, cracked, or still-obstructed arm needs Bosch service with the model information.
Before you begin
Safety first
- This no-model guide is limited to identifying the exact Bosch manual, switching the ice maker off, checking a model-approved storage-container area for loose visible blockage, and observing external water/enable/temperature conditions. Do not reach into a powered ice maker, open the ice-maker assembly, force or bend the arm, bypass a sensor, glue or splice a broken part, or order a replacement without E-Nr compatibility confirmation.
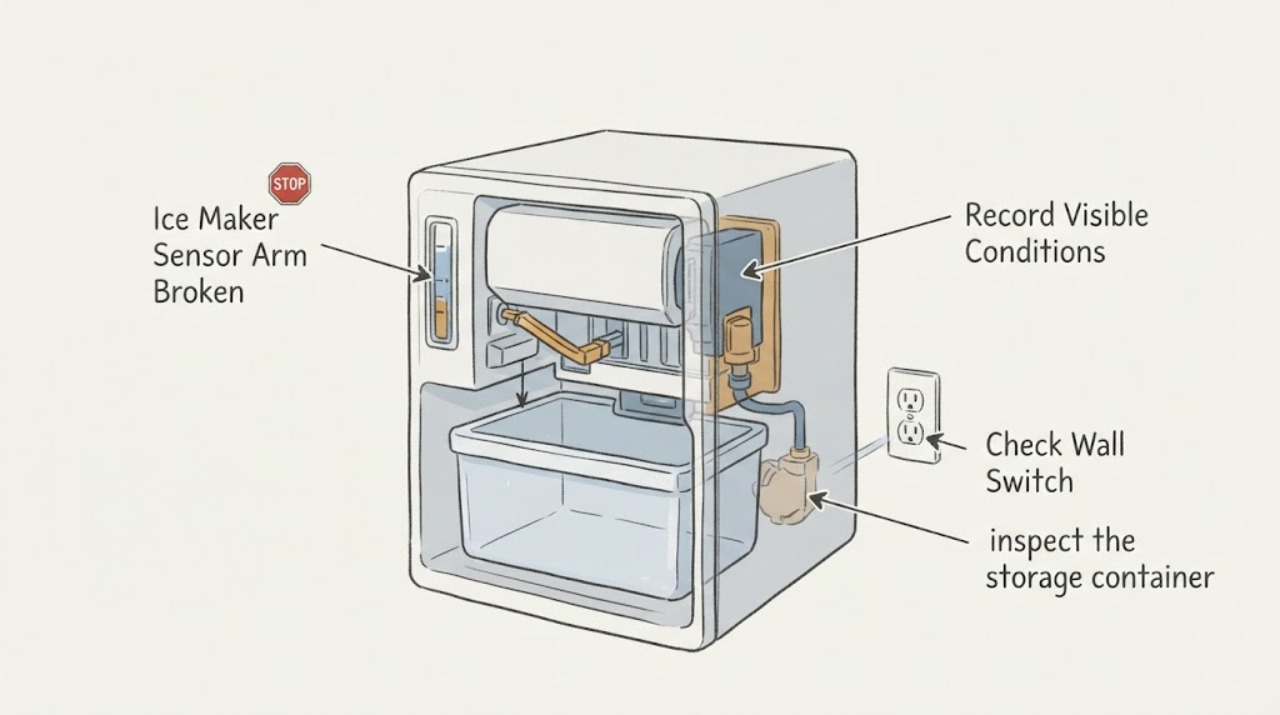
Work through in order
Diagnostic checks
Use only checks that match the exact appliance or system and its official guide.
-
Check 1
Record the complete Bosch E-Nr/model and FD number, region, and the exact visible part: wire or metal hook, plastic arm, or another sensor arrangement. Note whether the ice maker is making no ice, making little ice, or only appears mechanically damaged.
Expected result: The model matches a manual that names a moving metal hook or fill-level sensor, the layout differs, or the part cannot be identified from the accessible documentation.
Next step: Use only the manual matching the E-Nr for the remaining checks. If the layout is not confirmed, stop at visual documentation and arrange Bosch service rather than adapting another model's procedure.
Why this matters
Why: Bosch uses different ice-maker descriptions and controls across model families. A no-model photograph or a similar-looking arm cannot establish the correct component or compatibility.
-
Check 2
Switch the ice maker off using the exact model's control and follow the matching manual's cleaning or access instructions before looking into the ice container. Do not reach into or underneath the ice maker while it is powered, and do not remove the ice-maker assembly.
Expected result: The ice maker is confirmed off and the model manual identifies a safe storage-container access path, or the control/access path is unclear.
Next step: Continue only with the model-approved visible container check. If the control cannot be confirmed or the assembly would need to be opened, keep the ice maker off and contact Bosch service.
Why this matters
Why: Bosch warns that moving parts can injure and that the ice maker should not be reached into while operating. An unclear control or access path means the inspection cannot safely be generalized.
-
Check 3
With the model-approved access and ice maker off, inspect the storage container and the visible fill-level mechanism for loose cubes, clumped ice, food, or another object. Remove only loose material that can be lifted without tools, force, or contact with hidden parts.
Expected result: The metal hook/sensor is blocked by visible material, the container is clear and the mechanism moves only as the manual permits, or the arm is visibly bent, cracked, detached, or missing.
Next step: If a loose obstruction is removed, reinstall the container and restore operation only as the exact manual directs. If the arm is damaged, stuck after the obstruction is removed, or cannot be safely assessed, leave the ice maker off and arrange service.
Why this matters
Why: Bosch identifies a blocked fill-level hook or sensor as a cause of interrupted or low ice production. A visible break or deformation is different: the manuals do not identify a universal repair or part fit for an unspecified model.
-
Check 4
If the arm is intact and unobstructed, check only the external conditions named by the matching manual: ice-maker enable state, water supply or shutoff, freezer temperature, and any visible kink in an accessible water hose. Do not treat these checks as proof that the sensor arm is sound.
Expected result: The ice maker is off, water is unavailable, the freezer is too warm, a visible hose is kinked, or all external conditions are normal while production remains low or absent.
Next step: Correct only an obvious external condition allowed by the model manual. If the arm still appears damaged or production remains abnormal, stop troubleshooting and provide the model and observations to Bosch service.
Why this matters
Why: Bosch manuals list enable state, water connection, freezer temperature, and hose/supply conditions as alternative causes of low or absent production. Normal external conditions do not prove a sensor, motor, valve, or control failure.
-
Check 5
Give Bosch service the complete E-Nr/model, FD number, region, photos of the arm and storage-container area with the appliance powered down, production symptoms, and the result of the model-approved obstruction check.
Expected result: The arm is detached, bent, cracked, missing, repeatedly obstructed, or the ice maker remains faulty after a visible blockage is cleared; diagnosis would require opening the ice-maker assembly or selecting a replacement part.
Next step: Keep the ice maker off and arrange qualified Bosch service. Do not bend the arm back, splice or glue it, force a harvest, open the assembly, bypass a sensor, or operate with a loose part.
Why this matters
Why: The opened evidence supports removing a visible blockage and service escalation, but it does not support a universal bail-arm or ice-maker fitment claim for an unspecified Bosch model.
Use your observations
Decision map
Find the observation that best matches what you see, then follow the next safe action.
-
PATH 01Next step
What you see
The exact manual identifies a moving hook or fill-level sensor and loose ice, food, or another object is visibly blocking it.
Do this next
With the ice maker off, remove only the plainly accessible loose blockage as the model manual permits, reinstall the container, and monitor production. Stop if the mechanism remains stuck or damaged.
Why this path and its safety boundary
Why it matters: Bosch documents a blocked fill-level mechanism as a cause of interrupted or low ice production, so the observation does not by itself prove that the arm is broken.
-
PATH 02Next step
What you see
The storage container is clear but the arm is visibly bent, cracked, detached, missing, or not moving after the documented obstruction is gone.
Do this next
Leave the ice maker off and arrange Bosch service with the E-Nr and FD number. Do not force, glue, bend, or substitute a similar-looking arm.
Why this path and its safety boundary
Why it matters: This is consistent with a mechanical damage or service condition, but the no-model task does not establish the correct arm design, part, or compatible ice-maker assembly.
-
PATH 03Next step
What you see
The arm is intact and unobstructed, but the ice maker is off, the water supply is closed or kinked, or the freezer has not reached the required condition.
Do this next
Correct only the model-documented external condition and reassess. If production does not recover or the arm remains uncertain, contact Bosch service.
Why this path and its safety boundary
Why it matters: Bosch lists these external conditions as alternative reasons for low or absent production; they can mimic an arm fault without identifying an internal part.
-
PATH 04Next step
What you see
The exact model, control, access path, or ice-maker layout cannot be confirmed, or checking the part would require reaching into a powered assembly or opening it.
Do this next
Keep the ice maker off, record the rating-plate information, and arrange Bosch service. Do not continue by copying another Bosch model's arm or reset procedure.
Why this path and its safety boundary
Why it matters: The available manuals are family-specific and cannot safely establish a universal sensor-arm procedure or compatibility.
Helpful context
Understand the symptom
A reported broken ice-maker sensor arm may mean a truly detached or bent part, but it may also be a food or ice obstruction that prevents the fill-level mechanism from moving. Bosch's opened manuals are family-specific: the B1..CB..2 manual calls the moving part a metal hook, while the B36CT.. manual calls it a fill-level sensor. Because the task has no E-Nr or exact layout, this guide is limited to safe identification, visible obstruction checks, and service handoff.
Before touching the ice bin, record the full model number from the rating plate and note whether the issue is low production, no production, a visibly detached arm, or an arm that will not move. Turn the ice maker off using the control identified by the exact manual. Do not reach into a powered ice maker: the assembly contains moving parts and may include a heating element.
If the model manual permits access to the storage container, look for loose cubes, clumped ice, food, or another object blocking the fill-level mechanism. Remove only loose material that is plainly accessible without tools or force. A clean container with a visibly bent, cracked, detached, or missing arm is a service condition; it is not enough evidence to order a generic bail arm or complete ice-maker assembly.
When checks do not resolve it
Need a professional?
Call Bosch service when the arm is detached, bent, cracked, missing, or still stuck after a model-approved visible blockage check; when the exact E-Nr and ice-maker layout are unknown; when production remains abnormal after external water, enable, and temperature checks; or when diagnosis would require opening or reaching into the ice-maker assembly.
Safety scope: This no-model guide is limited to identifying the exact Bosch manual, switching the ice maker off, checking a model-approved storage-container area for loose visible blockage, and observing external water/enable/temperature conditions. Do not reach into a powered ice maker, open the ice-maker assembly, force or bend the arm, bypass a sensor, glue or splice a broken part, or order a replacement without E-Nr compatibility confirmation.
Common questions
FAQ
Is a Bosch ice-maker sensor arm the same on every model?
No universal fit is established here. Bosch's opened manuals use different descriptions and controls for named model families, and the task has no E-Nr. Confirm the exact model before selecting a part or copying an access procedure.
Can ice or food make the Bosch ice-maker arm look broken?
It can obstruct the documented fill-level hook or sensor. Bosch directs the user to remove a blockage or clear food and objects from the storage container on the applicable manuals. A clean container with a visibly bent or detached arm is a service condition, not proof that a generic replacement will fit.
Can I bend the arm back or test the ice maker by hand?
Do not bend or force it. Switch the ice maker off and follow the exact manual's visible-container check; Bosch warns against reaching into or underneath an operating ice maker. A damaged or still-stuck arm should be handled by Bosch service.
What else can cause low ice production if the arm is intact?
Bosch manuals list an off ice maker, absent or kinked water supply, a freezer that is too warm, and a blocked fill-level mechanism as possible causes on the applicable families. Check only the model-documented external conditions; normal checks do not identify an internal valve, motor, sensor, or control failure.
Read the exact guide
Official sources
- Operating Instructions B1..CB..2 RefrigeratorBosch · Opened the Bosch-hosted PDF and verified the cover identifies refrigerator family B1..CB..2. It is used only for that documented family as an example of a moving metal hook and its blockage/troubleshooting boundaries, not as a universal Bosch model manual.
- Use and Care Manual B36CT..Bosch · Opened the Bosch-hosted PDF and verified the cover identifies the B36CT.. fridge-freezer family. It is used only for that documented family and demonstrates why the no-model topic cannot assume one universal sensor-arm layout.
Community feedback
Share a repair observation
Share a plain-text repair observation. Accepted observations are published automatically; this page may take a moment to update.