
On this page
Start here
Quick answer
A flickering light in a Crosley refrigerator should be separated into a bulb or socket issue, a door-switch or door-position issue, and an LED-module or supply issue. With the refrigerator unplugged, confirm that the bulb or cover is secure and that the door closes normally without pressing or releasing the switch unexpectedly. Restore power only for an ordinary observation; do not expose wiring or test the circuit energized. Crosley manuals show that some models use replaceable appliance bulbs, while models with an LED lighting assembly direct the user to authorized service. If the refrigerator's other lights or controls also flicker, the outlet, cord, or internal supply may be involved; stop using it for heat, odor, sparks, damaged wiring, or a protection trip and arrange qualified service.
Before you begin
Safety first
- This article covers symptom observation, model lookup, dry exterior door and actuator checks, and a matching manual's unplugged bulb or cover step when explicitly allowed. A qualified professional must handle LED assemblies, sockets, connectors, internal wiring, controls, door-switch replacement, outlet faults, damaged cords, and energized testing.
Work through in order
Diagnostic checks
Use only checks that match the exact appliance or system and its official guide.
-
Check 1
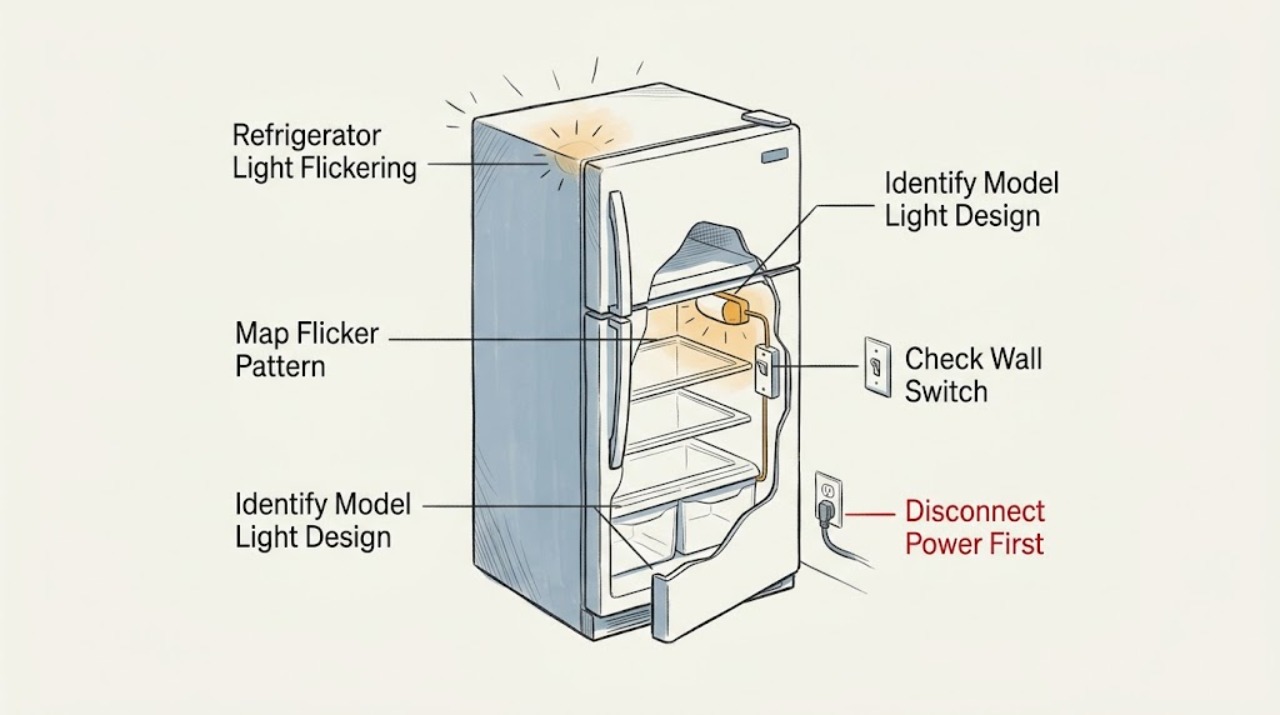
Observe the light with the door moving slowly and then fully open, without touching any exposed electrical parts. Note whether the flicker follows the door position, affects one lamp or several, and occurs with the display, fan, or other refrigerator functions. Also check whether the door closes squarely against its gasket.
Expected result: The flicker occurs only near one door position, remains constant with the door open, affects several lights or controls, or appears with a door that is not closing or aligning normally.
Next step: Use the matching model manual to determine whether the light is a replaceable bulb or a service-only LED assembly, then perform only the corresponding safe checks below. Stop immediately for smoke, sparks, heat, damaged wiring, or a protection trip.
Stop if: Do not keep cycling a door or appliance that is arcing, overheating, or causing a breaker or other protection device to operate.
Why this matters
Why: A door-position-only pattern makes the door switch, actuator, alignment, or a local light connection more likely. Constant flicker in one light makes that lamp, socket, or LED assembly more likely. Several lights or controls flickering together makes a shared supply or control issue more likely; none of these observations identifies a component by itself.
-
Check 2
Read the complete model number from the refrigerator label and open the matching Crosley manual. Locate the interior-light instructions and determine whether the appliance has a replaceable appliance bulb, an LED light assembly, or a model-specific light arrangement.
Expected result: The manual describes a replaceable bulb, an LED assembly that is to be serviced, a door light switch, or a different design than the examples in this article.
Next step: Follow only the matching manual's light-cover or bulb instructions. If it specifies an LED assembly or does not clearly permit the user step, do not remove the module and arrange authorized service.
Stop if: Do not infer bulb wattage, socket layout, or LED-module compatibility from another Crosley model.
Why this matters
Why: Lighting construction and service access vary across Crosley families. The XRS/XRE manual places an LED light at the top center and directs assembly replacement to an authorized technician; the XSS23G/XSS25G manual states that features vary by model and sends LED-light faults to service.
-
Check 3
With power disconnected, inspect the accessible door-switch button or actuator and the nearby dry surface for food residue, a stuck position, or an object preventing the door from closing. Gently confirm that the door gasket contacts the cabinet evenly; do not remove the switch or door panels.
Expected result: The switch or actuator is visibly held in, the door changes the flicker when it is moved, the gasket or a package prevents full closure, or the switch and door fit appear normal.
Next step: Remove only an obvious obstruction, clean the dry accessible surface with power disconnected, and verify the gasket and door close normally. If flicker remains, continue with the model-specific light check or service route.
Stop if: Do not pry out a switch, remove trim, expose wiring, or continue if the area is wet, damaged, or showing heat or discoloration.
Why this matters
Why: A blocked actuator or poor door fit can change the light command as the door moves. A normal door and switch area make a lamp, LED assembly, socket, connector, or shared supply more likely, but a hidden electrical fault remains possible.
-
Check 4
If and only if the matching manual permits a user-replaceable bulb, unplug the refrigerator, wait for the light to be safe to handle, and inspect the bulb, cover, and visible seating for looseness, damage, or a darkened bulb. Reinstall or replace only with the exact type and rating specified by that manual. If the manual identifies an LED assembly, leave it closed and skip bulb work.
Expected result: The permitted bulb is loose or failed, the cover is not seated, the manual specifies an LED assembly, or the bulb and cover appear sound but the light still flickers.
Next step: Correct only the manual-approved bulb or cover issue and restore power for one supervised observation. If the symptom remains, or the model uses LED lighting, arrange qualified service.
Stop if: Do not work with power connected, use a bulb with an unverified rating, touch broken glass bare-handed, or open an LED module.
Why this matters
Why: A loose or failed replaceable bulb can explain flicker in that lamp. A sound bulb with continued flicker, or any LED assembly symptom, points toward the socket, driver, connector, switch, or control and cannot be isolated safely by changing random parts.
-
Check 5
After the permitted unplugged checks are complete, make one ordinary supervised observation of the refrigerator. Compare the interior light with the display, dispenser light if fitted, fan, and cooling operation, and note any outlet, cord, or breaker symptom without opening the appliance or performing an energized electrical test.
Expected result: Only one light flickers, several functions flicker together, the refrigerator loses power, the outlet or cord is warm or damaged, or operation is otherwise normal except for the light.
Next step: For a persistent single-light flicker or any LED symptom, arrange Crosley or qualified appliance service. For a supply, cord, heat, smoke, spark, or protection-trip symptom, stop using the appliance and have the electrical condition assessed by a qualified professional.
Stop if: Do not remove covers, probe wiring, bypass the door switch, reset protection repeatedly, or continue using the refrigerator with smoke, sparks, burning odor, abnormal heat, or damaged wiring.
Why this matters
Why: A single-light symptom makes a local bulb, LED assembly, switch, socket, or connector more likely. Synchronized loss or flicker across functions raises concern about the outlet, cord, control, or internal supply. A warm or damaged electrical connection is a safety issue, not a light-bulb diagnosis.
Use your observations
Decision map
Find the observation that best matches what you see, then follow the next safe action.
-
PATH 01Safety boundary
What you see
The light flickers only while the door is moving or at a particular nearly-closed position, and the door or actuator does not sit consistently.
Do this next
With power disconnected, clear only an obvious obstruction and confirm the door closes evenly. If the pattern remains, have the switch, wiring, and light circuit checked by qualified service.
Why this path and its safety boundary
Why it matters: The door switch, actuator, alignment, gasket, or a local light contact is more likely than a whole-appliance supply problem, but the pattern does not prove which one.
Safety stop: Stop for wet or damaged switch areas, heat, discoloration, sparks, or a protection trip.
-
PATH 02Safety boundary
What you see
One light flickers continuously with the door open, and the matching manual permits a replaceable bulb that is loose, darkened, or visibly damaged.
Do this next
Unplug the refrigerator and perform only the matching manual's bulb and cover step once. If the light still flickers, stop replacing bulbs and arrange service for the socket, switch, connector, or control.
Why this path and its safety boundary
Why it matters: The bulb or its permitted seating is a reasonable first suspect; the manual's model-specific rating still controls what replacement is allowed.
Safety stop: Do not use an unverified bulb rating, handle broken glass bare-handed, or work with power connected.
-
PATH 03Safety boundary
What you see
The model manual identifies LED lighting, the bulb is not a user-replaceable item, or multiple LEDs flicker while the door and accessible switch area appear normal.
Do this next
Leave the light assembly closed and arrange authorized or qualified Crosley service with the full model number and the observed flicker pattern.
Why this path and its safety boundary
Why it matters: An LED assembly, driver, connector, switch, or control issue is more likely; Crosley manuals do not make opening the assembly a general user repair.
Safety stop: Do not open an LED module, disconnect its connector, or attempt an energized circuit test.
-
PATH 04Safety boundary
What you see
The light flicker is synchronized with the display or other functions, or the outlet, cord, or protection device shows heat, damage, sparks, smoke, or repeated interruption.
Do this next
Stop using the refrigerator, isolate power only from a safe dry position, and arrange qualified appliance or electrical service. Do not keep resetting a protection device to retest it.
Why this path and its safety boundary
Why it matters: A shared supply, cord, outlet, control, or internal electrical fault is more likely than an isolated bulb problem and creates a safety boundary.
Safety stop: Treat smoke, sparks, burning odor, abnormal heat, damaged wiring, or a repeated protection trip as urgent; do not touch damaged parts.
Helpful context
Understand the symptom
First identify when the flicker happens
Watch whether the light flickers only while the door is moving, only when the door is nearly closed, continuously while open, or together with the display, fan, or other lights. A change tied to door movement makes the door-switch position, door alignment, or a local light contact more plausible; a flicker that follows the whole refrigerator points more toward supply or control trouble. These are observations, not a confirmation of a failed part.
Crosley lighting is not one universal design
The opened XRS/XRE manual covers a top-freezer family with an LED light at the top center of the fresh-food compartment and sends LED-assembly replacement to an authorized technician. The XSS23G/XSS25G manual covers a side-by-side family with model-dependent bulbs and an LED display, and its troubleshooting table separately lists outlet power, a burned-out bulb, and service for LED lights. Use the manual that matches the full model number rather than fitting a bulb or module from another Crosley family.
Keep the electrical boundary clear
A user can observe the door, clean a dry exterior switch area, and perform the exact unplugged bulb or cover step allowed by the matching manual. Opening an LED module, tracing wiring, checking voltage, repairing a socket, or working around a damaged cord is service work. If the light problem comes with a burning smell, heat, sparking, or an outlet or breaker problem, isolate the appliance only when safe and get qualified help.
Safety boundary
Stop conditions
- Stop using the refrigerator for smoke, sparks, burning odor, abnormal heat, a damaged cord or outlet, exposed wiring, or a breaker or other protection device that trips again; isolate power only if safe and arrange prompt professional help.
- Unplug the refrigerator before any permitted bulb, cover, cleaning, or repair step. A control-panel OFF setting does not by itself remove power from the light circuit.
- Do not open an LED assembly, remove internal panels, bypass a door switch or safety device, probe wiring, or perform an energized electrical test.
- If the light continues to flicker after the matching manual's permitted check, or if the model uses an LED assembly, leave the appliance closed and arrange Crosley or qualified service.
Only after diagnosis
Potential parts
- Crosley model-matched appliance light bulb
Consider this category only when the matching manual permits a replaceable bulb and the unplugged inspection shows a failed, damaged, or persistently loose bulb; flickering alone does not establish bulb compatibility or failure.
Confirm the complete Crosley model and the exact bulb type and rating in its manual before ordering or installing. - Crosley model-matched LED light assembly or door switch
Consider this category only after qualified service identifies an LED assembly, driver, connector, or door-switch fault that remains after the door fit and any permitted bulb check are addressed.
Do not infer fit from another Crosley family; confirm the full model and have internal light-circuit work performed by qualified service.
When checks do not resolve it
Need a professional?
Safety scope: This article covers symptom observation, model lookup, dry exterior door and actuator checks, and a matching manual's unplugged bulb or cover step when explicitly allowed. A qualified professional must handle LED assemblies, sockets, connectors, internal wiring, controls, door-switch replacement, outlet faults, damaged cords, and energized testing.
Common questions
FAQ
Why does my Crosley refrigerator light flicker when I move the door?
A flicker tied to door movement makes the door switch, actuator, alignment, gasket, or a local light contact more plausible, but it does not identify the failed part. With power disconnected, clear only an obvious obstruction and confirm that the door closes evenly. If the pattern remains, have the switch and light circuit checked by qualified service.
Can I replace the flickering LED in a Crosley refrigerator?
Not as a general rule. The opened XRS/XRE manual says its LED assembly should be replaced by an authorized technician, and the XSS23G/XSS25G troubleshooting table sends LED-light faults to service. Check the full model manual first and do not open an LED module based on another model's instructions.
Should I turn the refrigerator control to OFF before checking the light?
No. Crosley manuals state that a control-panel OFF setting does not remove power from the light circuit. Unplug the refrigerator before permitted bulb, cover, cleaning, or repair work, and keep internal electrical work with a qualified professional.
What if the refrigerator display and light flicker together?
Synchronized flicker across the light and controls raises concern about a shared outlet, cord, control, or internal supply rather than one bulb. Stop for heat, smoke, sparks, damaged wiring, or repeated protection trips, and arrange qualified appliance or electrical service without opening the refrigerator.
What information should I give the Crosley service technician?
Provide the complete model number, the flicker pattern, whether it changes with the door, whether one or several lights are involved, the manual's bulb-versus-LED designation, and any outlet, cord, heat, odor, spark, smoke, water, or protection-device symptom. Mention every safe check already completed with power disconnected.
Read the exact guide
Official sources
- Side by Side Refrigerators Owner's Manual and Installation InstructionsCrosley Home Products · Official Crosley manual opened from the XSS23GSKW/B/S product page; apply bulb, LED, and troubleshooting details only to the matching XSS23G/XSS25G family.
- XTS18GSHW/B/S - CROSLEY HOME PRODUCTSCrosley Home Products · Official Crosley product page that links the XRS/XRE use-and-care manual and identifies LED lighting on the listed top-mount family.
- Top-Freezer Refrigerators Owner's Manual and Installation InstructionsCrosley Home Products · Official Crosley manual linked from the Crosley XTS18GSHW/B/S product page; apply lighting details only to the matching XRS/XRE model family.
Community feedback
Share a repair observation
Share a plain-text repair observation. Accepted observations are published automatically; this page may take a moment to update.